Quality Guaranteed

Across the EU

Free Shipping

60€ in Germany | 100€ Europe*

Queer & Woman Owned

Founded 2017 in Berlin

chevron_left chevron_right

Filters

Clear all

Blog Themes

    Common pests: Fungus gnats

    by Plant Circle

    Common pests: Fungus gnats

    Fungus gnats- identification, treatment and prevention! Often confused with fruit flies, fungus gnats are small, flying insects about the same size as their almost equally annoying cousins, that most people who live with houseplants have had to deal with at one time or another. Because adult fungus gnats are attracted to light, you might first notice these pests flying near your windows, making windows a great spot to place your yellow sticky traps. But we’ll get to traps later. First, let’s get into the gnats themselves! Fungus gnats develop through four stages; egg, larva, pupa, and adult. The lifespan of a fungus gnat is not very impressive, as the adults only live from about one to two weeks, and complete a full life cycle, including the egg and larvae stages, in about 18-30 days. However, their ability to reproduce at an astonishing speed, approximately 200 eggs a day, is where the real problems lies. While we can all agree that adult fungus gnats are an absolute nuisance, they are mostly harmless, and the larvae are the ones you actually need to worry about. Why? Well, fungus gnat larvae live in the topsoil of the plants, and primarily feed on fungi, hence the name, and organic matter in the soil. But since they also like to chew on the roots of the plants, they can stunt the growth of your plants, especially young and vulnerable ones.So if you were wondering why your plant suddenly stopped growing, slowed down, or started producing smaller or not fully formed leaves, it might actually be related to those annoying little flies buzzing around your plants and light sources! As with all plant pests and plant problems, there are a lot of tips and tricks out there on how to deal with fungus gnats. Some suggest preventing the flies from laying eggs by sprinkling cinnamon or sand on top of the soil, which in theory could prevent them from reproducing.Temperature also plays a big part when it comes to the ideal living conditions of fungus gnats, as they seem to really thrive at about 21-24c, which is unfortunately a very common temperature in most homes!Various tips and tricks aside, once you recognize that there is a problem with gnats in your home, we believe the most effective way to get rid of them, is by fighting them with either beneficial bugs, or a bacteria in the form of pill. Don’t be discouraged by the the words ‘bugs’ or ‘bacteria’, both options are 100% natural, and actually quite simple. Allow us to explain! Nematodes are predatory bugs, basically microscopic worm like creatures that will attack and feed off the larvae of other insects. Nematodes that are specifically sold to to fight fungus gnats and other pests, can be purchased online in pouches that you keep in the fridge until you’re ready to use them. You simply add them to water before watering your plants. The amount of water you need is determined by the amount of nematodes, and the amount of nematodes is determined by the number of plants you own, and you’ll need approximately 1 million nematodes for every 10 plants… don’t worry, like we said, they’re microscopic, so you won’t have a million visible worms in your home, more like a harmless looking powder that you add to your watering can! The bacterial solution is often referred to as Mosquito Bits in the US and the UK, and it is also known as ‘BTI’, which is short for Bacillus Thuringiensis  Israelensis. It is a naturally occurring bacteria found in soils, which contains spores that produce toxins that specifically target and only affect the larvae of the mosquito, the blackfly and, of course, our nemesis the fungus gnat!In Germany, you can find Bacillus thuringiensis sraelensis in pill form, making it by far one of the easiest solutions out there, as you just dissolve the pill in water according to the instructions, and then use that water to water your plants, and you don’t have to keep this solution refrigerated, or worry about an expiration date, as you do with nematodes. And while nematodes might have a slight advantage in some areas, the bacterial solution should kill all of the larvae just as well! While these two solutions are our main picks for fighting fungus gnats in your home, there are of course other methods of prevention to consider, including but not limited to: Letting your plants dry out between waterings. Fungus gnat larvae prefer wet, peaty substrates, as that type of soil is ideal for growing the fungus and cyanobacteria, that the gnats feed on. Investing in a carnivorous plant, such as a Pinguicula, commonly known as Butterworts, or a Drosera Capensis. The sticky, hairy leaves on carnivorous plants trap the gnats, and the plant then feeds on them. Using yellow sticky papers to capture the adult fungus gnats. This is important, because even though they don’t harm the plants directly, their offspring will, so we recommend using yellow sticky papers in combination with either nematodes or bacteria for optimal results! We hope you found some helpful tips for getting rid of those pesky gnats, and keeping your beloved plants happy and healthy!

    Read more

    Introducing: Huperzia

    by Plant Circle

    Introducing: Huperzia

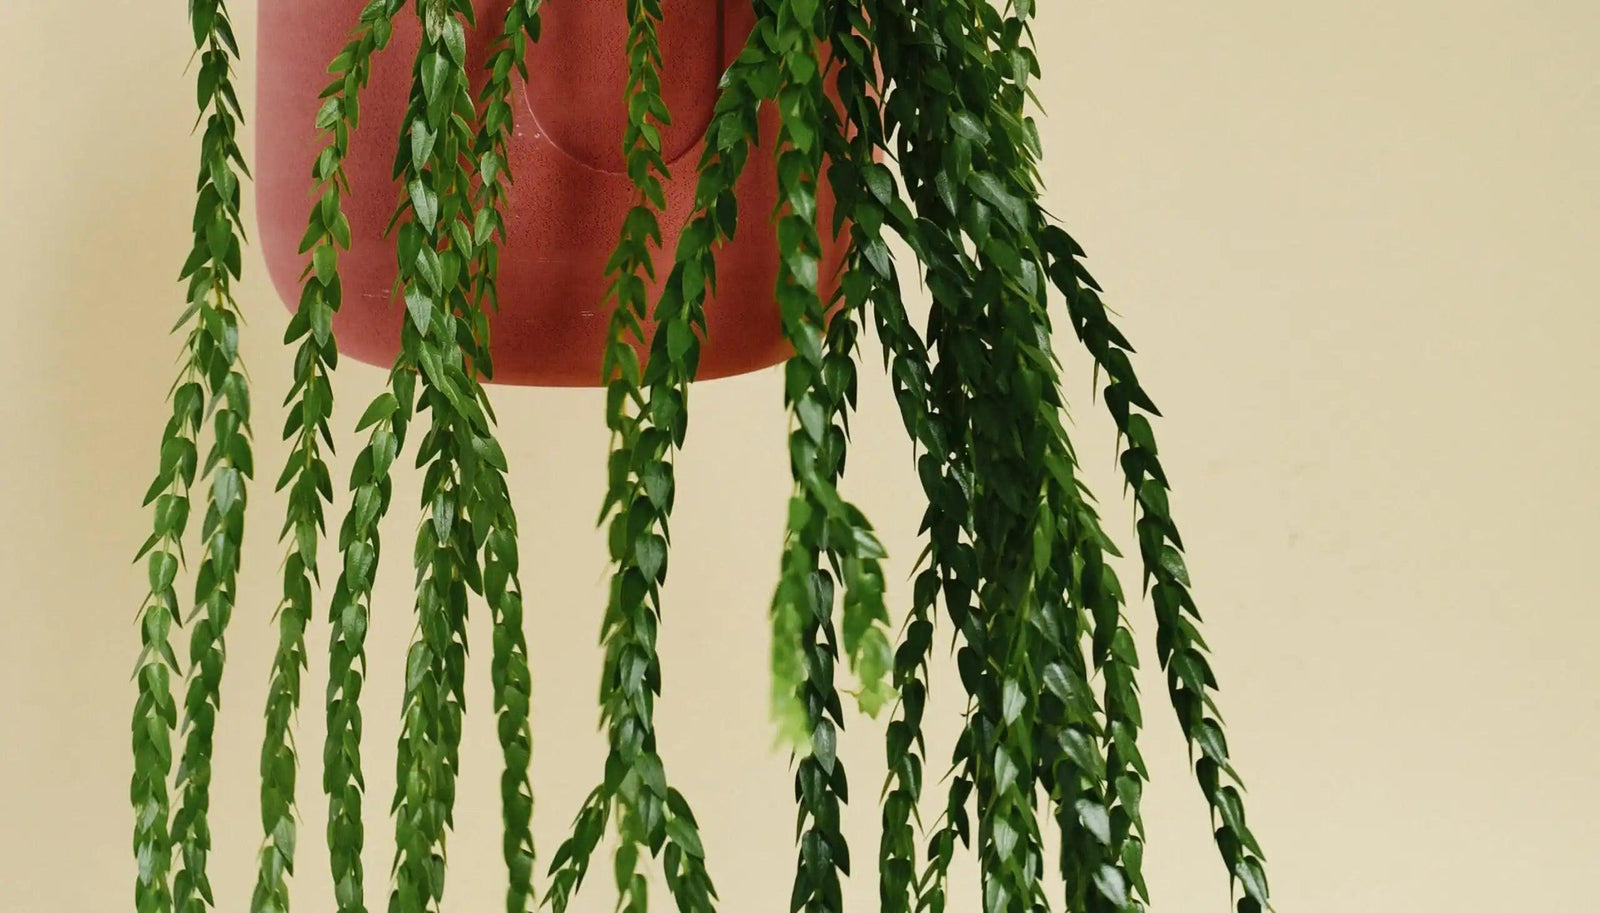
    An intro to the mysterious and controversial Huperzias, and Oliver’s top tips on how to care for them! If you’re trying to claim the title of the most plant obsessed person you know, nothing beats getting involved with the hot topic that is the Lycopodiaceae family! Even that simple sentence could stir up some serious drama in the taxonomy world, as this family has been highly contentious when it comes to classifications. Most commonly known as Clubmoss, these plants are ironically not moss at all, and in fact have a striking resemblance to fir trees, so some people also call them Ground Pines. We could go on and on covering the intrigue and drama surrounding the more than 400 species in this family, but since this is merely an introduction, we have decided to let you geek out and do some digging yourself… you have to earn the label ‘plant obsessed’ after all! But what we will do is give you the inside scoop on one genus of this family: the Huperzia. Huperzia has many of the same characteristics of other species of Lycopodiaceae: a fir tree-like leaf shape, dichotomous stem branching, and flowers/spores, which are called strobili. Most specimens are found in alpine regions with temperate environments, meaning they thrive in quite a unique ecosystem, that is rarely found in your average apartment! These environments often experience heavy fog, rain, and mist, and this fact is important to consider when trying to grow your Huperzia indoors. High humidity is important, as well as constant moisture in the substrate, which should be representative of those same alpine regions. These environmental needs obviously makes caring for a Huperzia a more difficult task than with other houseplants, so how exactly are you supposed to replicate the natural environment of sub-tropical alpine Asia in your own bedroom? Well, the answer is quite simple, but it does involve a certain level of dedication to the cause! Firstly, research! Understanding this plant is an important part of being able to care for it. Your research will probably lead you down a trail of confusing information, but understanding the mystery of these plants will help you understand the importance of their care. However, if you can’t be bothered spending your free time dredging through the difficult to find, and often conflicting, information about a plant family that has dozens of different names, then just skip it, and listen here: Water your Huperzia regularly. And by regularly we’re actually talking multiple times per week, and in the peak of summer it could even be daily. Ideally you want to make sure there is always moisture in the substrate. The Huperzia should be planted in a coco-chunk-like substrate which doesn’t hold water as well as a soil mix. Learning to feel the subtle weight difference between a watered and unwatered plant is of the utmost importance. Medium to high humidity will protect delicate Huperzia leaves from browning, and seeing as you are going to be watering the plant so regularly, watering the entire plant in the shower would be a great way to keep the leaves from drying out. Additionally, a humidifier, or grouping your Huperzia with other plants, can be helpful. Keep your Huperzia in a bright, well lit area with exposure to a few hours of morning sun, if possible. Midday and afternoon sun will burn your Huperzia dreams to dust, but a little morning sun will give you and your beloved Huperzia some time to relax and daydream about being 1/10th of the way up a beautiful Himalayan Mountain from the comfort of your inner-city dwelling! So, now that you’ve followed these care tips, your Huperzia is lush, and has branched several times, an indicator of age, and has begun to develop spores. At this point you’re probably thinking ‘’wow, lucky me, new plant babies!’… well, think again, budding Huperzia heads! Germination of spores takes between three and eight years, and if you are thinking about propagation, well, that’s just as difficult. In conclusion, the Huperzia is a true plant baby in an almost literal sense, meaning it’s all yours, and you will have trouble sharing it with other plant parents. So instead we recommend that you just cherish it, get to know it, love it, and it will love you back!

    Read more

    Plant Circle investigates: Stephania erecta

    by Plant Circle

    Plant Circle investigates: Stephania erecta

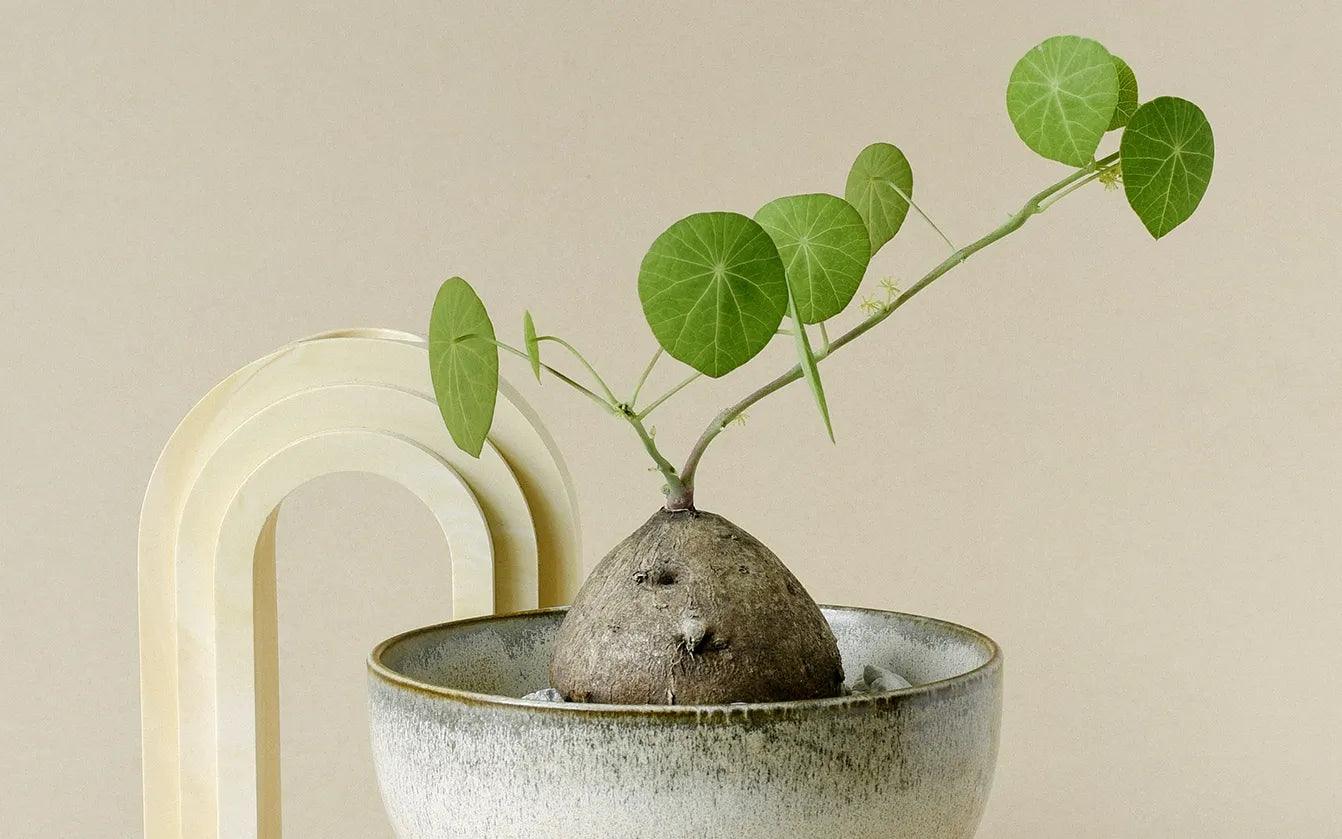
    Exposed: Every single Stephania erecta on the European market is a poached plant! Stephania erecta has been trending in the houseplant community for the past one and a half years. These potato-like, tuberous plants with delicate round leaves have a special aesthetic that appeals to many plant enthusiasts, not only because they make for great pictures on social media, but also because their distinctive look sets them apart from a lot of other houseplants on the market. The hype around Stephania led wholesalers to source this peculiar plant for the European market and culminated in the sale of probably thousands of them in the last year. However, both experts and sellers now agree that it is most likely all of them were collected from the wild. “They are probably all poached,” says Rogier van Vugt, Head of Greenhouse at the Botanical Gardens in Leiden, Netherlands According to him, the wholesalers were “seemingly misled by the Thai sellers who told them all these plants were cultivated. However, one quick glance at the plants makes it clear they are not.” Plant poaching is the removal of plants from their natural habitat. In the case of Stephania, it is not illegal for the local sellers in Thailand to collect the caudex plants by detaching them from the limestones or digging them out of the forest floor, since they are not endangered. However, the plant community generally deems it unethical to buy or sell plants that have been ripped out of nature, as opposed to having been cultivated professionally at a nursery, mainly due to the detrimental long-term effects poaching can have on the population of certain species. A lot of the Stephania on the European market come from Dutch wholesaler Ansu. “Last year, we and our Thai partner Suphachadiwong saw that there was demand for rare plants on the market,” says Steef van Adrichem, Commercial Director at Ansu. “We found the caudex family interesting enough to give it a try.” With this move, the company decided not only to bring Stephania erecta to market, but also rarer caudex plants such as Stephania kaweesakii or Impatiens phengklaii, which were sold on to plant shops and consequently to house plant enthusiasts around Europe. “Stephania erecta is kind of a weed in some places,” van Adrichem says, “and it does not harm the environment when you take some out”.Still, van Adrichem acknowledges that the poaching of other caudex plants, which his company imported to Europe, might have had more detrimental effects. “We do not buy Impatiens phengklaii anymore,” he continues. “We also stopped importing Stephania kaweesakii after finding out how they take them from nature.”Ansu now strives to grow their own seedlings instead, in order to ethically cultivate these two rarer species. For this reason, Ansu is collaborating with Rogier van Vugt, who has been conducting research on the cultivation of Stephania and Impatiens.“I’m working on investigating how some of these caudex plants can be propagated by seed,” van Vugt says. “I urged Steef [van Adrichem of Ansu] to ask people in Thailand to do the same.” His experiments have yielded the first results in the form of Stephania erecta and kaweesakii seedlings. “Stephania seeds germinate very easily. It will be interesting to see how fast these will develop a desired caudex size. But I’m sure this will take years.”And therein lies the problem, as Stephania grow very slowly in their natural habitat, which is one of the challenges growers face when trying to cultivate them for profit. “Many Stephania like the popular S. erecta are lithophytes meaning they grow on rocks or, more specifically, limestone in this case,” says Stefan Burger, an Australian naturalist, habitat guide, and expert on cacti and succulents. “It takes them decades to mature and reach just a few inches in diameter. Under more favourable circumstances, like subtropical climates and nutritious substrates, they can grow quite fast and the caudex may reach a few inches in diameter in only a couple of years,” Burger explains. But the ever-changing houseplant market and drive for new plants often does not allow for such a large timeframe. New, trendy plants need to be saleable as quickly as possible – ideally in a good size and at an accessible price. “Even though they may grow fast under good circumstances, habitat poaching is the quicker and cheaper alternative for those living near to the native habitats,” says Burger. While there are no studies on the consequences of Stephania’s rise to popularity and mass poaching so far, it is clear that the harvest of thousands of bulbs in recent years has diminished their population quite a bit. According to Burger, there is no information on “these specific habitats, but we know that it is obviously having a negative effect“. While all Stephania were traditionally harvested from habitat, according to Burger, some growers have now begun cultivating them professionally. However, this remains a rare practice. In their home country of Thailand, Stephania suberosa in particular are commonly sold in Asian markets for home decoration and medicinal purposes. A few species of Stephania are toxic, while others are part of the Asian cuisine. The leaves of Stephania japonica, for instance, are commonly used to produce edible green grass jelly in Indonesia. “It all comes down to whether the Stephania are ethically grown or not,” Burger says. “Plants should only be bought from a CITES-approved nursery for 100% peace of mind.” The Convention on International Trade in Endangered Species of Wild Fauna and Flora (CITES) regulates the global trade in plants. It categorises endangered plants into three categories, depending on the level of threat they are under. It lists more than 30,000 taxa of plants compared to about 5,000 taxa of animals. Stephanias are not on the CITES list as of now.“Any plants sold via social media direct messages should be treated with suspicion,” Burger says. He strives to educate plant enthusiasts about illegal plant poaching and importing via his Instagram @cactusexplorer_.He also runs cactus exploration tours in South America, where cactus and succulent poaching is of particular concern. Rogier van Vugt suggests sellers should be more mindful when selling slow-growing caudex plants, such as Stephania. “The plant market should at least stop advertising these plants as a funny, disposable, cheap plant,“ he says.“This way people will have to think a bit more before they buy one. This will limit the demand in numbers, yet can still supply the people in Thailand with an income. Logically, this can only be done with common species.” Thanks to everyone who generously gave us their time and expertise, so we could put together this article, and to Plant Circle’s Sarah for doing the investigating.If you are one of the people who have been wondering why we haven’t restocked Stephania erecta in ages, now you know that as soon as the reality of where these plants come from came to our attention we stopped selling them in our shop immediately. It is our hope that other plant sellers who haven’t already will consider following suit.If an ethically grown Stephania erecta enters the market we look forward to offering it in our shop again. But until then, let’s be mindful of where our house plants come from and remember that no plant collection or home aesthetic is worth damaging a plant’s natural habitat.

    Read more

    Plant Circle’s top 5 plants for your workspace

    by Plant Circle

    Plant Circle’s top 5 plants for your workspace

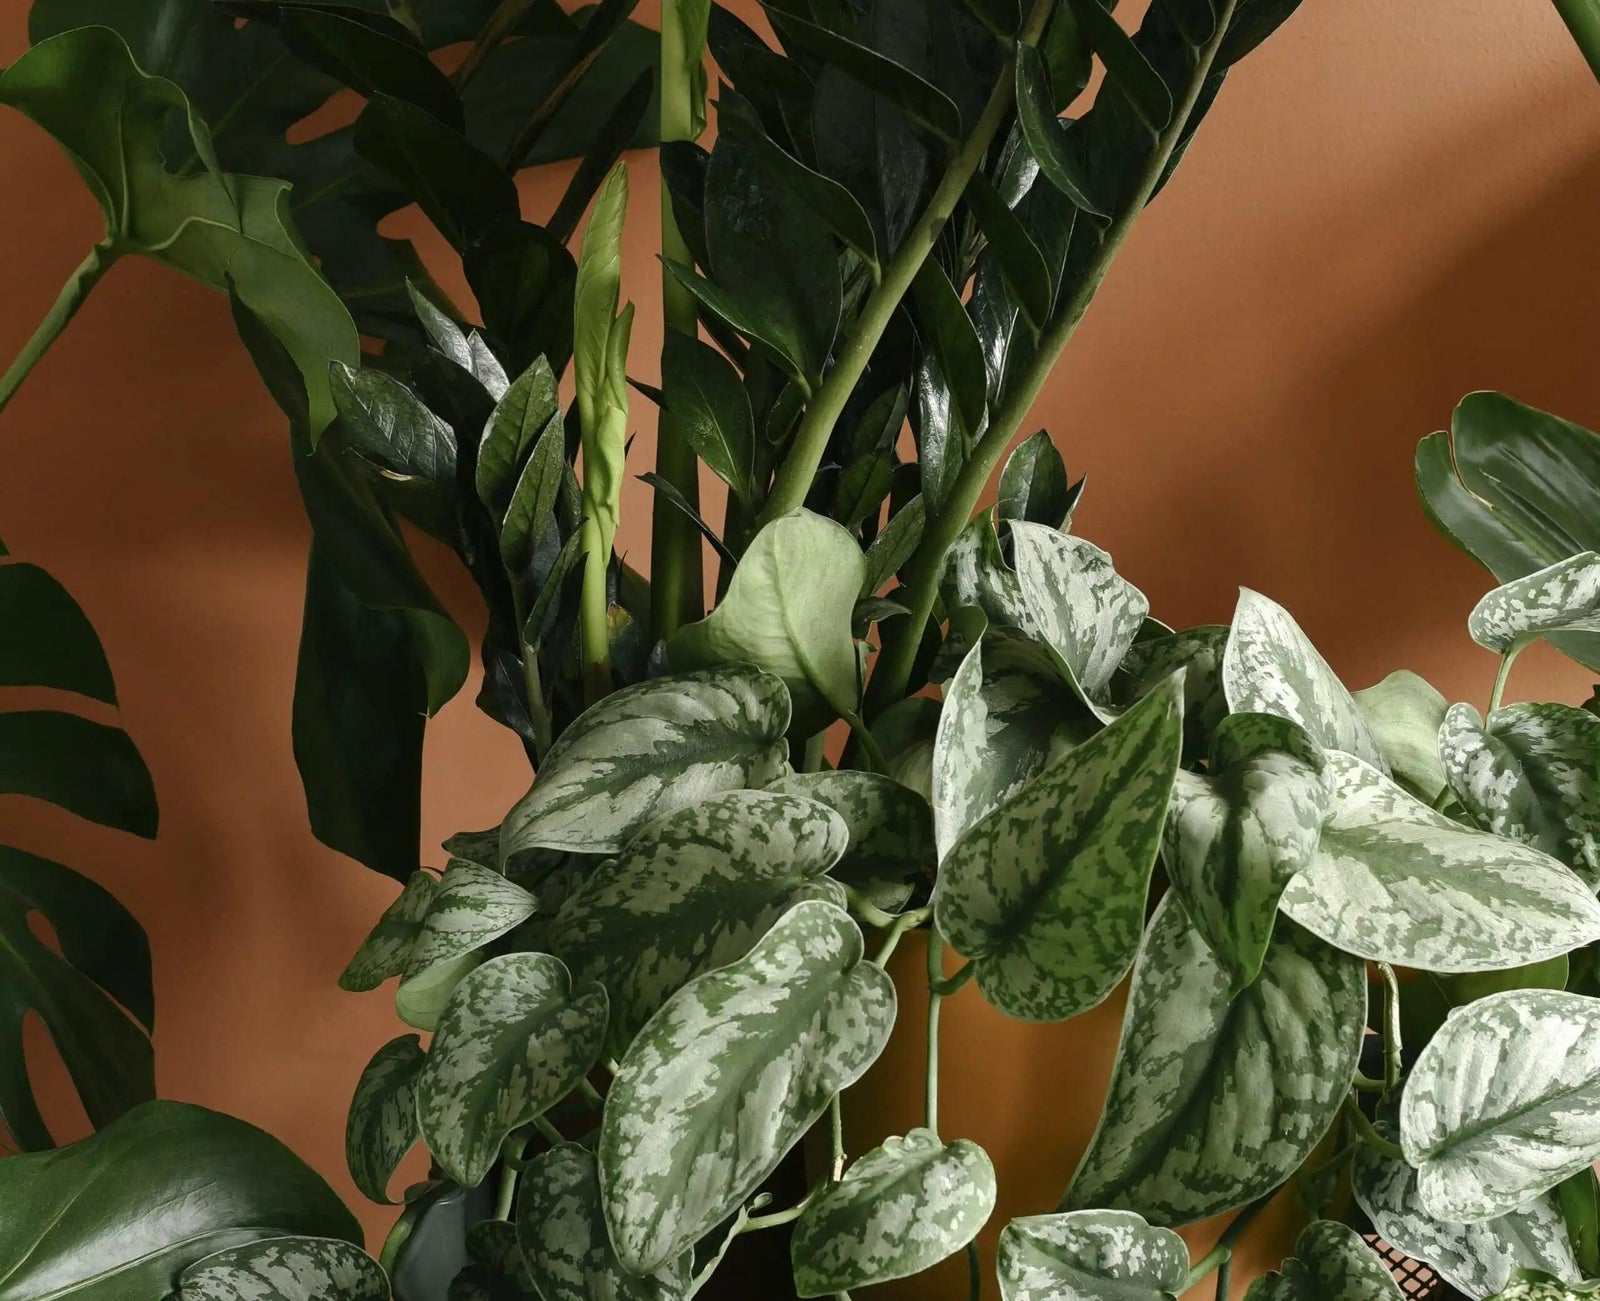
      In our humble opinion, any plant is better than no plants in your workspace! But even we must admit that there are some that are just more suitable for workspaces than others. In this post we explore which plant varieties would make the perfect additions to your (home) office, and why! ‘Why do I even need plants in the office?’, you may ask. Well, according to scientists, not only do they purify the air you breathe and improve the indoor air quality, but they also help you focus and increase your productivity.Additionally, looking at the color green makes you feel calmer and uplifts your mood!All pretty good reasons to have plants around while you’re working, if you ask us, and if you’re feeling convinced too, let’s take a look at the conditions that a plant needs to meet to be considered a great choice for the workspace. We think that the ideal candidate should be:• super easy to take care of• known for its air purifying qualities• visually pleasing, as a bonus! And it should however NOT:• require too frequent watering• require higher than average humidity Lucky for all of us, there are plenty of plants that meet all of those requirements, and we’ve gone ahead and made it super easy for you by compiling our choice for the top five plants for your workspace, that tick all the before mentioned boxes! 1. Zamioculcas Zamifoliia ‘Raven’A very interesting cousin of the more well known green variety, popularly known as the ZZ plant, will lure you in with its stunning, almost black foliage. Besides looking super interesting, this plant is known for being easy care… and we’re talking super easy!The only way to kill a ZZ plant is by watering it frequently, so just don’t do that and you should be fine! We suggest to water it only every 4-6 weeks and apart from maybe a windowless bathroom, you can pretty much place this plant anywhere you want, as it doesn’t have high expectations when it comes to light either.Just an easy care champion all around, but one that’s still sure to attract plenty of compliments from friends and coworkers! 2. Monstera DeliciosaUnbeatable when it comes to creating that #urbanjungle vibe we all love, the iconic foliage and avid growth of the Monstera are just some of the reasons why people continue to be obsessed with this classic.A Monstera Deliciosa will liven up any corner of your office, just don’t let it sit in complete darkness, or the sharp afternoon sun, as that can scorch the leaves.Just like the ZZ, it’s easy to take care for, but this one will appreciate weekly or bi-weekly watering depending on where it’s placed.In some countries Monsteras grow like weeds, which seems strange considering its status as a houseplant, but you literally can’t get rid of them if you plant them in your garden in warmer climates, so that should tell you something about how easy this plant actually is!Read more about Monstera care in this blog post. 3. Scindapsus PictusAlso known as silver pothos, Scindapsus Pictus is a perfect addition to your workspace and creates and instant lush and jungley vibe. This plant will do great on a shelf or in a plant hanger as it loves to trail. Not only is it super easy to care for, but it’s also known for its ability to remove toxins from indoor climates.We love the silver varieties, as they’re so unpretentiously beautiful and also grow like crazy! These plants are not fussy when it comes to light and will do well in medium to bright indirect light. Direct sun is the natural enemy of your Scindapsus, and will burn its leaves. Also don’t overdo it with the water, depending on the position simply water it every 1-2 weeks.Read more about Scindapsus care in this blog post.  4. Hoya Carnosa Krimson QueenHave a sunny office and don’t know what to grow there? Hoyas are your new best friends! We particularly love the Hoya Compacta Baby variety, as it gives you so much variation in color on the leaves! The colors can range from white to cream to hot pink, and an added bonus? Hoyas are succulents, and don’t like to drink often outside growing season AND they produce flowers that smell insanely good!Place your Hoya on a shelf, or in a hanging basket, and water it weekly in summer, and every 2-3 weeks in winter, provided its growing in a sunny window.Please keep in mind that Hoyas shouldn’t be repotted during flowering season, and that they like to grow pot bound in general. So basically just leave it alone. Easy!Read more about Hoya care in this blog post. 5. Sansevieria MetallicaOk, we know that snake plants may not be known for their stunning good looks, but the gorgeous Metallica variety definitely proves this assumption wrong!Not only is it proven by NASA that all Sansevierias can help if you suffer from migraines, but also they’re also famous for being super easy to care for. Just like Hoya, Sansevierias are succulents, which means they are not particularly big on drinking. We’re talking not even weekly in summer, once a month will do the trick. Besides that, they like to grow pot bound so you won’t need to repot it that often either.The perfect plant if you’re forgetful, or don’t stop by the office as often as you used to!

    Read more

    Plant care: Non deadly issues

    by Plant Circle

    Plant care: Non deadly issues

    Have you ever questioned your inner morals as a human after realising that you would rather spend hours sitting with your houseplants, than visiting the newborn child that your cousin has just brought into the world? Oliver has, but thankfully his questionable morals are your gain, as they led to this post about non deadly issues, aka things that actually won’t kill your plants! Sometimes, to us house plant addicts, the connection with our plants can be similar to the connection with a child. You love them with all your heart, to a point of absurdity, and to a point of over-protectivity. We all need to learn how to sometimes take a step back and, ultimately, realise that what might be a problem for us as humans, is perhaps not actually a problem for our plant friends. In this blog post we will cover some common non deadly issues that most plant parents will encounter during their parenthood, and hopefully reading this will help you to calm down a little in the future, if and when these discoveries take place. The most important thing to remember when coming across new, unexpected life forms in your indoor jungle is this: you have brought nature into an unnatural environment, and that nature will actually benefit from an ecosystem of some sort. Here are some common insects that you might find repulsive, but your plants will welcome with open stems! Soil mites. These tiny white mites can be seen crawling through soil just living their best life. They love your plants just as much as you do, but love composting material even more!These little critters spend their days munching on this decaying plant material, while leaving your plant, and its root system, happy and healthy. Sometimes these mites are confused with spider mites, which are dangerous to the plants health, or fungus gnats, but take some time to observe them, and you will quickly be able to see that these soil mites are exclusively sub-terrestrial. Springtails. Another bug commonly confused with the infamous fungus gnat, is the Springtail. These little white bugs live in the soil, feasting on decaying plant matter, and while they may look threatening, these guys are not there to eat your plant, and while they can occasionally inhibit the hardiness of your plant, they are very rarely the actual cause of your plants problems. Most notably, Springtails can jump several inches into the air when disturbed, causing disgust and disarray from the plant parent, but be grateful for this ability, as it can help you distinguish them from the real pest! Silverfish. Possibly the most difficult insect to decide if you want to allow to continue to co-inhabit your indoor jungle is the Silverfish. While they may look like something from a poorly animated 80s horror film, we should not judge a bug by its apparent creepiness. These truly buggy looking creatures like to feed on dead insects, such as springtails, soil mites, and even fungus gnats and other detrimental pests, as well as fungi, which is almost always found within soil, even if you cannot see it. While silverfish can absolutely cause damage to your books and other material possessions, but as they will not harm you or your plant babies, they still fall under the Non deadly issues category. So what do you say? In my opinion, out of sight, out of mind! Earwig. Another common house guest, that looks like it could kill you with a bite of its scorpion like pincers, is the deceptively harmless Earwig. Even more beneficial than Silverfish, Earwigs will feed on live, plant-feeding insects, acting as a biological control supporting your plant. While they can become pests if their population are allowed to get out of control, this rarely occurs and their population can be kept at a reasonable and manageable level by following a few simple and overall beneficial rules. Managing population levels of houseplant bugs. The thing that all of these animals have in common is their ideal environment. Dark, cool, humid. The exact environment that you will find in the bottom part of the soil of a plant, or under a ceramic pot, especially the highly popular terracotta pots. Using specific potting mixes for different types of plants will manage the humid environment that these bugs love, ensuring that your plant love its soil, and that the bugs don’t get too comfortable in your jungle. Additionally, watering correctly (not over watering, and ensuring that excess water is always removed after watering) will again help your plant and its living pot-mates. Whilst potting substrate and watering are essential for managing the living populations in your plants, it is also highly beneficial for managing some other non deadly, purely cosmetic issues that are found in plants. Oedema. Caused by excess uptake of water by the plants roots, oedema is characterised by a corky, blustery like appearance on the leaf of plants. This can be the result of poor potting mix, excessive watering or prolonged exposure to water, as well as watering with warm water, or during periods of the day where it is too hot. All of these issues are easily solved through your actions! While you might have a few deformed leaves, the plant is still happy and just being a nice friend with a good level of resilience. Stunted growth. Don’t take it personally, but this is a problem with you! Not the plant. Stunted growth and deformed leaves are again an issue with the sub-terrain. Maybe you haven’t ever changed the potting mix, which has now turned rock solid after months of watering and dying out? Or perhaps the plants have grown so well that it’s now time for a bigger pot with more space for the roots? Whatever you might have done, or neglected to do, it’s time to do something about it! Increase the pot size, provide a more penetrable potting medium, and give your baby an upgrade. The roots will always dictate your plants overall health!

    Read more

    Plant care: Potting mix

    by Plant Circle

    Plant care: Potting mix

    Many longtime plant parents started out thinking that dirt is dirt, and plants will grow in anything. No? Was that just us? Well, luckily thanks to information being more widely available, we now know that plants in fact need high quality potting mixes to really thrive, and to make understanding the ingredients and compositions easier for you, we've gathered them here! Having a good quality potting mix tailored to the needs of the plant is every bit as important as providing your plant with water or sufficient light. In fact, most common plant related issues, like overwatering and root rot, come from using an average quality potting mix... or worse.Let's start by getting into the two most frequently used terms when it comes to this topic: 'potting soil' and 'potting mix'. Though these terms are used interchangeably, there is a difference. Potting soil may contain soil, while potting mix is strictly a soilless medium. Technically, potting soil is nothing but dirt that no longer has the adequate elements necessary to support the growth of potted plants, or indoor plants. Potting mix, however, is sterile, which makes it safer for plants because it's guaranteed to not contain pathogens such as fungus or other diseases. Why is having a good quality potting mix so important? The main reason is that potting mixes are designed to not get too compacted, something that can suffocate the roots of a plant, or impede the flow of water and nutrients, and in the worst cases, cause root rot. A high quality potting mix will be lightweight and fluffy, with the ability to hold moisture. For the roots to grow deeply, good aeration is necessary and recommended. Aeration requires puncturing the soil with tiny holes in order for the water, air, and nutrients to penetrate the roots. To achieve that effect without the physical labour, you simply add bark to the potting mix, which creates little air pockets! Now that we've established the importance of a good potting mix, and what it does for the health of your plant, let's get into the the most common components that can be added to your potting mix! Perlite. Perlite is the name of a naturally occurring mineral. In nature, it exists as a type of volcanic glass, created when the volcanic obsidian glass gets saturated with water over a long period of time. And since fertile, volcanic areas have been settled due to fertile soils since biblical times, humans have been aware of perlite at least since Third Century BC. Other uses of perlite include masonry construction, cement, gypsum plasters, and loose-fill insulation. Horticultural perlite is made by exposing perlite to heat, which causes the trace water contained in the perlite to expand, 'popping' the perlite like popcorn and expanding it to 13 times its former size, resulting in an incredibly lightweight material! Since it is a naturally occurring, mined mineral, perlite is a nonrenewable resource. Perlite is an excellent potting mix additive, and is also an effective rooting medium. Please note: Perlite dust can aggravate existing respiratory conditions and cause eye irritation. Eye and mouth protection are recommended to prevent the dust from being ingested. Want to go deeper? Read an exhaustive article on perlite here! Vermiculite. Vermiculite is the name of a group of hydrated laminar minerals (aluminum-iron magnesium silicates) which look like mica. Horticultural vermiculite is processed with massive heat that expands it into accordion shaped pellets composed of multiple layers of thin plates. It will not rot, deteriorate, or mold, and is enduring, odorless, non-toxic, and sterile. It is however not a renewable source. Just as perlite, vermiculite is an excellent potting mix additive, and can also be used as rooting medium! This article further explores the topic of vermiculite! Activated charcoal. Activated charcoal prolongs the life of soil media by balancing pH levels and sweetening the soil of potted plants and terrariums. It also eliminates odour, absorbs salt residue, and breaks down the build-up of bacteria. We love to add activated charcoal to any potting mix, and we also add it to the water when rooting a plant! Coconut Coir. Firstly, what exactly is coconut coir? Actually everything in between the shell and the outer coating of the coconut seed is considered coco coir! While most people mainly think of the edible parts when they think of this fruit, coconuts actually have many applications in horticulture! Coco coir is known to be one of the most moisture retaining growing medias, and can absorb up to 10 times its weight in water. On the market coco coir is available in three forms: coco peat, coco fibres, and coco chips. It's very common to grow tropical plants in coco coir in Asia; in fact, that's how most of our imported plants arrive from there. We are however not big fans of coco coir as the only potting medium, and therefore suggest using it in potting mixes in combination with other ingredients. For example, you can use coco chips instead of bark, or coco peat instead of peat moss! Bark. We love bark! Namely pine bark shreds. You can easily improve drainage and aeration of your potting mix by adding some bark to it. We recommend it for pretty much all mixes, besides succulent ones. Sand. Sand is super helpful when creating a potting mix for succulents and cacti, as it it increases drainage ability. Please note: we advice not using sand taken directly from the beach, as this type of sand has a high salt content, and could severely damage your plants roots! Ideally you should only use horticultural sand. Worm humus. Worm humus, also known as vermicast, is the final product of decomposed material excreted by the king of the soil: the mighty earthworm! Packed with water soluble nutrients and bacteria, worm humus is a very nutritious organic fertilizer, and excellent all-round soil improver. Worm humus is perfect for refreshing a potting mix, or adding to substrate mixtures already in use. The ideal proportions to aim for are a blend of 10 – 15% worm humus to 85 – 90% substrate. Spaghnum moss. Spaghnum moss is generally used more for cuttings and propagations, however, some Anthuriums can be grown in it, but this is generally only recommended for people who check on their plants daily, as spaghnum moss can dry out quickly, and might require you to check on your plants every day. Read more about this, and other types of moss, in our post dedicated to Anthuriums! Last but not least, and maybe this goes without saying, but don't plant your plant into a pot without drainage holes! Leave it in the plastic nursery pot, and always check for excess water to get rid of after watering. You'll also want your ceramic planter to be a tad bigger than your plastic nursery pot, as the little gap between the two will allow a better airflow around the roots. We hope this gave you an idea of how to provide your plant with the best potting mix, and if you're still in doubt, we recommend starting out with our handmade Aroid Potting Mix! It's suitable for most tropical house plants, and contains a high quality ingredients such as bark, perlite and activated charcoal.Happy potting, plant lovers!

    Read more

    Plant care: Predator bugs

    by Plant Circle

    Plant care: Predator bugs

    Perhaps you’ve been hearing people, your friends here at Plant Circle included, rave about predator bugs, but if you’re still unsure of exactly what they are and how to use them, we’re here to help clear things up Predator bugs, also referred to as predator insects, or beneficial insects, are the natural enemies of common pests, such as thrips, spider mites, etc. They’re important agents in biological control of pests, and the perfect solution for those who don’t like to use chemicals at home, and would rather see nature take its own course, with just a tiny bit of human interference! With predator bugs you get good results with little effort, as long as you make sure to act quick! Predators are most effective as prevention, or at the earliest stages of an infestation. Once your plants are covered in pests, these won’t be of much help, so try to keep that in mind, and check our previous blog posts on treatments, such as our post about Neem oil!However, if you are in the early stages of a pest infestation, and you want to make sure it doesn’t escalate, read on! Many types of beneficial insects can be purchased and released in your home, balcony, or garden to control specific pests. Here are some of the most common commercially available beneficial bugs, and the pests they work to prevent. Please remember not every predator is good for every pest, you have to choose the right one. Most beneficial bugs come in containers in some sort of medium, which you can easily sprinkle that on top of your plants foliage. Nematodes. These microscopic worms live deep down in the soil and feed on variety of underground pests like fungus gnat larvae, slugs, or snails. Each type targets different pests. You release them by mixing them with water, and using that mixture to water your plant. We highly recommend these guys if you have been struggling with fungus gnats! Read more and buy them here! Lacewing. These gorgeous flying insect is usually shipped in form of eggs or larvae. Once hatched, they feed on aphids, thrips, mealybugs, and spider mites, among others. The lacewing larvae have pincer-like jaws with which they grasp their prey and inject them with a poison, after which the pest is sucked out. We can highly recommend them, especially in the sometimes seemingly never ending fight against thrips! Buy them here! Ladybugs. Yes, the cute little innocent looking ladybug is actually a voracious eater of all kind of soft bodied bugs and larvae. These predator bugs are particularly effective against aphids and mealybugs! Parasitic wasps. These tiny wasps lay eggs inside the bodies of pests. We highly recommend them if you have problems with Aphids! Predatory mites. These tiny mites are excellent weapon against thrips and spider mites. We highly recommend Amblyseiulus Californicus. We use them regularly and find them effective, and they’re available to buy online! If you decide to try and fight or prevent pests with beneficial bugs, there are a few important things to consider: Do not use neem oil sprays after releasing predators, as it can effectively kill them by smothering them, much as it would the pests Do not use pesticides that require contact to be deadly at the same time as using the beneficial bugs, as these could kill them too Once the pests are gone, predators will die soon after, as they feed on the pests and cant survive without their food source. Some predators, however, feed on pollen, that can usually be purchased together with the bugs Predators are most effective when being used as a preventative measure, and when infestation is on a smaller scale, so always keep a close eye on your plants for early warning signs of an infestation!

    Read more

    Plant care: Succulents

    by Plant Circle

    Plant care: Succulents

    Succulents are some of the easiest plants to care for, so why do they have a reputation that says the opposite? We’ll get into that, and the most important tips on how to care for a succulent, in this post! First off, what are succulents? By definition, succulents are drought resistant plants that store water in their stems, leaves, or roots, and because of that have a more “fleshy” appearance. They can be found all over the world… except Antarctica! There are about 60 different plant families that contain succulents. Fun fact: cacti are also categorised as a succulents and some plants loosely referred to as cacti, like many varieties of Euphorbia, are actually succulents, not cacti! Now that we know what a succulent is, let’s move onto how to care for these plants, and why so many people end up killing them. As previously mentioned, succulents store water in their roots, stems, and leaves. This means that they really don’t need a lot of watering provided by you. And by not a lot, we actually mean about once a month tops! The number one cause of death for succulents is, as you may have already guessed, overwatering. Yes, that extra love we so want to show our plants, really can kill them! So please, and we can’t stress it enough, if you feel like showing them some extra affection by watering them: don’t! One of the great things about succulents is that they’ll show you when they’re dehydrated and in need of watering by basically shrinking. If you pay attention to the leaves, you’ll notice they appear wrinkly, so just watch them closely, and you’ll know when it’s watering time!  Ok, so you’ve been watching the leaves, they’re looking nice and wrinkly, it’s been weeks since the last watering, and your succulent is looking thirsty… How do you water a succulent correctly? In our opinion, the best technique is to soak them. Yup, you read that right! Simply take a bowl filled with water, and put your succulent in there for couple of hours. This may sound excessive after we just told you they don’t need much water, but allow us to explain why we stand by this.Succulent soil is the most draining potting medium out there. It’s usually 50/50 potting soil and sand, which means that it does not hold any water, the water just runs right through it. In practise, this means that the roots don’t have a chance to soak it up, so when watered using the usual method, they just get teased by the water, but won’t actually get to have a good drink. So if you’ve been watering your favorite succulent with little sips of water, now you know why it always looks a bit sad! We suggest you switch to soaking your succulent every 2-3 weeks in summer, and every 4-6 weeks in winter instead of regular watering. This is of course providing that your succulents receive the best light possible… Succulents love light, the more the better, and some even love direct sunlight if they’re used to it! For most, a few hours of sun a day would be ideal. As a lot of succulents actually live under a transparent shade cloth, even in the nurseries where they’re grown, they could burn if you put them in an afternoon sun right away. But you can easily train your plant to endure direct sun, if you just remember to expose it to the new conditions little by little, every day. An apartment with southern exposure is ideal for most succulents, and if that’s the case with your home, you can pretty much take your pick! However, if your apartment only has northern exposure, we suggest sticking to more patient and low light tolerant species such as Sansevieria or Zamioculcas! Potting mix. As we mentioned earlier, succulents love extremely well draining potting mixes that are 50/50 potting soil and sand. And here’s a little bonus trick: place a piece of mesh at the bottom of your nursery pot so your potting mix doesn’t spill. You can check out all of our high-quality substrates in the collection. Important: unless you’re a certified plant pro, we suggest to never plant your succulents directly into planters without drainage holes. These plants are, as we may have already implied once or twice, extremely prone to overwatering, and the lack of proper drainage can be fatal! Propagation. Most succulents propagate easily by leaf or stem cuttings. Simply pluck the leaf or stem off, and leave them atop of the soil for a few weeks until roots start to appear. Once your cutting is rooting, you can start misting it with water. When the roots are more developed, plant it into soil and water sparingly. This is a very generic guide on how to care for succulents, and there are so many different kinds of succulents out there, that all have slightly different requirements. So if you’re looking for more specific tips on particular varieties, we recommend checking out our beginner guide for plant care!

    Read more

    Plant profile: Scindapsus

    by Plant Circle

    Plant profile: Scindapsus

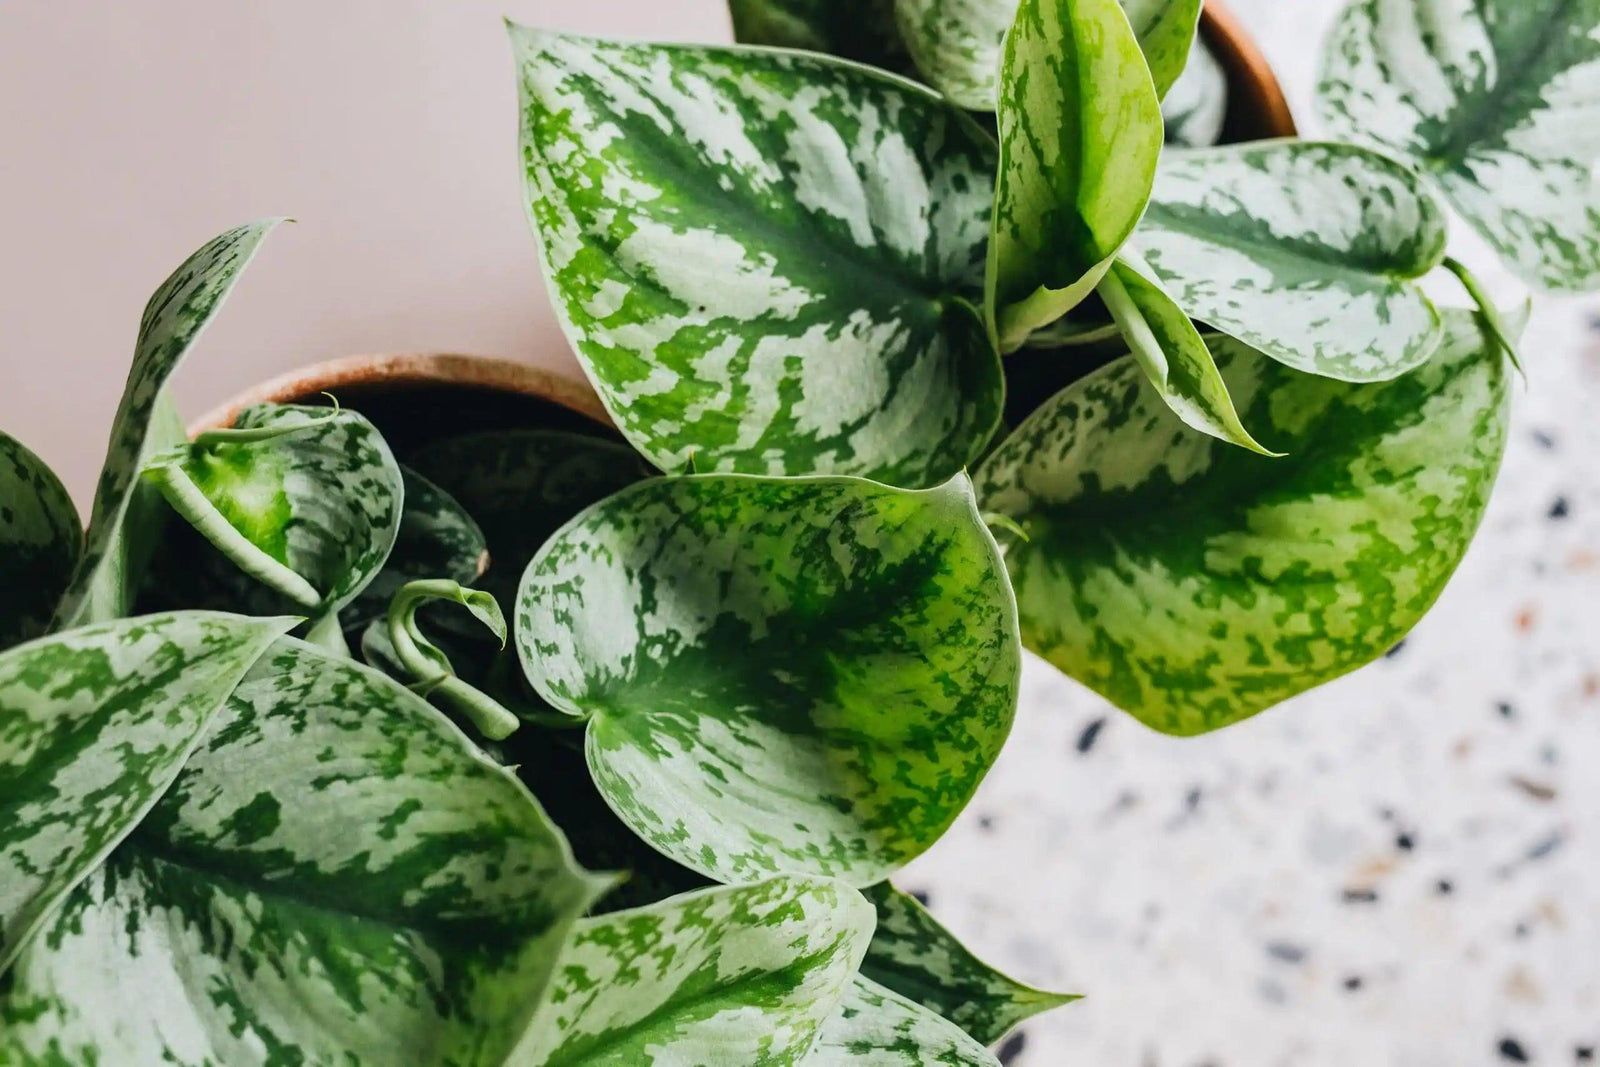
    In this plant profile we get into Scindapsus! Learn about where they’re from, how to care for them, and how to tell them apart! The Scindapsus is a popular genus, commonly known as ‘Satin Pothos’ or ‘Silver Pothos’, despite not actually being a Pothos at all! Not an Epipremnum, and not a Philodendron either, although sometimes mistaken for that too, Scindapsus belongs to the Araceae family, which is native to Southeast Asia, New Guinea, Queensland, and a few western Pacific islands.The most common Scindapsus species in cultivation today is the Scindapsus Pictus, followed by Scindapsus Treubii, which has only recently become more commonly available due to an increase in popularity. Scindapsus plants are highly decorative, climbing vines with thin stems and rooting at the nodes. These plants are some of the best selling plants that we carry here at Plant Circle, and with good reason; not only are they easy to care for, but they’re also absolutely beautiful, and most importantly, affordable… even the rare ones! Scindapsus Pictus was described in 1842 by German botanist Justus Carl Hasskarl. The name ‘Pictus’ comes from Greek and means ‘Painted’, and it’s not hard to understand why they decided to name it that! When young, this species is characterised by thick, velvety leaves, that are narrowly ovate with a heart-shaped, slightly asymmetric base. The leaves have a dark green color with silver-grey edges, and irregular spots of the same colour. In their mature form, the leaves become fully heart-shaped. Left image, clockwise from the top: Silver Princess, sp Sumatra, Silver Splash, Silver Splash, Silver PrincessRight image: Exotica, Silver Hero, Silver Hero, Silvery Ann, Argyraeus Some Scindapsus varieties have been on the market for a while, and are already in mass production, while others are more uncommon, or even rare. Scindapsus Treubii, for example, which is native to Jawa, Malaysia and Borneo, is a less common species of Scindapsus that has only entered the European market in very recent years. Scindapsus Treubii ‘Moonlight’ is the only species currently in commercial production in Europe, while ‘Dark Form’ is slowly making its way into European greenhouses.At the end of this post we have compiled a list, to the best of our abilities, of the different varieties of Scindapsus Pictus and Scindapsus Treubii, that we are familiar with, sorted by how common or rare they are. The list will be updated on regular basis as we become familiar with new varieties. But first, let’s get into some basic plant care for this surprisingly low maintenance genus! Growing tips. Although Scindapsus is a great plant to grow in hanging basket, and it’s tempting to just do that, if you want your plant to really achieve its full potential, and grow large sized leaves, try letting it climb something like a coco pole instead. The key here is providing the plant with a climbing surface made from organic matter. This allows the plant can grow its roots into the pole, and only then can the leaves can reach a truly impressive size! Humidity. Scindapsus prefer temperatures around 18-20 degrees, but when it comes to humidity, which is so often a problem for plant lovers in drier climates, this plant doesn’t require a lot of humidity, and can even thrive under more dry conditions, so you won’t need to invest in a humidifier because of this plant! Watering. Very basic; simply check with a finger and water the plant when top 3 cm of soil is dry, and let it dry out between waterings. This plant is very adept at communicating its needs, and its leaves will start to curl when it’s really thirsty! Soil. Scindapsus likes a porous, well draining substrate that is rich in organic substance, like our aroid potting mix! The faster growing species will need to be repotted frequently, but you can tell that it’s time when you see the roots growing out of the bottom of the pot. Light. The darker the Scindapsus, the less light it will need to survive, and while it prefers bright indirect sunlight, it can tolerate low light conditions. However, as with all plants, the less light it gets, the slower the growth will be! Note: Scindapsus Treubii tends to grow at a much slower rate than Scindapsus Pictus, who is considered an avid grower. Pests and problems. If you notice your Scindapsus growing very small leaves it usually means that it’s in need of something to climb, or that the light it’s receiving is insufficient. When you notice the edges of the leaves rolling inwards, it means the plant is dehydrated and needs water right away, or that it’s suffering from root rot, which also prevents it from drinking. Common pests include the usual suspects; thrips, fungus gnats, and spider mites.If you live with kids or pets, it’s important to remember that this plant is toxic if ingested! Propagation. These plants are easily propagated by stem cutting or air layering. Fun fact. Each variety of Scindapsus Pictus has the ability to suddenly produce a leaf that will look like another cultivar. We have come across ‘Silvery Ann’ producing ‘Argyraeus’ leaves, and ‘Silver Splash’ suddenly growing an ‘Exotica’ patterned leaf, so don’t say this genus isn’t full of surprises! Common types of Scindapsus Pictus (commercially produced): Scindapsus Pictus ‘Exotica’ Scindapsus Pictus ‘Argyraeus’ Scindapsus Pictus ‘Silvery Ann’ Uncommon types of Scindapsus Pictus: Scindapsus Pictus ‘Silver Hero/Platinum’ Scindapsus Pictus ‘Silver Splash/Silver Cloud’ Scindapsus Pictus ‘Silver Lady’ Scindapsus Pictus ‘Silver Princess’ Scindapsus Pictus ‘Jade Satin’ Rare types of Scindapsus Pictus: Scindapsus Pictus var ‘Argyraeus Dark Form’ Scindapsus Pictus ‘Jade Satin Variegated’ Common types of Scindapsus Treubii: Scindapsus Treubii ‘Moonlight’ Uncommon types of Scindapsus Treubii: Scindapsus Treubii ‘Dark Form’ Scindapsus Treubii Sp ‘Sumatra’ Rare types of Scindapsus Treubii: Scindapsus Treubii ‘Variegated’ Scindapsus Treubii ‘Mint’

    Read more

    Why is my cactus not flowering?

    by Plant Circle

    Why is my cactus not flowering?

    You’ve probably seen loads of pictures on Pinterest and Instagram of beautiful cacti with stunning flowers on them, and you wouldn’t be the first person to wonder “how come I’ve never seen these on my own cactus?!” Let’s look at the main reasons your cactus isn’t blooming, and what to do about that! Now that the summer is almost over and we are approaching autumn and winter, aka hibernation season, it’s the perfect time to start planning ahead by looking into what will make your cactus bloom during the next growing season. First of all, it may surprise you to know, that a cactus has to be mature to produce a flower, and for some cacti species it may take up to as much as 50 years before they reach maturity and finally start to bloom! So in order to be sure your cactus will even be able to flower for you and not your grandchildren, a good tip is to buy a cactus that’s already in bloom. This way you at least know that the cactus is mature enough! But that being said, we also encourage you not to give up if you try all of our following suggestions, and your cactus still refuses to bloom for you. It may just have a bit more growing up to do! In order for a cactus to produce a flower it needs to first have a good rest period, also known as hibernation or dormancy. Please note that a dormancy period is not necessary for all cacti, though, in fact, Rhipsalis, Epiphyllum, and Schlumbergera genus don’t require one at all. But for those that do, how do you initiate hibernation in an indoor environment? 1. Reduce wateringIf you were watering your cactus every two weeks in summer, do every 3-4 weeks in autumn, and every 6-8 weeks in winter. 2. Keep your cactus coolThe ideal temperature for hibernation is 8-12 °c, or 12-15 °c for tropical cacti. A window sill far from a heater, and next to a window that you open often would be the ideal spot. You want to keep your cactus cool throughout winter, until  March.  3. Shade it from the sun Make sure that your cactus is shaded from the sun wherever you placed him for the winter sleep, so if you picked a window, make sure that it’s not south facing, or hide your cactus behind a curtain, so it doesn’t receive direct sun. 4. Slowly reintroduce it to sun Some time in March you can start re-introducing your cactus to the sun by putting it back in its usual spot, while using a shade cloth to protect it from direct sun. Don’t forget that part, if you don’t shade your cactus from direct sun, it will most likely get burnt! Important: you still need to water your cactus during hibernation, but as mentioned earlier, very sparingly, and with lukewarm water. Cacti won’t absorb cold water, and additionally, cold water can lead to root rot. And don't forget the right soil! Don’t repot your cactus during hibernation and also don’t feed it! The best time to repot a cacti is at the end of its dormancy. During the growth season, make sure to provide your cacti with the correct care to give it the best shot at producing flowers.

    Read more