Quality Guaranteed

Across the EU

Free Shipping

60€ in Germany | 100€ Europe*

Queer & Woman Owned

Founded 2017 in Berlin

chevron_left chevron_right

Filters

Clear all

Blog Themes

    3 simple tips for beginner plant parents

    by Plant Circle

    3 simple tips for beginner plant parents

    Have you been wanting to start a plant collection of your own this year? If so, we wanna get you off to a good start with some simple tips for beginner plant parents that will make you feel successful from the get go! Experienced plant owners can read along too! If you are new to growing plants indoors you might find yourself reading a lot of conflicting information online on how to care for your green buddies. After years of running workshops and answering your questions in person, as well as online, we have decided to put together our top 3 simple tips for beginner plant parents that can be universally applied to all plants in all sorts of conditions! 1. Give your plant sufficient light. Bright enough light for houseplants won’t be found in rooms or hallways that have no windows, or if plants sit in corners more than 1,5 m from windows. Please keep your plants close to windows or under (grow) lights. That being said, a lot of popular plants grown at home do not tolerate direct sunlight, it can literally burn their leaves! In practice, this means that if you have south or west facing windows, it could be dangerous to place your philodendron or monstera directly on the window sill during spring or summer. Most plants can withstand, and will even enjoy, a few hours of morning sun, but the afternoon sun can be a deadly. Please always google your specific plant’s light requirements before deciding on the perfect spot! 2. Learn how much water your plant needs. There is no universal watering advice for plants, and whatever you’ve been told about the plant you bought might not work for the conditions in your home. How often you need to water your plants depends on how much light they get, but also on the potting mix and planter it sits in. In order to determine how often to water your plant, please observe it as it will get droopy when it’s time for watering, and always check the soil with your finger, or a moisture meter, before watering. 3. Treat your plant to a quality potting mix. Plants tend to come in poor quality potting mixes, and we highly recommend always repotting them. But wait approximately 1-2 weeks after bringing them home before repotting them, so they have a chance to get acclimated! There is no universal potting mix recipe for all plants, but we find that just by adding a part orchid mix, part perlite and some charcoal you will improve the likelihood of your plant thriving in your home immensely!

    Read more

    Growing Your Plants from Plugs

    by Plant Circle

    Growing Your Plants from Plugs

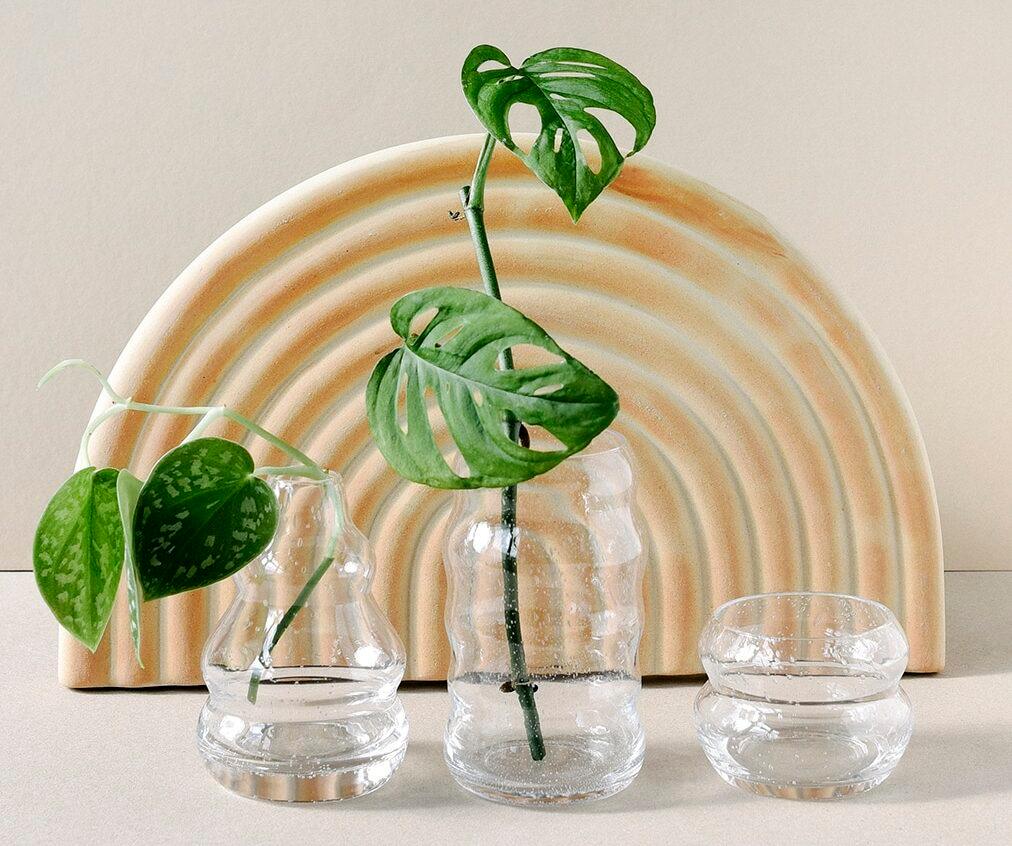
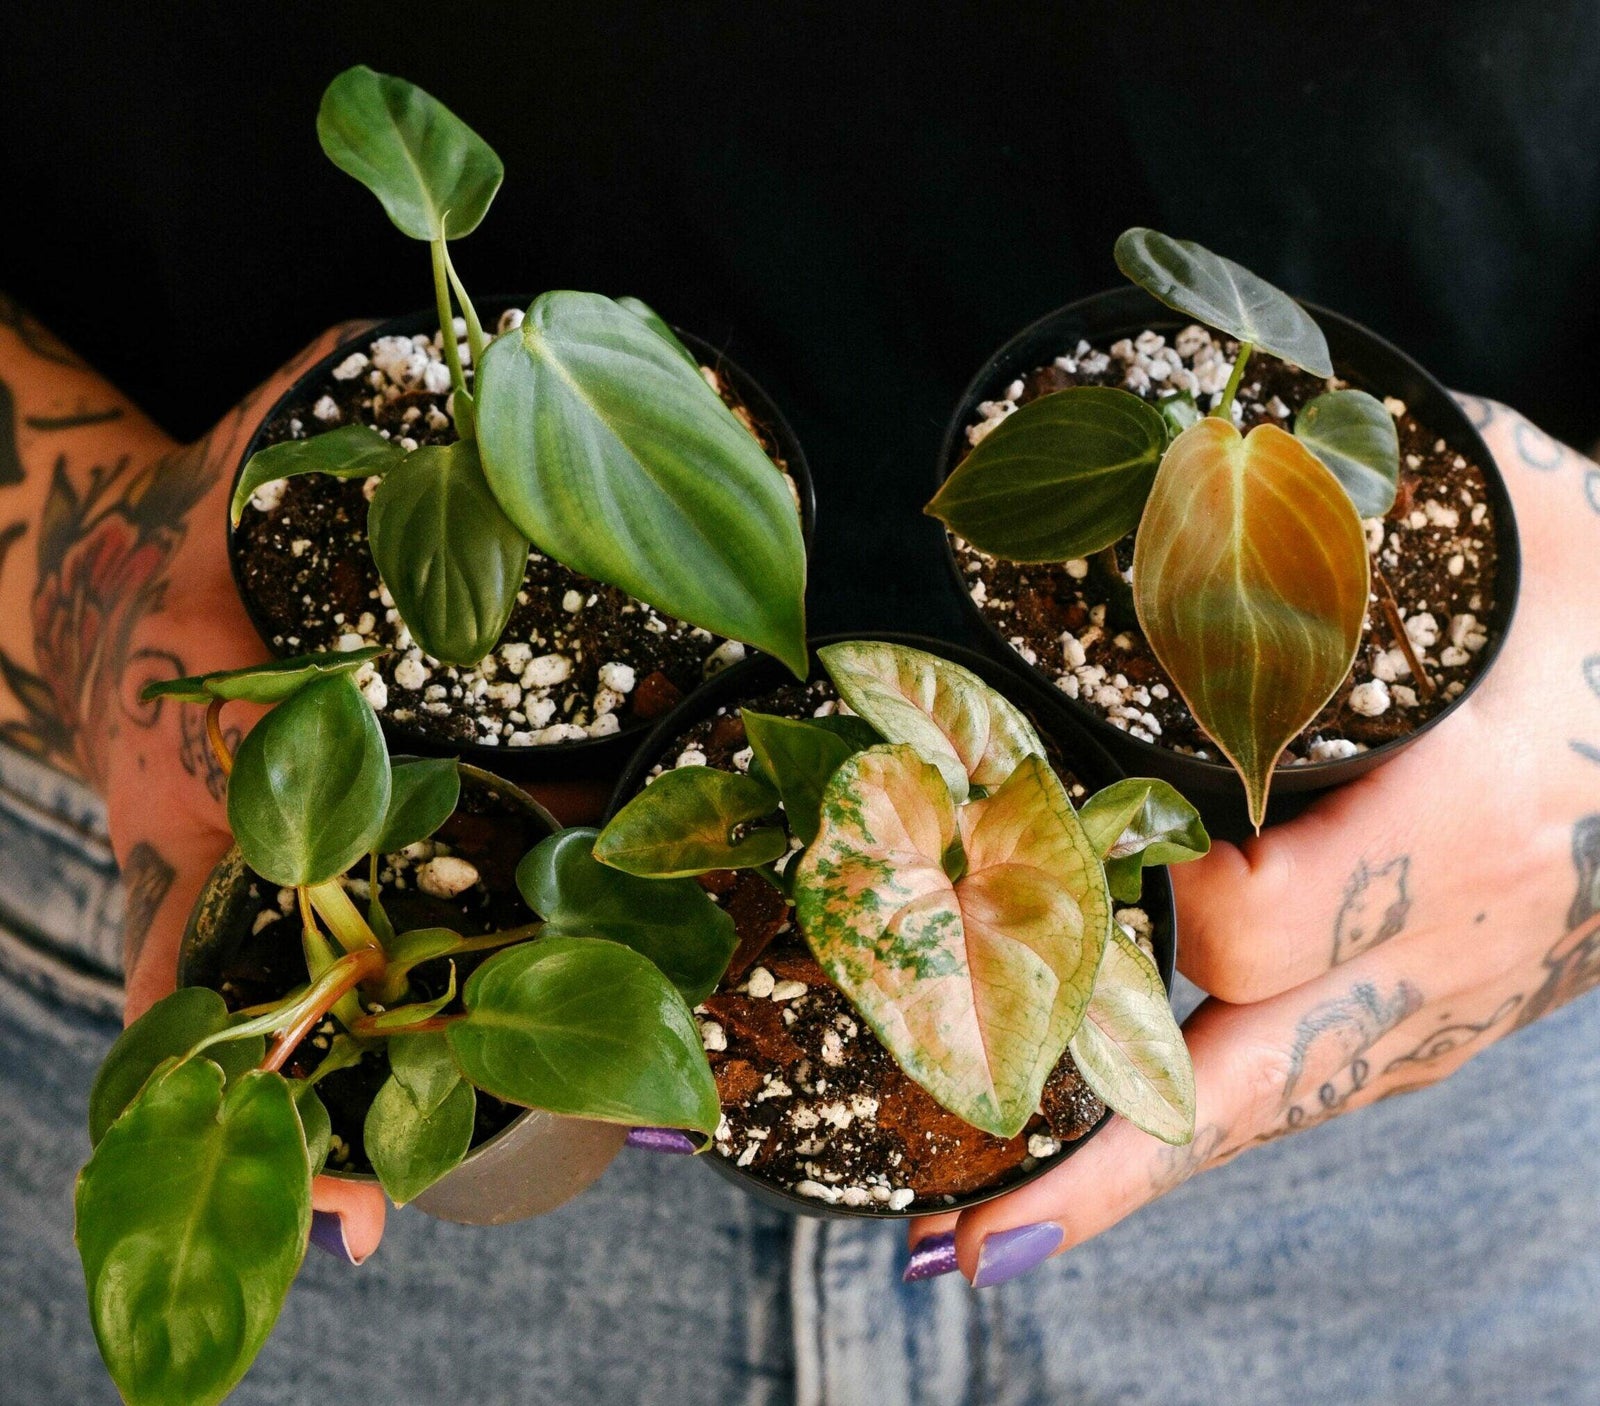
    Are you looking to expand your houseplant collection without breaking the bank? Starting your plants from plugs might be the perfect solution. In this blog, we’ll explore what plant plugs are and why they are a cost-effective and sustainable way to grow your favorite plants. From understanding the innovative tissue culture propagation method to providing a step-by-step guide on how to pot and care for your plugs, we’ve got you covered. We have a large collection of plant plugs for you to check out! What Exactly is a Plug? A plant plug is a seedling that was started and grown in an individual cell filled with potting soil in a laboratory. This method, known as tissue culture propagation, involves growing plants from a small piece of plant tissue in a sterile environment. Tissue culture ensures that each plug is a genetic clone of the parent plant, free from diseases and pests. This method is highly efficient and sustainable because it produces a large number of uniform plants in a short period, using minimal resources. By optimizing growth conditions in the lab, tissue culture reduces the need for chemical treatments and water, making it a cost-effective and environmentally friendly way to propagate plants. Plugs provide a cost-effective way to jump-start your houseplant collection. These well-developed young plants with strong root systems are ready for potting up. Step-by-Step: What to Do with Your Plugs When They Arrive Prepare a Plastic Nursery Pot: Select a small pot, preferably around 8 cm in diameter. Using a bigger pot will require more soil, which can retain excess moisture and potentially cause root rot. It’s better to start with a smaller pot and gradually pot up as the plant grows. Typically, when the roots begin to grow out of the holes at the bottom, it’s time to pot up. Prepare an Appropriate Potting Mix: Choosing the right potting mix is crucial for the healthy growth of your plant plugs. You can either purchase a potting mix specifically tailored for the type of plants you are growing or create your own blend. A pre-made potting mix ensures that your plants receive the optimal balance of nutrients, drainage, and aeration needed for robust growth. These mixes are formulated to meet the specific needs of different plant varieties, making it easier for you to provide the best growing conditions. If you prefer a more customised approach, you can mix your own potting soil. Start with a good-quality base such as peat moss or coco coir for moisture retention, and add perlite or vermiculite to improve drainage and aeration. Incorporate organic matter like compost or worm castings to enhance nutrient content. Depending on your plant’s specific requirements, you might also add ingredients like sand, charcoal or bark. We offer a large selection of potting mixes and soil improvers to help you create the perfect blend. With the right potting mix, your plant plugs will have a better chances to thrive and grow into healthy, mature plants. Base Mix 5L 12 € Shop now Planting the Plug: Carefully take the plug out of its packaging. You’ll notice that the root ball is often surrounded by a mesh or net. Gently remove this covering, being cautious not to damage the delicate roots. This step is crucial as it allows the roots to expand freely into the new soil. Start by adding a layer of soil to the bottom of your plastic nursery pot. This initial layer will help elevate the plug to the correct level and ensure good contact between the roots and the new soil. Place the plug in the center of the pot. Hold it steady and begin filling the pot with soil. As you add soil, make sure to cover all the roots and fill in any gaps around the plug. This helps stabilize the plant and promotes healthy root growth. Once the pot is filled, gently pat down the soil around the plug. This ensures that the seedling is firmly in place and that there are no air pockets, which can hinder root development. The goal is to make the seedling stable and secure in its new environment. Water and Fertilize: Water your plant with a light fertilizer, ensuring that you follow the recommended dilution rates on the package for optimal growth and health of your plant, and always remember to avoid over-fertilizing to prevent any potential damage. Place the pot in a well-lit spot, avoiding direct sunlight, to ensure that the plant receives enough light for photosynthesis without the risk of leaf burn. Alocasia Frydek Plug Shop now Now, it’s time to watch your plant grow! With the right care, your plugs will thrive and soon become beautiful additions to your home. If you don’t want to wait to see your plants grow, we recommend exploring our large and extra-large plant categories. These mature plants provide instant greenery and beauty, allowing you to enjoy the full aesthetic of a well-developed plant right away.

    Read more

    How to overwinter your tubers

    by Plant Circle

    How to overwinter your tubers

    In this article new would like to explain how to, and whether you should, overwinter your tuber plants! Did you know that Caladium, Amorphophallus and Xanthosoma all grow from a tuber? And that after the plant dies back, you can remove that tuber from the soil and plant it back later? Plants that grow from tubers usually die back in winter for a resting period of 3-7 months. Technically you can leave the plant in the pot and carry on as usual, as we assume the temperatures in your apartment won’t go below zero, meaning the plant can survive the cold season unaffected. However, if you would like your plant to come back in spring bigger and better than before, read on! 1. Remove the tuber from the soil and clean it well, getting as much excess soil off as possible. 2. Let the tuber dry out for a few days. 3. Once it’s dry to touch, place it in a box with a lid, and fill the box with either wood shavings or shredded paper.  4. Place it in a cool and dark storage with the lid not fully closed so a bit of air comes in. If you’ve followed the above steps to overwinter your tubers, all you have to do now is check back on your tubers once in a while. Once you notice a growth tip, it’s time to plant it back! You can plant Caladiums indoors in March and outdoors when the temperature is above 20 degrees celsius. When planting your Amorphohallus again, make sure that you place the tuber deep under the soil as the roots grow from the above the tube. This is so the tuber can support that beautiful, long stalk! When planting your Caladiums, make sure that the tuber is facing rings up, as this is where the plant will grow from. The tuber should be about 3-4 cm deep and you’ll need to keep it above approximately 24 degrees celsius for it to sprout. Tubers should be kept in moist, but not soggy, soil to sprout. Once new growth appears they should be watered often enough to keep the soil evenly moist, but again, never soggy! More detailed information on Amorphophallus, and how to grow them, can be found here.Happy planting!

    Read more

    Rooting for Growth: A Beginner’s Guide to Propagating Aroids from Cuttings

    by Plant Circle

    Rooting for Growth: A Beginner’s Guide to Propagating Aroids from Cuttings

      Welcome to the first volume of our propagation tips and techniques blog, where we will be discussing how to propagate aroid plants from cuttings that include nodes and aerial roots. Aroid plants, including Philodendron, Epipremnum, Syngonium, Scindapsus and Monstera, are popular houseplants that are easy to propagate from cuttings. When taking a cutting from an aroid plant, it’s important to include a node. A node is a small bump or ridge on the stem of the plant where the leaves, aerial roots, and new shoots grow from. Nodes are essential for propagation because they contain meristematic tissue, which is responsible for the growth and development of new roots and shoots.   Cuttings without a node and just a leaf will not be able to develop roots and grow into a new plant. This is because the cutting lacks the meristematic tissue found in the node that is responsible for root and shoot development. Therefore, it’s important to make sure the cutting includes a node. To take a cutting from an aroid plant, follow these simple steps: Choose a healthy plant.Select a healthy aroid plant with strong stems and no signs of disease or damage. Find a node.Locate a node on the stem of the plant, where the aerial roots or leaves are growing from. Make the cut.Use a sharp, clean pair of scissors or a knife to make a clean cut below the node. The cutting should be at least 3-4 inches long and include one or two nodes.   Place the cutting in water.Place the cutting in a jar or vase filled with clean, room-temperature water. Make sure the node is submerged in water, but the leaves are not. Change the water every few days to keep it clean and prevent bacteria from growing.   Wait for the roots to growAfter a few weeks, you should start to see roots growing from the node. Once the roots are strong and at least few centimetres long, the cutting is ready to be planted in soil. Better have longer roots than shorter so if you can wait longer, do it.   Plant the cutting in soil.Fill a small pot with potting mix and make a small hole in the center. Insert the cutting into the soil, making sure the node and roots are buried about few centimetres deep. The cutting needs to be stable and all roots need to be covered. Water the soil and place the pot in a bright, warm spot, but avoid direct sunlight. By following these simple steps, you can easily propagate aroid plants from cuttings with nodes and aerial roots. Propagating plants is a fun and easy way to expand your plant collection or share your love of plants with friends and family. Stay tuned for the next volume of our propagation tips and techniques blog, where we will discuss how to propagate another popular houseplant.

    Read more

    Roots of Success: Mastering the Art of Water Rooting Cuttings!

    by Plant Circle

    Roots of Success: Mastering the Art of Water Rooting Cuttings!

    As spring ushers in new life and vibrant greenery, many plant parents look forward to propagating their beloved plants through cuttings. Sharing these cuttings with friends is not only a great way to spread the joy of gardening but also allows us to multiply our plant collections without spending a fortune. One popular and relatively easy method of propagation is water rooting. In this blog post, we will explore the best practices for propagating plants through cuttings and successfully rooting them in water. Start with Clean and Disinfected Tools.Before embarking on your propagation journey, it’s essential to ensure that your tools are clean and ideally disinfected. Use sharp scissors or a knife to make clean cuts, as jagged or torn edges may hinder successful rooting. Allow the Cut to Heal Once you’ve taken a cutting, it’s crucial to let the wound heal before placing it in water. Freshly cut stems are prone to becoming mushy and rotting in water. Most plants require a few hours on the counter to heal the cut, while succulents or cacti may need a few days for the cut to callous over. Change the Water Regularly or Use Activated CharcoalTo prevent bacterial growth and maintain a healthy environment for rooting, remember to change the water in the container every few days. Alternatively, you can add a small amount of activated carbon pellets to the water, which helps keep it bacteria-free. Provide Light for Root DevelopmentChoose a glass container for your cuttings, allowing the roots to receive some light. Light exposure promotes photosynthesis, helping the cuttings develop stronger root systems. However, be mindful of excessive direct sunlight, as it can overheat the water and damage the delicate roots. Consider Rooting Hormone Although not always necessary, using a rooting hormone formulated for foliage application can boost the success rate of your water-rooted cuttings. Apply it according to the product instructions, as improper use can be counterproductive. Wait for a Strong Root Network Patience is key when propagating plants through cuttings. Wait until your cutting has developed a healthy network of roots before proceeding. Rushing the process could lead to transplant shock or the failure of the cutting to establish itself. Choose the Right Pot and Potting Mix When your cutting has developed sufficient roots, it’s time to transition it to soil. Select a small pot that provides stability for the cutting. Ensure that all the roots are covered with potting mix, but be cautious not to choose a pot that is too large, as excess soil can lead to overwatering and root rot. We have substrates (potting soils) for all types of plants. Provide Bright Indirect Light Place your newly potted cutting in an area with bright indirect light. This will allow the plant to photosynthesize and promote healthy growth. Avoid placing it in direct sunlight initially, as it may be too intense for the tender roots. Water and Fertilize with Care In the first few weeks, be mindful of watering your newly potted cutting. Overwatering can drown the young roots, while underwatering can lead to dehydration. Find the right balance and adjust your watering schedule based on the needs of the specific plant. Additionally, provide a balanced fertilizer to nourish the growing cutting but avoid over-fertilization, as it can cause root burn. Propagation through cuttings and water rooting is an exciting and rewarding way to expand your plant collection and share the joy of gardening with friends. By following these best practices, you can increase your chances of success and ensure the healthy establishment of your propagated plants. So, grab your disinfected tools, prepare your glass containers, and embark on a propagating adventure this spring. Happy propagating!

    Read more

    Should You Repot Plants in Winter? The Complete Guide to Cold-Weather Repotting

    by Plant Circle

    Should You Repot Plants in Winter? The Complete Guide to Cold-Weather Repotting

    Let's address the elephant in the room: you're standing in your Berlin apartment in January, staring at a rootbound Monstera, and wondering if you should repot it now or wait until spring. The internet says "never repot in winter," but your plant is literally bursting out of its pot. So what's the truth?Here's the deal: winter repotting isn't ideal, but it's also not the plant death sentence everyone makes it out to be. Sometimes your plants need intervention regardless of the season, and knowing how to do it safely can save your green babies from serious stress. Let's break down everything you need to know about repotting during the cold months.Why Do People Say Not to Repot in Winter?The "don't repot in winter" rule exists for good reasons. During winter, most houseplants enter a period of dormancy or significantly slower growth. They're conserving energy, not actively producing new roots or leaves. When you repot a dormant plant, you're asking it to recover from root disturbance and establish itself in new soil while it's in low-power mode.What happens when you repot a dormant plant: Slower root recovery means the plant sits in moist soil longer Increased risk of root rot from overwatering Transplant shock takes longer to overcome The plant uses precious energy reserves for recovery instead of survival Lower light levels and humidity make recovery harder But here's the thing: these risks are manageable if you know what you're doing.When Should You Actually Repot in Winter?Winter repotting should be reserved for plants that genuinely need it, not just because you're bored and want a plant project (we've all been there). Here are the situations where winter repotting is justified:Emergency Situations (Repot Immediately) Root rot: If your plant has root rot, waiting until spring means it'll be dead by then. Repot now, trim the rot, and give it fresh soil. Severe pest infestations in the soil: Fungus gnats, soil mealybugs, or other soil-dwelling pests sometimes require a complete soil change. Completely rootbound: If roots are circling so tightly they're strangling themselves or growing out of drainage holes in thick masses, the plant needs space. Soil has completely broken down: If the soil is compacted, hydrophobic, or has turned to mush, your plant can't access water or oxygen properly. You just bought a plant in terrible soil: Nursery soil is often peat-heavy and breaks down quickly. If your new plant is struggling, repotting might be necessary. Situations Where You Can Wait The plant is slightly rootbound but still healthy You just want a prettier pot (use it as a cover pot instead!) The plant is growing slowly but otherwise fine You're just feeling antsy and want to do plant stuff (we get it, but resist!) How to Safely Repot Plants in WinterIf you've determined your plant genuinely needs repotting, here's how to minimize stress and maximize success during the cold months.Step 1: Choose the Right DayPick a mild day if possible – not during a cold snap or when your apartment is freezing. Ideally, repot when indoor temperatures are stable and you can keep the plant in a warm spot afterward. Avoid repotting right before or during a trip when you can't monitor the plant's recovery.Step 2: Prepare Your WorkspaceSet up in a warm room away from drafts. Gather everything you need before you start: Fresh, well-draining potting mix (more on this below) New pot (only 2-5cm larger than the current one – don't oversize!) Drainage materials like lava rocks or perlite Active charcoal to prevent rot and keep soil fresh Clean scissors or pruning shears for trimming dead roots Wooden soil checker to monitor moisture after repotting Newspaper or a repotting mat to contain the mess Step 3: Remove the Plant GentlyWater your plant lightly 1-2 days before repotting – this makes the root ball easier to remove without damaging roots. Tip the pot on its side and gently squeeze or tap to loosen the root ball. If it's really stuck, run a knife around the inside edge of the pot.Once out, gently tease apart the roots if they're circling. Don't be afraid to loosen them – this encourages outward growth in the new pot. Trim any dead, mushy, or damaged roots with clean scissors.Step 4: Choose the Right Soil MixThis is CRITICAL for winter repotting. You need a mix that drains exceptionally well because your plant won't be drinking much water. A soggy mix in winter = root rot city.Winter repotting soil formula: 60% quality potting soil 20% perlite or lava rocks for drainage and aeration 10% orchid bark or coco coir for structure 10% worm castings or compost for gentle nutrients A handful of active charcoal to prevent bacterial growth The goal is a chunky, airy mix that allows water to flow through quickly while still retaining some moisture. Avoid dense, peat-heavy mixes that stay wet for weeks.Step 5: Pot Up CarefullyAdd a layer of your soil mix to the bottom of the new pot (about 2-3cm). Place the plant in the center, ensuring it sits at the same depth as before – don't bury the stem deeper than it was originally.Fill in around the sides with your soil mix, gently pressing to eliminate air pockets but not compacting too hard. Leave about 2cm of space at the top for watering.Step 6: Water StrategicallyHere's where winter repotting differs from spring/summer: DO NOT thoroughly water immediately after repotting unless you removed a lot of roots or the plant was bone dry.Instead, lightly moisten the soil – just enough to settle it around the roots. Then WAIT. Let the plant recover for a few days before watering again. Use your soil checker to monitor moisture levels and only water when the top 5cm of soil is dry.For the first month after winter repotting, water less frequently than usual. The plant isn't actively growing, so it needs less water. Overwatering is the #1 killer of winter-repotted plants.Step 7: Provide Optimal Recovery ConditionsAfter repotting, give your plant the best possible environment to recover: Warmth: Keep it in a warm spot (18-24°C), away from cold windows and drafts Humidity: Increase humidity with a plant mister, pebble tray, or humidifier to reduce stress Light: Provide bright, indirect light but avoid harsh direct sun while the plant recovers Stability: Don't move the plant around – let it settle in one spot No fertilizer: Wait at least 4-6 weeks before fertilizing. The fresh soil has nutrients, and the plant isn't actively growing anyway Which Plants Can Handle Winter Repotting Better?Some plants are more resilient to winter repotting than others. Here's a quick guide:More Tolerant of Winter Repotting Pothos and Philodendron: These tough vining plants recover quickly even in winter Snake plants and ZZ plants: Slow growers that don't mind being disturbed Succulents and cacti: Already dormant in winter, they handle repotting well if kept dry Spider plants: Resilient and forgiving Monsteras: Tough aroids that bounce back relatively quickly More Sensitive to Winter Repotting Calatheas and Marantas: Drama queens that hate any disturbance, especially in winter Ferns: Sensitive to root disturbance and need high humidity to recover Alocasias: Can go into shock easily; only repot if absolutely necessary Fiddle leaf figs: Notoriously sensitive to change Orchids: Wait until they finish blooming and show new root growth What About Adding Support During Winter Repotting?If you're repotting a climbing plant like Monstera, Philodendron, or Pothos, winter is actually a decent time to add a coco coir support pole. Since you're already disturbing the roots, you might as well give your plant the structure it needs.Insert the pole before adding all the soil, positioning it securely in the center or back of the pot. This way you won't damage roots by shoving it in later. Your plant won't actively climb in winter, but it'll be ready to go when spring growth kicks in.Post-Repotting Care: The First MonthThe month after winter repotting is critical. Here's your care checklist:Week 1-2: Recovery Phase Monitor daily for signs of stress (wilting, yellowing, drooping) Keep soil barely moist, not wet Maintain high humidity Avoid fertilizing Don't panic if a few lower leaves yellow – this is normal transplant shock Week 3-4: Stabilization Phase Check soil moisture with your soil checker before each watering Look for signs of new growth (this is a good sign!) Gradually return to normal care routine Still no fertilizer – wait until spring Month 2+: Maintenance Phase Resume normal watering schedule (still less than summer) Watch for spring growth signals (new leaves, faster water uptake) Begin fertilizing lightly once you see active growth Common Winter Repotting Mistakes (And How to Avoid Them)Mistake #1: Overwatering After RepottingThe fix: Water lightly initially, then wait. Use a soil moisture meter and only water when the top several inches are dry. In winter, less is more.Mistake #2: Using Too Large a PotThe fix: Only go up 2-5cm in diameter. A huge pot holds too much moisture that the plant can't use, leading to root rot.Mistake #3: Using Dense, Peat-Heavy SoilThe fix: Add plenty of drainage amendments like perlite, lava rocks, or orchid bark. Your winter mix should be chunkier and airier than your summer mix.Mistake #4: Repotting Multiple Plants at OnceThe fix: If you must repot in winter, do one plant at a time so you can monitor each one's recovery. Don't overwhelm yourself or your plants.Mistake #5: Placing the Plant in a Cold or Drafty SpotThe fix: Keep newly repotted plants in the warmest, most stable spot in your home. Away from windows, doors, and heating vents.Mistake #6: Fertilizing Too SoonThe fix: Wait at least 4-6 weeks, or better yet, wait until you see active spring growth. Fresh soil has nutrients; your plant doesn't need more right away.The Alternative: Top Dressing Instead of RepottingIf your plant doesn't desperately need repotting but the soil looks depleted, consider top dressing instead. Remove the top 2-5cm of old soil (being careful not to damage surface roots) and replace it with fresh potting mix. This refreshes nutrients without the stress of full repotting.Top dressing works great for: Large plants that are difficult to repot Plants that prefer being slightly rootbound Situations where you just want to refresh the soil surface Plants that are healthy but in old, depleted soil When to Absolutely Wait Until SpringSome situations genuinely require waiting, no matter how impatient you are: Your plant is actively flowering or about to bloom The plant is already stressed from pests, disease, or environmental issues You're in the middle of a cold snap with freezing temperatures Your home is particularly cold (below 15°C consistently) The plant is a known drama queen (looking at you, Calathea) and is otherwise healthy You can't provide adequate warmth, light, and humidity for recovery The Bottom Line on Winter RepottingShould you repot in winter? Only if you have to. Is it possible to do it successfully? Absolutely, if you follow the right steps.The key is understanding that winter repotting requires extra care, better drainage, less water, and more patience than spring/summer repotting. Your plant is in survival mode, not growth mode, so you need to support it through recovery with optimal conditions and minimal stress.If your plant is genuinely suffering – rootbound to the point of stunted growth, sitting in broken-down soil, or dealing with root rot – then winter repotting is the lesser evil compared to waiting months while the plant declines. But if it's just a matter of wanting a prettier pot or feeling like you should repot because it's been a year, wait until spring when your plant is actively growing and can recover quickly.Ready to repot safely? Stock up on drainage materials, active charcoal, and support poles from our accessories collection. And remember: when in doubt, wait it out. Spring is just around the corner, and your plants will thank you for the patience.Happy (careful) repotting, plant parents! 🌱✨

    Read more

    Why is my plant’s soil mouldy?

    by Plant Circle

    Why is my plant’s soil mouldy?

    … and other common soil issues! Plant issues often start with the soil, so to ensure that your plants are as healthy and thriving as possible, we’re gonna take a look at the most common soil related issues, and how to fix them! Poor potting mix can lead to a plethora of problems with your plants, but they can easily be avoided by switching to a quality potting mix. We cannot stress enough how important it is to repot your plants into something light and airy after purchasing them, and it doesn’t have to cost a fortune. In fact, you can improve any potting mix by simply adding perlite and orchid bark to it!Now, some soil issues can be difficult to spot, but most of them are actually quite obvious… if you know what to look for!Let’s take a look at some of the most common ones, and the solutions. Mouldy soil. The root problem here, no pun intended, is a poor potting mix that doesn’t dry out fast enough. Additionally, your plant could also be dealing with over watering, and possibly even poor air circulation in the room. If you ever spot this issue, we suggest repotting your plant into a better aerated potting mix immediately . You can improve the quality of any soil by adding perlite and orchid bark to the mix, so invest in those, as they will always come in handy and last you a long time!In our experience, this hack will work well for pretty much any plant besides cacti.  White stuff on top of your plant’s soil. The white stuff on your plants soil is a buildup of minerals and salts. This is a very common issue in countries where tap water is very hard. To keep this from happening, switch to softer water if you can, like distilled-, filtered-, or rain water. We also suggest removing the affected top layer of soil and replacing it with a fresh mix, as those salts are harmful to your plants. And lastly, give your plant a shower from time to time to wash it all down! Soil is too compact. This one of the most common soil issues, and a very serious problem that can cause a lot of damage to the roots of your plant. And to make matters worse, it’s not the easiest one to spot either!Compact soil doesn’t let water get through, so whenever you water your plant, the liquid flows around the dense substrate, but doesn’t penetrate it. This way, the roots of your plant actually don’t get any of the water you’re watering it with! So if you’ve been wondering why your plant is looking all droopy even right after you’ve just watered it, check the potting mix! The only way to fix this issue is to immediately change the potting mix to something more airy. Little flies around you plants. These little flies that resemble fruit flies are called fungus gnats. Although these guys are not harmful in their mature form, the larvae will feed on your plants roots, making this a potentially serious soil issue. But not to worry, we wrote a whole blog post on how to get rid of them, and you can read it here!

    Read more