


Accessories
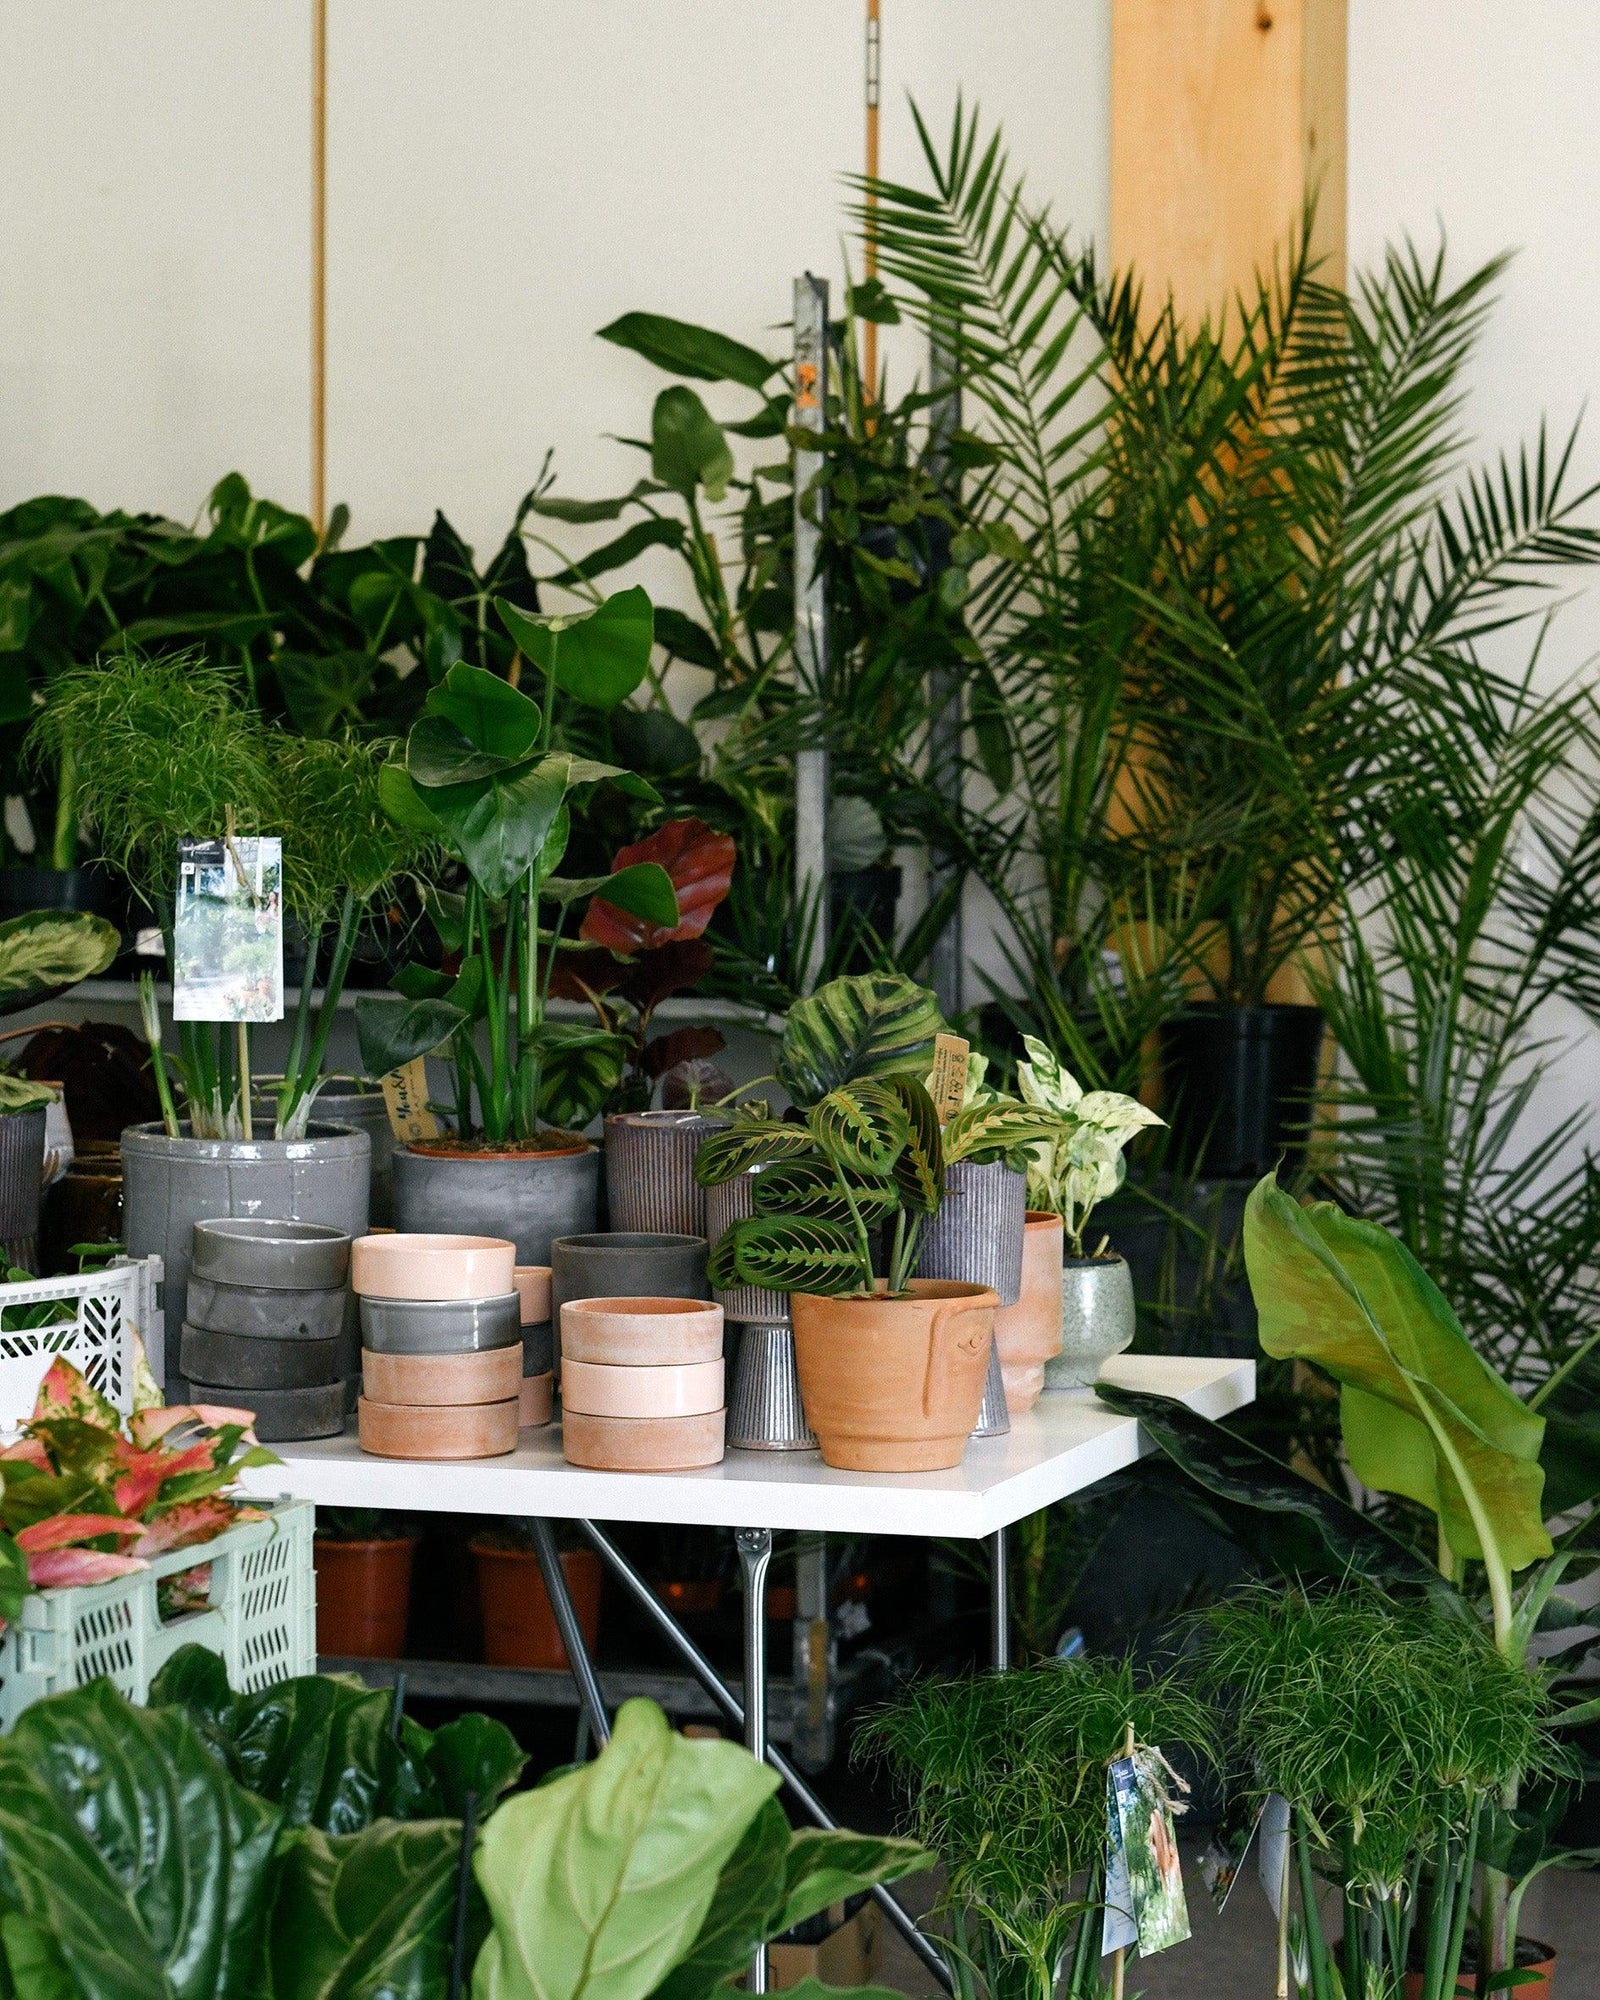
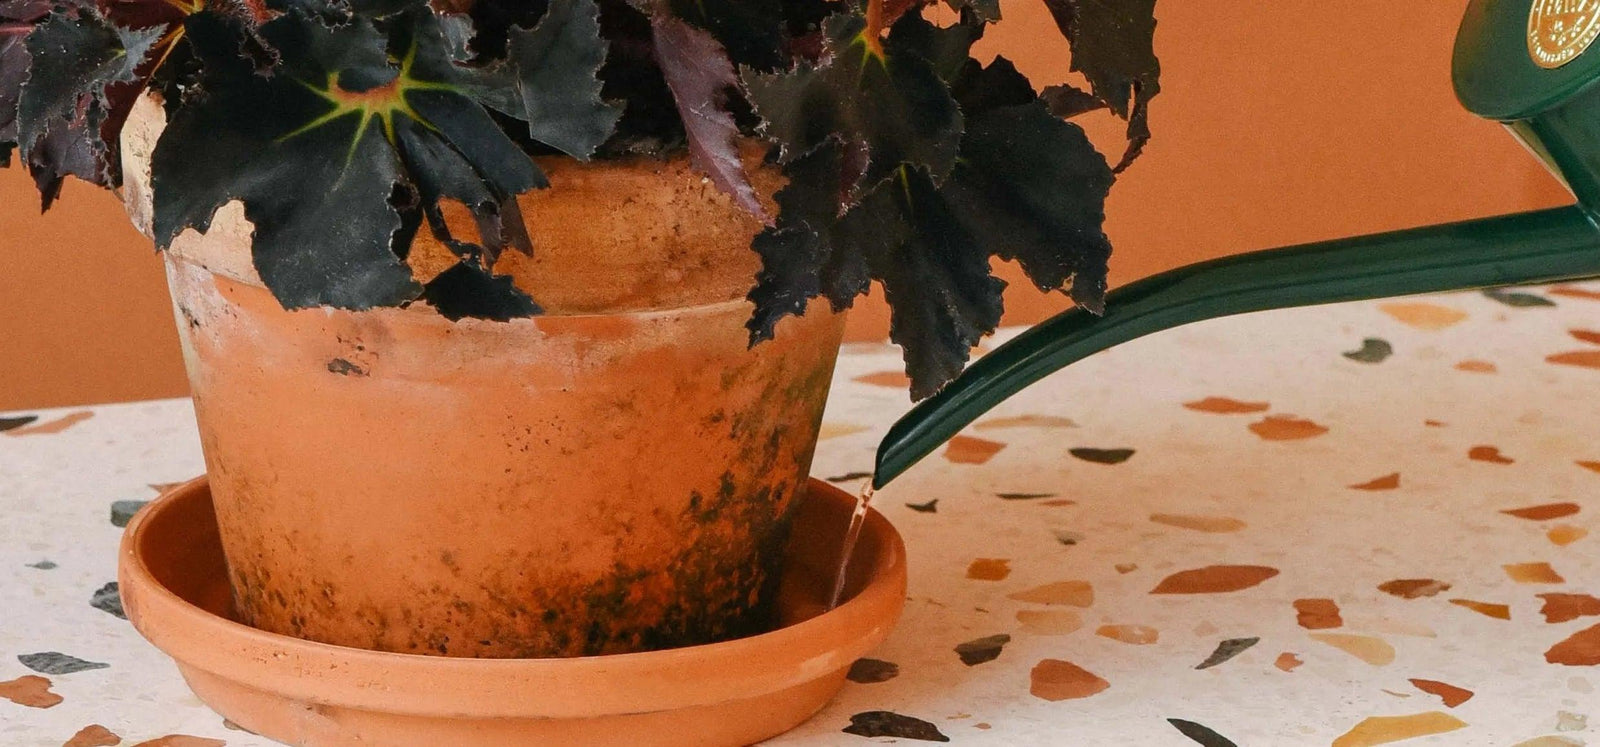
Shop our Accessories collection, featuring pots, soils, watering cans, and more to elevate your plant care routine. See our collection of Minimum Design planters a sustainable option of high quality minimalist planters.
Free Shipping: 60€+ DE | 100€+ EU* ★★★★★ 20K+ Happy Customers | *25€ Min Order Value
Across the EU
60€ in Germany | 100€ Europe*
Founded 2017 in Berlin


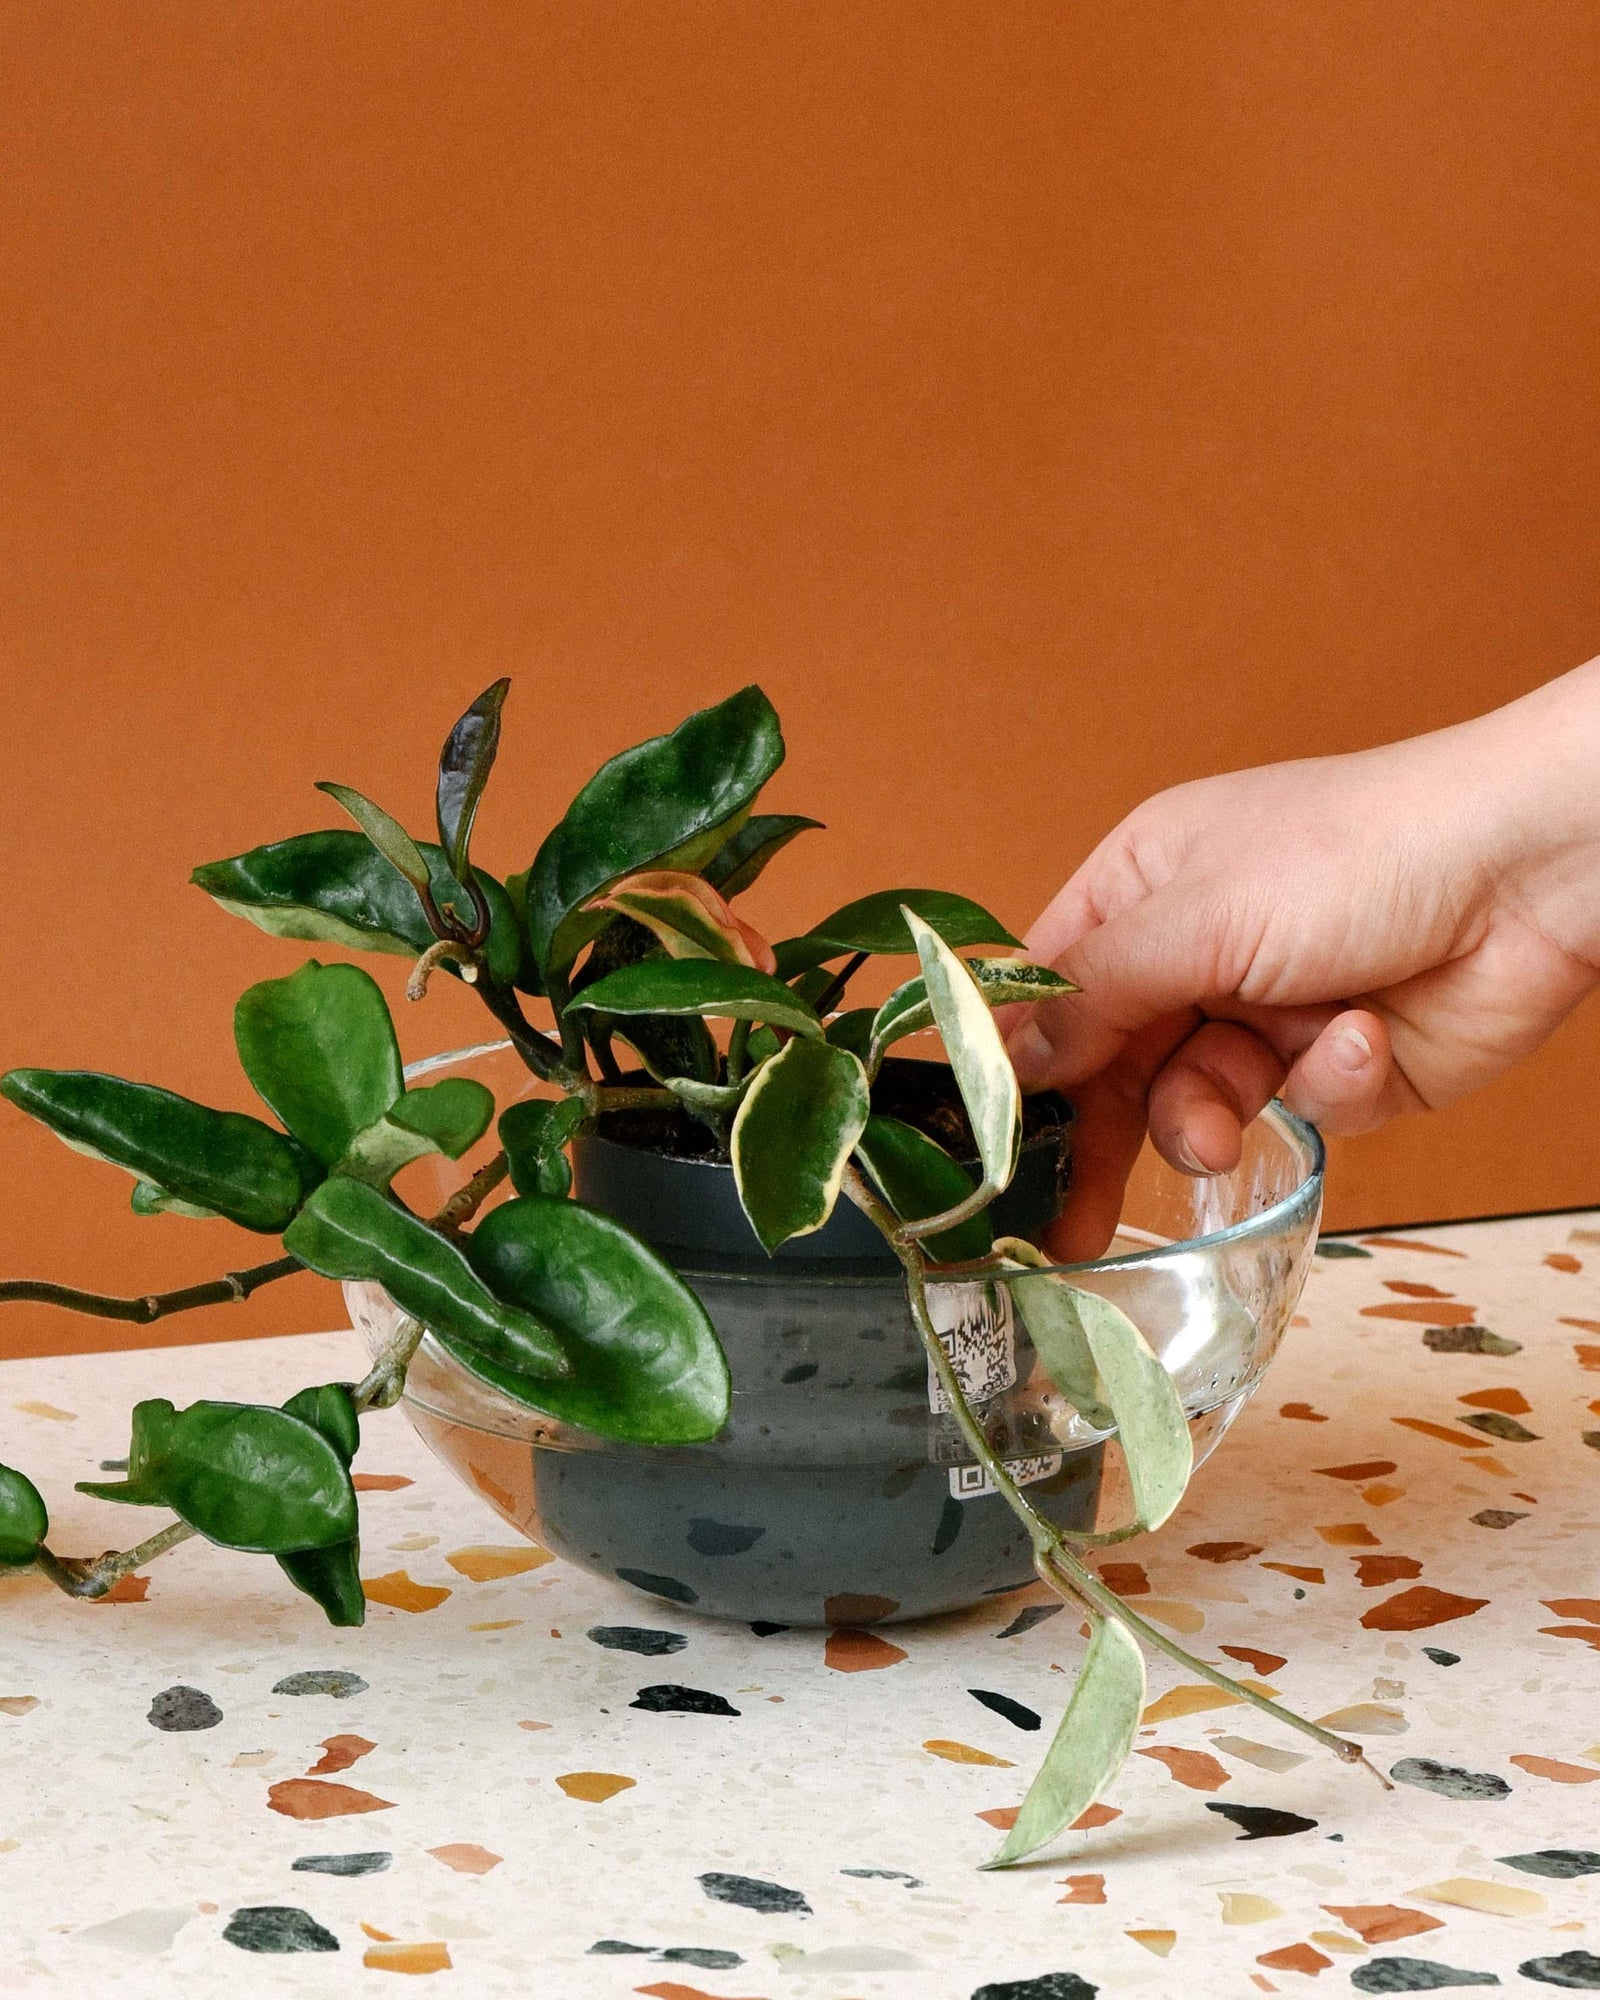
For a limited time, buy three hoyas, get the fourth free! Discount automatically applied at checkout.


Sale
Sale


Sold out
Sold out
Sold out
Sold out
Sold out
Sold out
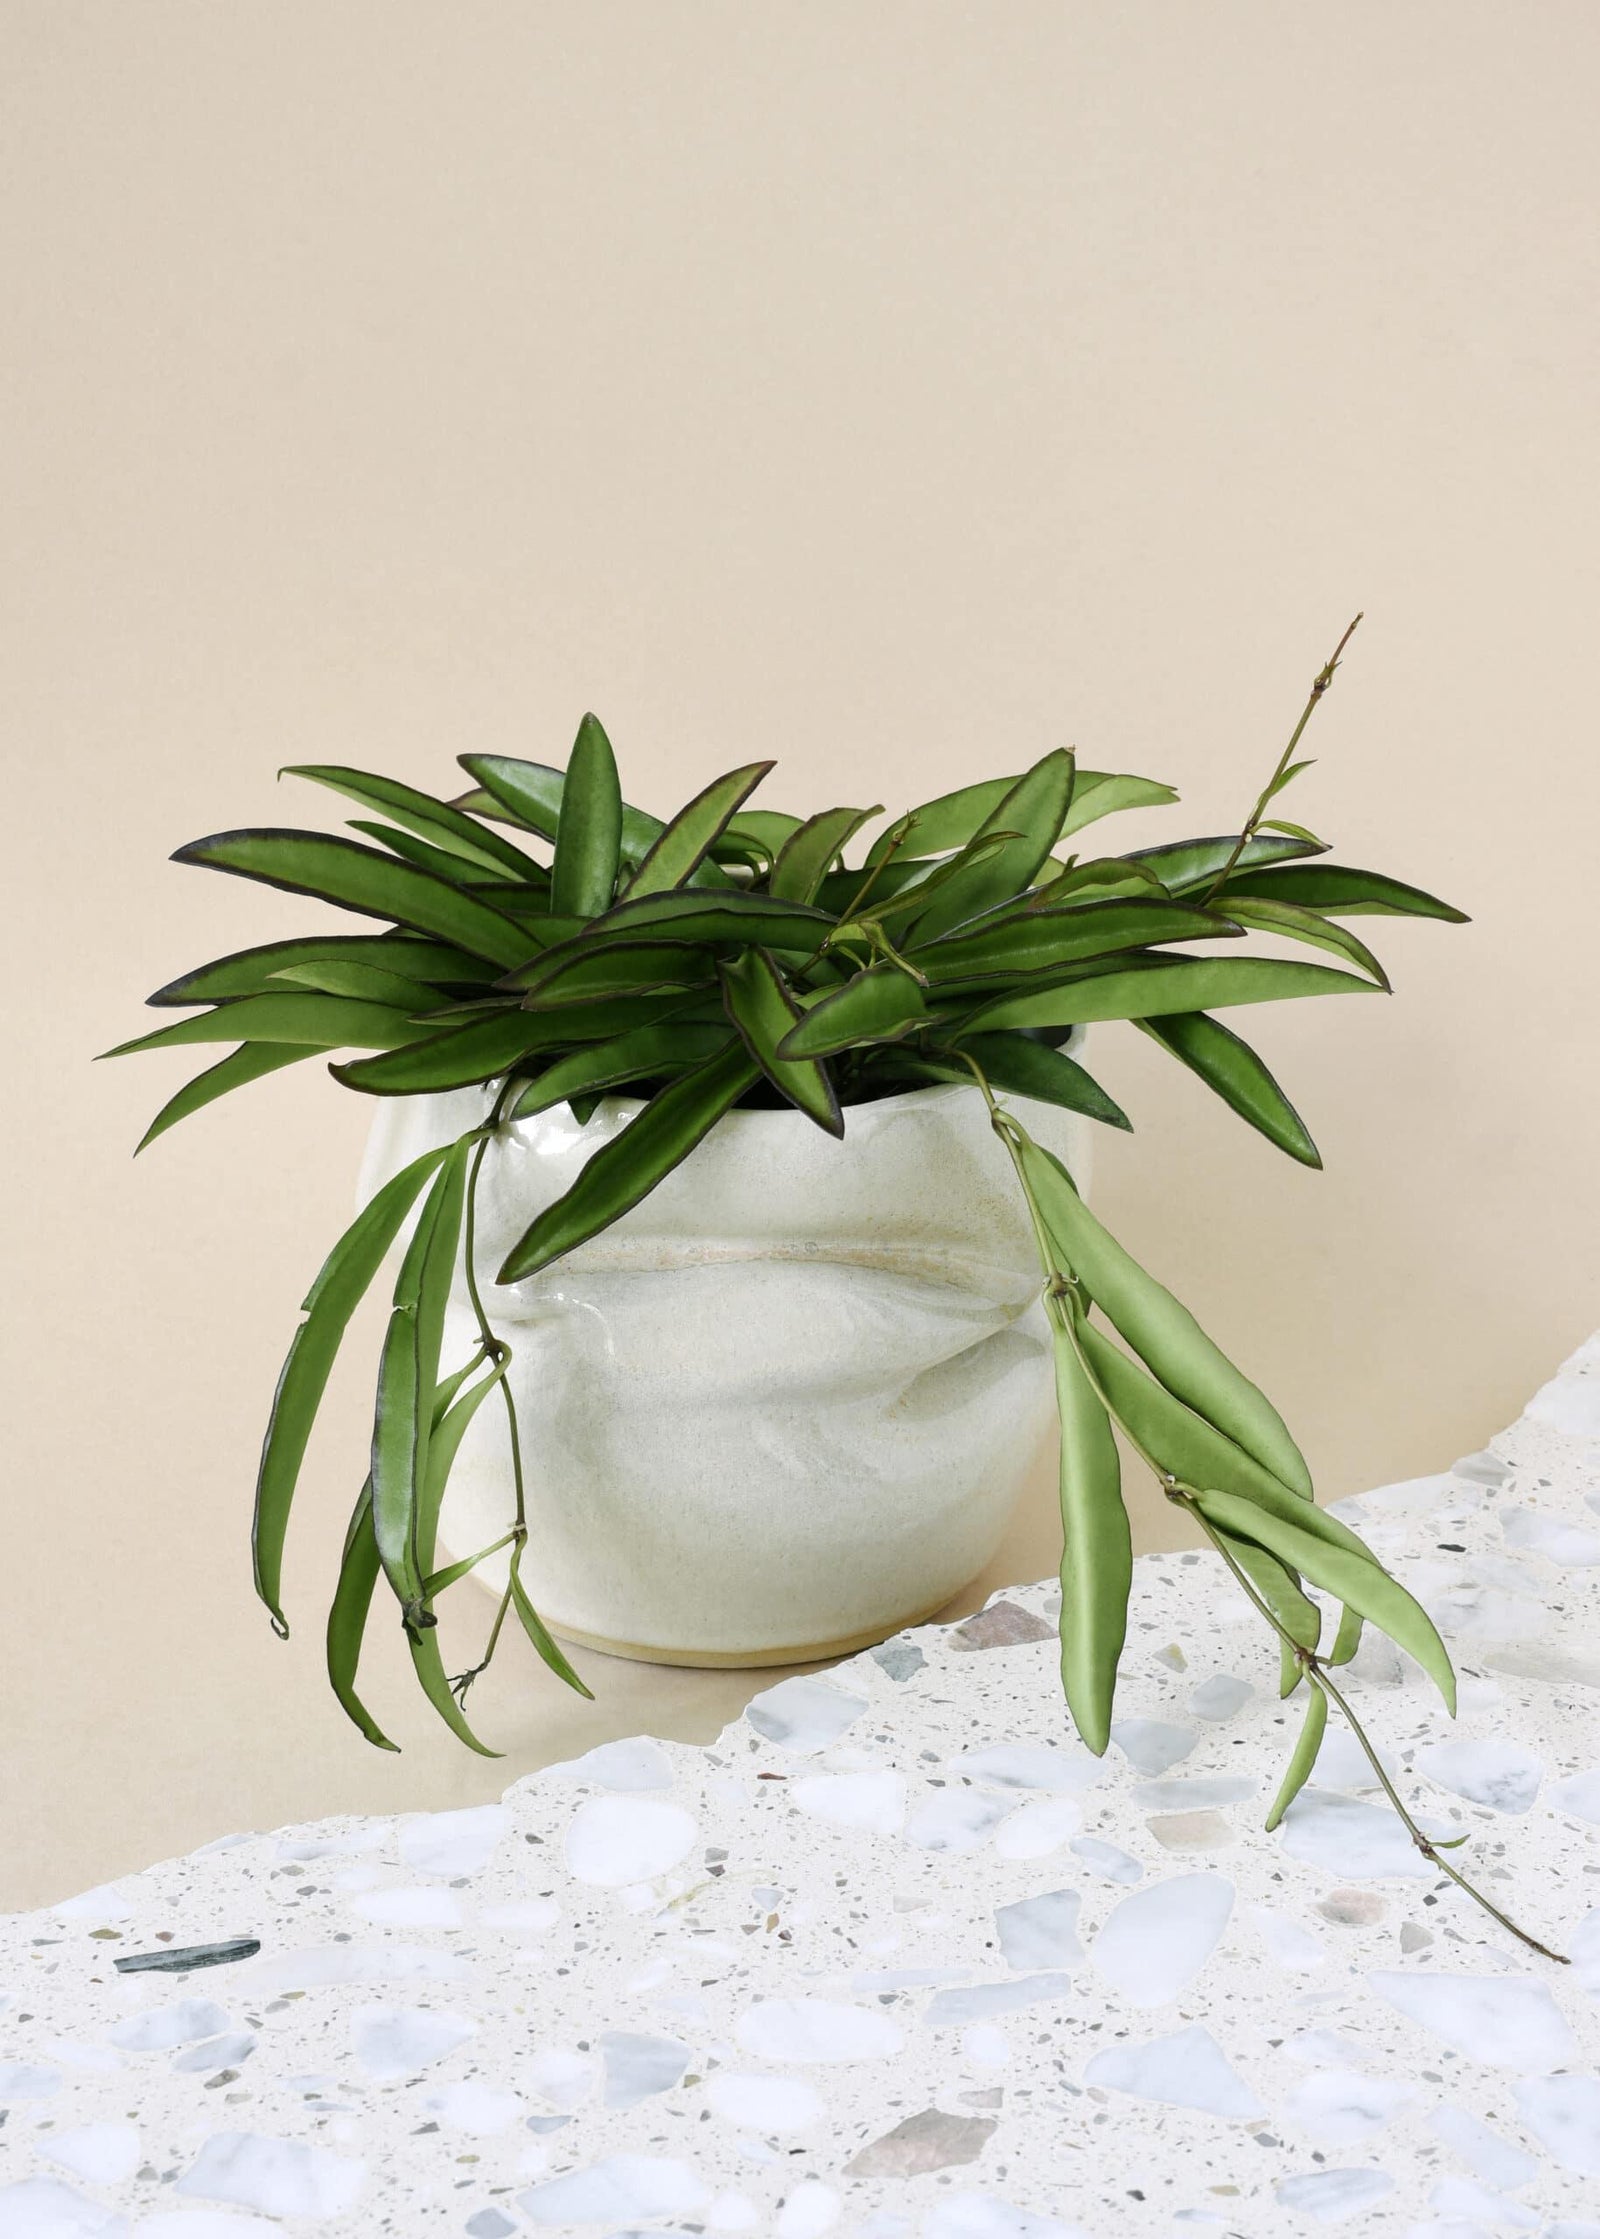
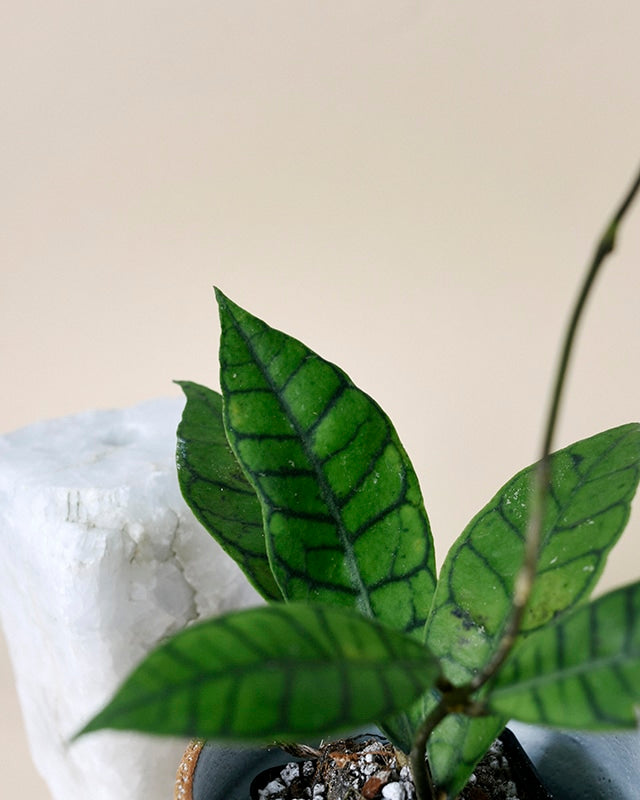
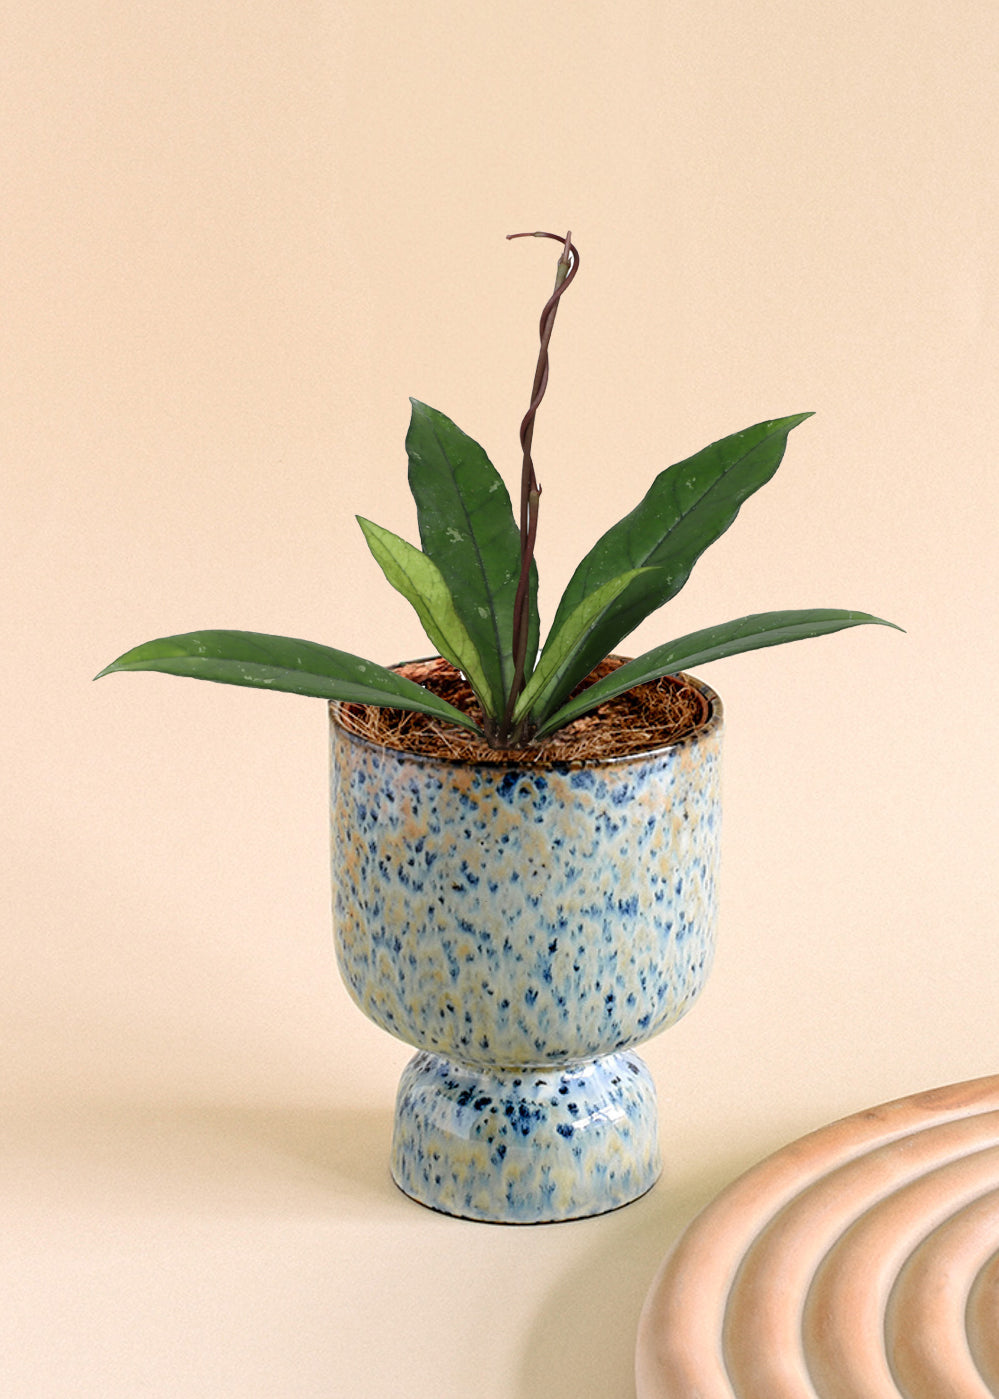
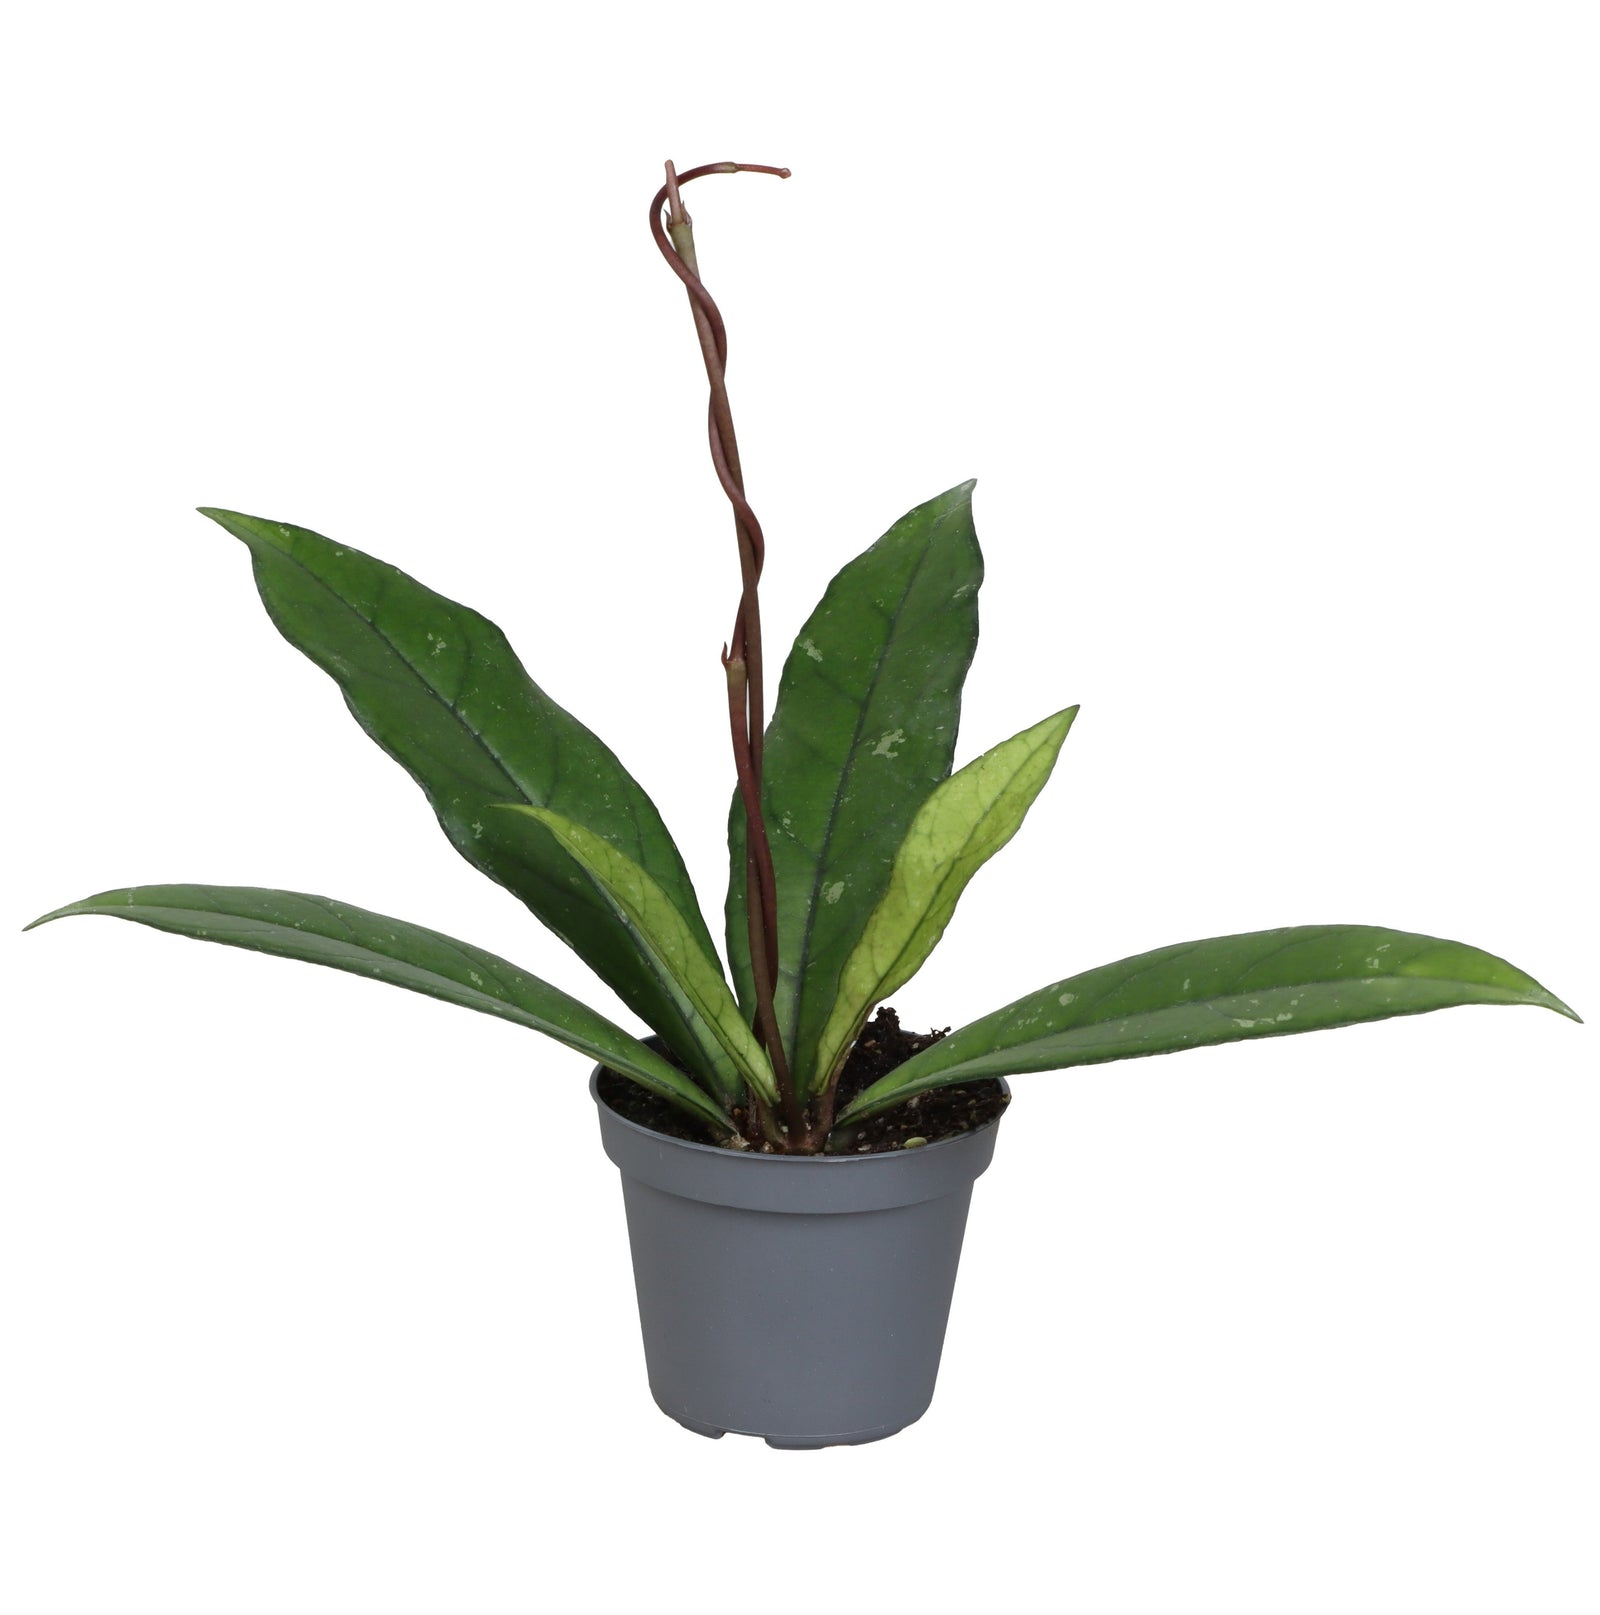
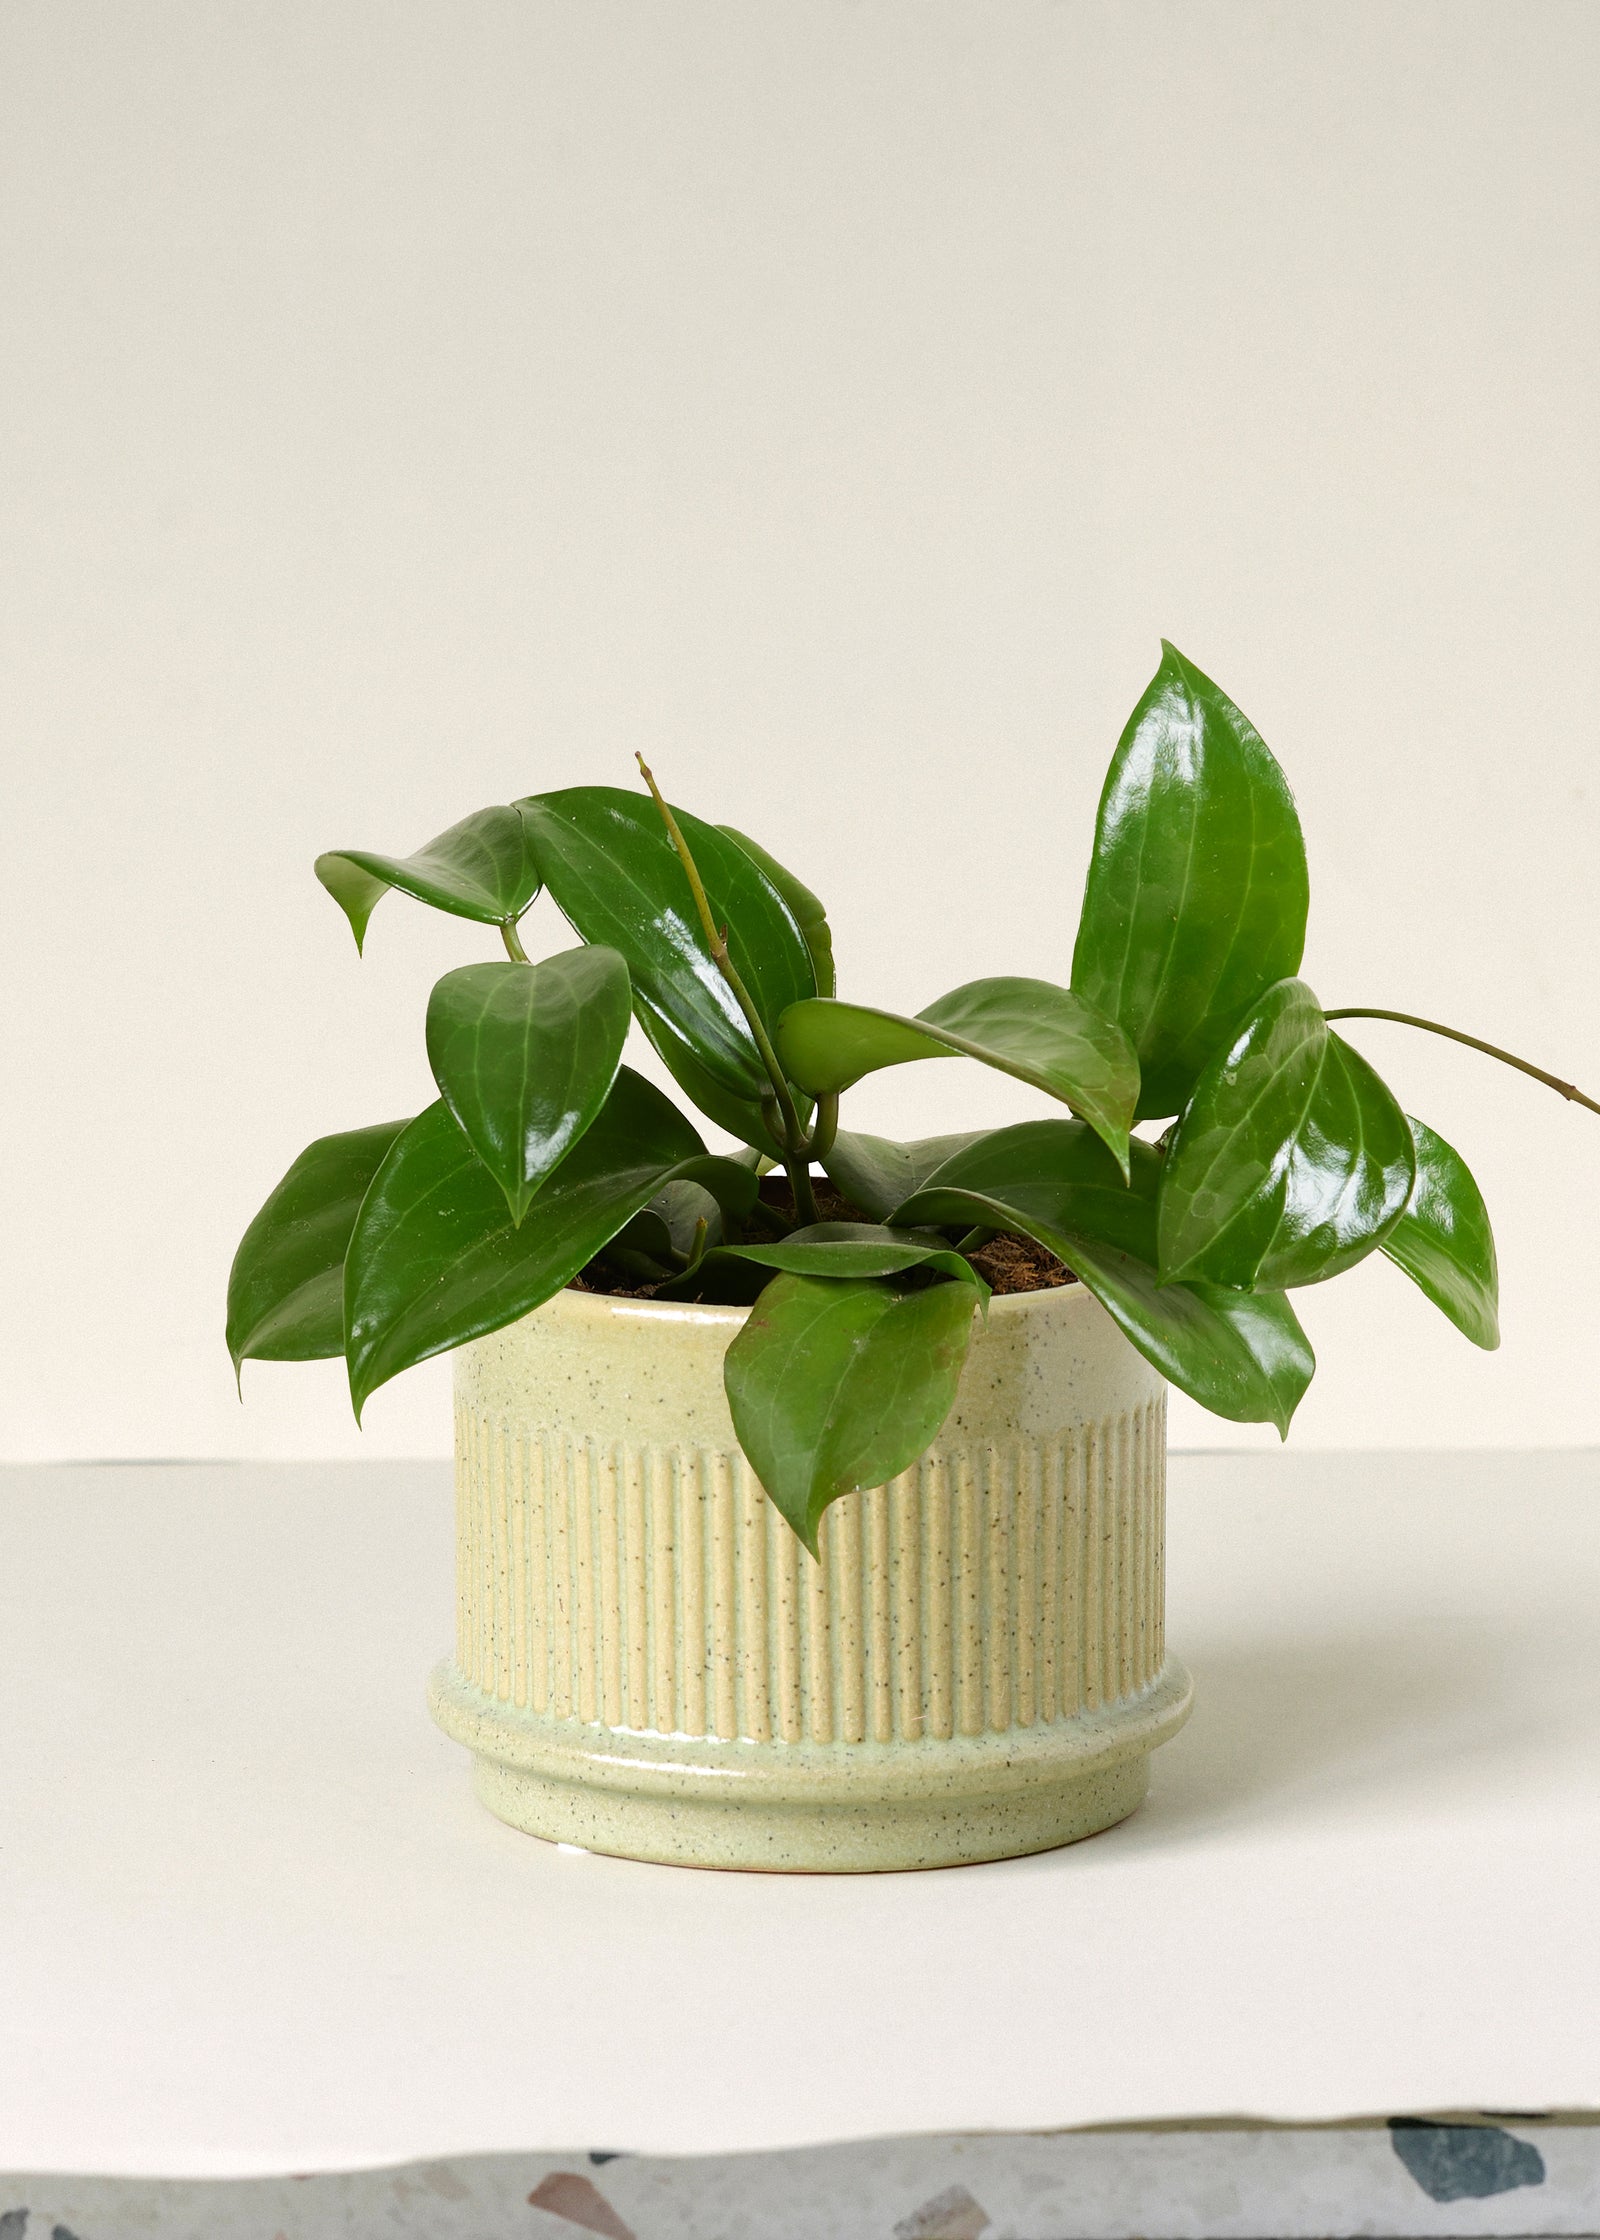
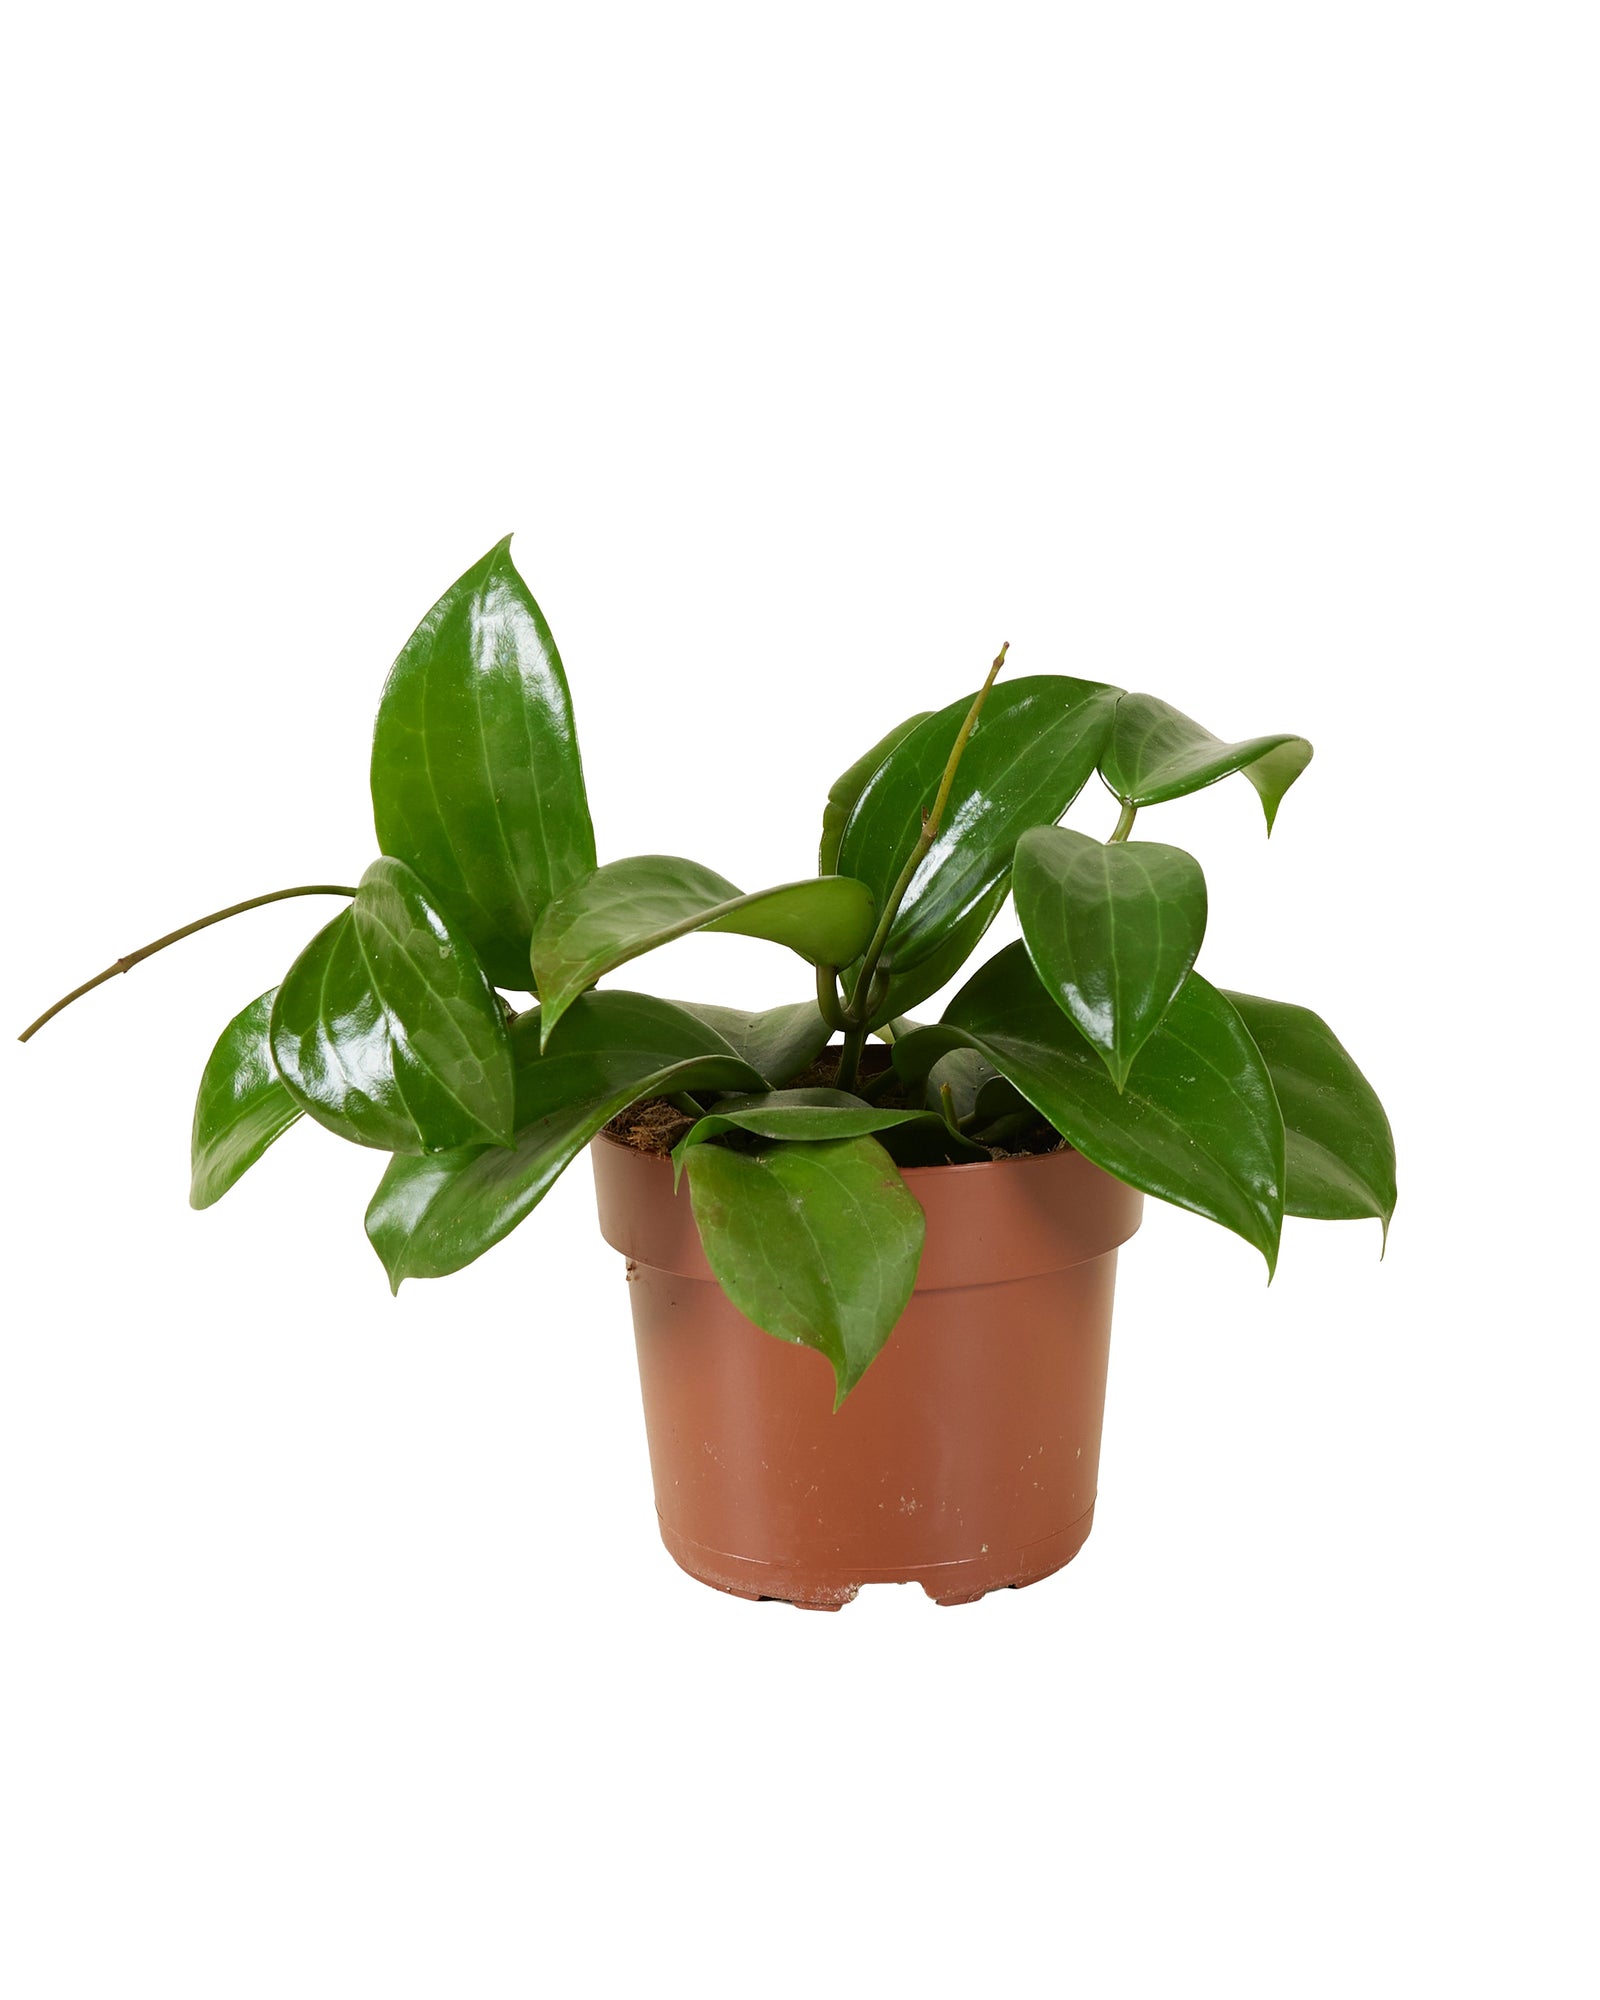
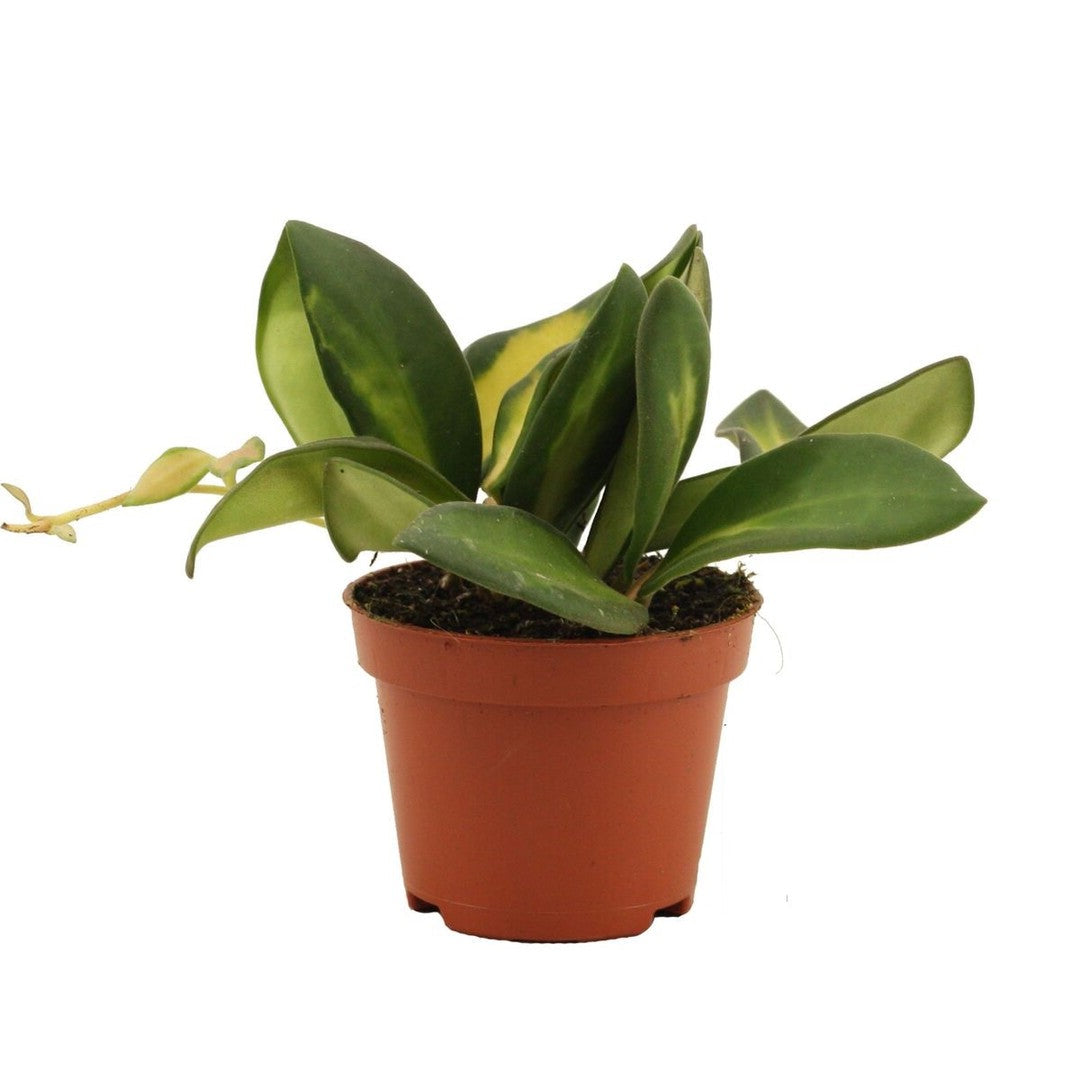
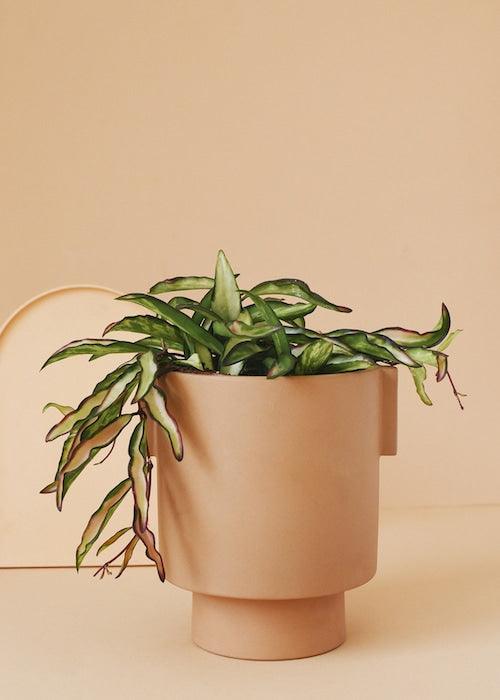
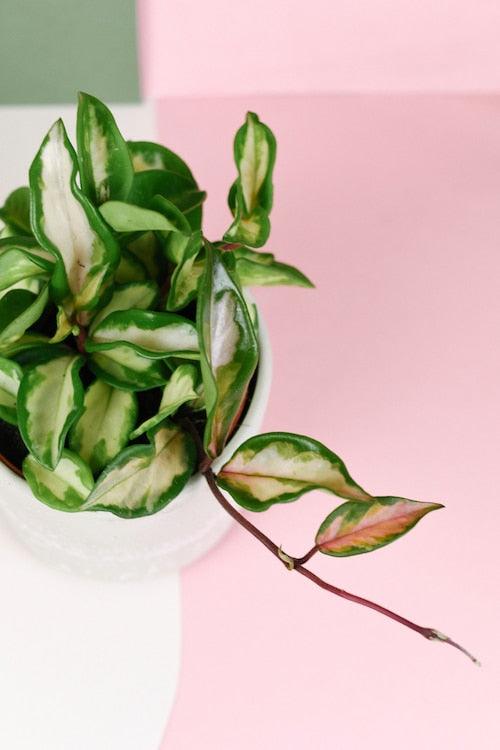
Hoya Wayetii S by Plant Circle – Small, Approx. 10.0cm height by Plant Circle – 9.0cm Pot
Sold out

Check out what is new at Plant Circle, recently restocked and price reduced


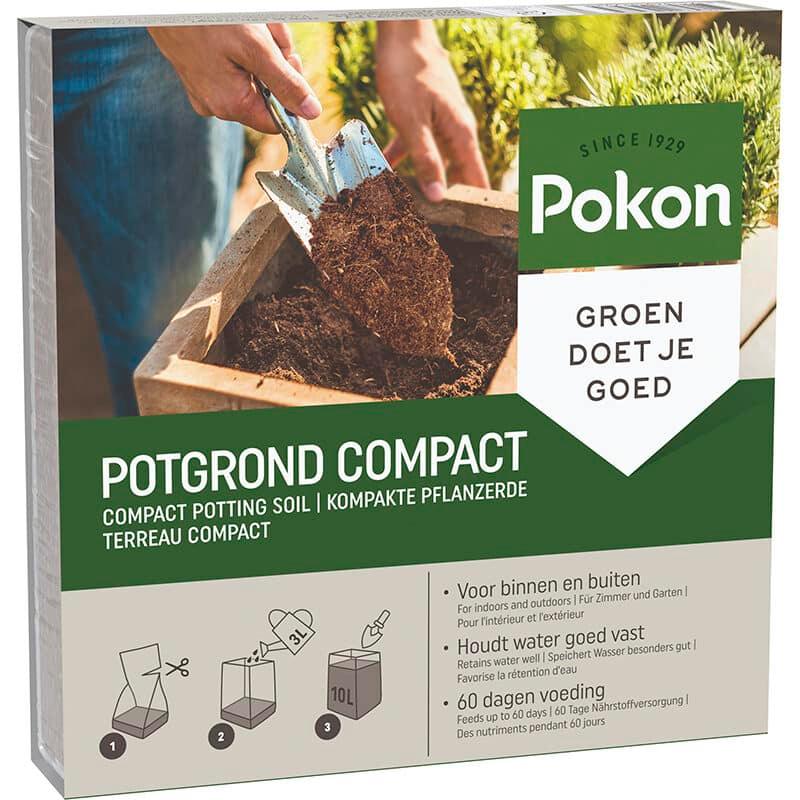
Everything you need for potting and replanting your plant collection


Sold out


Transform your space instantly
Shop XL Plants
Sale

Big savings
Shop sale
Explore more
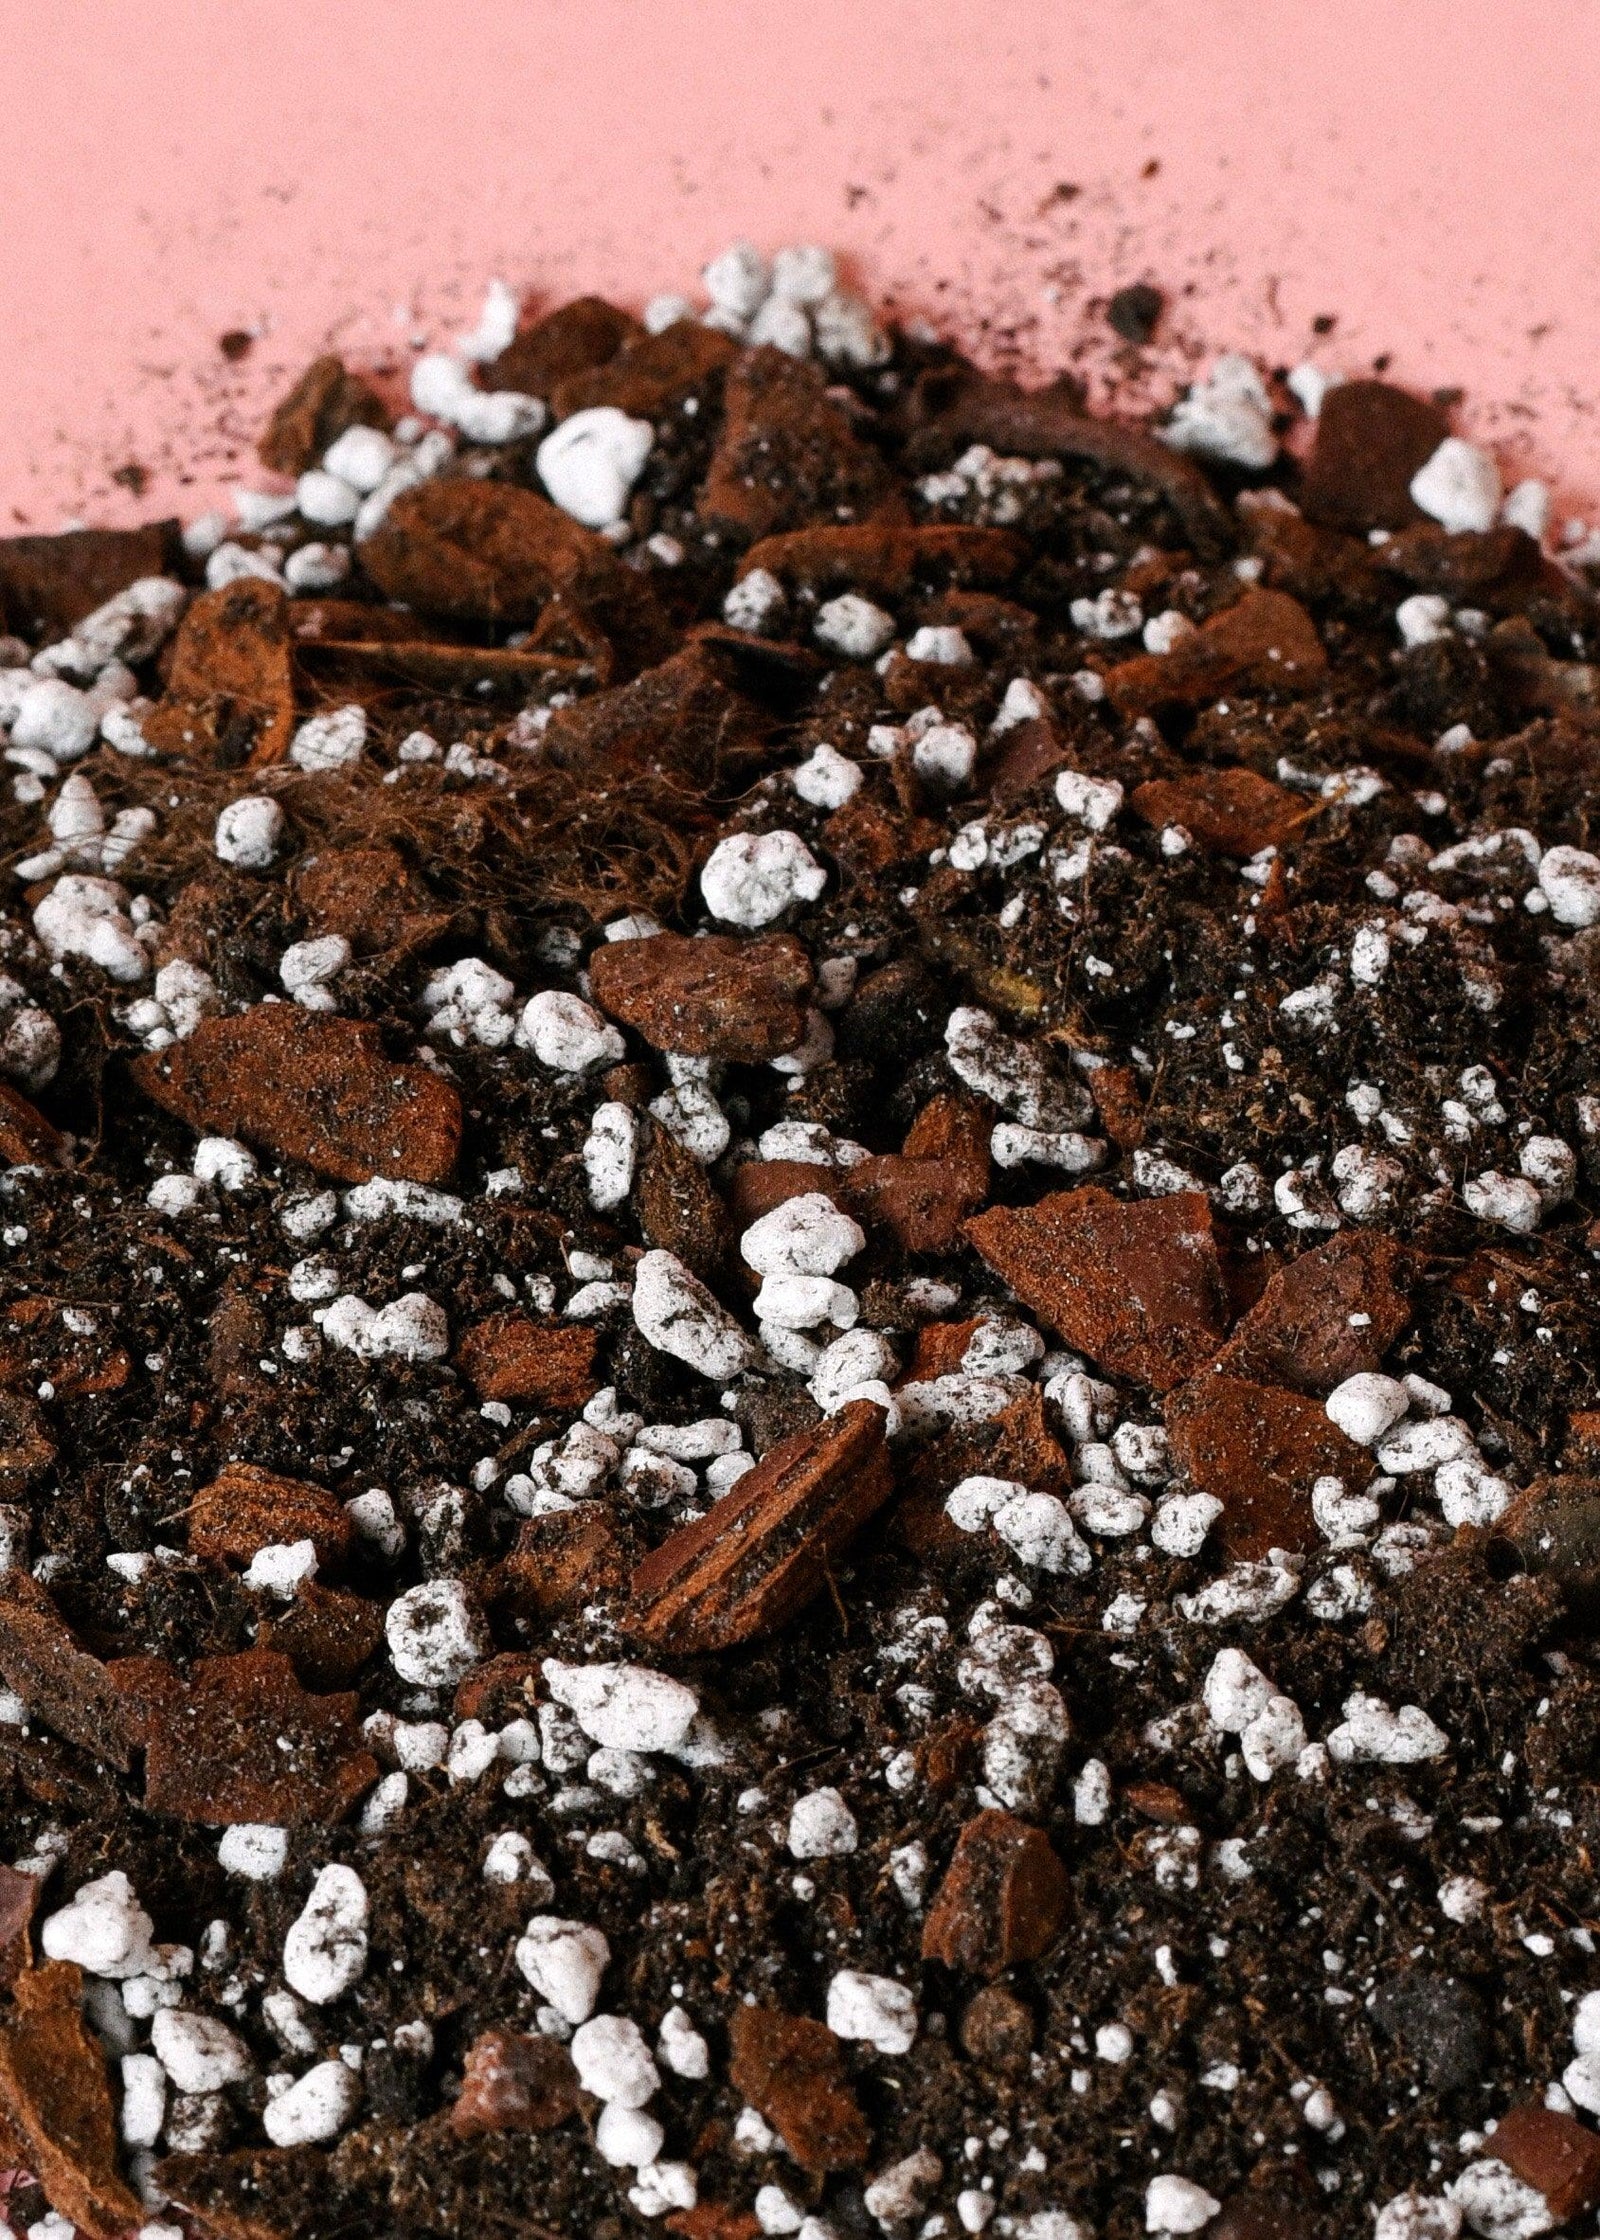
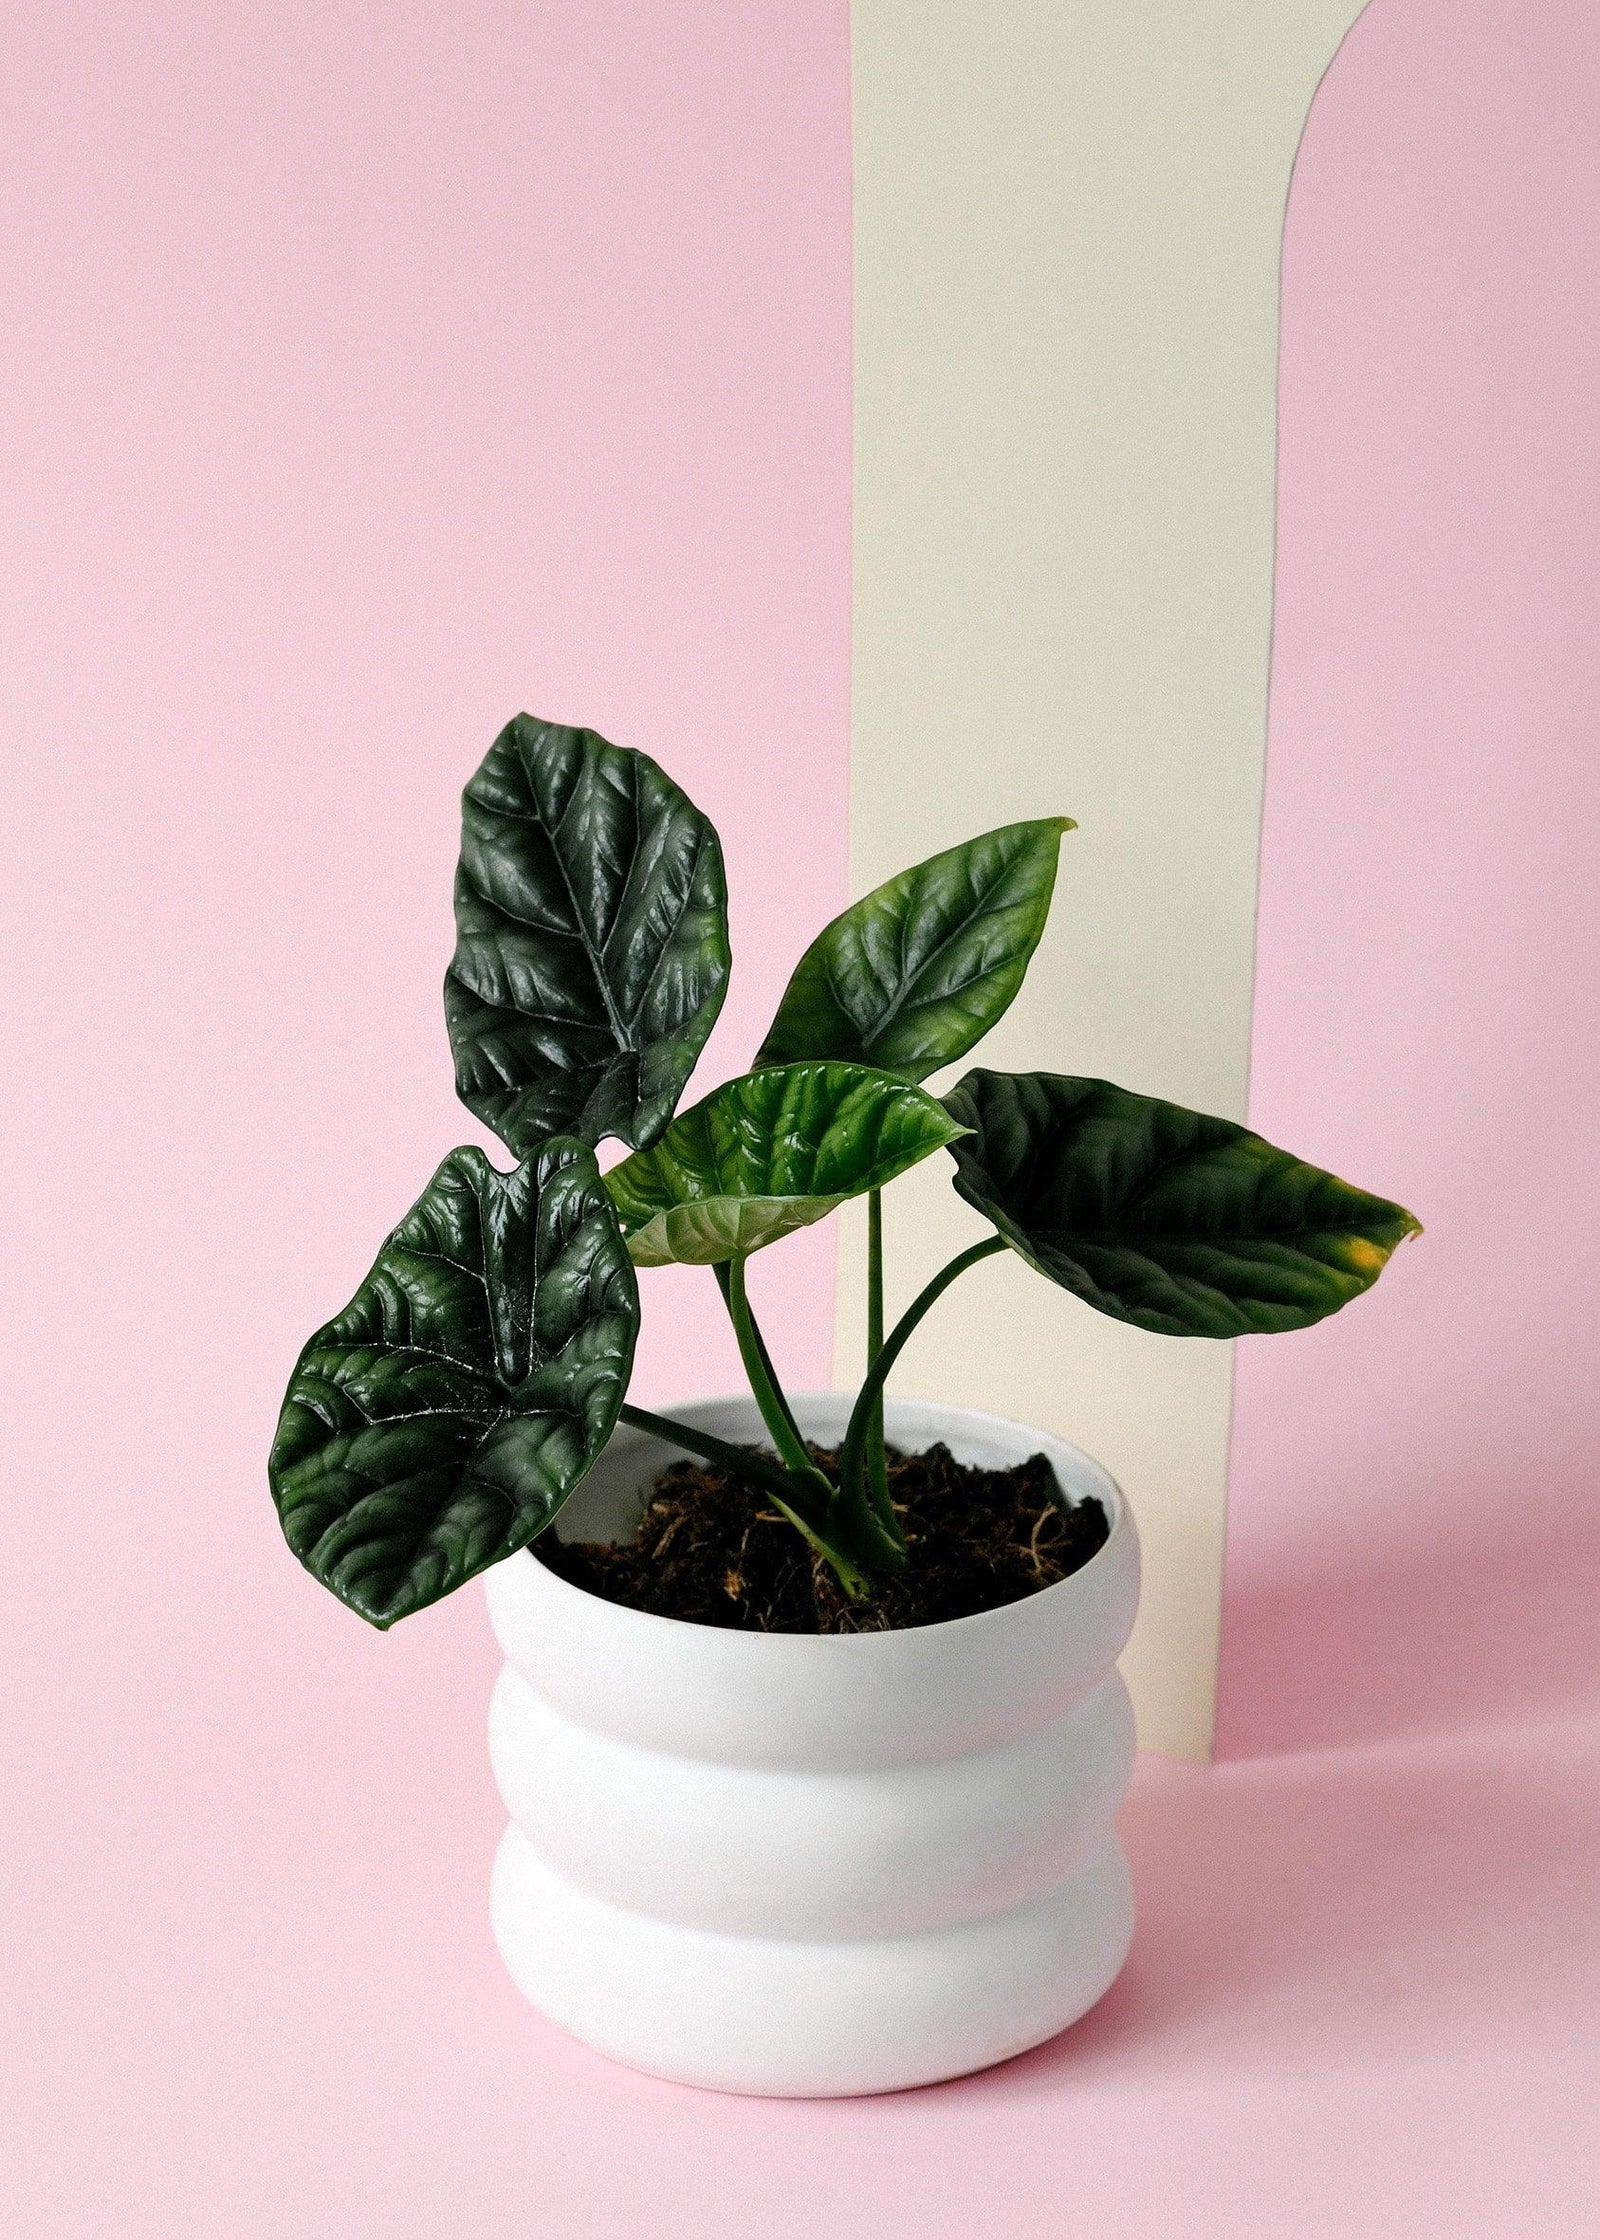
Accessories
Shop our Accessories collection, featuring pots, soils, watering cans, and more to elevate your plant care routine. See our collection of Minimum Design planters a sustainable option of high quality minimalist planters.
View collection
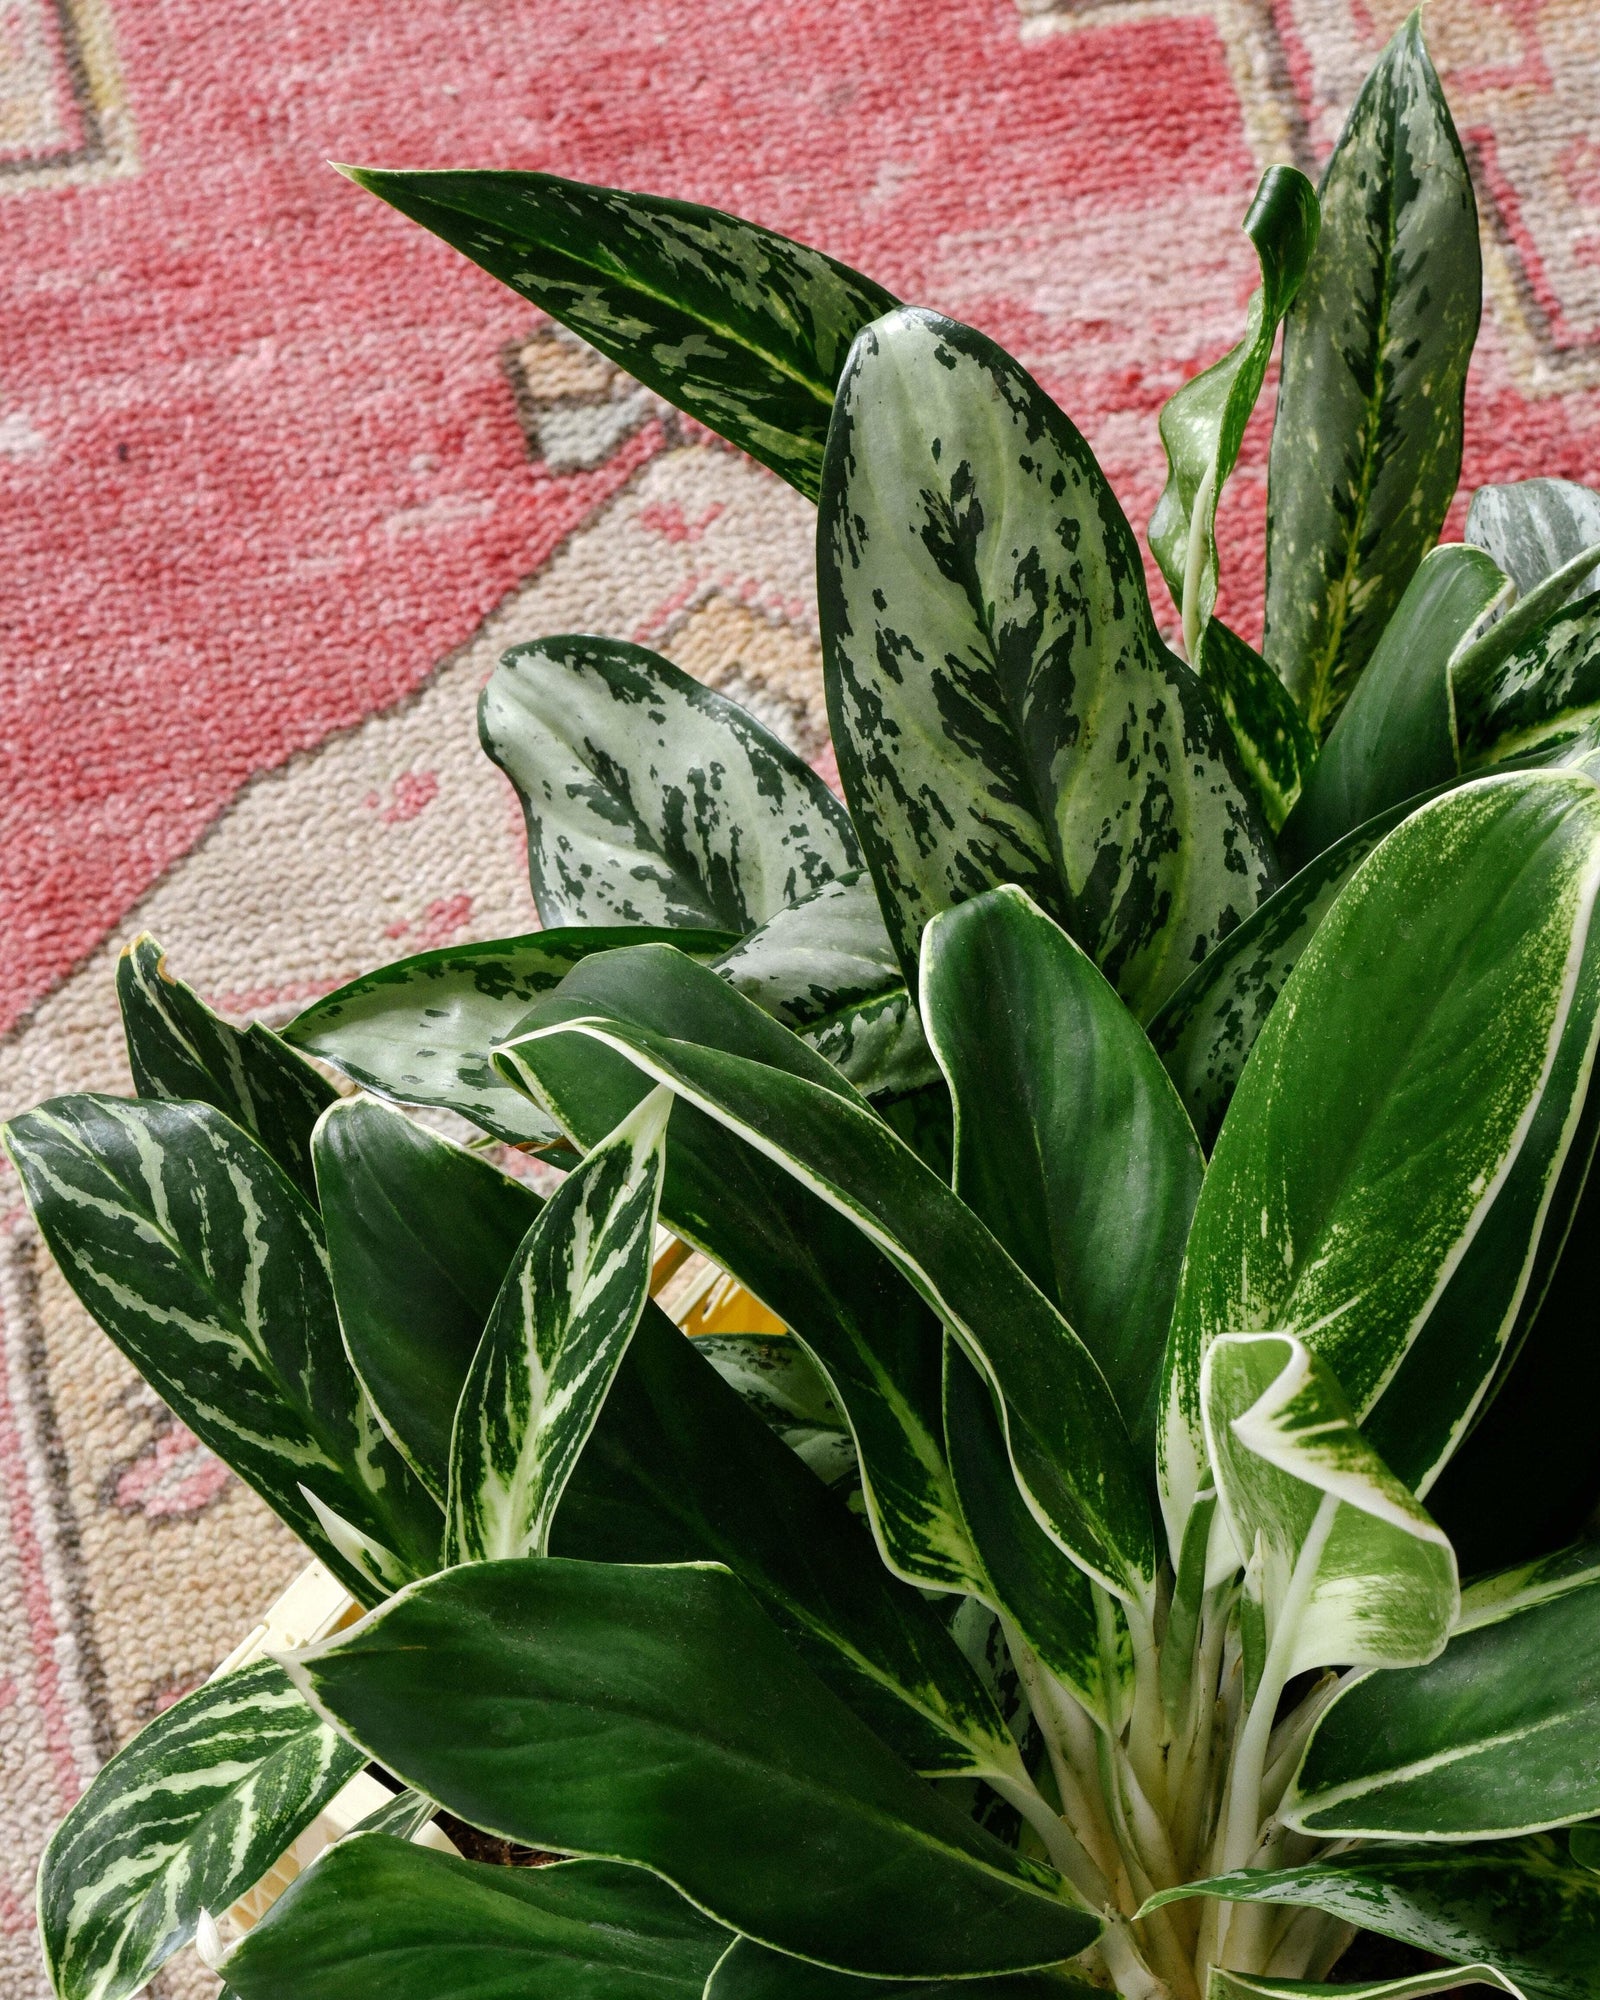
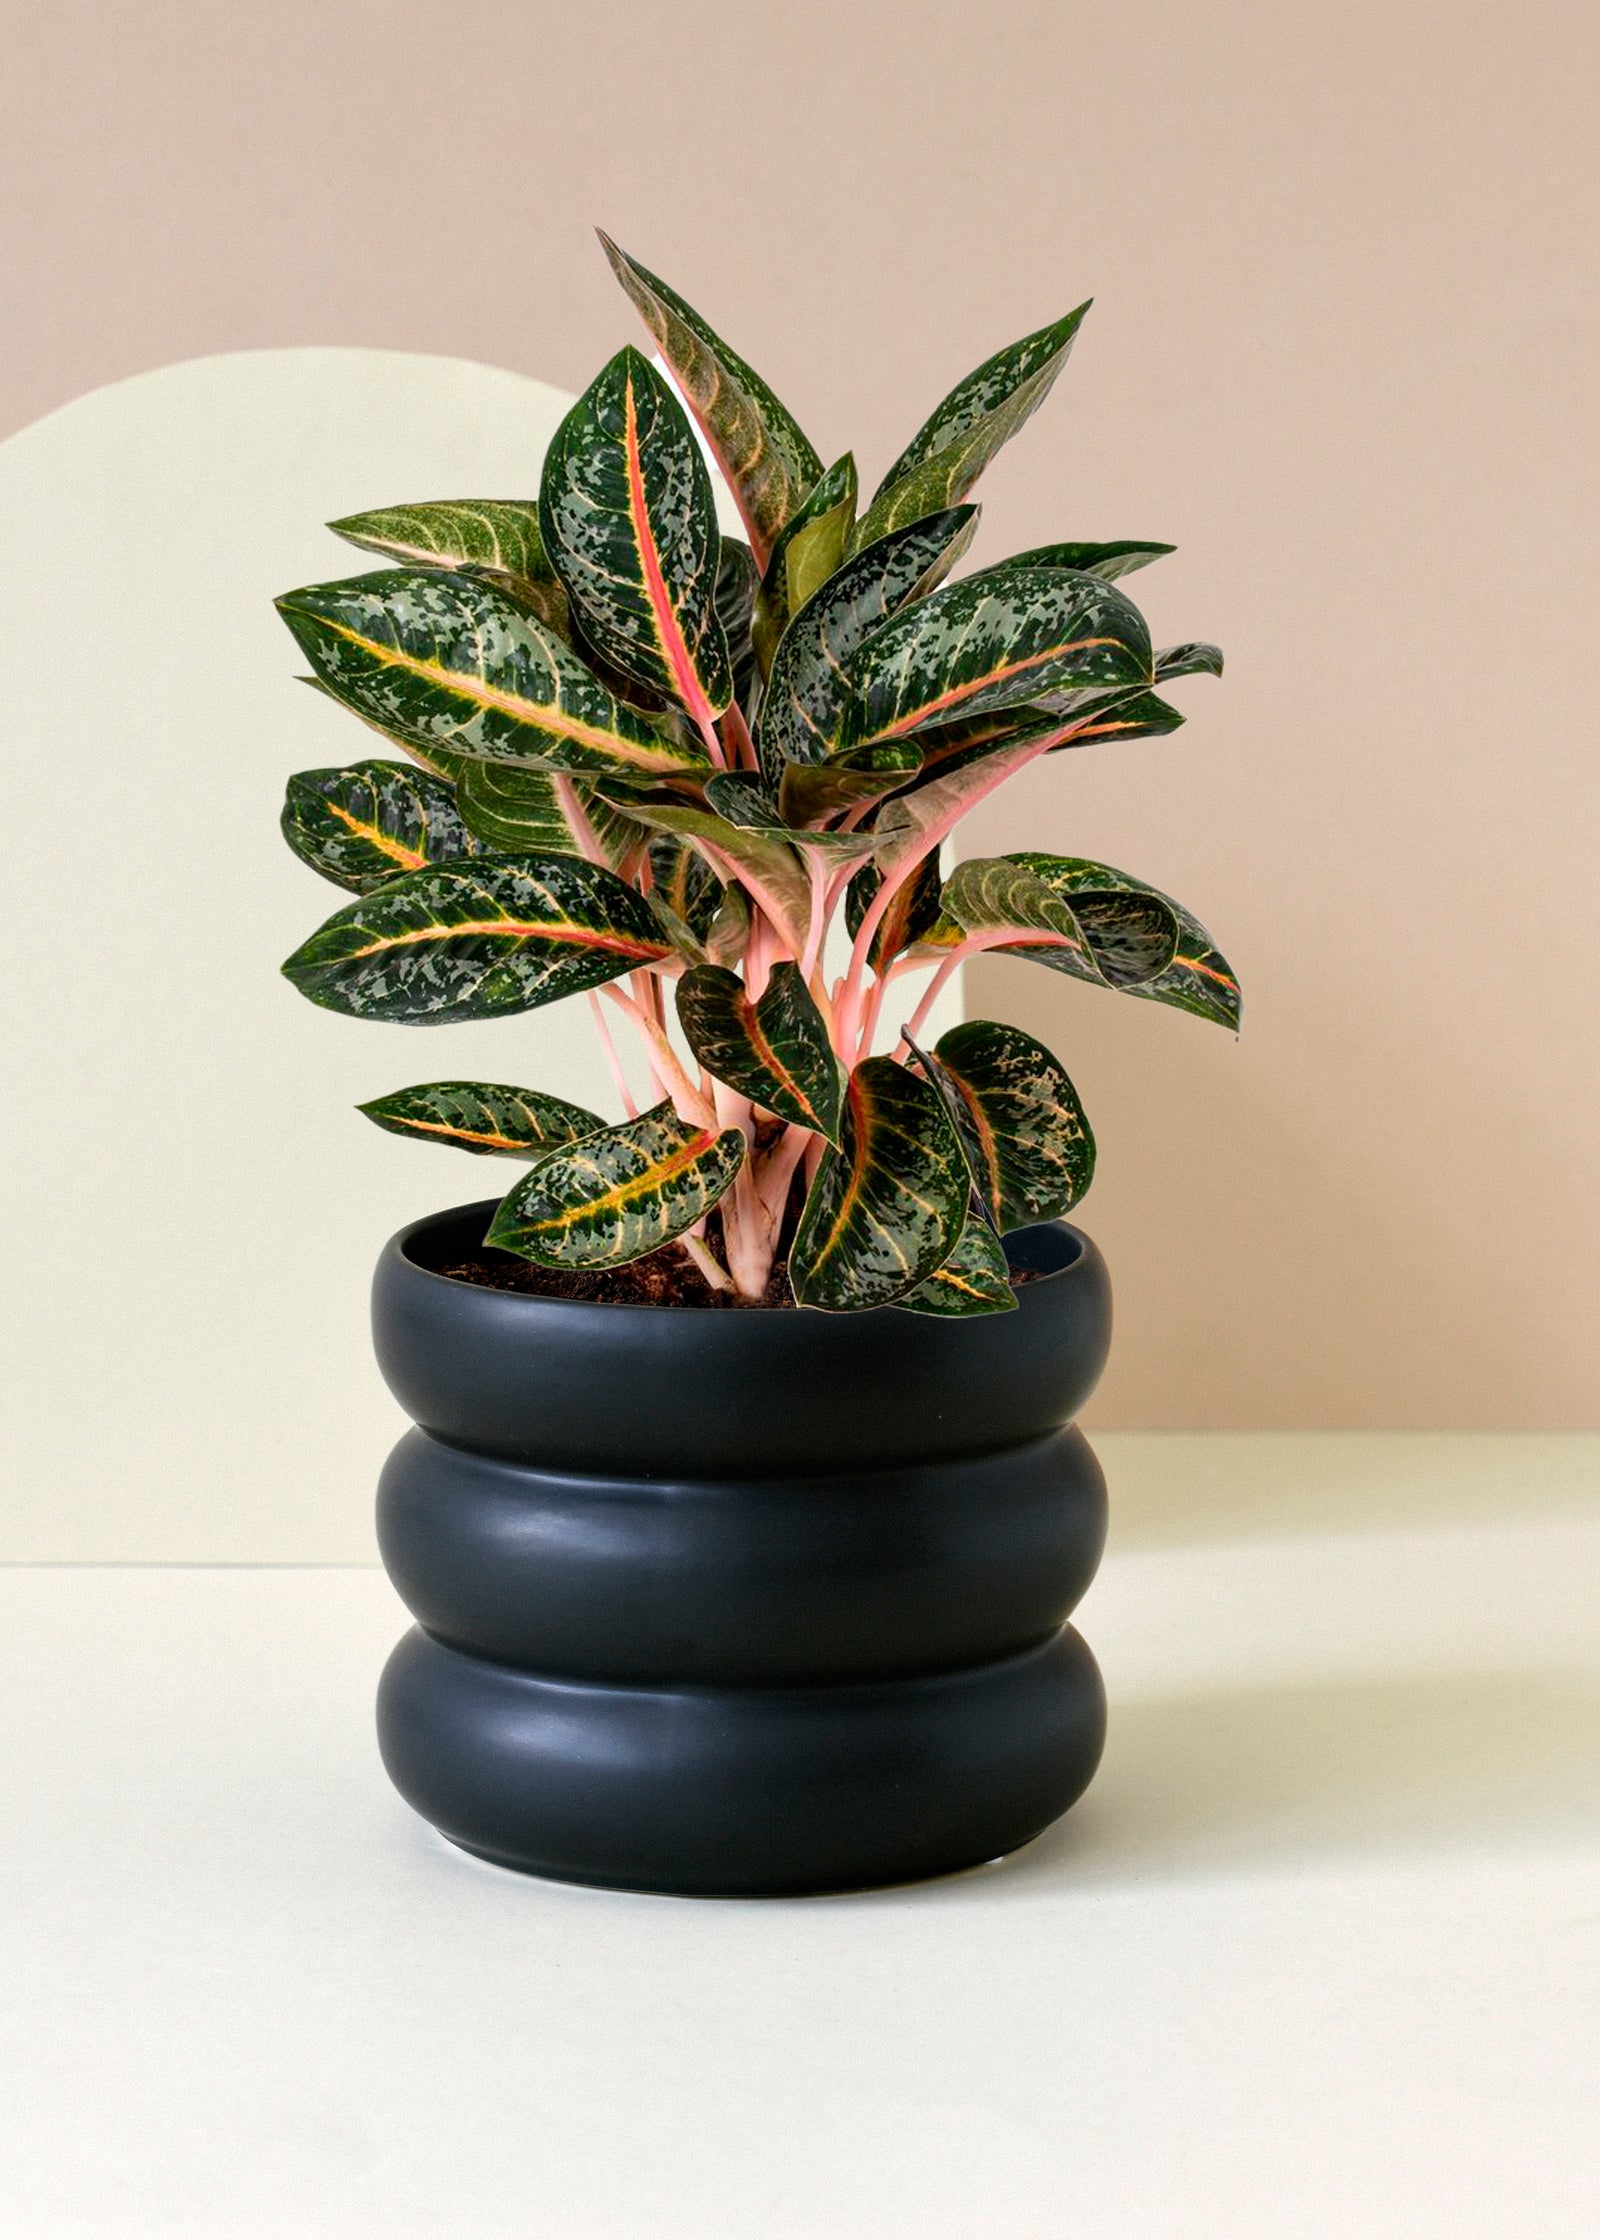
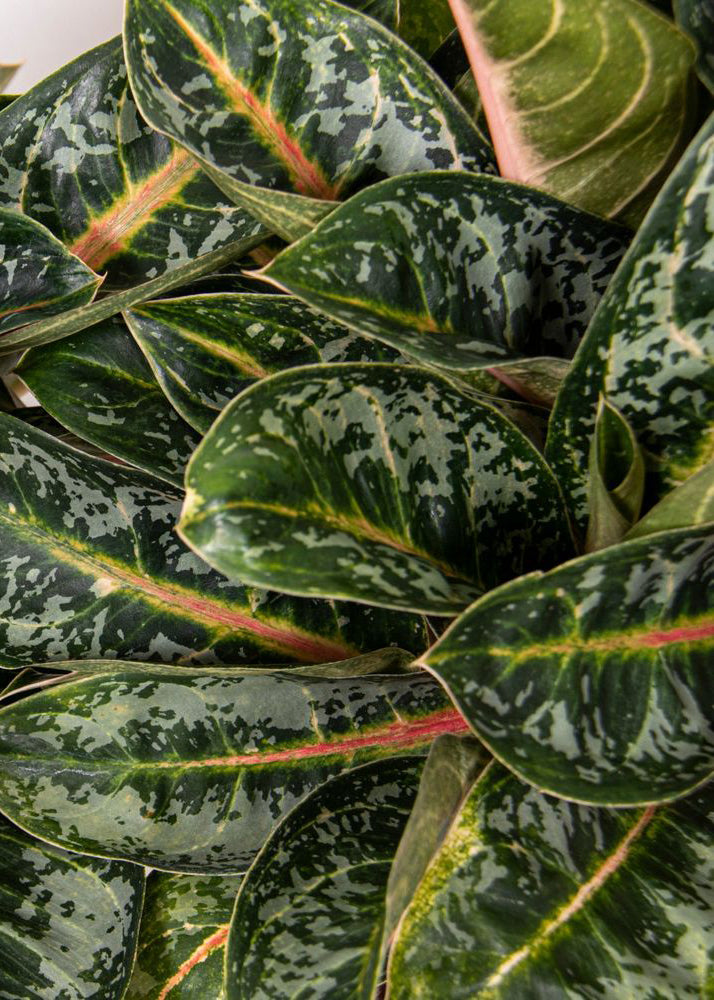
Aglaonema
Shop our Aglaonema collection, featuring vibrant houseplants with colorful, patterned leaves and low-maintenance care.
View collection

All plants
Plant Circle is your online shop for houseplants! We sell hundreds of rare and common plants in all sizes, which will look great in your home! No matter if you live in a single room, flat or a big house - we are sure to stock the right one for your needs. We specialise in tropical houseplants, such as Aroids, but have lost our heart to other And we can ship them right to your doorstep! So, if you want to turn your home into an (urban) jungle, look no further! You will find everything you need in our online houseplant shop. Why everyone should have houseplants Plants have the power to get us out of our heads and back into the here and now, they provide peace and strength, joy and hope. As houseplants, they give us humans purpose and affirmation, but even more so, they make our homes a place of comfort and life where we can feel at home. Houseplants have many positive influences on us, both mental and physical, which have been proven by research. Plants are good for our mental health Plants can help us stay calm and relaxed! Multiple studies have measured the blood pressure, pulse and the level of the stress hormone cortisol of subjects under mental stress or during a difficult task. They found that people remained calmer when surrounded by plants. Some therapists use gardening (and that includes caring for indoor plants) in treating patients with various mental illnesses. The idea is that caring for plants can evoke feelings of happiness and accomplishment in us. And, with that, they help alleviate anxiety, depression, and trauma. It's time to give your mental health a boost! In our online shop, you will find the perfect plants to make you feel better and at home. Plants increase our productivity We are more concentrated, more creative and our memory works better with houseplants around. In a study from Exeter University in the UK, researchers introduced plants to a previously barren office. They found that employee productivity increased by 15 percent as a consequence! In another study published in the Journal of Environmental Psychology, researchers gave students a challenging task. They found that those in a room with plants had longer attention spans than those sitting in a room without greenery. The researchers attributed this to both to the calming and soothing effects of houseplants. Such an environment has a positive effect on our performance and creativity. Because we believe in the power of plants, Plant Circle greens up offices for big companies as well as for individuals working from home. Simply get in touch with us via our form to inquire! Plants are good for our phyiscal health Better air quality When we breathe in, we bring oxygen into the body. When we breathe out, we release carbon dioxide. The cycle of a plant, which is essential for survival, runs roughly the other way around. They take in carbon dioxide and release oxygen again. That's why houseplants are virtually the perfect partners! At least when it comes to the air we breathe. Plants produce the most oxygen when they get plenty of sun and water, because that's when they photosynthesize most effectively. To supply one human being with oxygen, the leaves of our houseplants would have to cover an area of at least 400 square metres. A small tree has a leaf area roughly equivalent to that, so a larger indoor jungle would suffice as well. But even if you have fewer plants, every little counts! Every houseplant increases the oxygen content in the air at home - and that's good for our bodies! With better air quality, we get tired more slowly, get headaches less often and we sleep better! Increase your quality of life with more houseplants in your home! So, browse our All Plants section to find hundreds of great houseplants for your home. Plants purify the air Some plants can not only increase the oxygen content in the air, but also filter potentially hazardous substances from our indoor air. A study by NASA has found this out. According to the study, air-purifying houseplants can remove up to 87 percent of pollutants from indoor air within a single day. NASA researchers recommend one potted plant per 9.3 square metres in our homes. However, you don't have to worry too much about the respective air purification capacity! If you have at least one air-purifying plant per area recommended by NASA, you should be fine. We have lots of air-purifying plants in our online shop, such as Sansevieria, Aglaonema, Spathiphyllum, Epipremnum, Ficus Elastica and more! Plant Circle is your go-to online shop for houseplants you will love!
View collection
All Products
Shop all our products
View collection
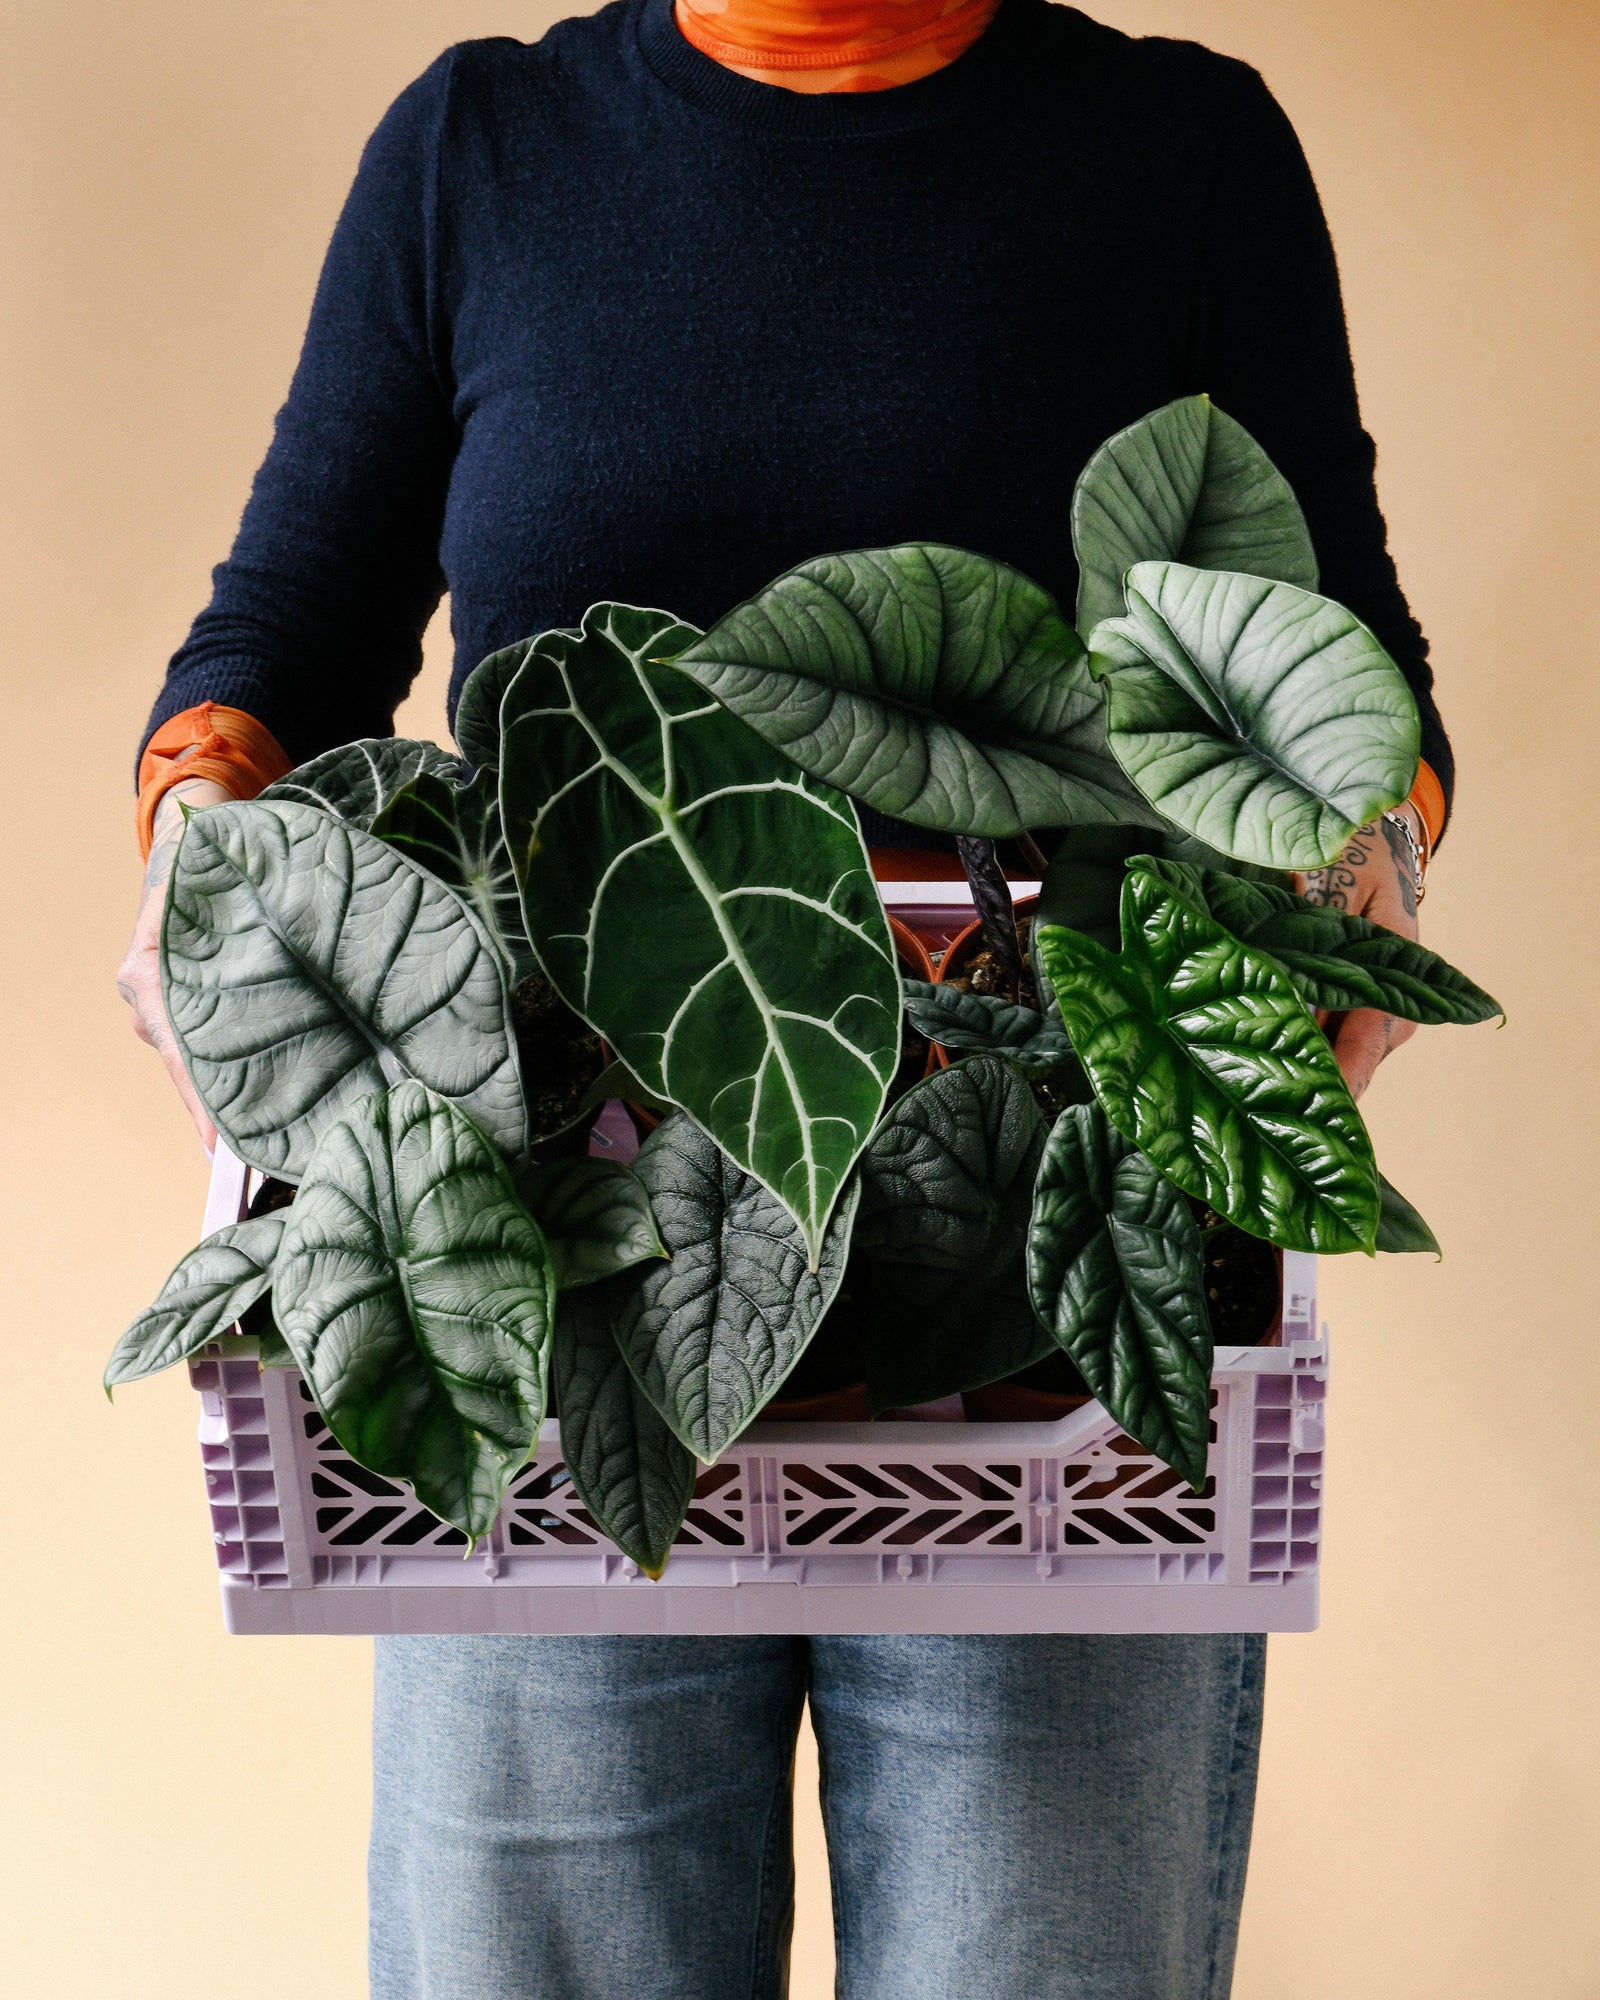
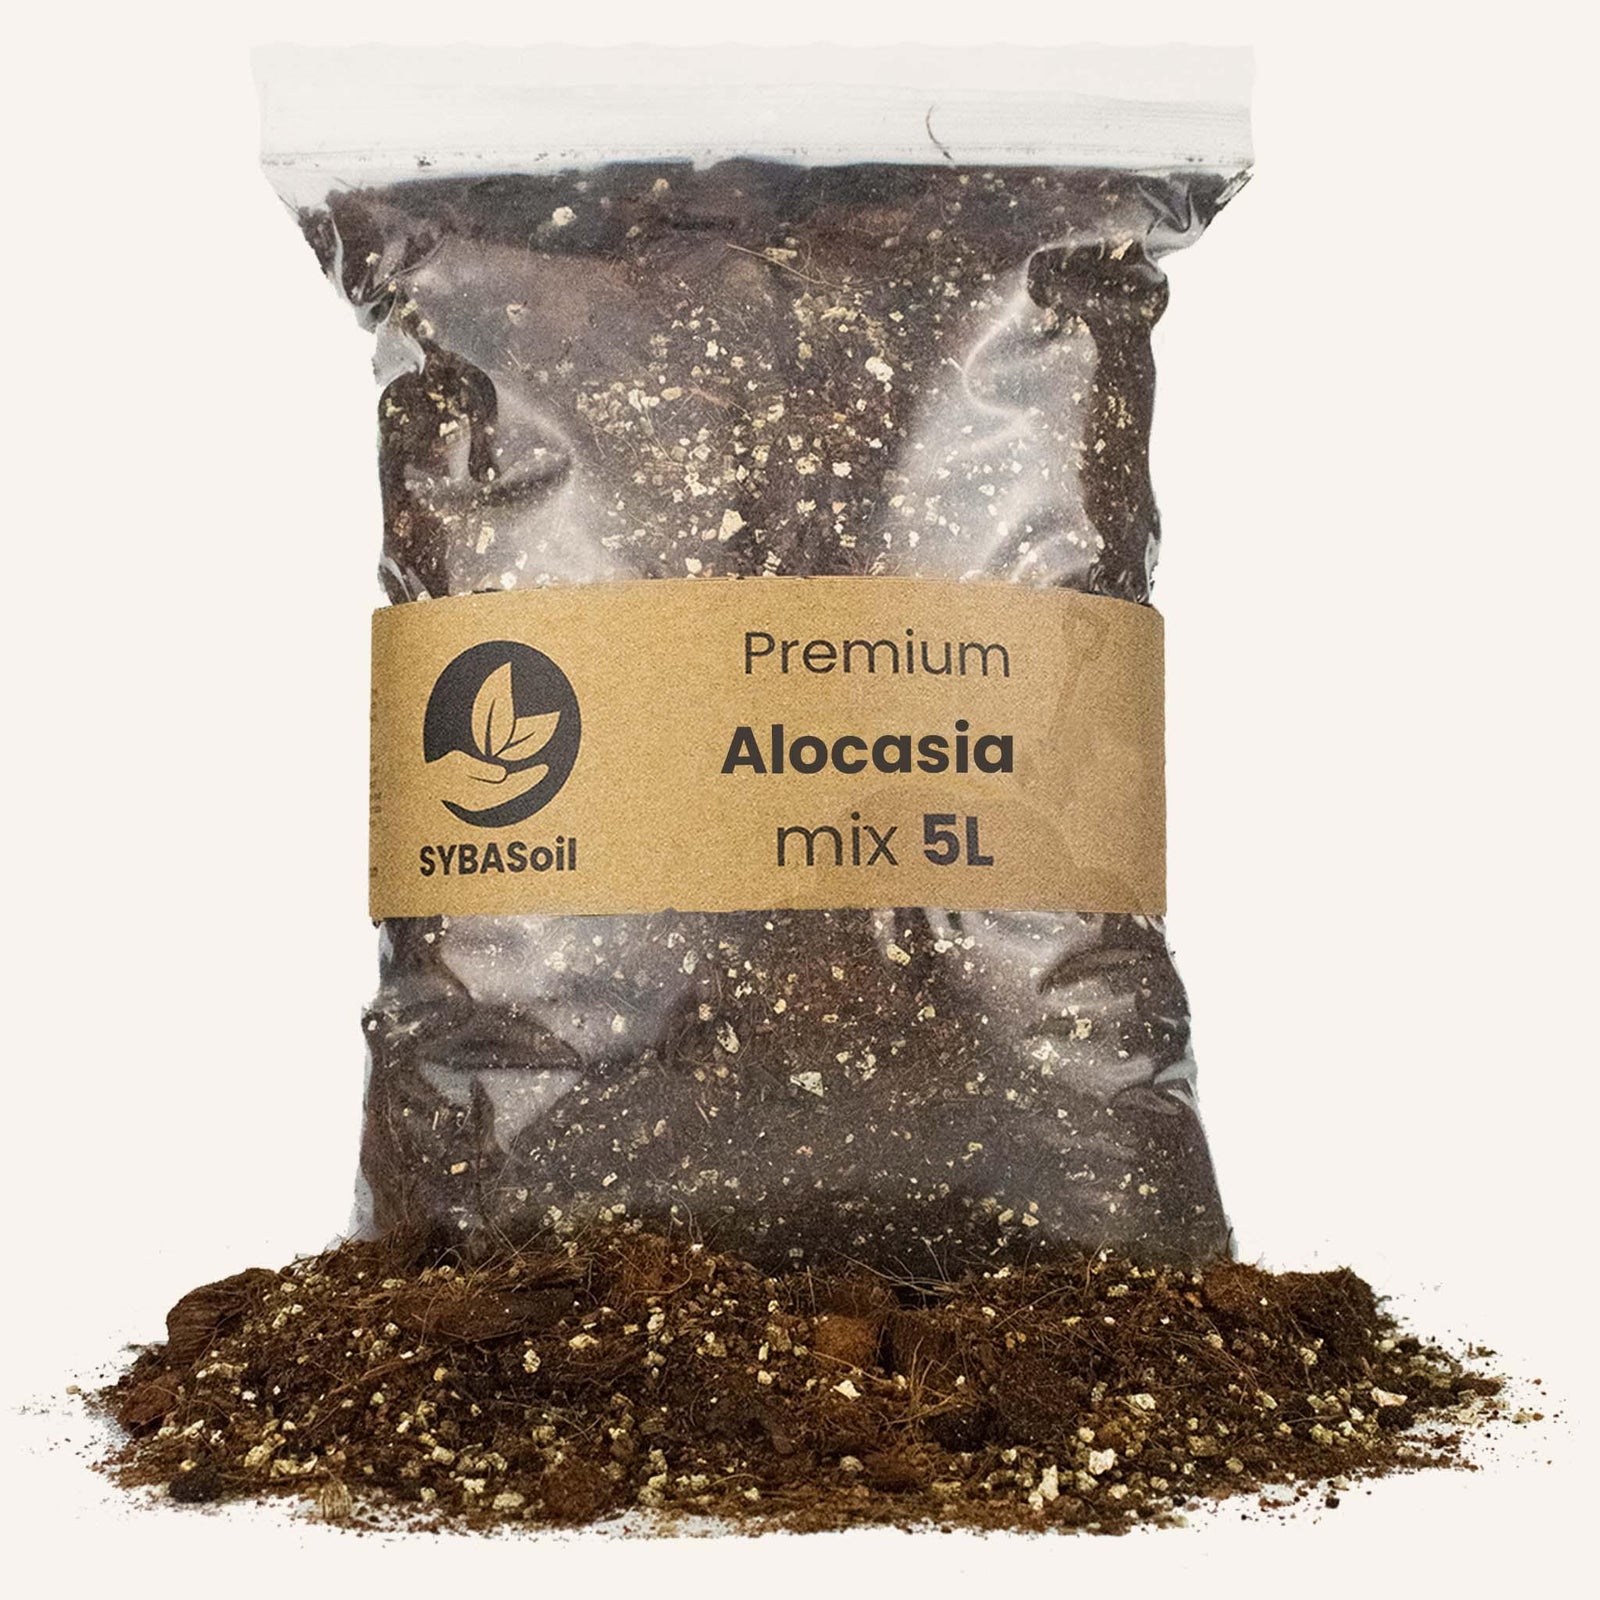
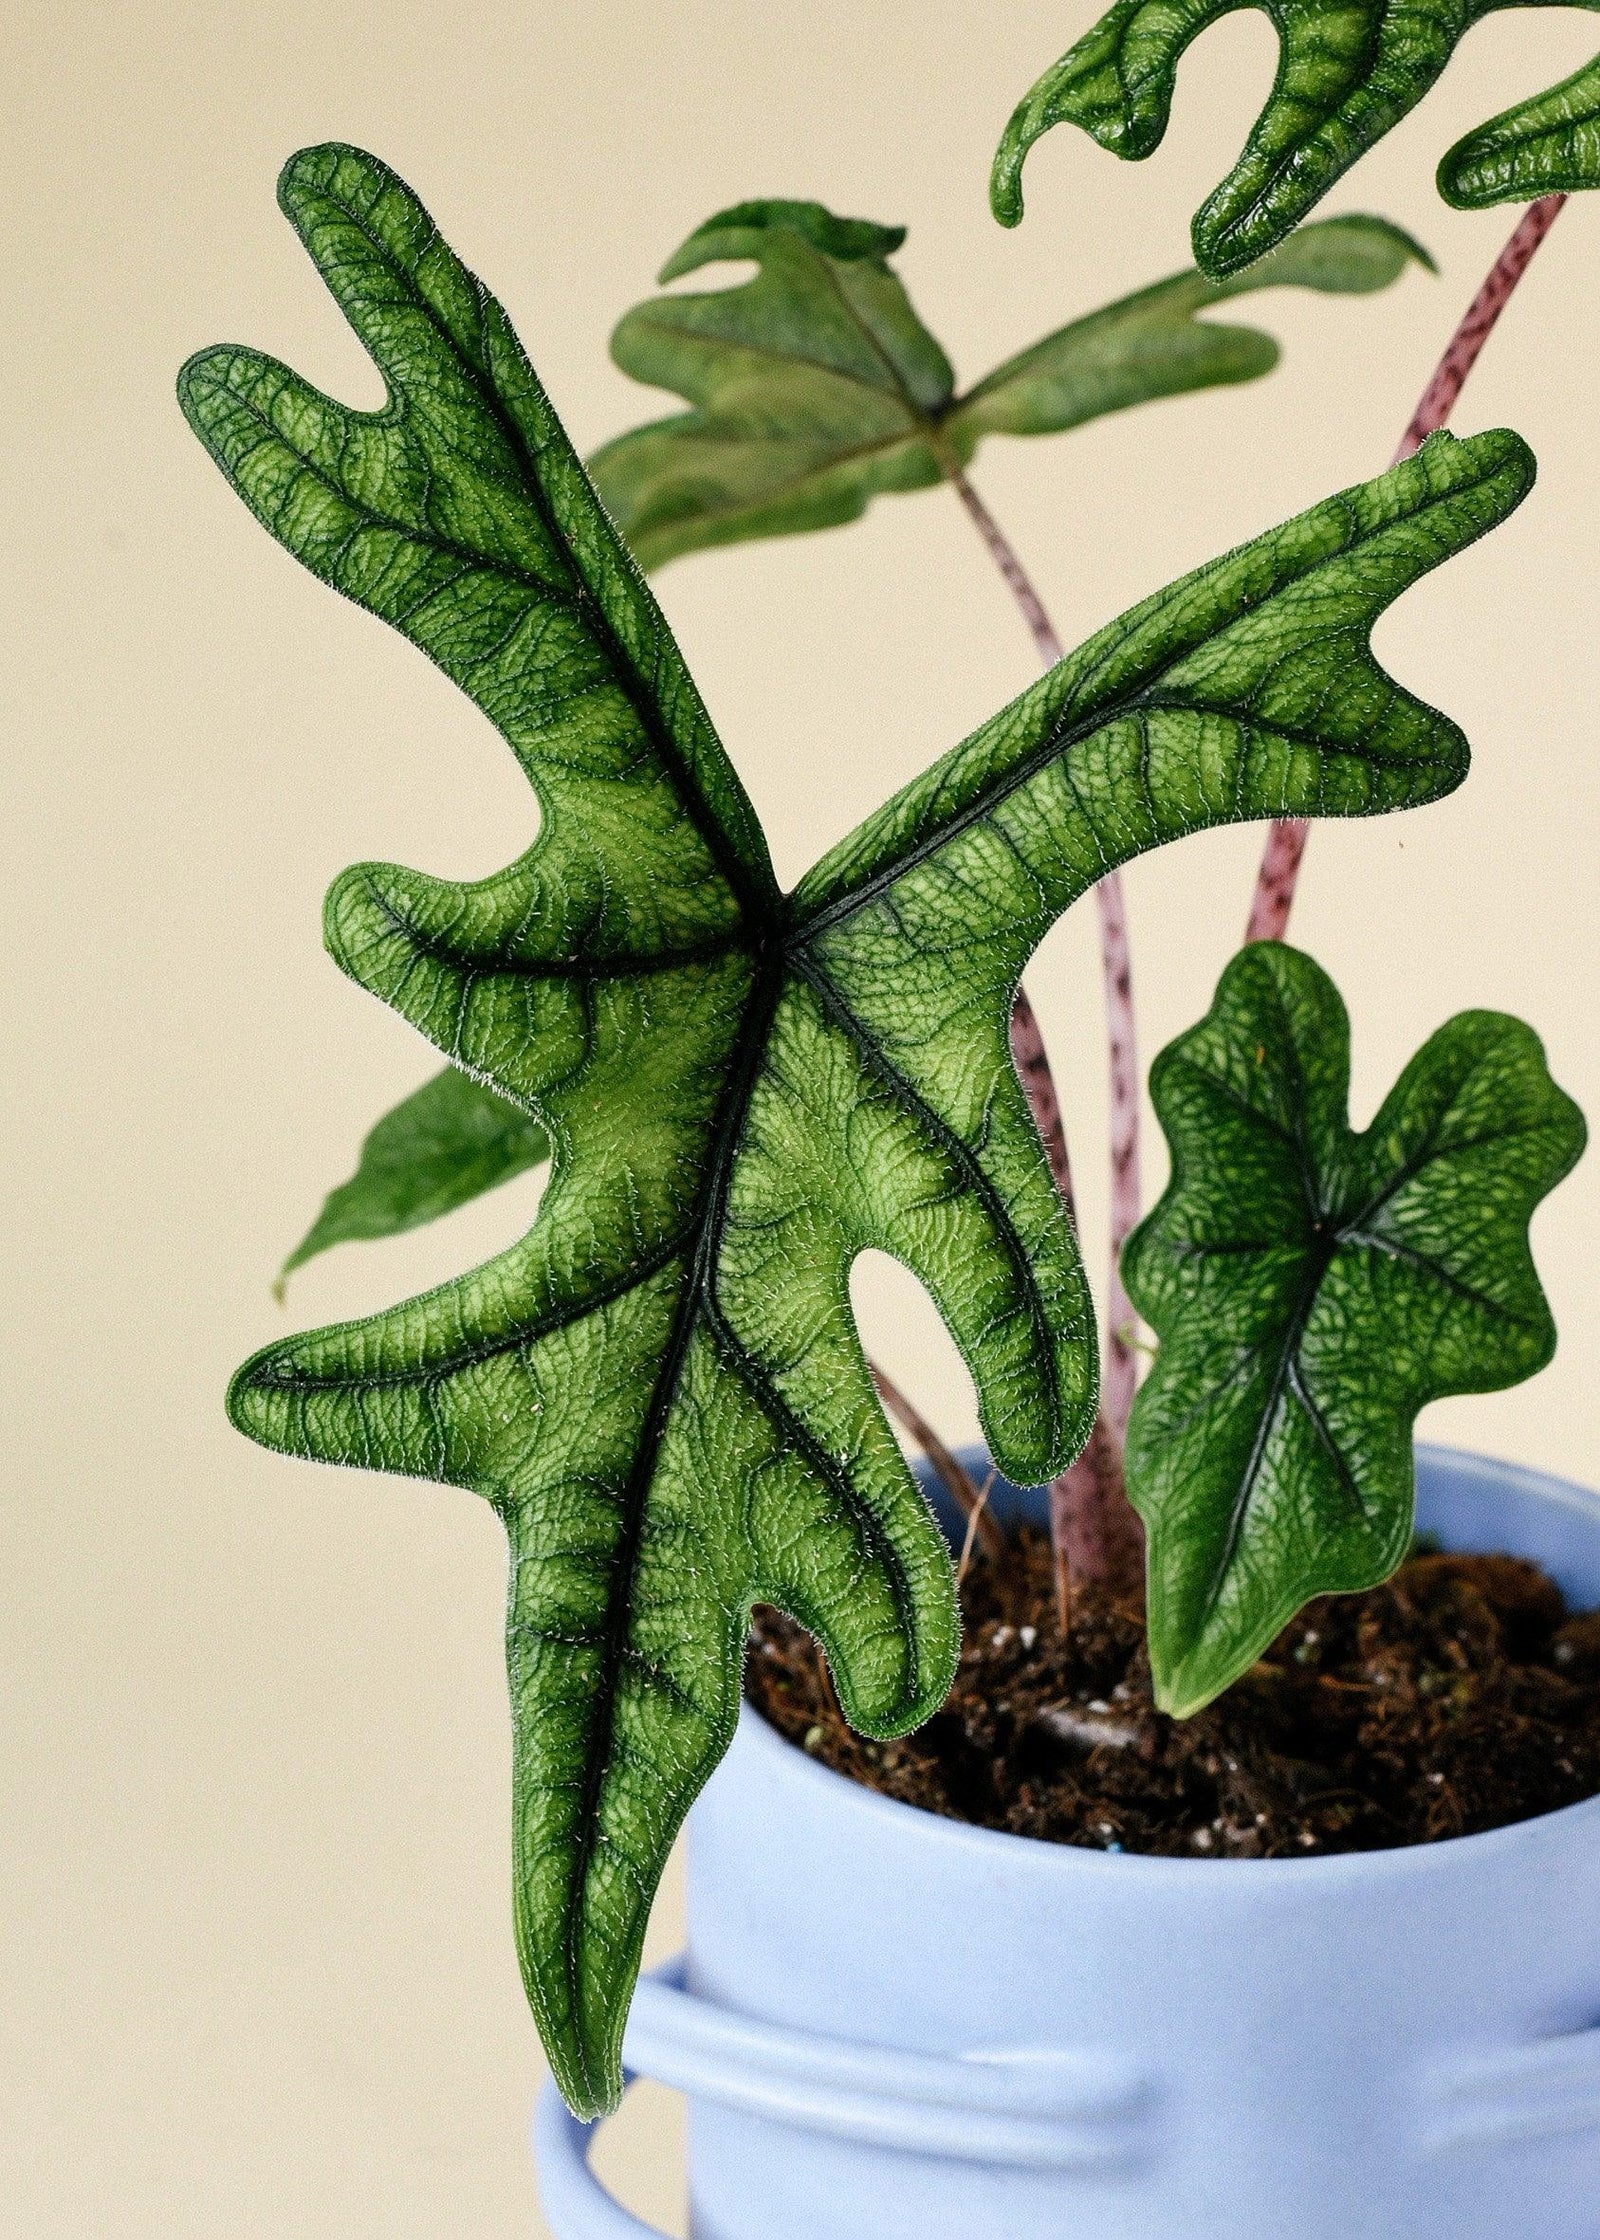
Alocasia
Shop our exclusive Alocasia collection, featuring stunning and rare varieties for the discerning plant lover.
View collection
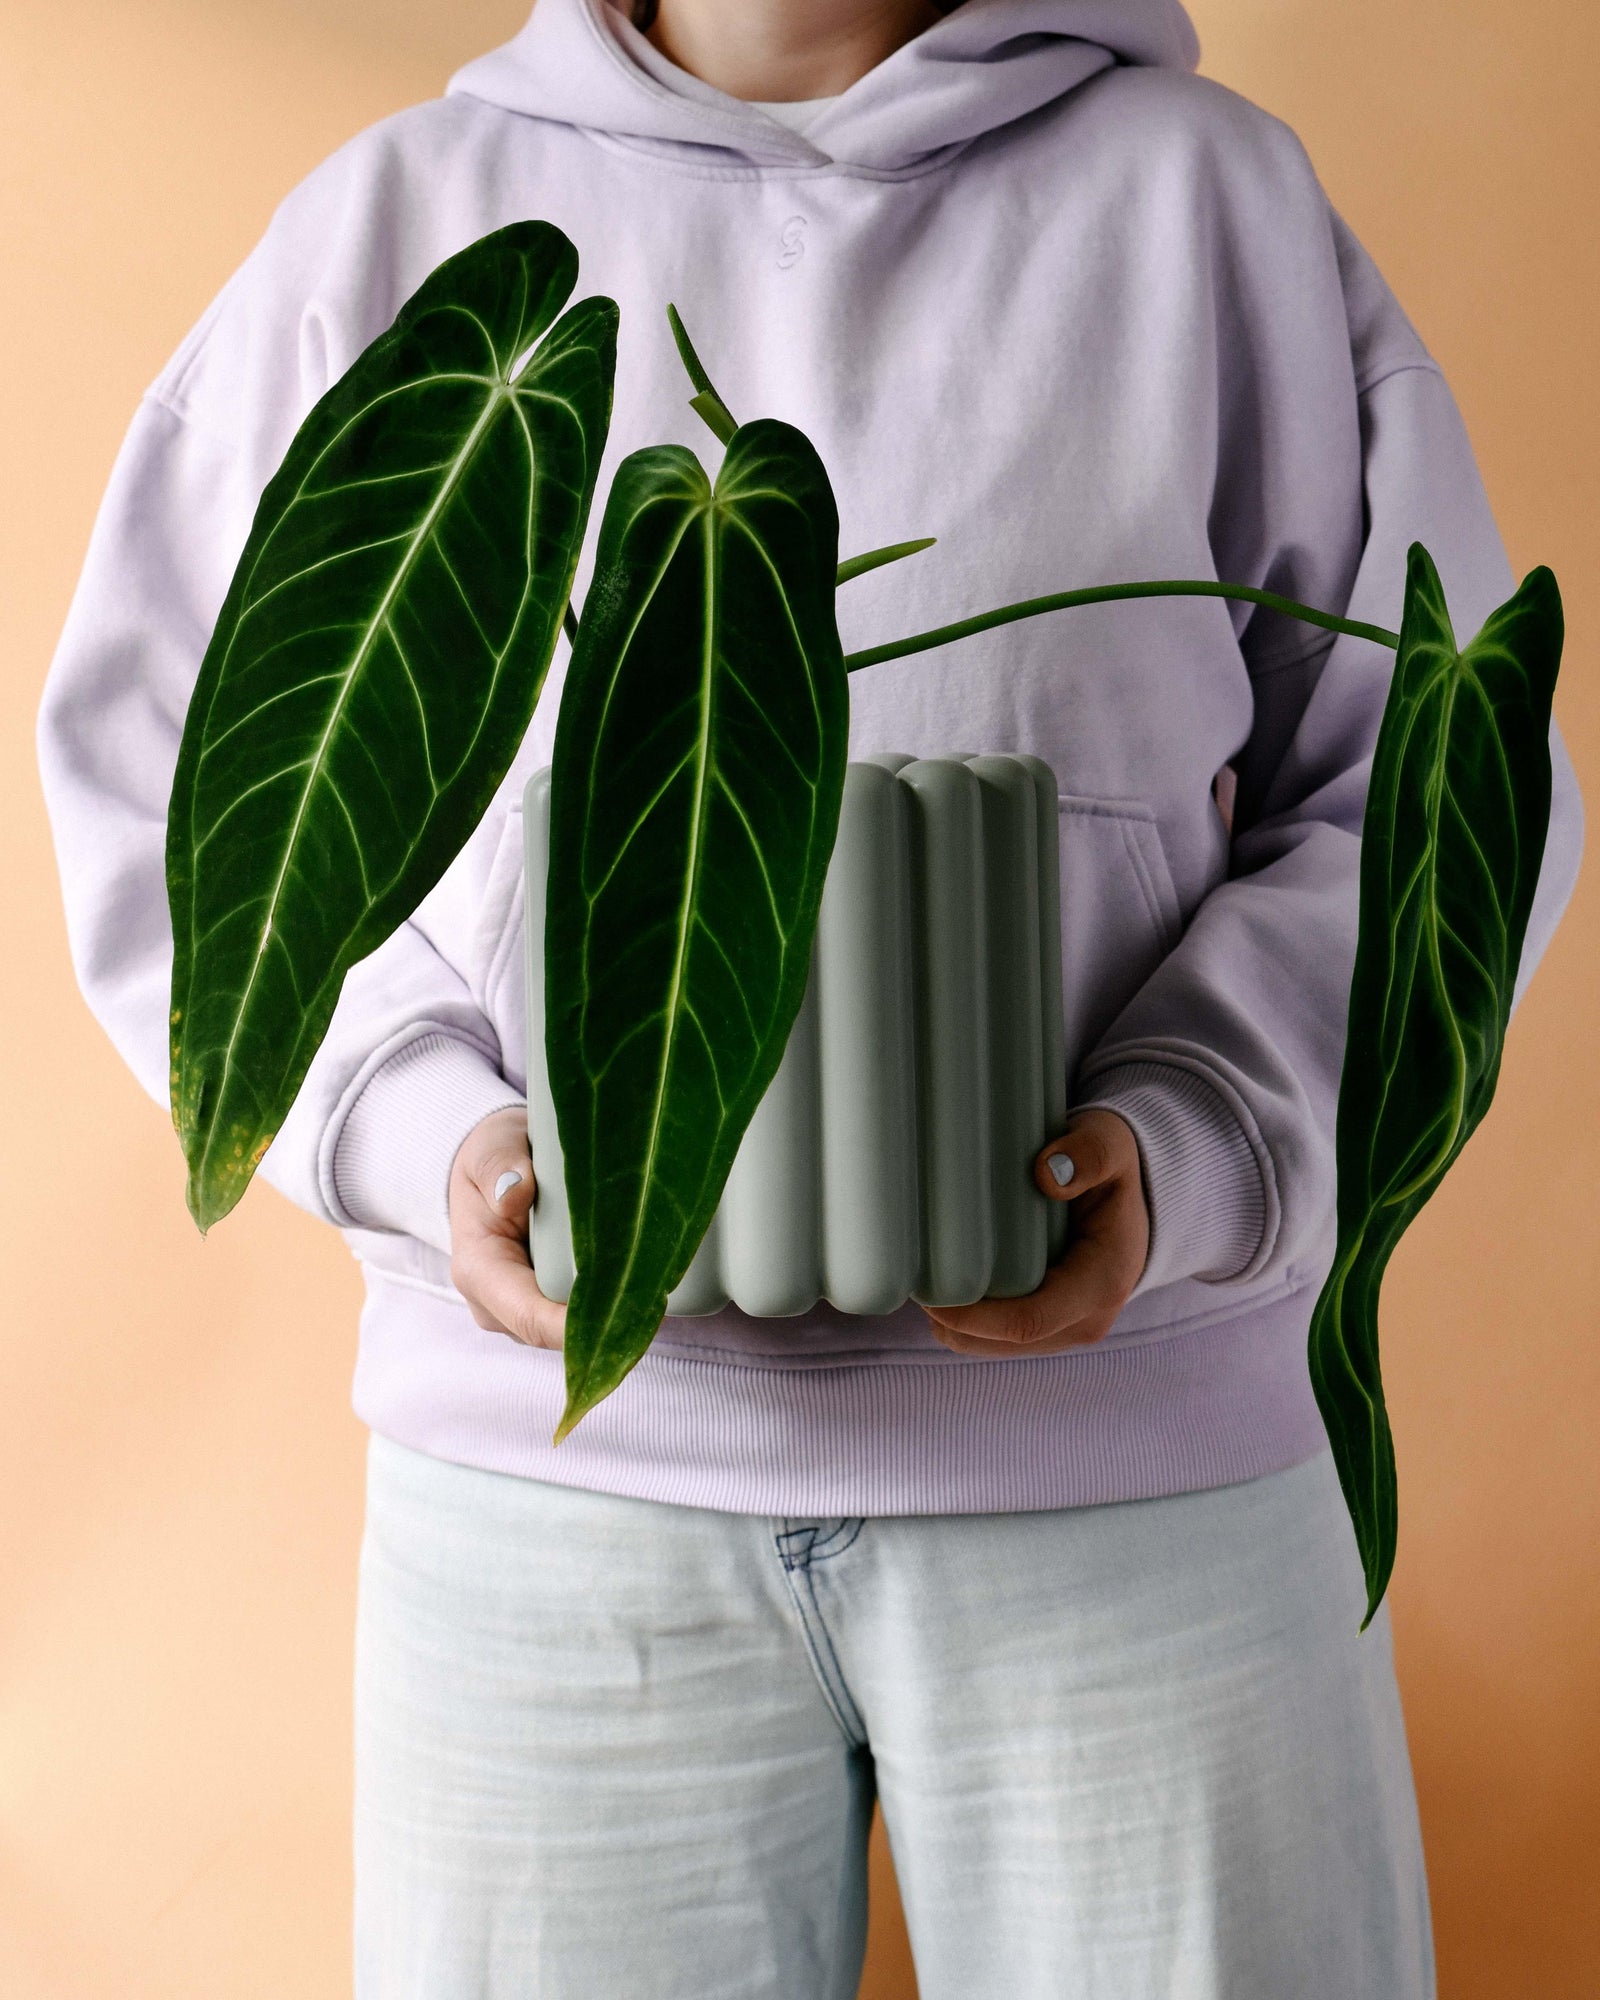
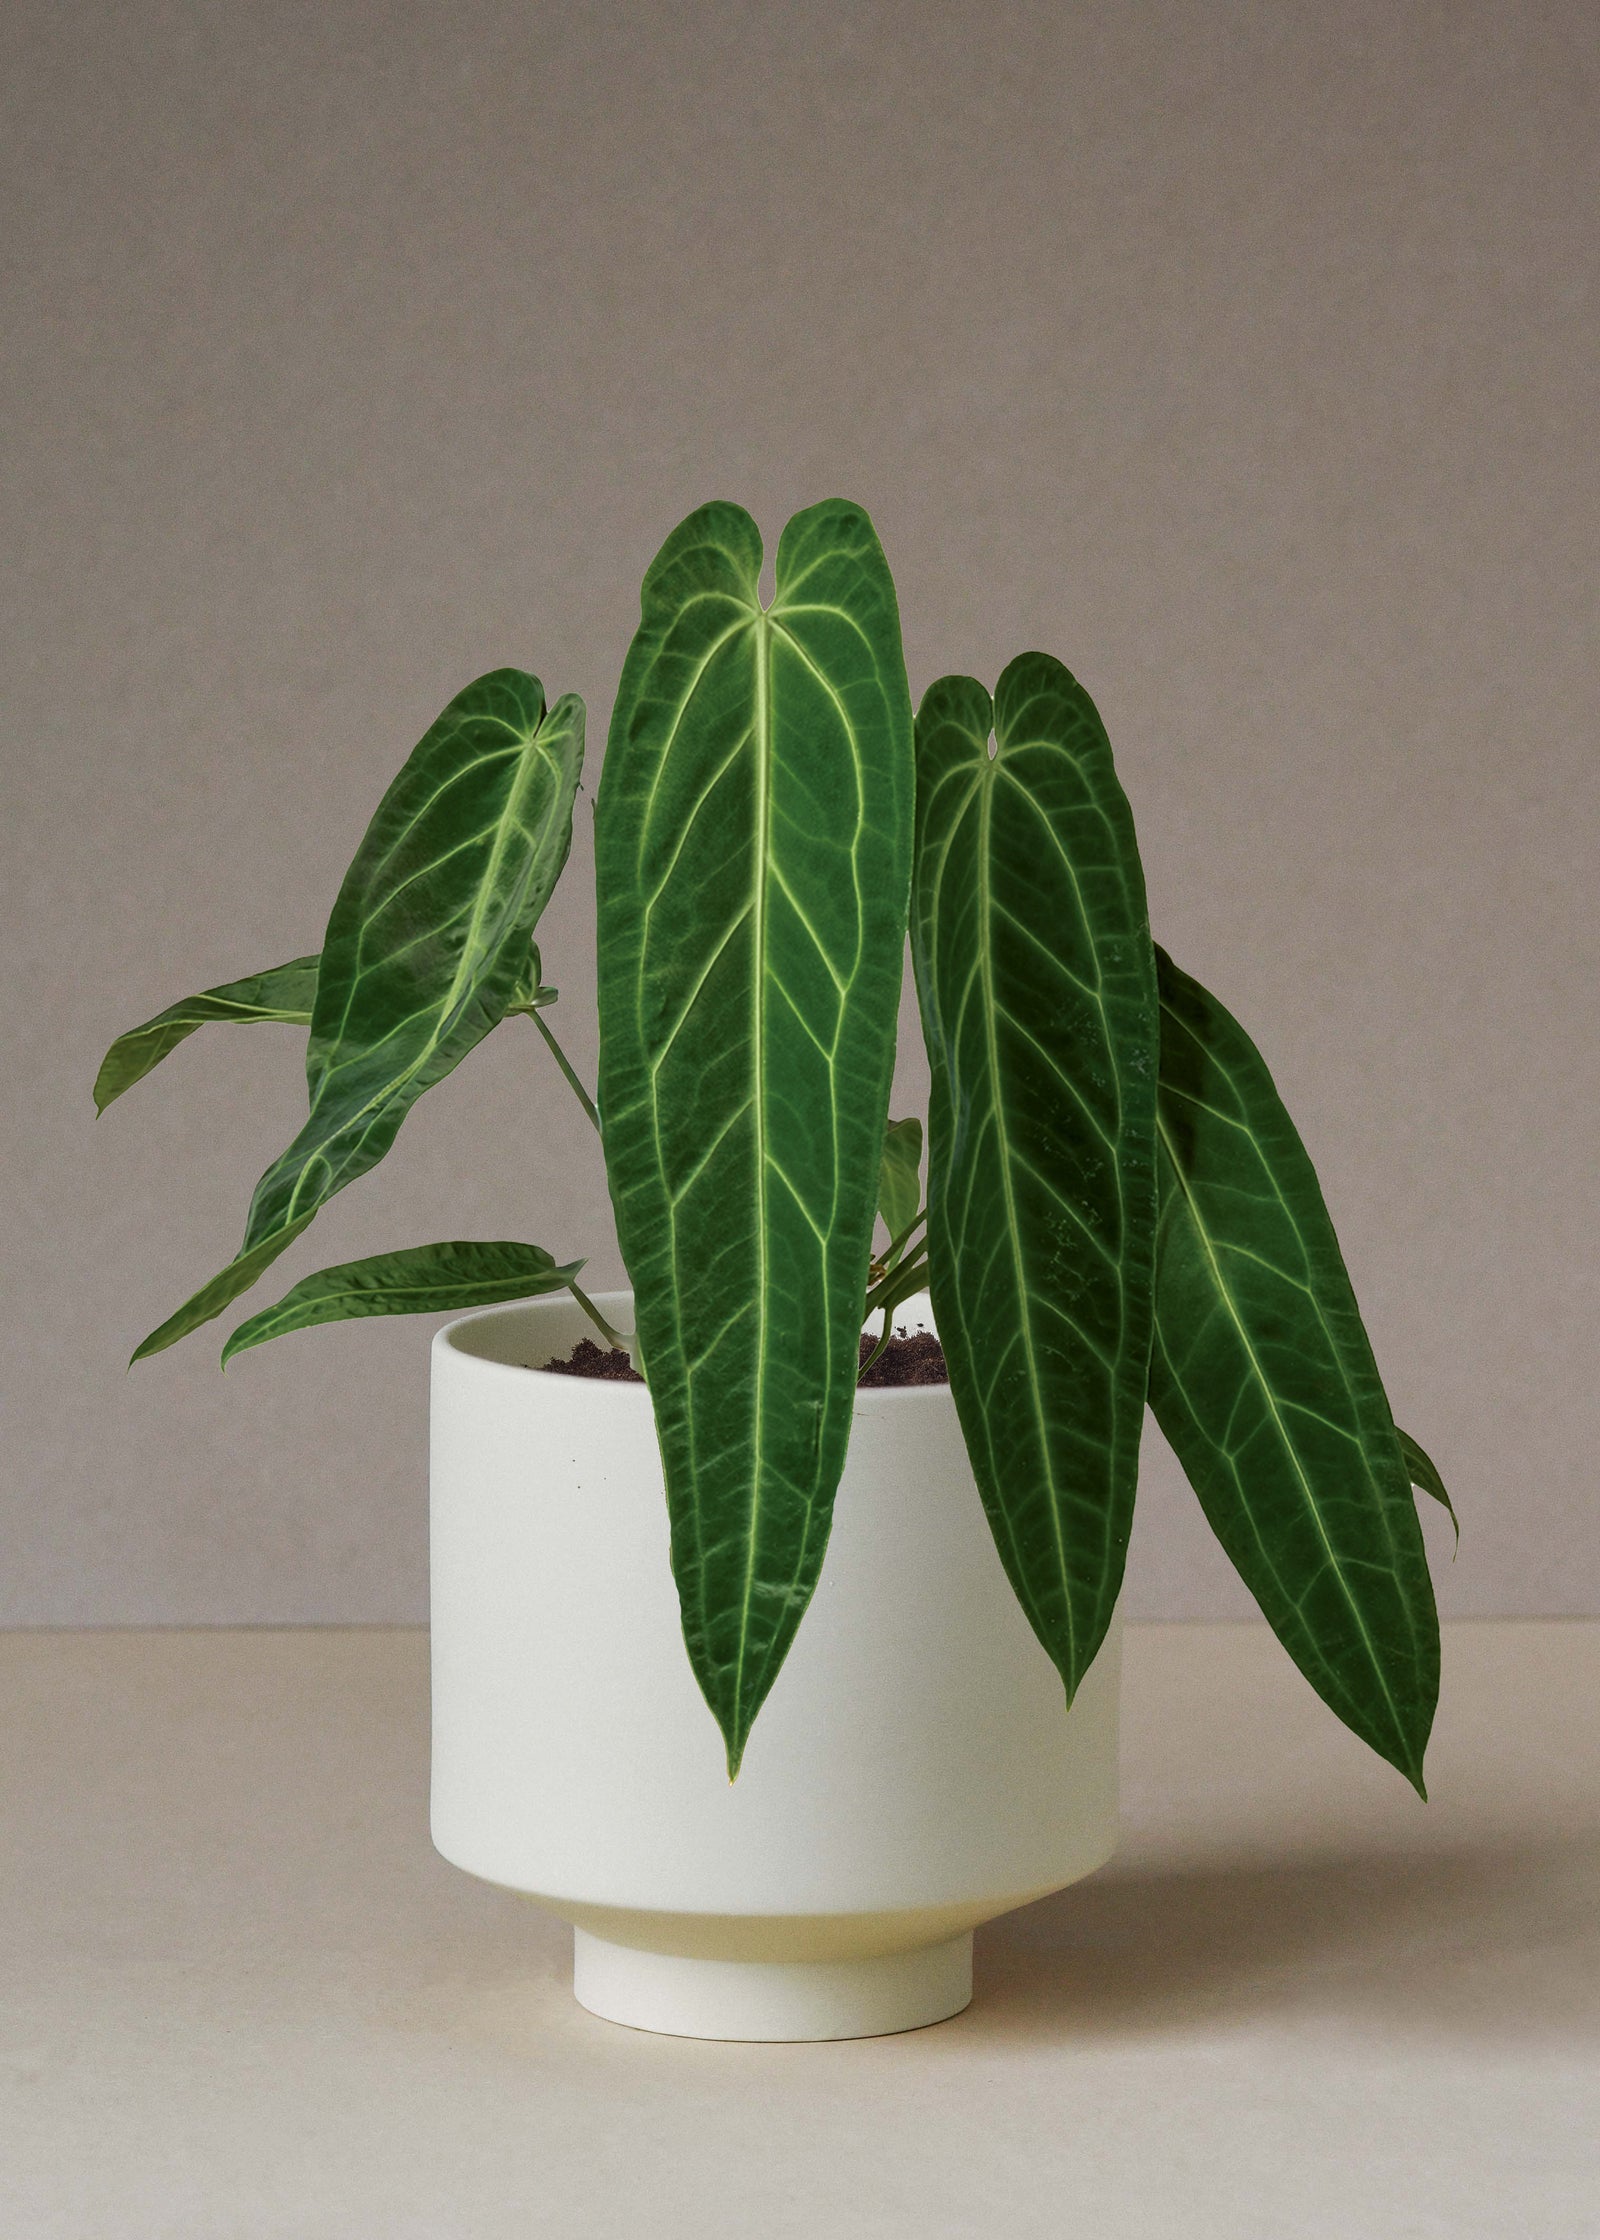
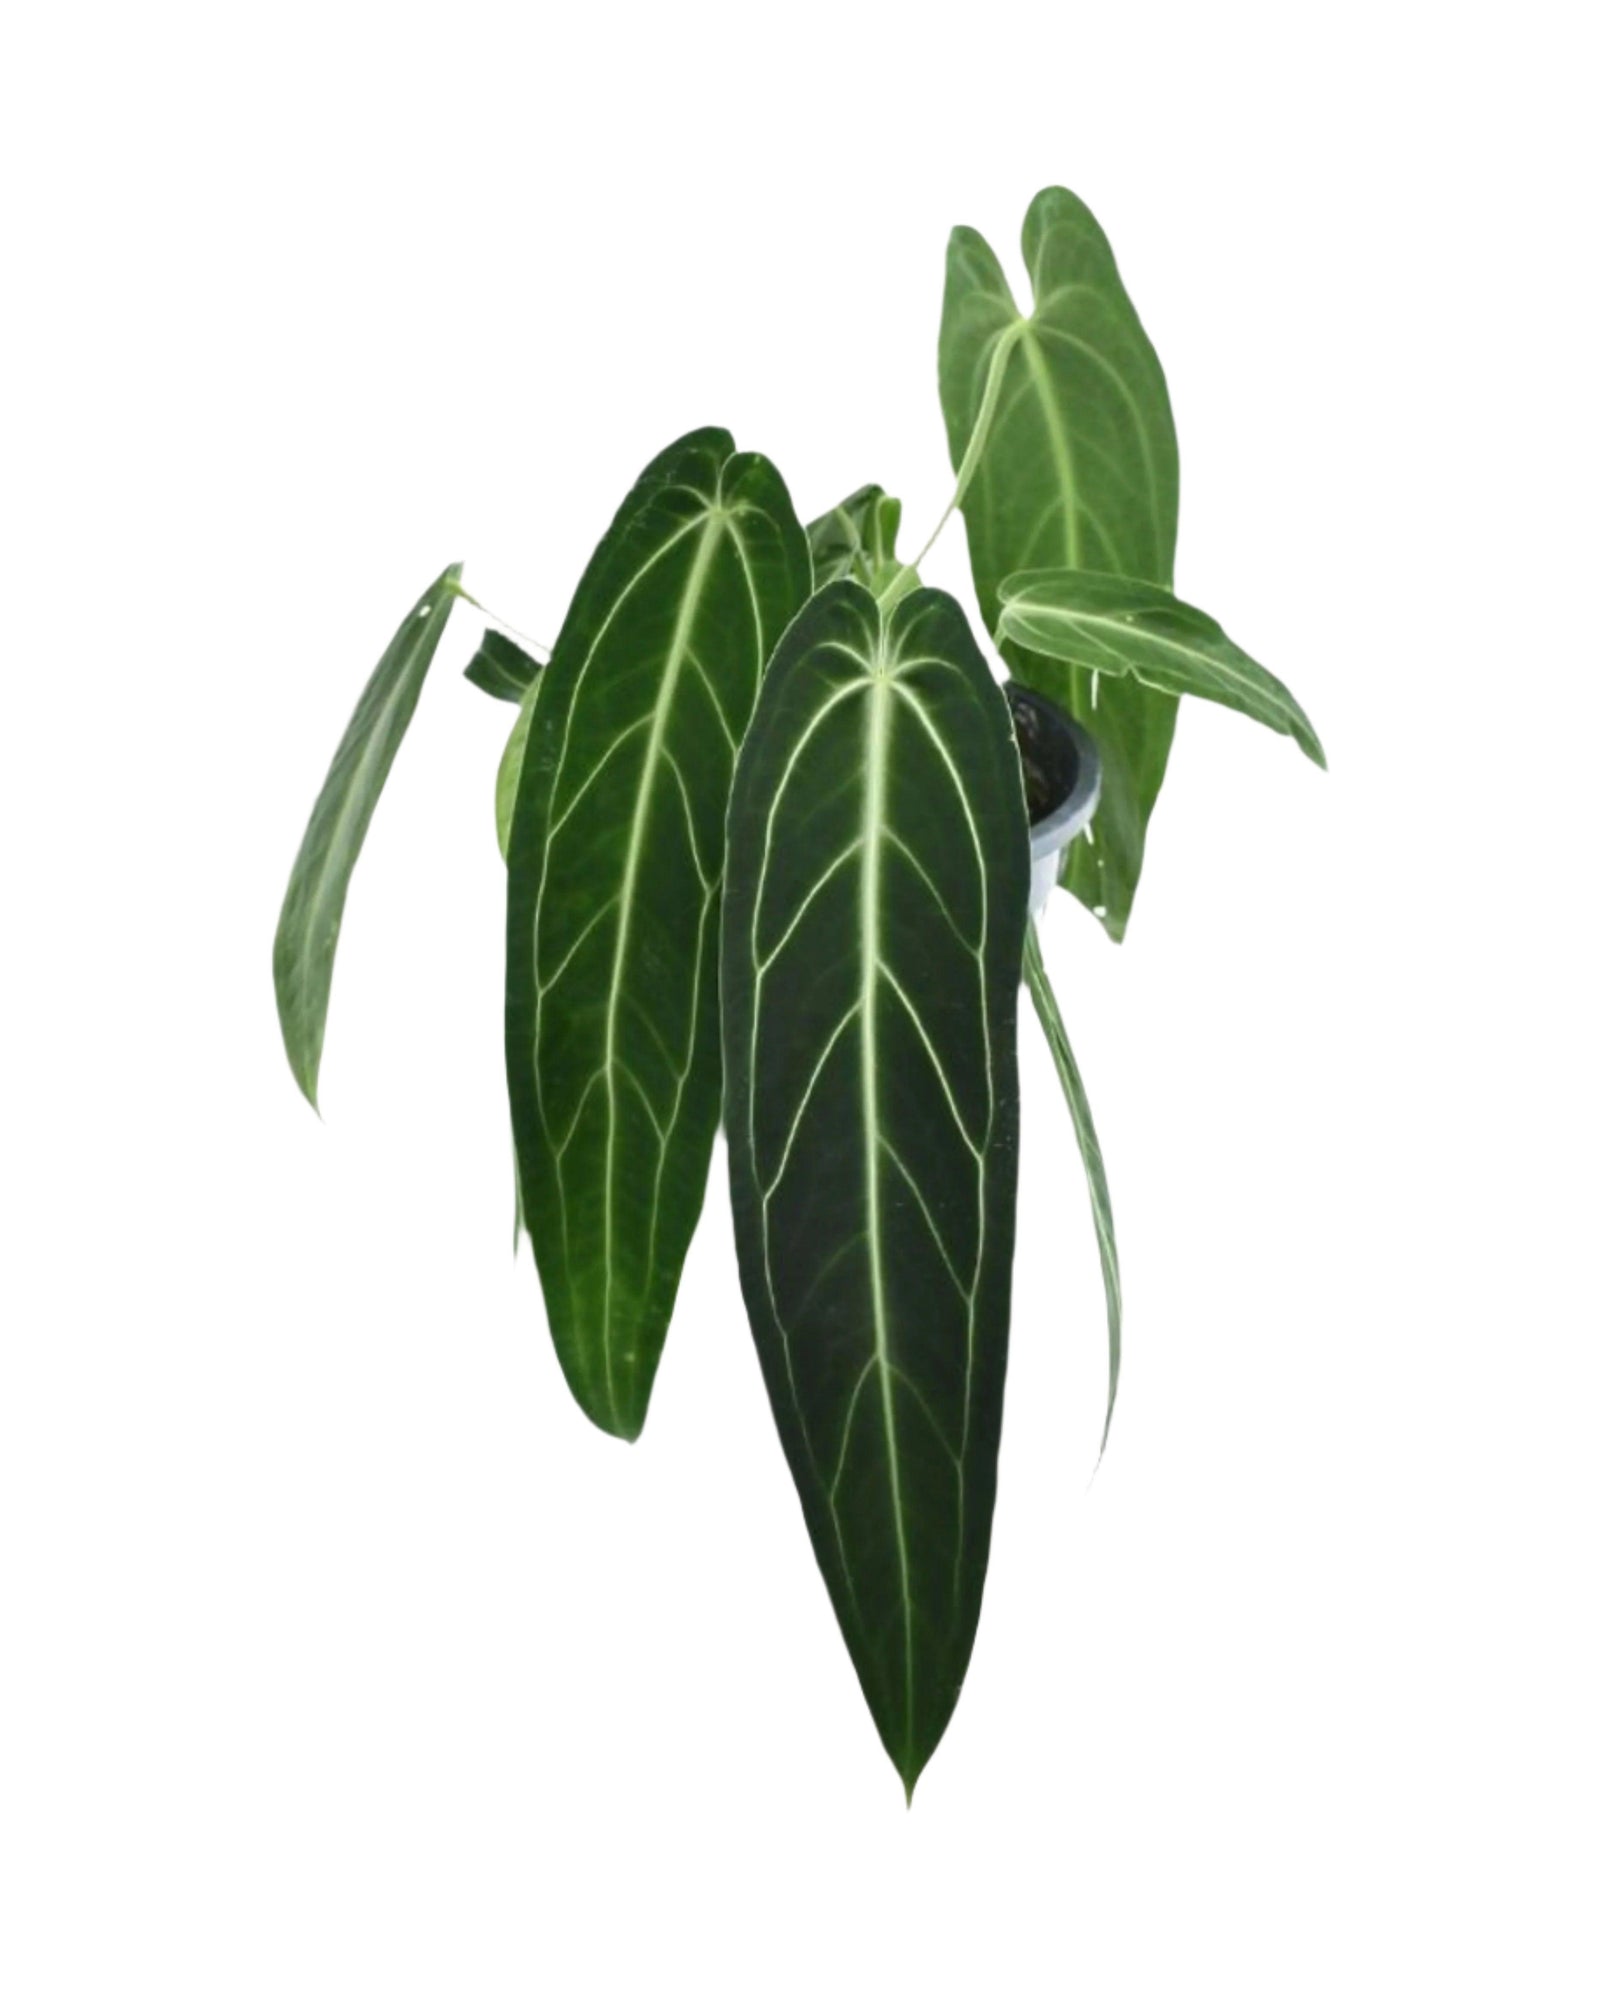
Anthurium
Shop our Anthurium collection, featuring stunning houseplants with striking foliage and vibrant blooms.
View collection
Aroids
Aroids, scientifically called Araceae, are a family of plants that have always been popular houseplants. However they have become increasingly trendy in the last few years. The urban jungle trend has made these plants famous and some of them became highly sought-after collector plants. In our online shop, we have hundreds of both common and rare Aroids for sale in all sizes for sale! Aroid houseplants and their care Even if you don't know what an Aroid is, chances are that you have a plant from this family at home already. These houseplants come in all different shapes and sizes from the classic, large-growing Monstera Deliciosa to the desk-sized peace lily. Scientifically, the Araceae family is easily distinguished by their charactaristic blossoms: Each Aroid blossom is made up of numerous tiny flowers clustered together on a 'spadix', a floral spike, that is found within a single curved, leaf-like 'spathe'. We have all seen this type of blossom on the popular peace lily. While the size, shape and colour can vary between different Aroid species, the overall appearance of the flower is the same for all plants in this family. Some of the popular plant genuses that belong the Aroid family are: Aglaonema Alocasia Anthurium Monstera Philodendron Scindapsus Syngonium The classic monstera, peace lilies or pothos are among the widespread, common houseplants of this plant family. However, we also sell rare Aroids that can be considered collector plants. These include for example the popular Monstera Variegata, Philodendron Florida Ghost or Philodendron Gloriosum. So, if you want to add some rare Aroids to your plant collection, our online store is the place to be! Aroids are tropical and sub-tropical plants and have become popular houseplants, because a lot of them thrive very well in household conditions. They usually grow on the rain forest floor or on branches under the forest canopy. So, they naturally grow in the shade and do not mind the often poor lighting situations in our home. A lot of them are also tolerant of periods of drought, despite most of them coming from the rain forest. At the same time, they don't take an occasional overwatering too seriously, either. As you can see, overall, Aroids are rather forgiving, highly adaptable and very decorative. This makes for a perfect combination for any houseplant. Make sure to browse our online shop to find hundreds of stunning, easy care Aroids for sale!
View collection
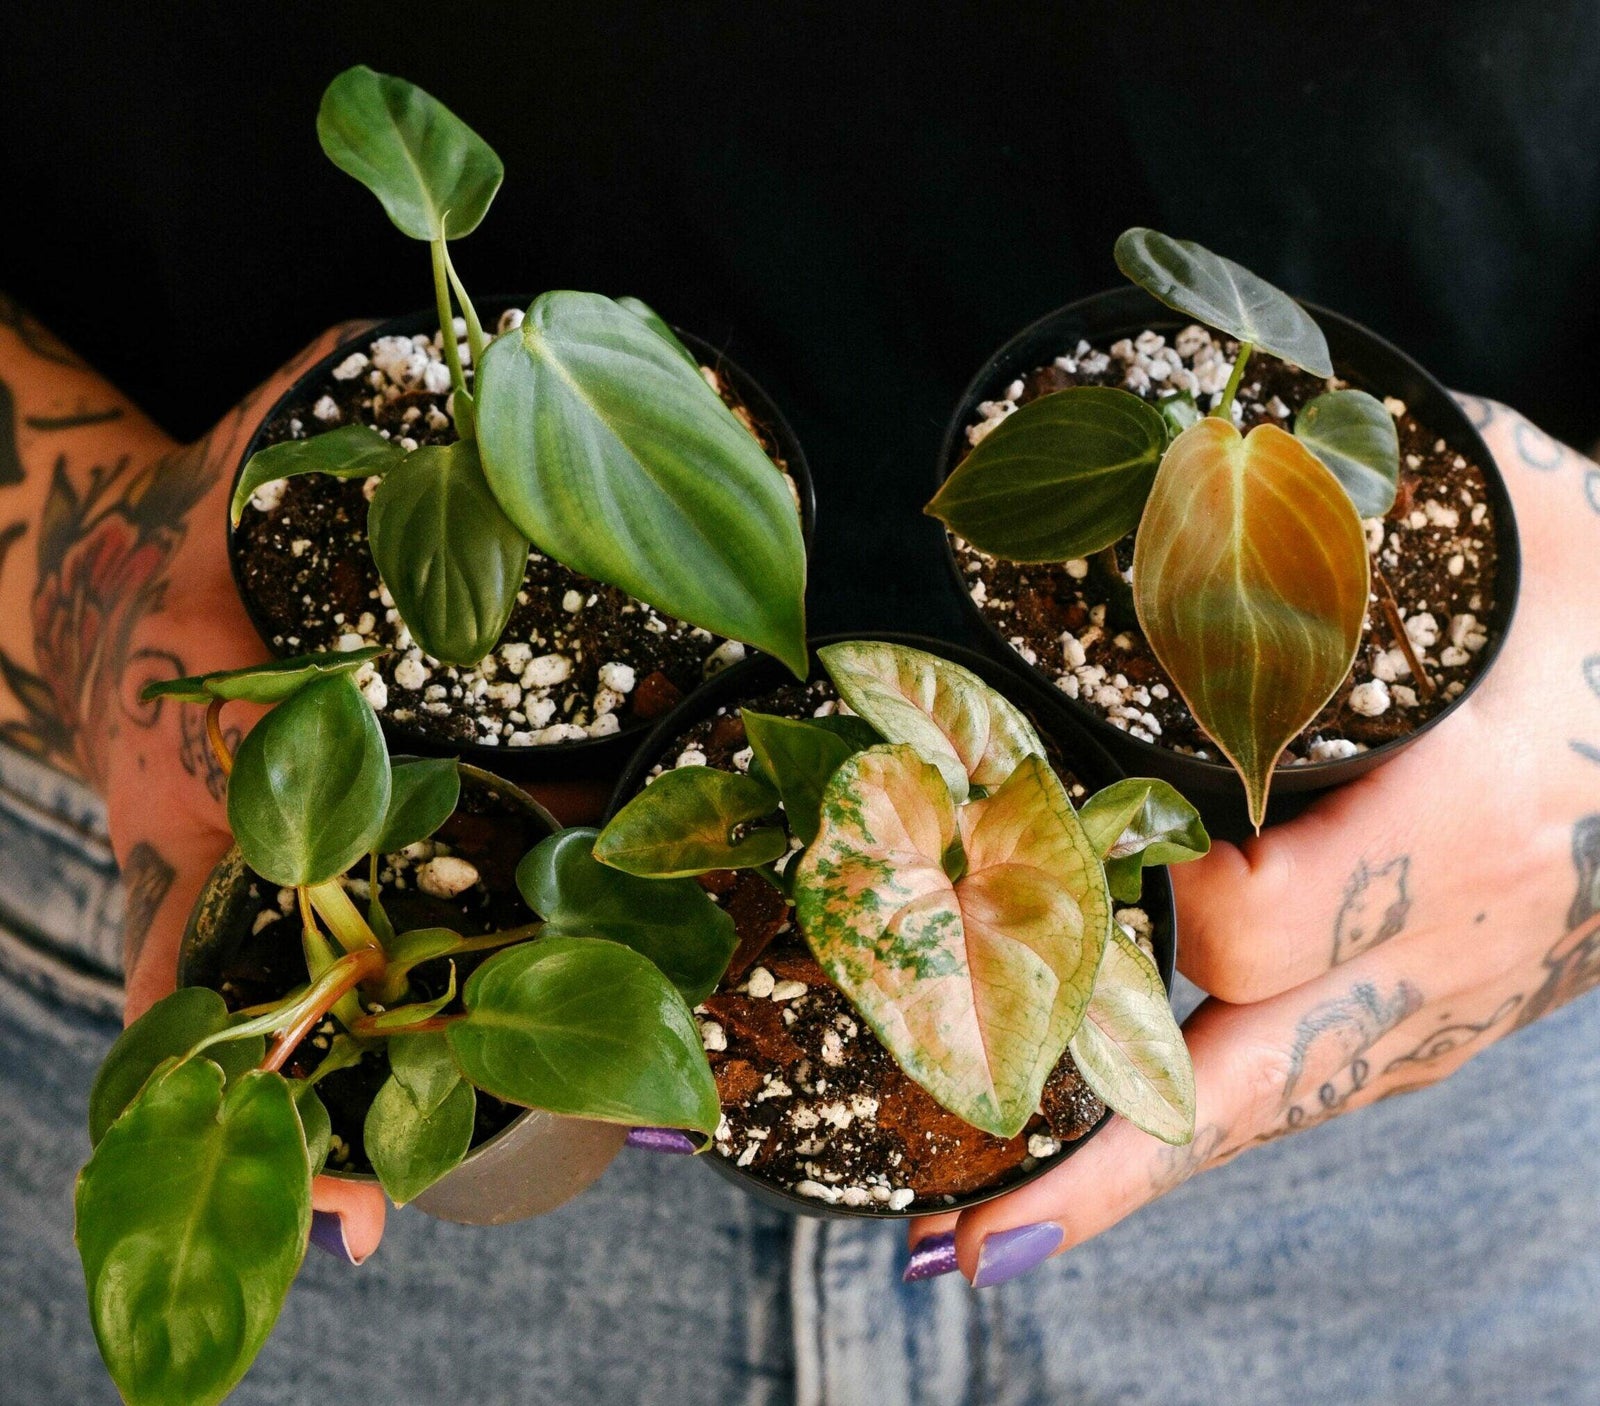
Baby Plants
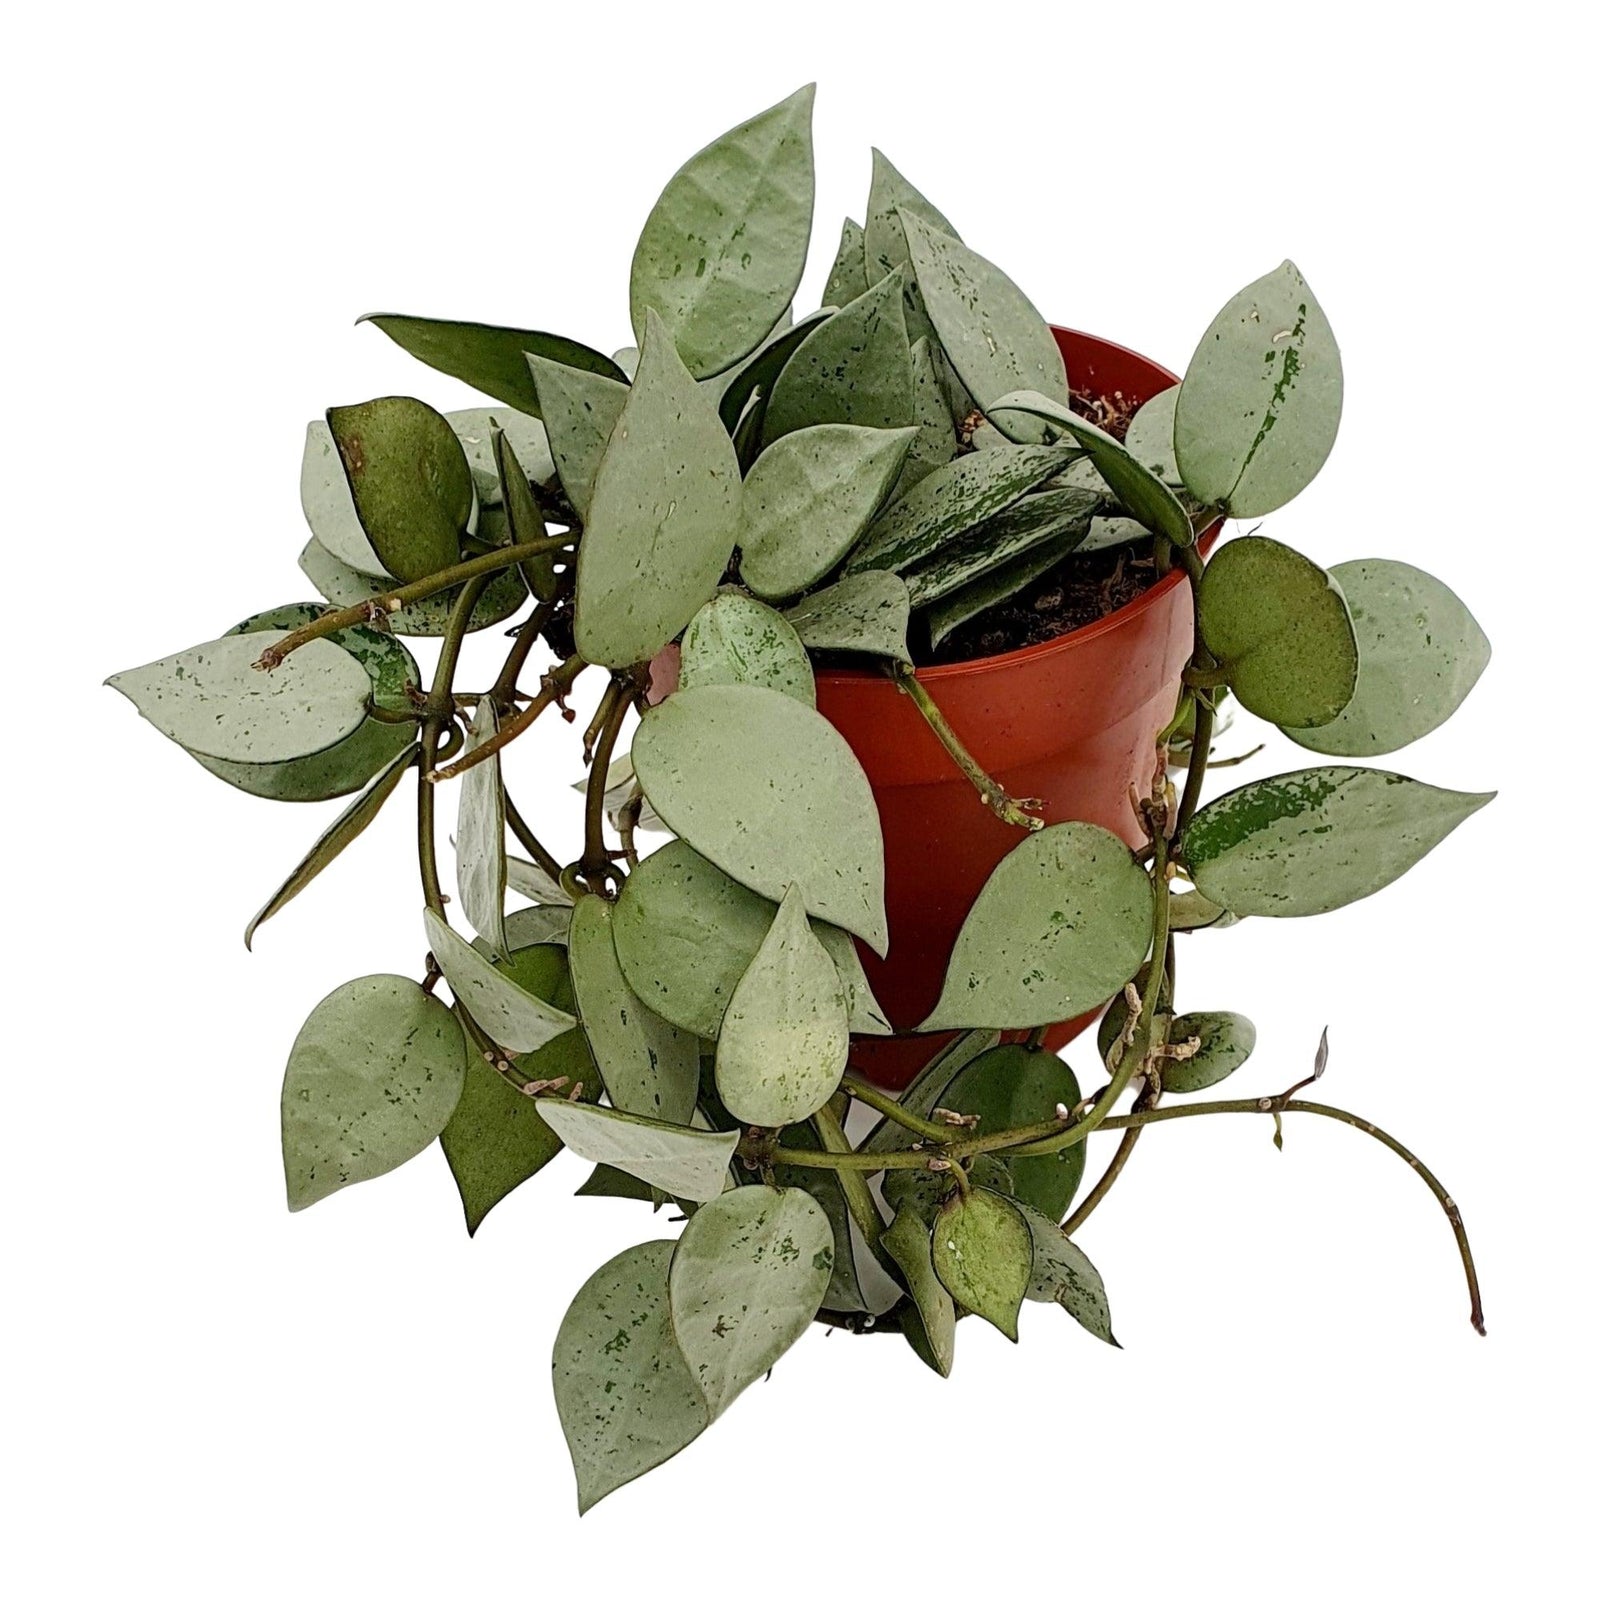
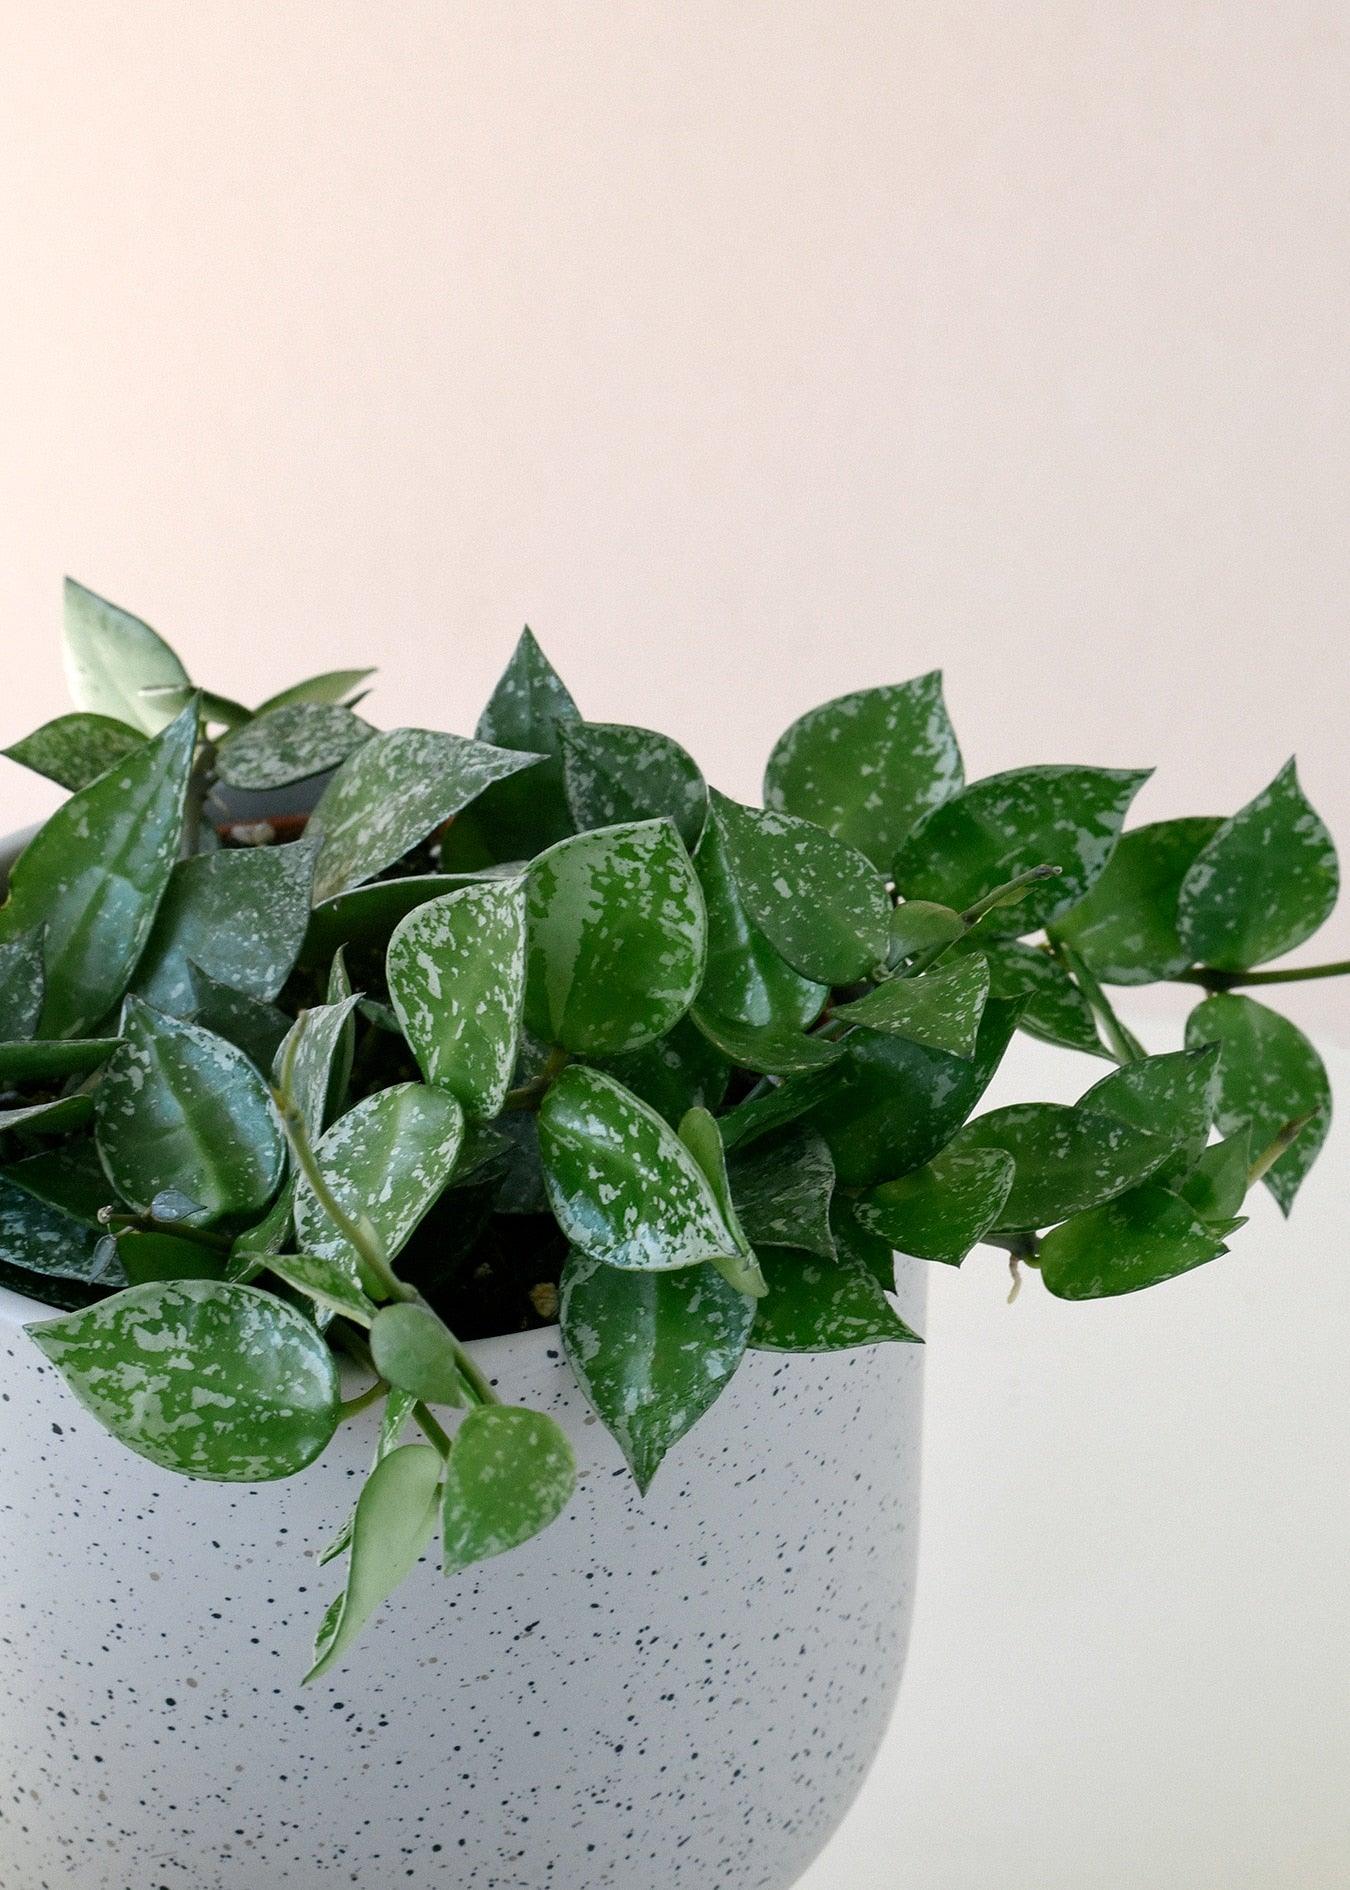
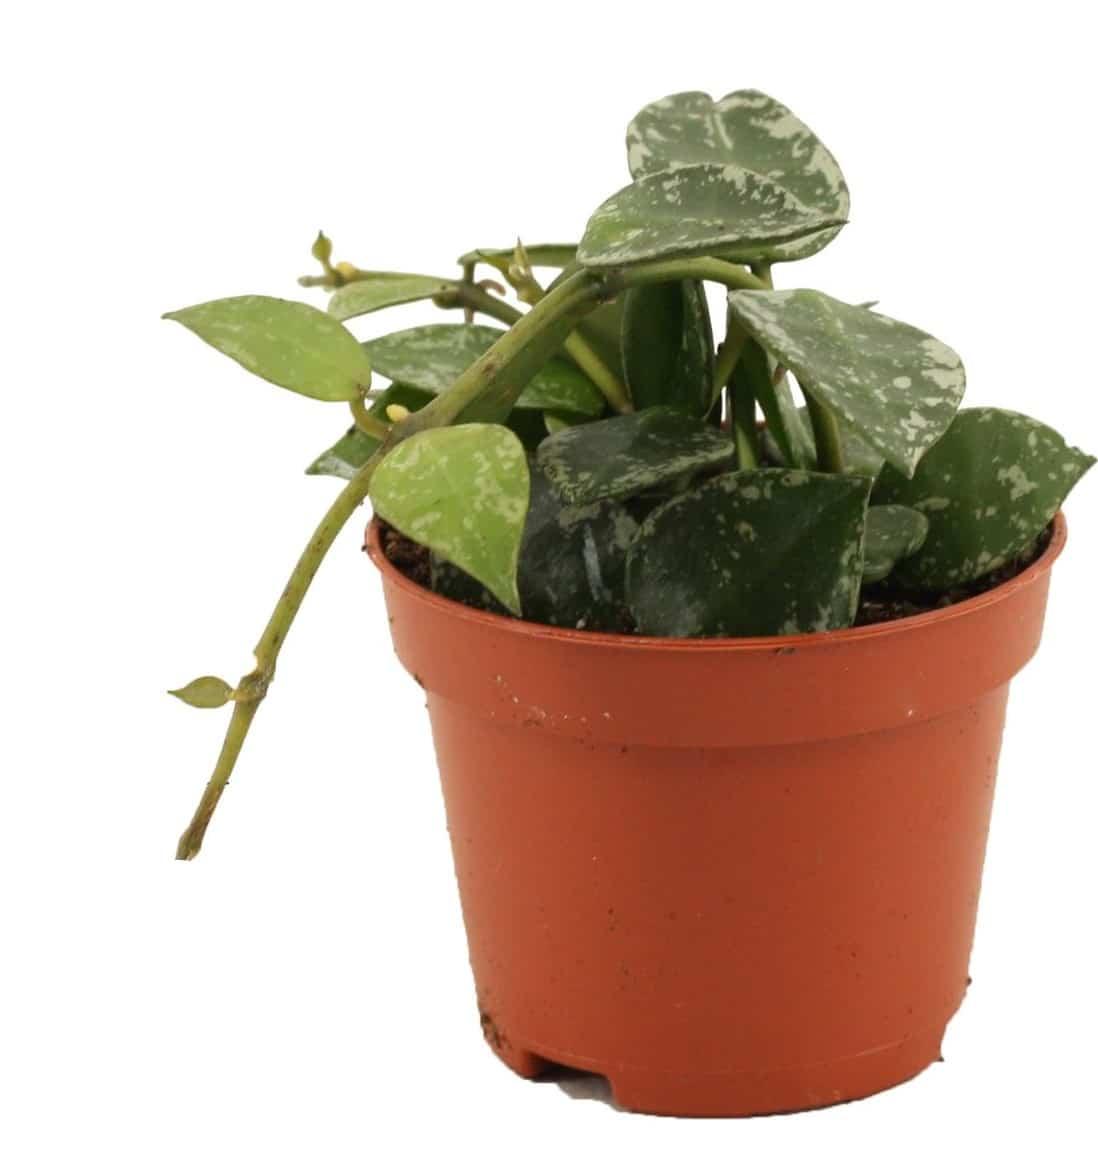
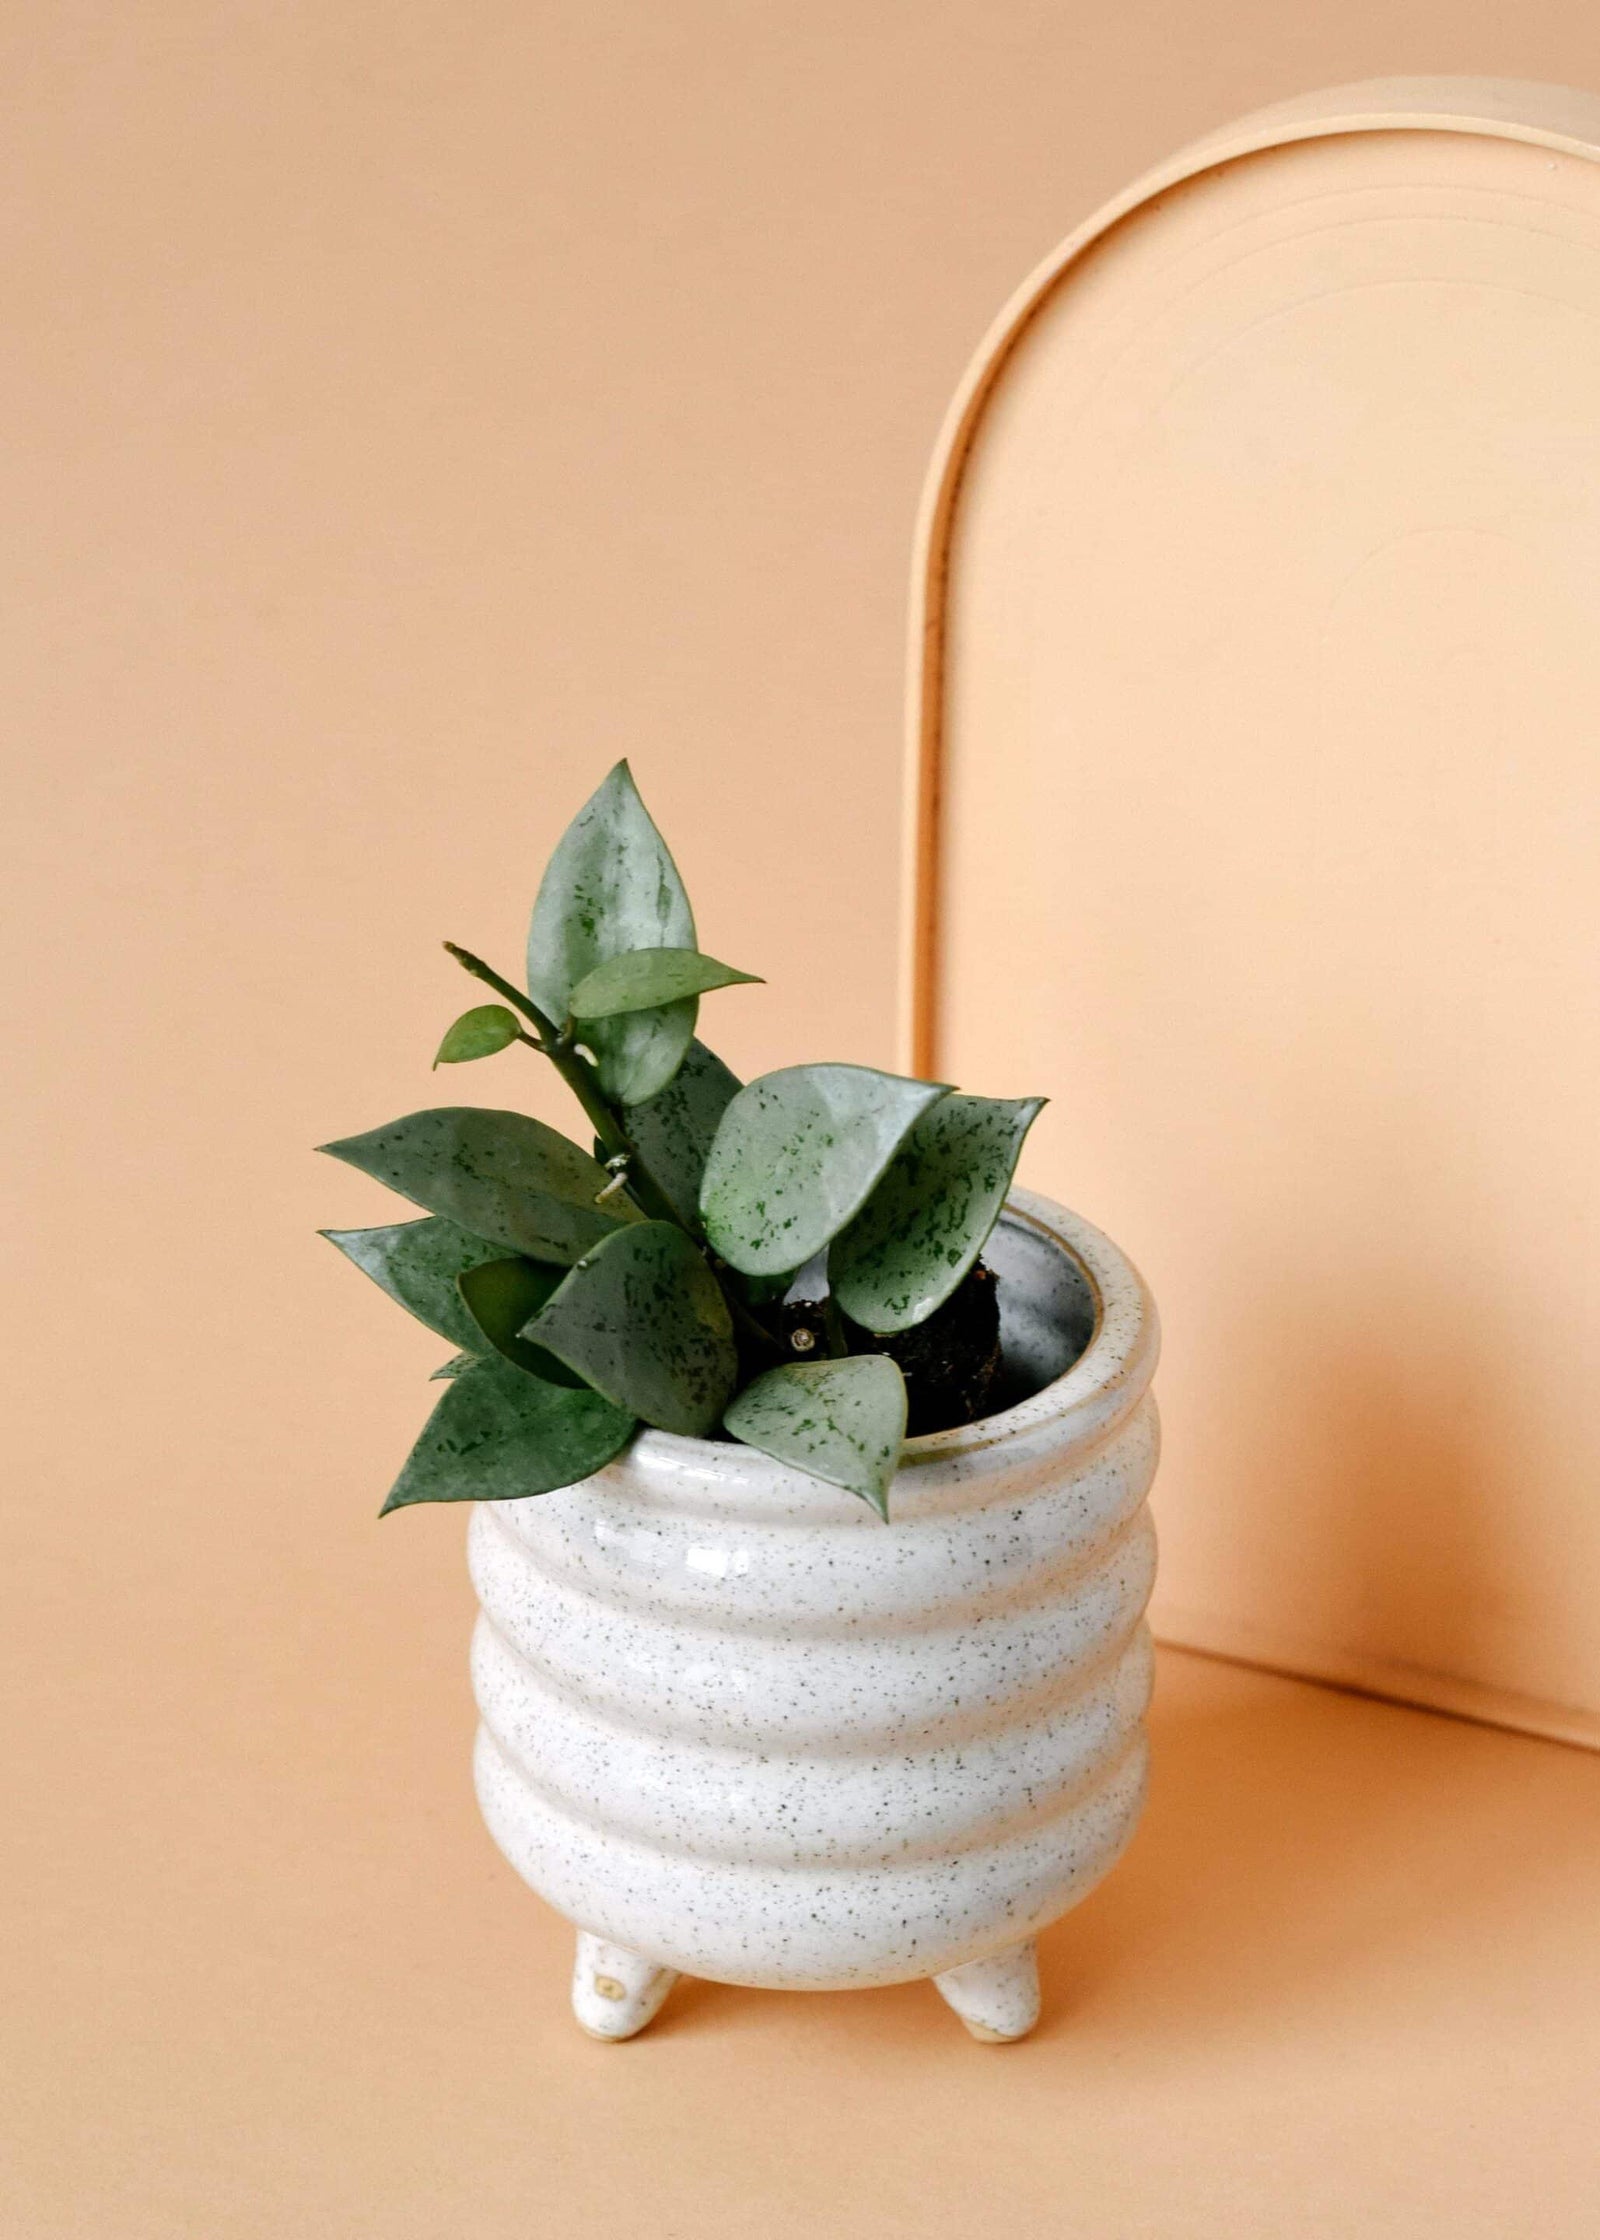
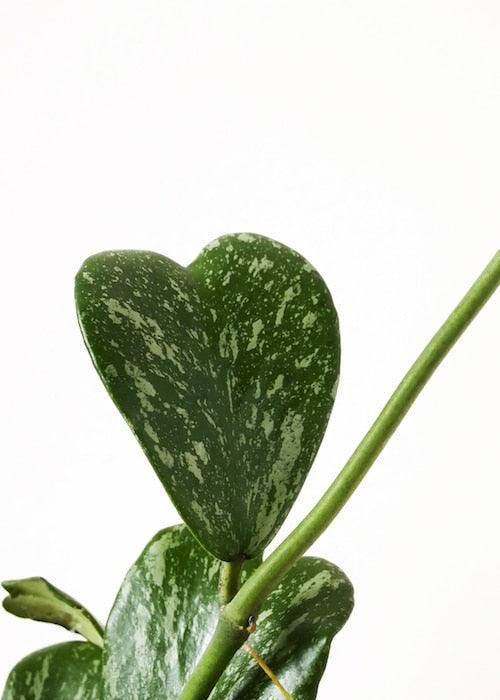
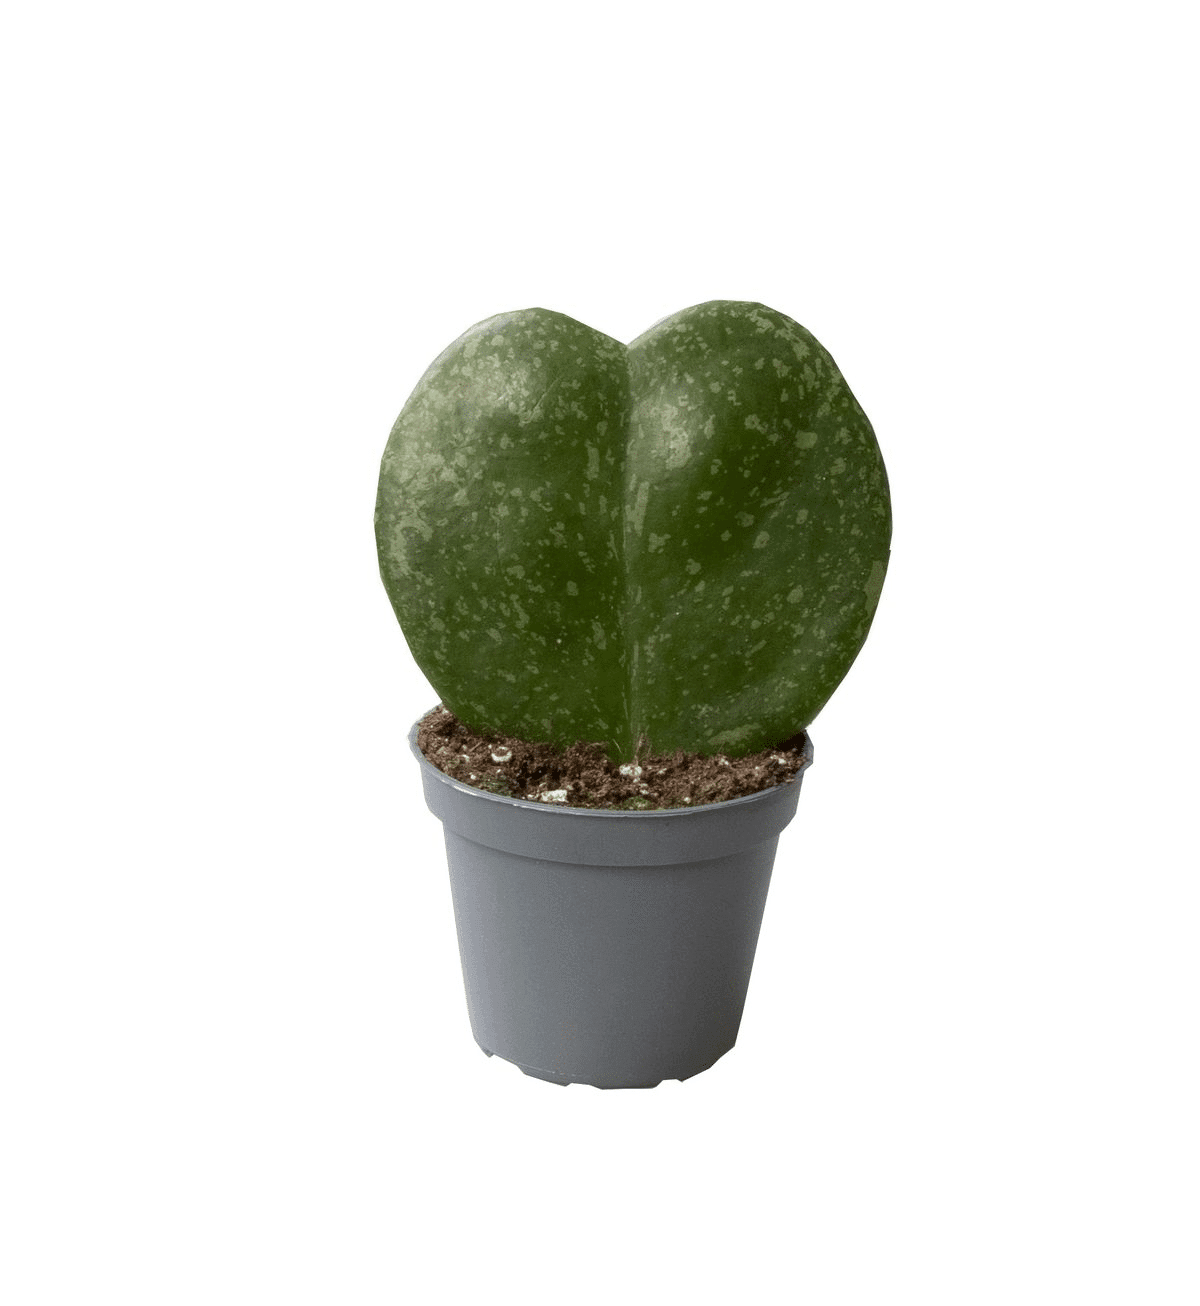
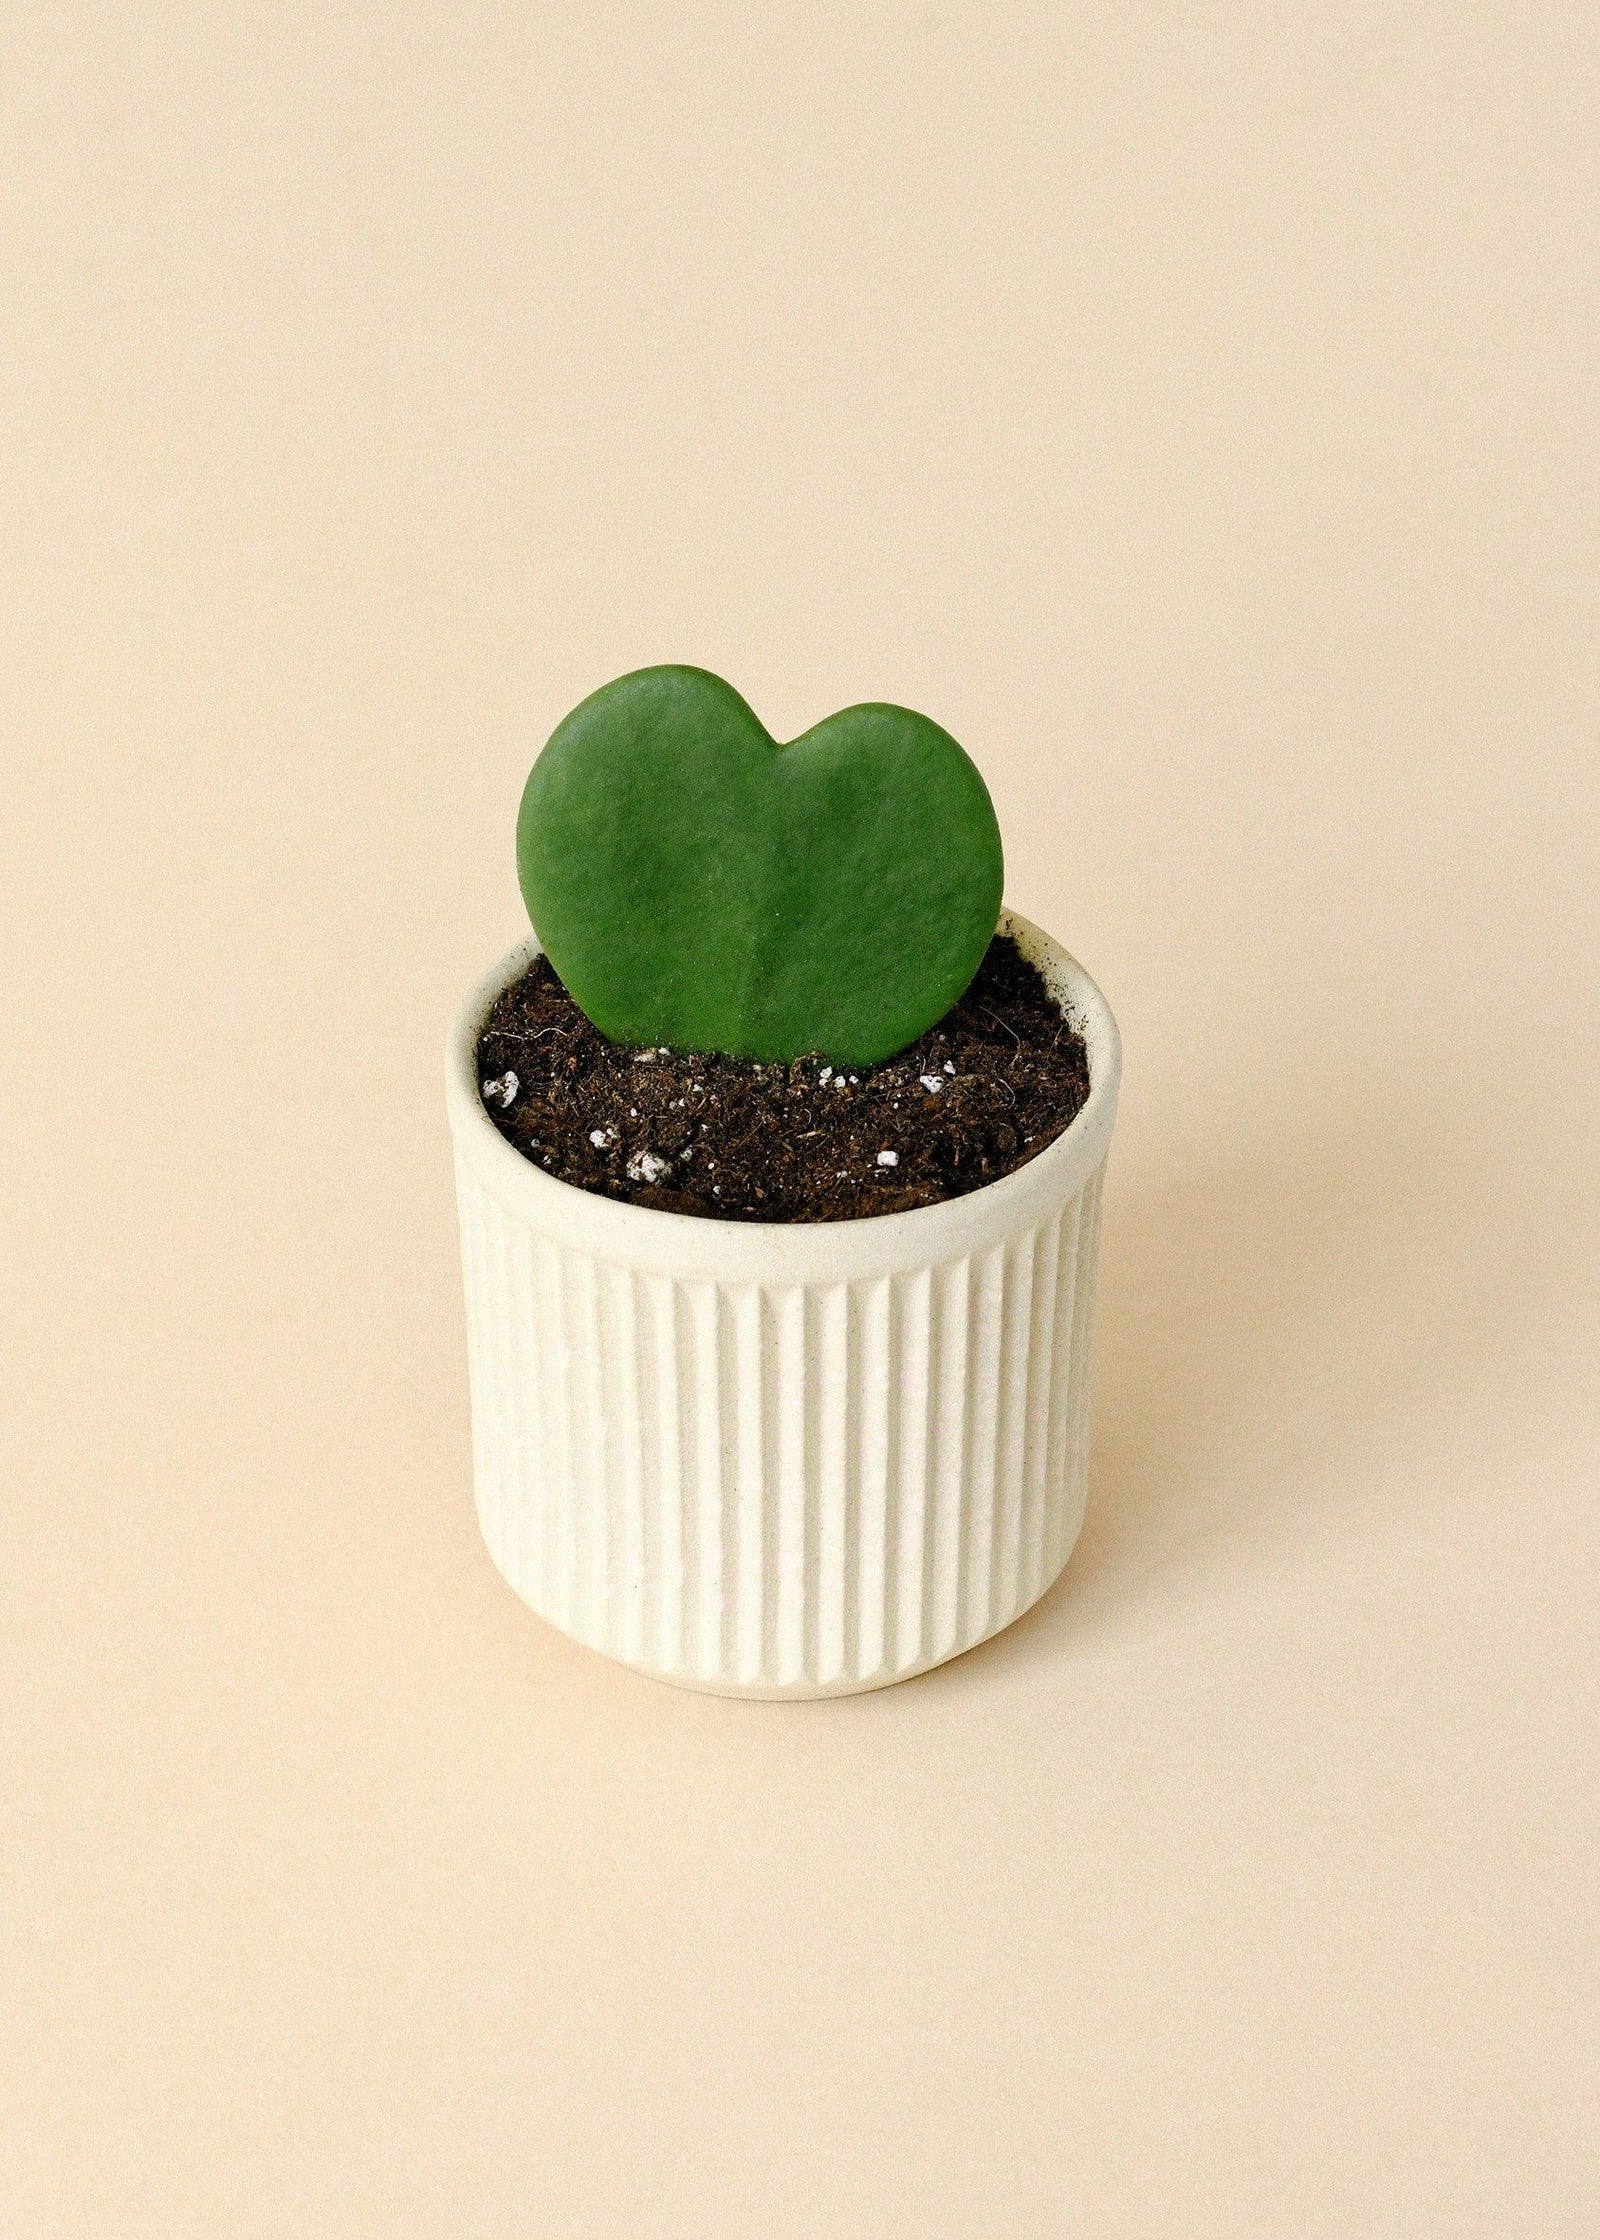
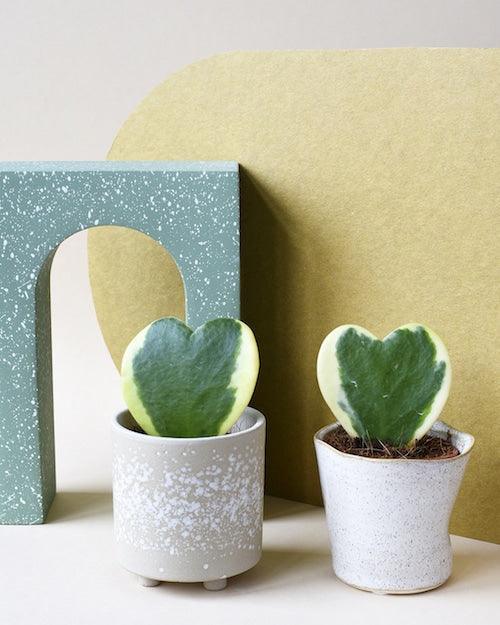
Baby plants is the most affordable and definitely the most fun way to expand your houseplant collection! Because we know that there is nothing more rewarding than the experience of watching a plant grow in your care, we sell a wide range of both common and rare houseplants in baby plant size. When your beloved miniature plant turns into a fully-grown houseplant over time, every plant parent knows they must have done something right! Baby plants vs. big houseplants There is no doubt that raising a baby plant brings joy to every plant parent! But more than that, it also allows the plants to adapt to your home early on. Bringing bigger houseplants home can sometimes cause shock to them. Why? Because they grew up in a greenhouse with perfect conditions for them to grow. It takes time for them to get used to their new home. Meanwhile, miniature plants are still more adaptable. Growing up in your home, they will acclimate to your space and care more easily. Miniature plants need different care It needs to be noted that baby plants require different care than fully grown houseplants. Just like human babies, they are fragile and more sensitive to care mistakes than fully-developed houseplants. They do not need as much water in one go as their big counterparts. However, they will not easily survive drying out, because their root system is not as established yet. So, you should always make sure to water your baby plants little but frequently. If you are afraid of forgetting to water your miniature plants for a little too long, we can recommend this watering hack by plant expert Hilton Carter. This trick uses a cord, which you stick into your plants' pots as well as in a vase. Via capillary action, this will allow your plants' soil to always stay moist. Our top baby plant picks Hoya Krohniana 'Super Silver' Hoya Krohniana ‘Super Silver’ is your queen of hearts among Hoyas! This rarely found wax plant has cute, heart-shaped leaves with silver splashes. It is a perfect plant for a hanging basket in front of a sunny window! It is also part of our wide range of easy care plants. Maranta Leuconeura var. kerchoveana 'Variegata' Maranta Leuconeura var. kerchoveana ‘Variegata’ also known as Maranta ‘Beauty Kim’ or The Prayer Plant, is a native to Brazil hardy tropical plant. Known for its striking foliage and no-fuss personality, it makes a great plant for a beginner. Philodendron Melanochrysum Philodendron Melanochrysum is one of the most popular and most exceptional Aroids around! A climbing Philodendron, its velvety leaves start out copper to pink with light green veins and slowly mature to dark green. The leaves on an adult plant are long and heart-shaped, and look beyond striking. This Philodendron is a must-have for any indoor jungle!
View collection
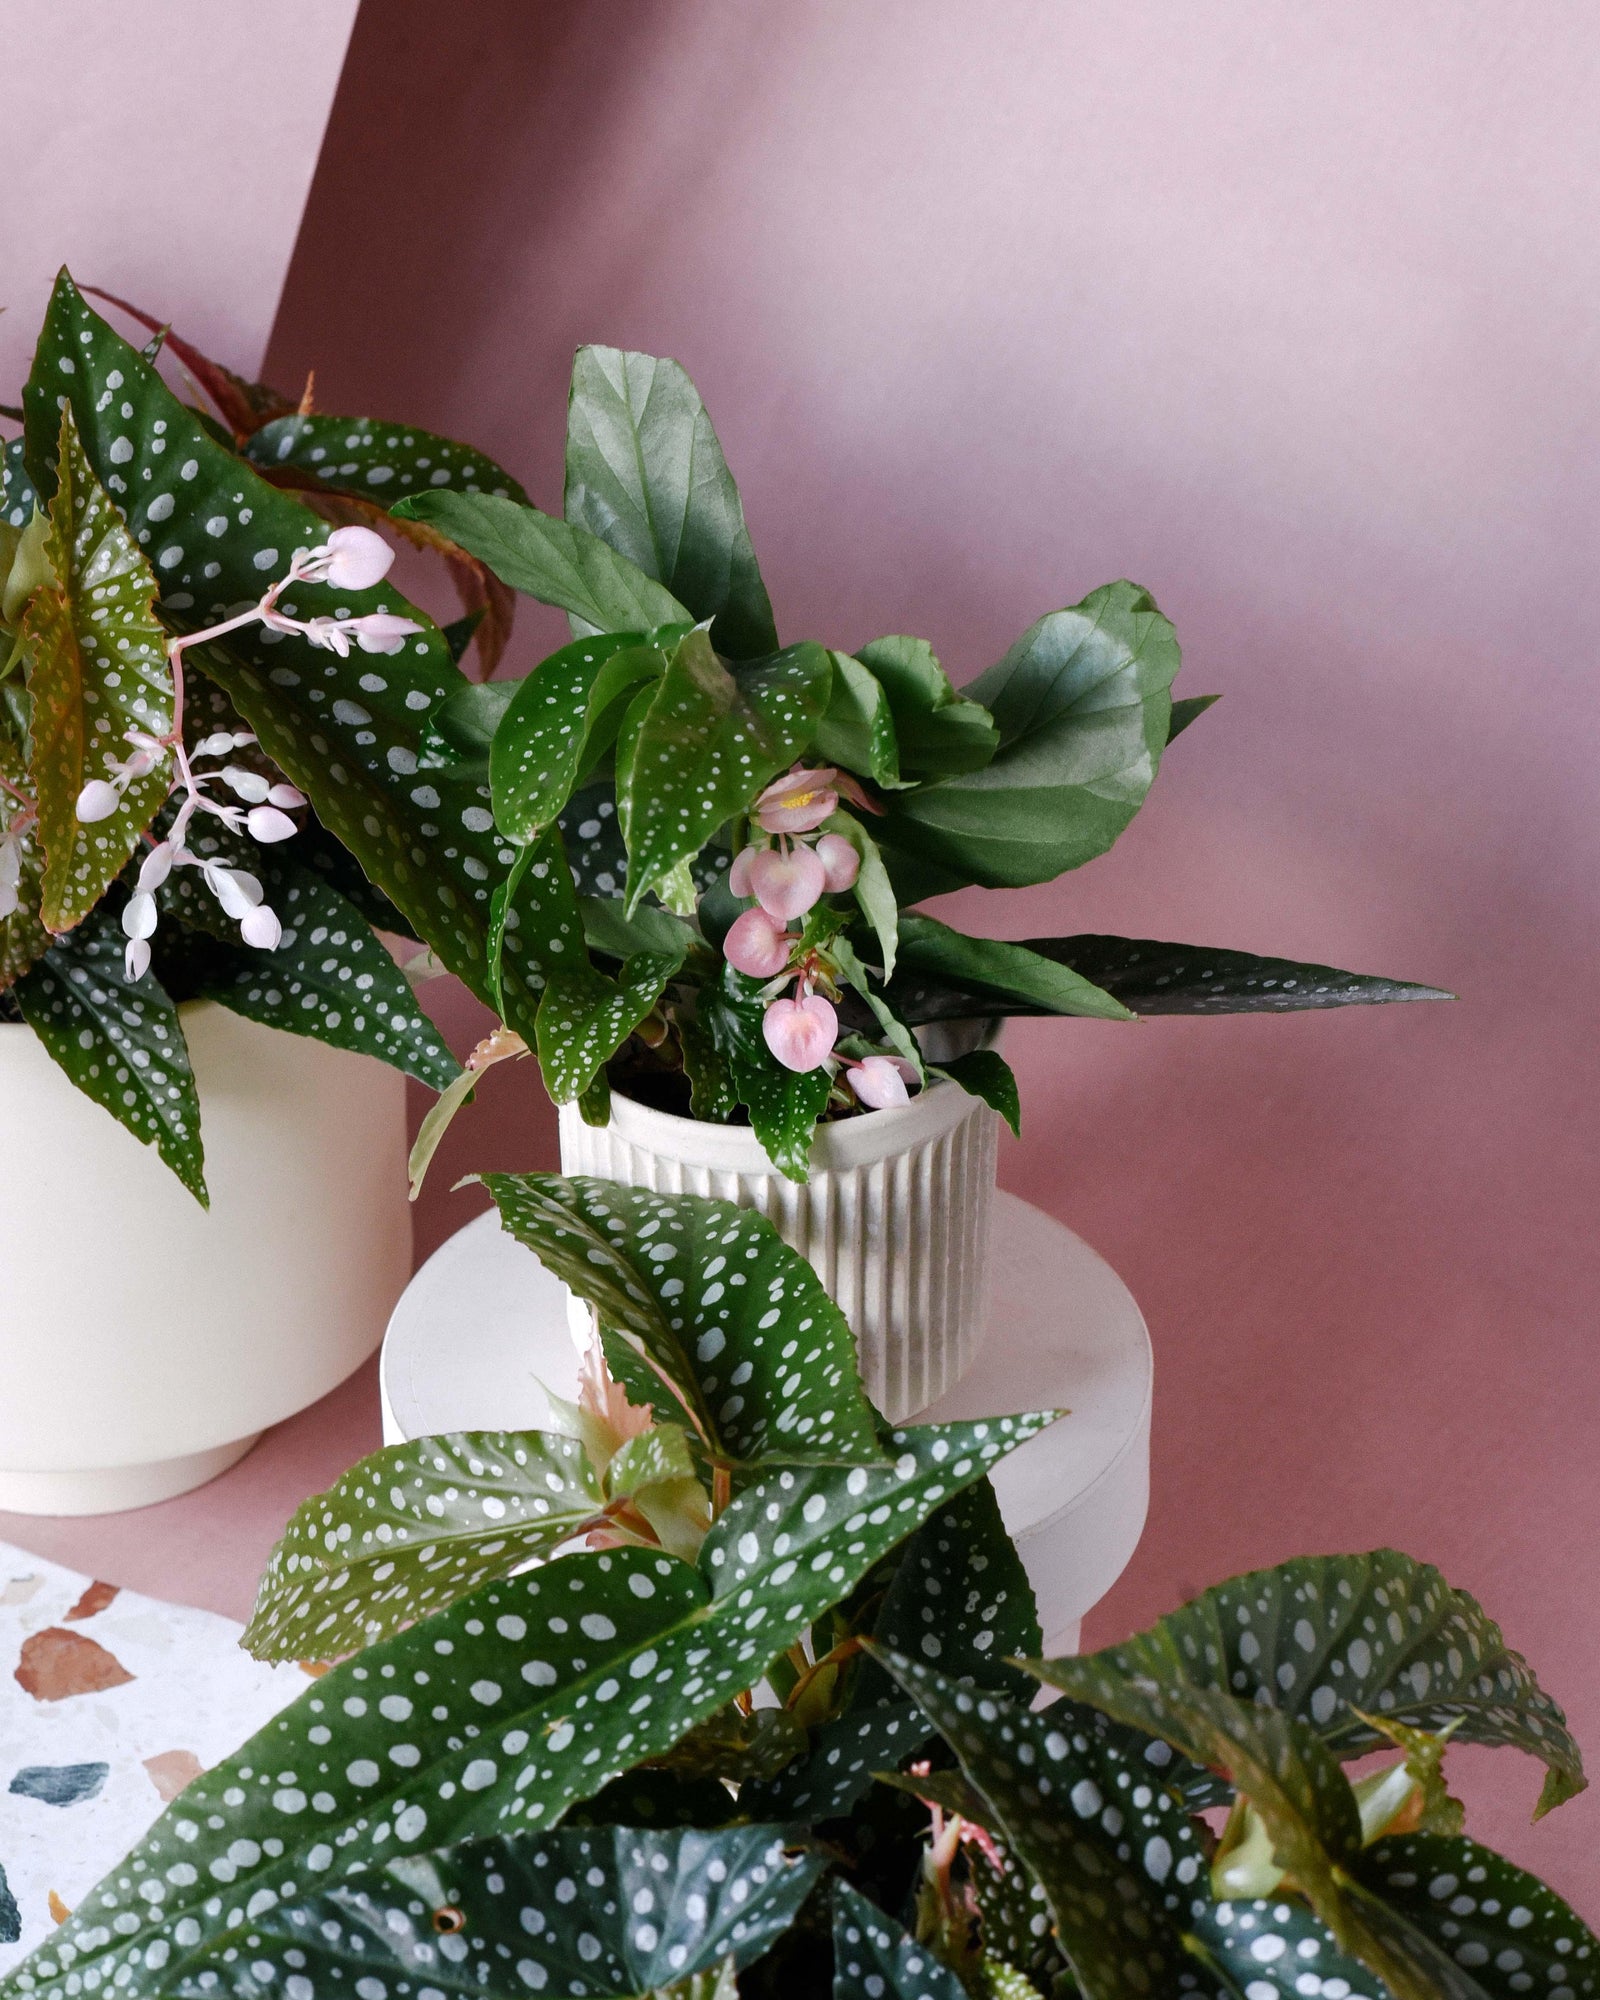
Begonia
Shop our Begonia collection, featuring vibrant plants with striking foliage and colorful blooms.
View collection
Best Sellers
Shop our best selling plants!
View collection
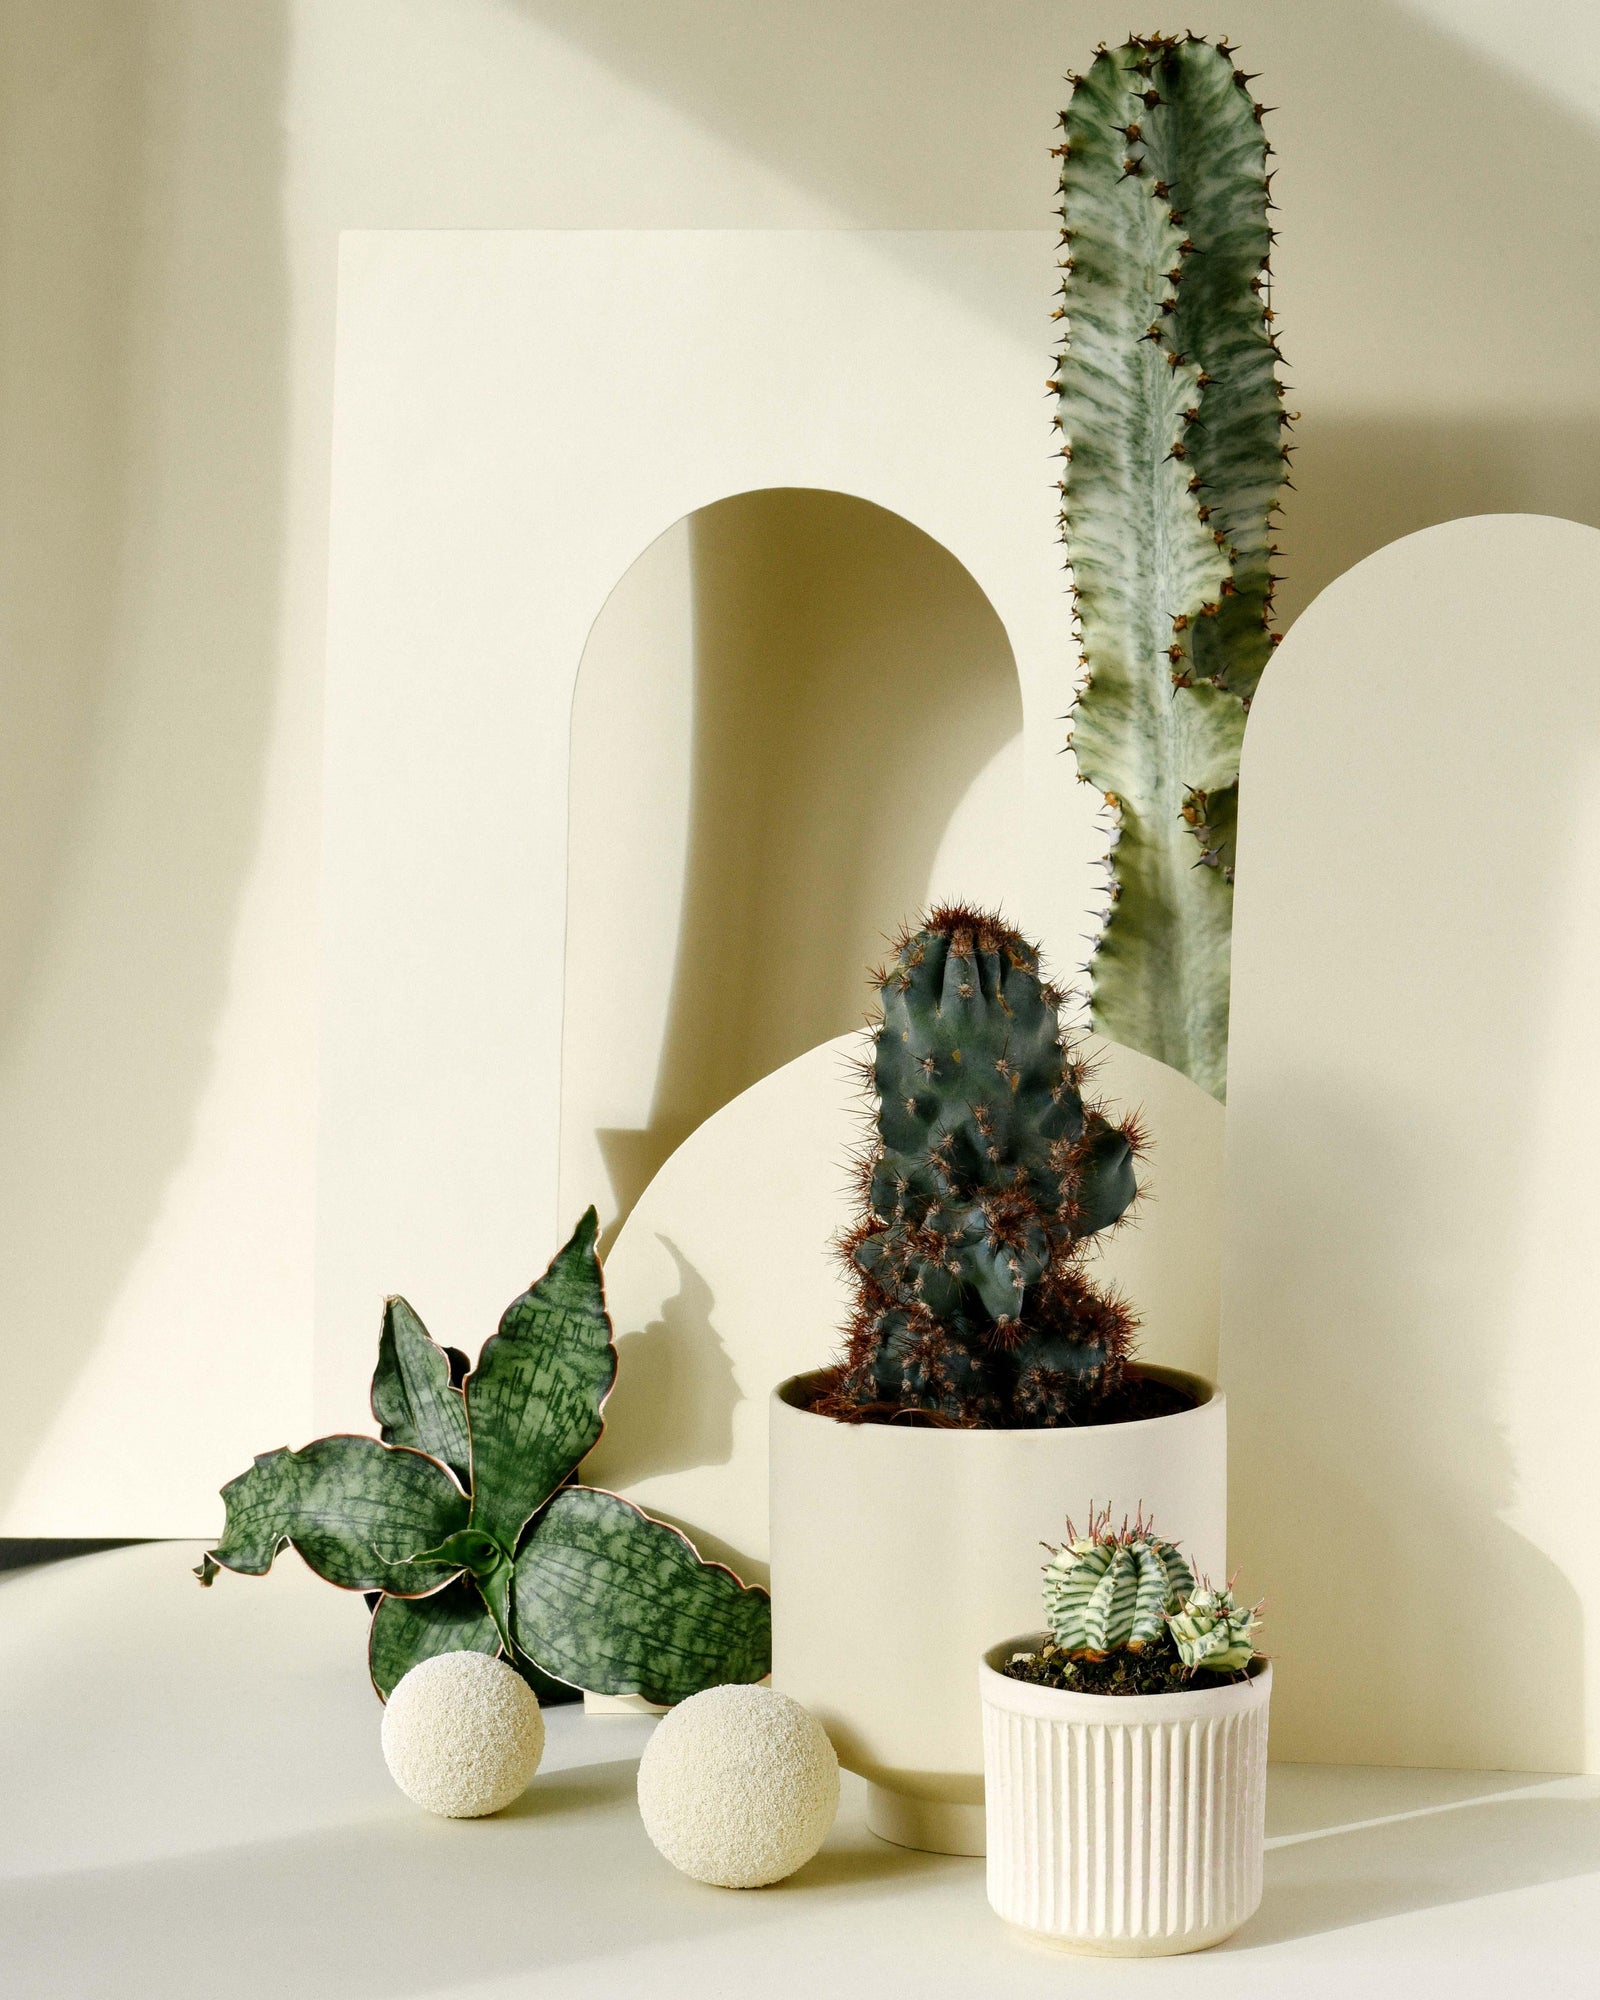
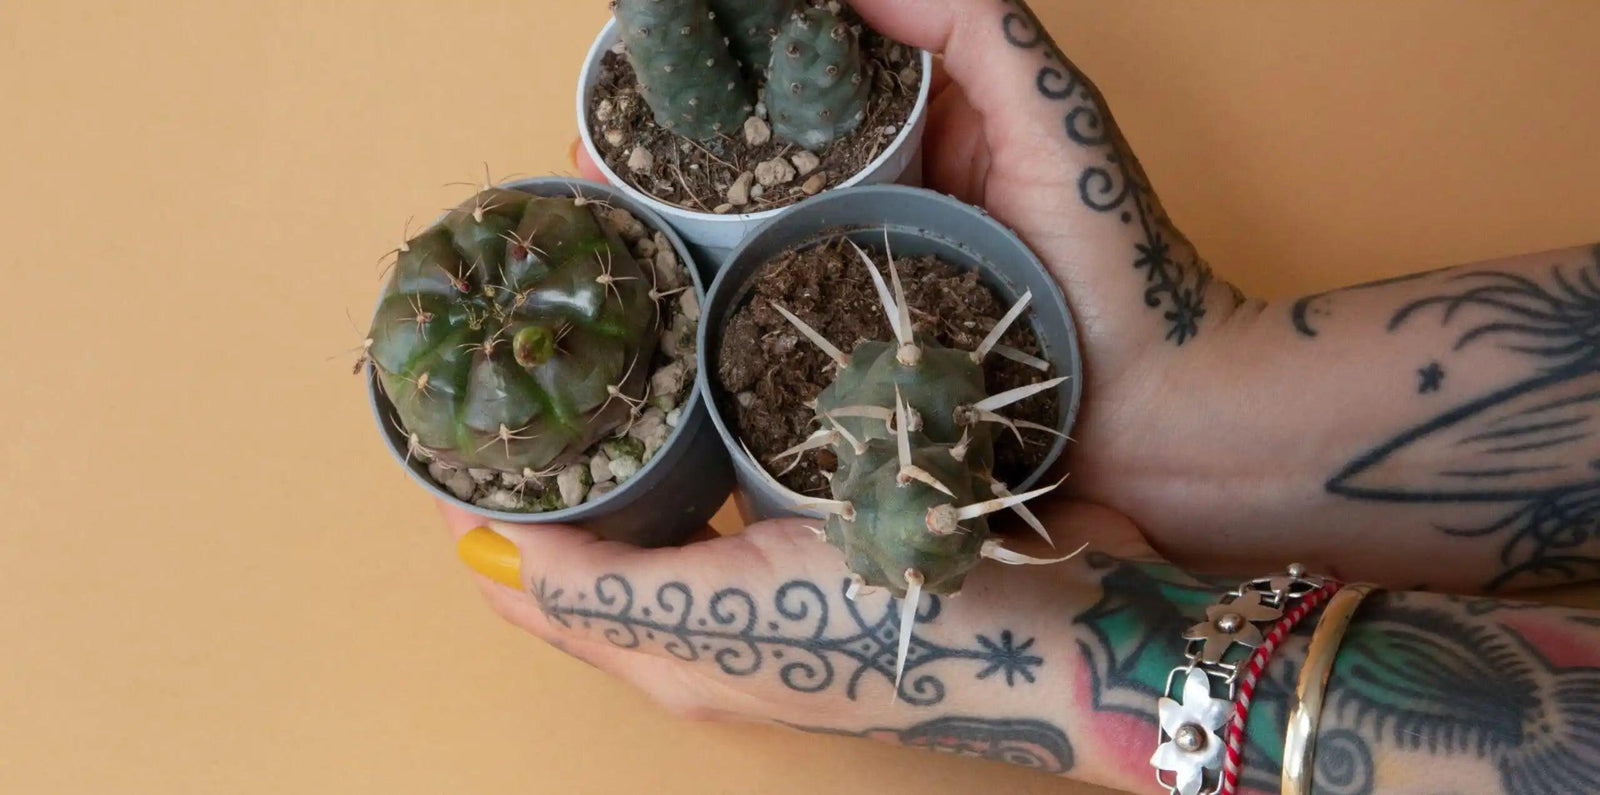
Cactus
Shop our Cactus collection, featuring low-maintenance, drought-tolerant plants perfect for sunny spaces.
View collection
Christmas
Find some decor to cheer up your home this holiday!
View collection

Designer Plant Lighting
Beautifully designed plant lights from Soltech, made the in the USA, to bring aesthetic beauty to your home and powerful growth to your plant collection.
View collection
Easy Care
No matter if you have a green thumb or not, these Easy Care plants won't let you down! The houseplants in this selection are perfect for beginner plant parents, since they do not require a certain humidity or a lot of watering to thrive and will tolerate some neglect. If you occasionally forget to water your green roommates, are a busy traveller or if you simply don't want to spend a lot of time caring for your plants, this selection of fail-safe, low maintenance houseplants is right for you! Just because you don't have the time or experience, that doesn't mean you can't green up your home with beautiful, living plants. Why you should give easy care plants a try We as humans are naturally drawn to green spaces, even if we don’t have plants at home (yet!). After all, we are natural beings. So, even the most hardcore city lovers will find it hard to live without any green in their lives. Plants have been shown to reduce psychological and physiological stress. On top of that, studies show they also allow you to be more productive. This is why a lot of companies have greened up their offices in recent years. Yet, a green energy boost for your own home is just as beneficial! So make sure not to lose out on these benefits because you are afraid of plant care. There is really no reason why you should be scared to introduce plants to your home, even if you are a newbie. In the Easy Care category, you can find a great selection of low maintenance plants that only need a few minutes of your attention each week to thrive. In return, they will boost our mood and, as an added bonus, purify the air you breathe. But not only that! Indoor plants bring instant and effortless style to an interior, and there’s a houseplant to suit any size house, apartment or flatshare. Our top easy care plant picks Aglaonema Aglaonema, commonly known as Chinese evergreens, are grown for their vibrancy in colour and gorgeous leaf patterns. They tolerate medium to low light and are perfect for those who occasionally forget to water their plants! Aglaonema are slow growers. However, they will reward you with beautiful variegated foliage and hardiness Philodendron Erubescens varieties Philodendron erubescens varieties are some of the most easygoing houseplants around. These Aroids are very adaptable to different light conditions and tolerate drying out. They are climbers and have long, slender leaves, which vary in colour depending on the cultivar. Many popular cultivars come from it, such as Philodendron White Princess, Philodendron Pink Princess, Philodendron Prince of Orange and Philodendron Moonlight. Sansevieria Sansevieria, also known as mother-in-law's tongue, have been popular houseplants for decades. You will have come across the plain green, long-leafed versions in doctor's practices or shopping centres. This is because they are so undemanding and require very little care, light and watering. But don't worry, we would never suggest boring plants to you! Our range of Sansevieria includes new, funkier and more colourful varieties that are not only easy care, but also eye-catching!
View collection
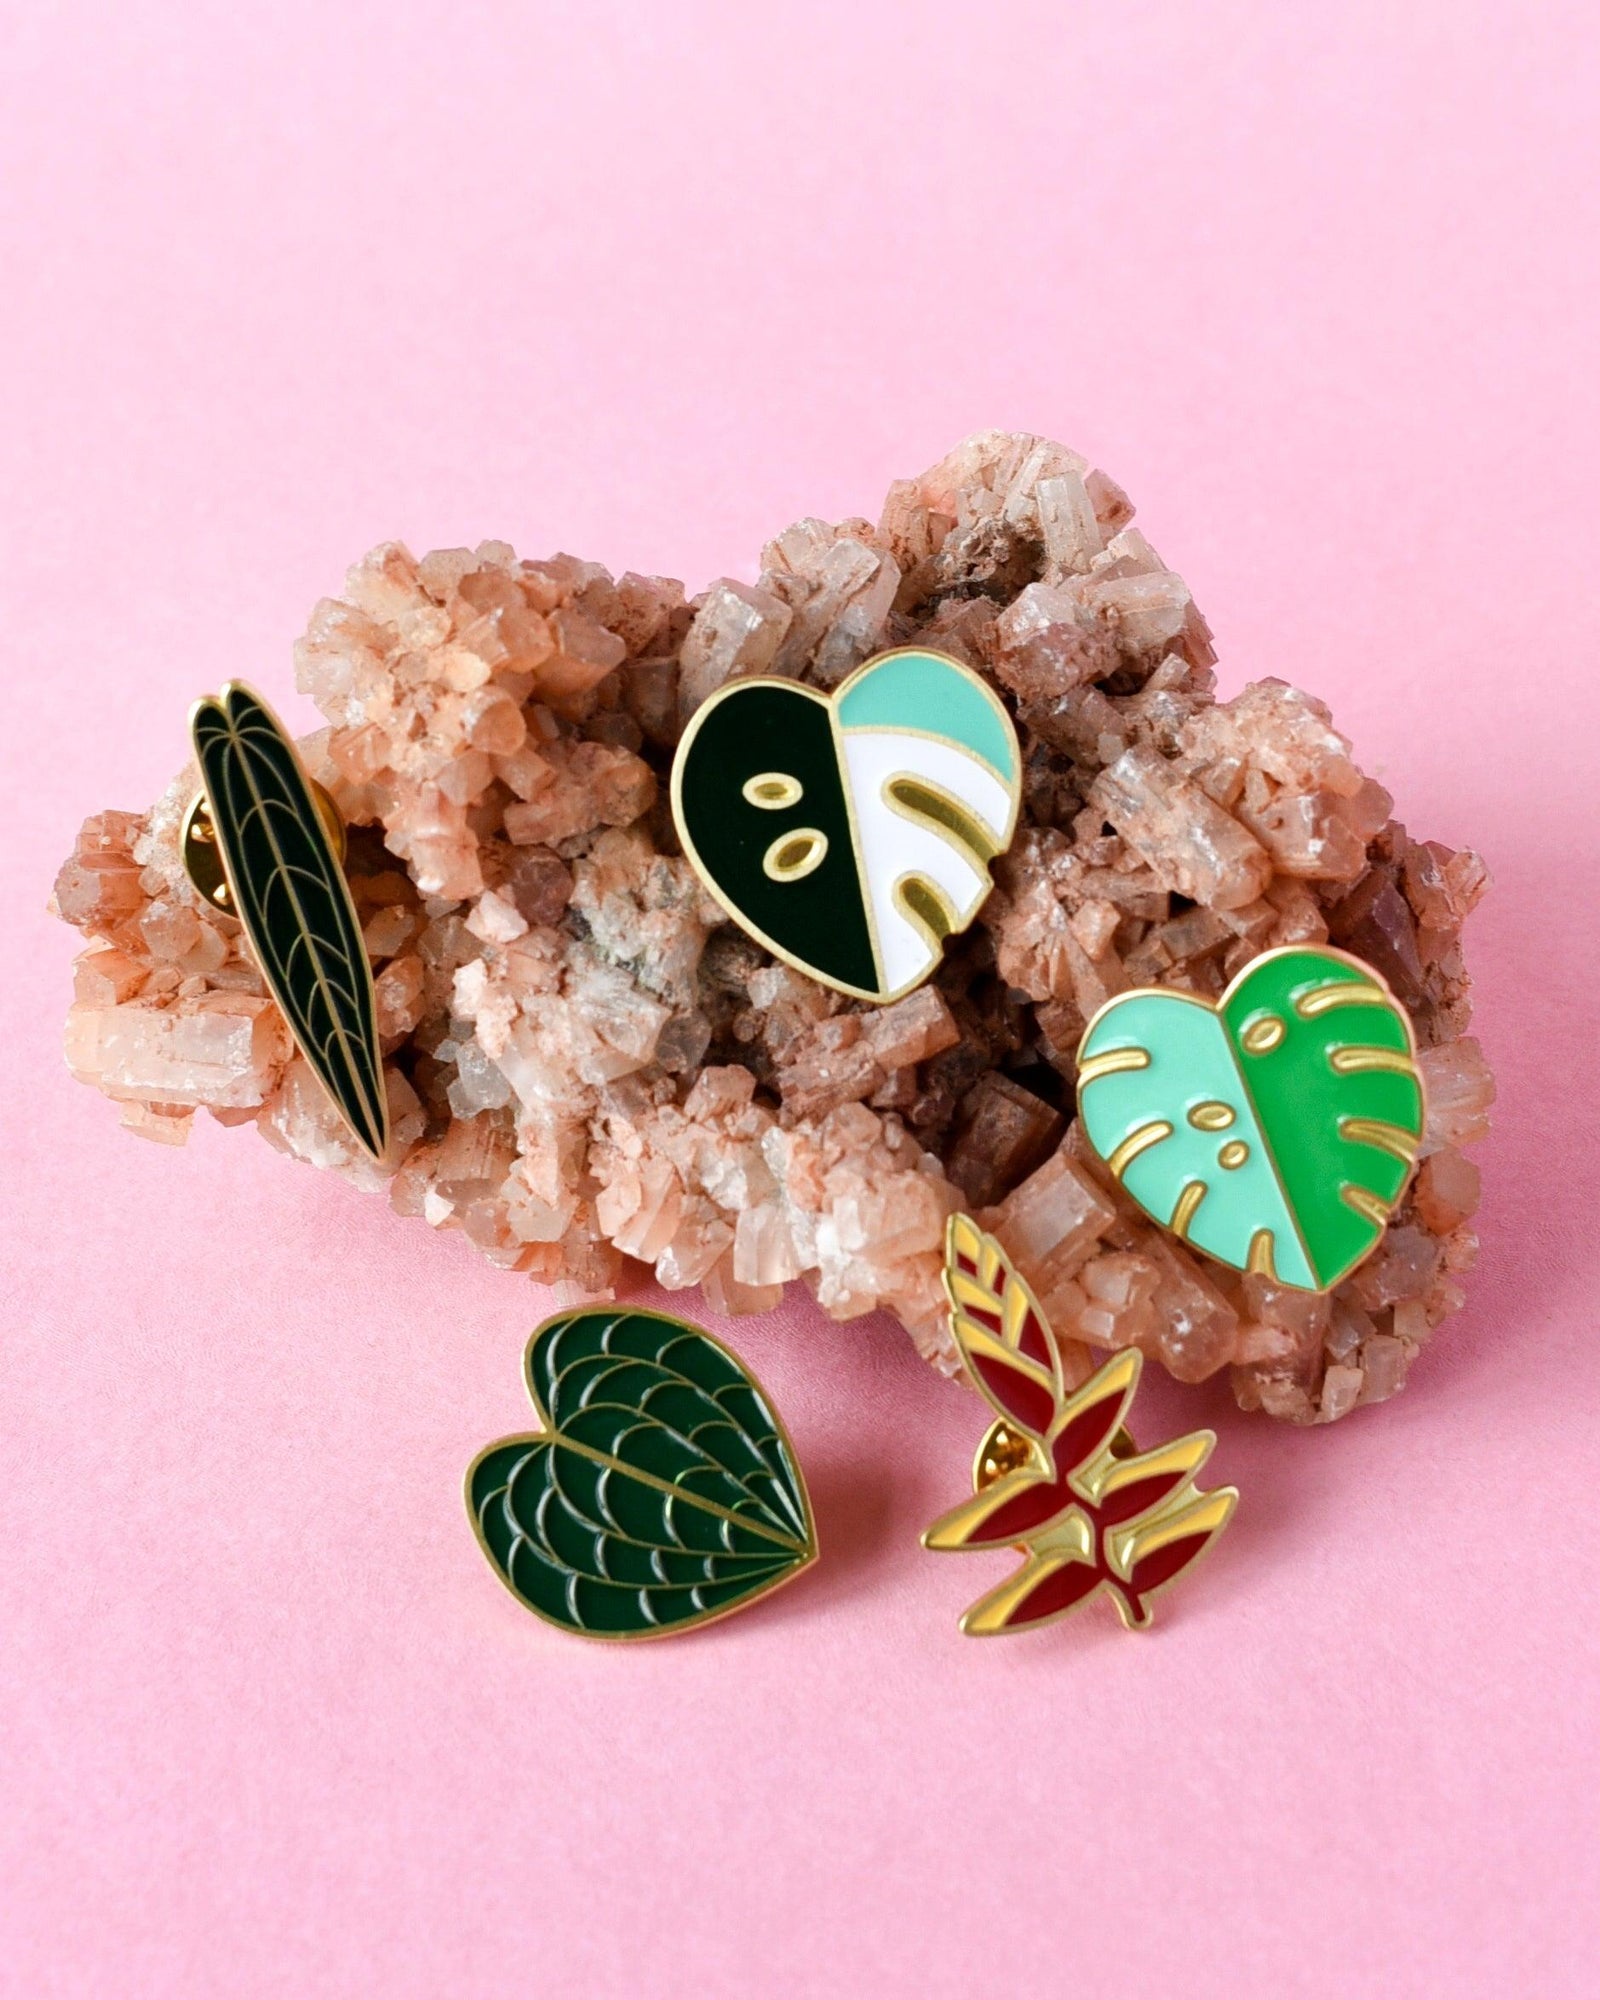
Exclusive Plant Circle Pins
Celebrate the Beauty of Plants with Our Stunning Botanical Pins Capture the essence of nature with our beautifully crafted plant-inspired pins. Designed with care and attention to detail, each pin highlights the unique characteristics of beloved houseplants, from intricate leaf patterns to striking veining, making them the perfect accessory for plant lovers. • Exclusive Designs: Each pin reflects the distinctive charm of a specific plant, celebrating the diversity of botanical beauty. • High-Quality Craftsmanship: Made in the EU with premium enamel and a polished finish, these pins combine durability with elegance. • Versatile Accessories: Perfect for adding a touch of greenery-inspired style to your bag, jacket, hat, or anywhere you like. • Compact & Lightweight: Designed for easy wear, these pins are stylish and practical for any occasion. Whether you're adding to your collection or searching for a thoughtful gift, these botanical pins are a perfect way to bring a touch of nature’s charm into your everyday life. 🌿✨
View collection
Felix Collection
View collection

Fern
Shop our Ferns collection, featuring lush, feathery plants that add natural elegance to any indoor space.
View collection
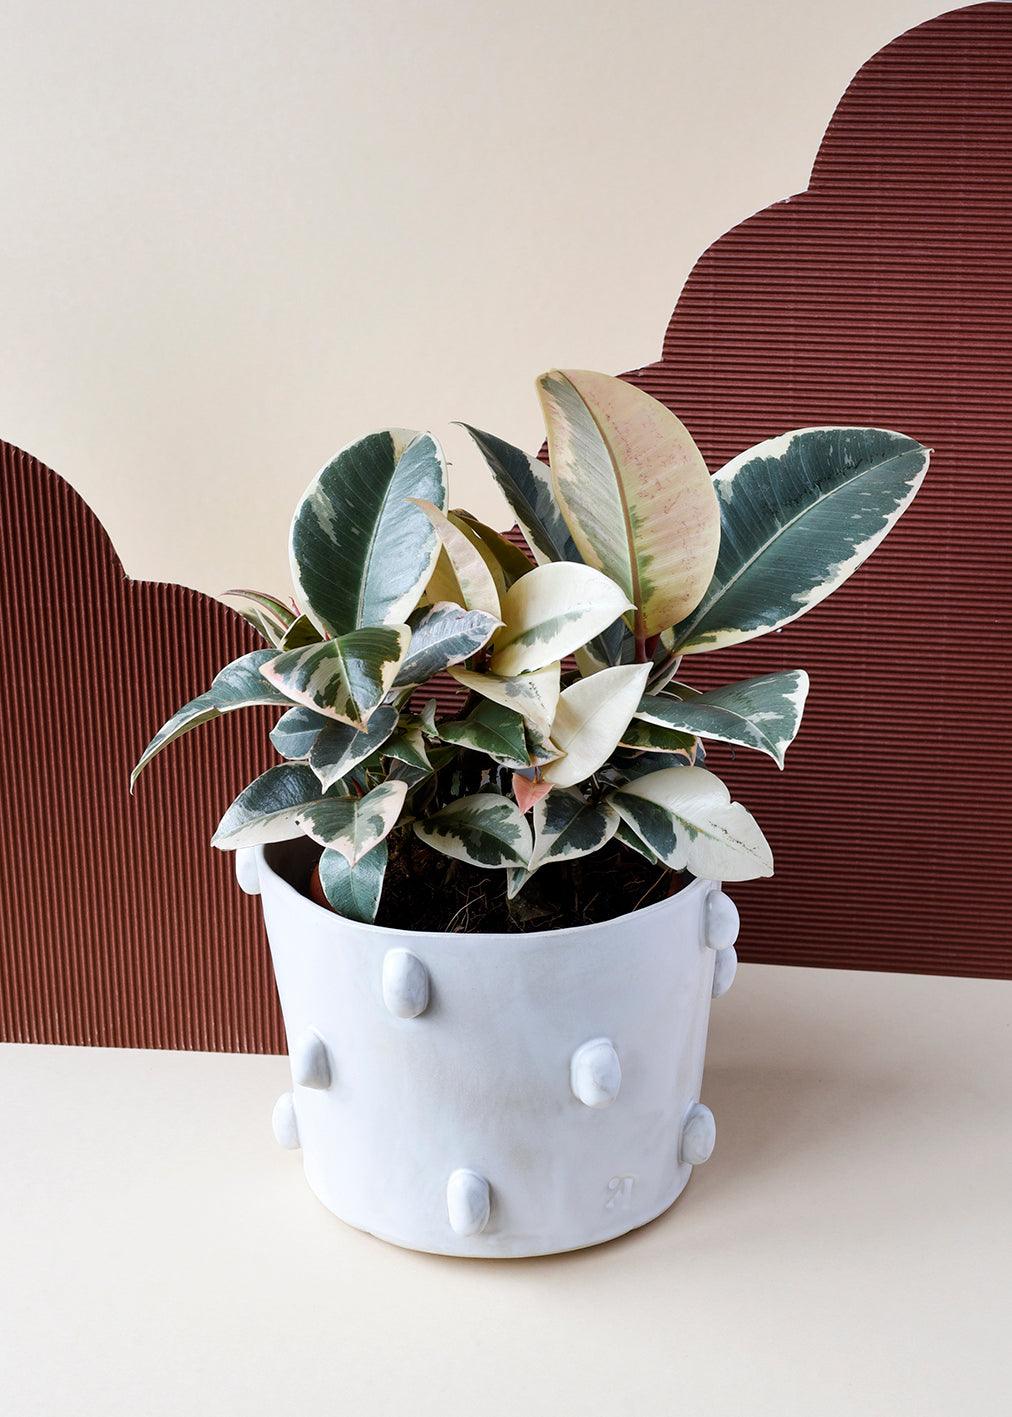
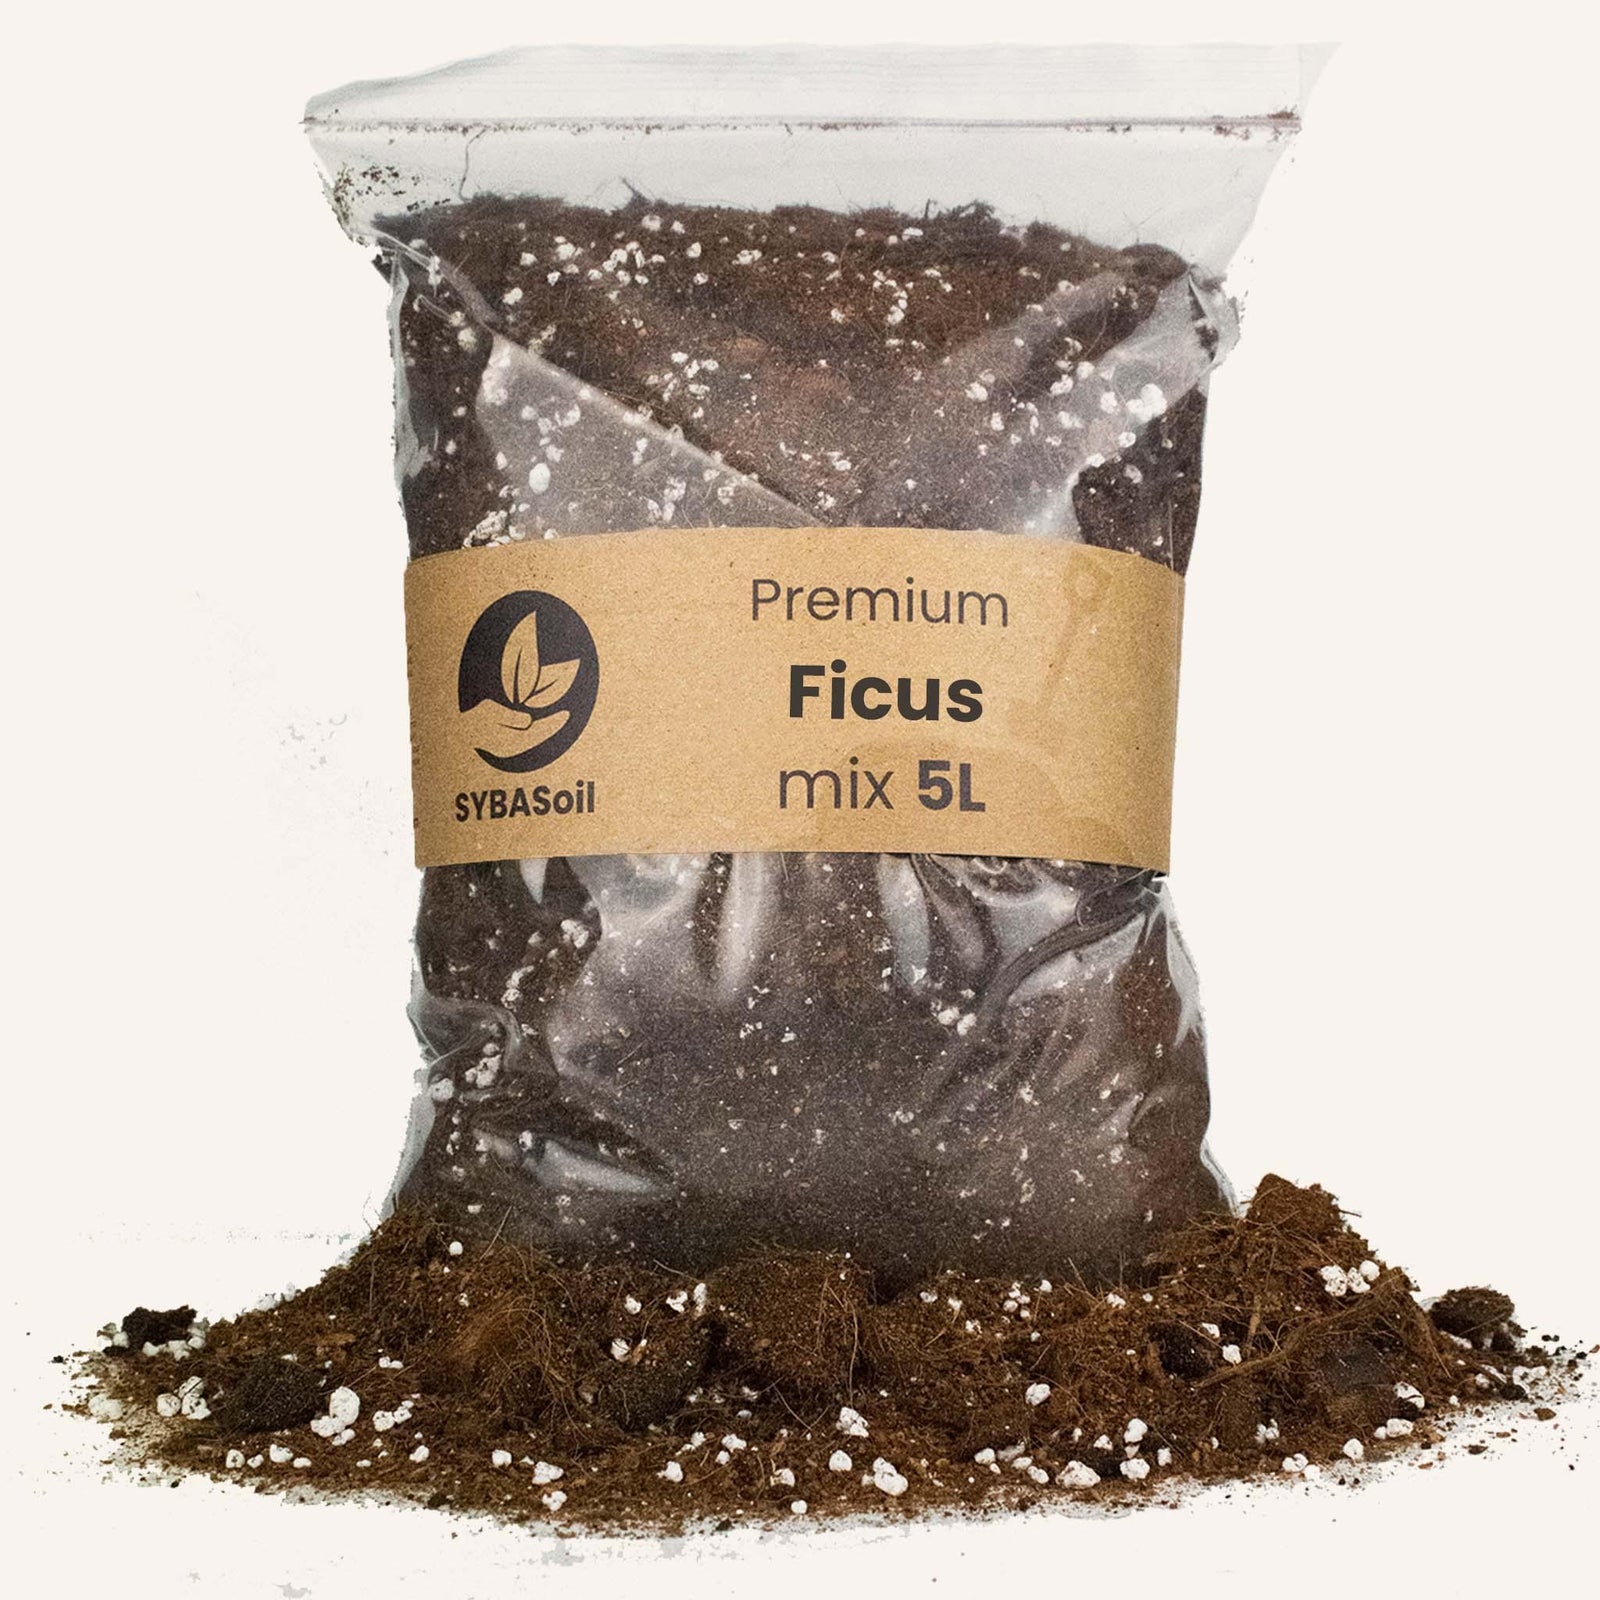
Ficus
Shop our Ficus collection, featuring elegant houseplants known for their lush foliage and tree-like form.
View collection
Gifts for True Plant Lovers
The ultimate assortment of carefully selected plants, stylish accessories, and flexible gift cards, ideal for anyone with a passion for greenery. This collection is designed to bring joy to plant enthusiasts of all levels, from budding plant parents to seasoned collectors. Each live plant in this collection is handpicked for its unique charm and easy-to-care-for nature, making them perfect for brightening up any home or workspace. The selection includes rare and eye-catching varieties that any plant lover would be thrilled to add to their collection. Complementing the plants are chic, functional accessories, including modern pots, watering cans, and care tools that elevate any indoor jungle. These accessories not only enhance the aesthetics but also support the health and growth of each plant, ensuring they thrive for years to come. For those who like to choose their own plant babies, our gift cards offer the flexibility to explore our full range and find the perfect green addition, whether it’s a new pot, a rare plant, or the latest must-have accessory. Celebrate the plant obsessed with the gift of greenery, style, and choice – a collection that embodies nature, nurturing, and the joy of bringing the outdoors in.
View collection

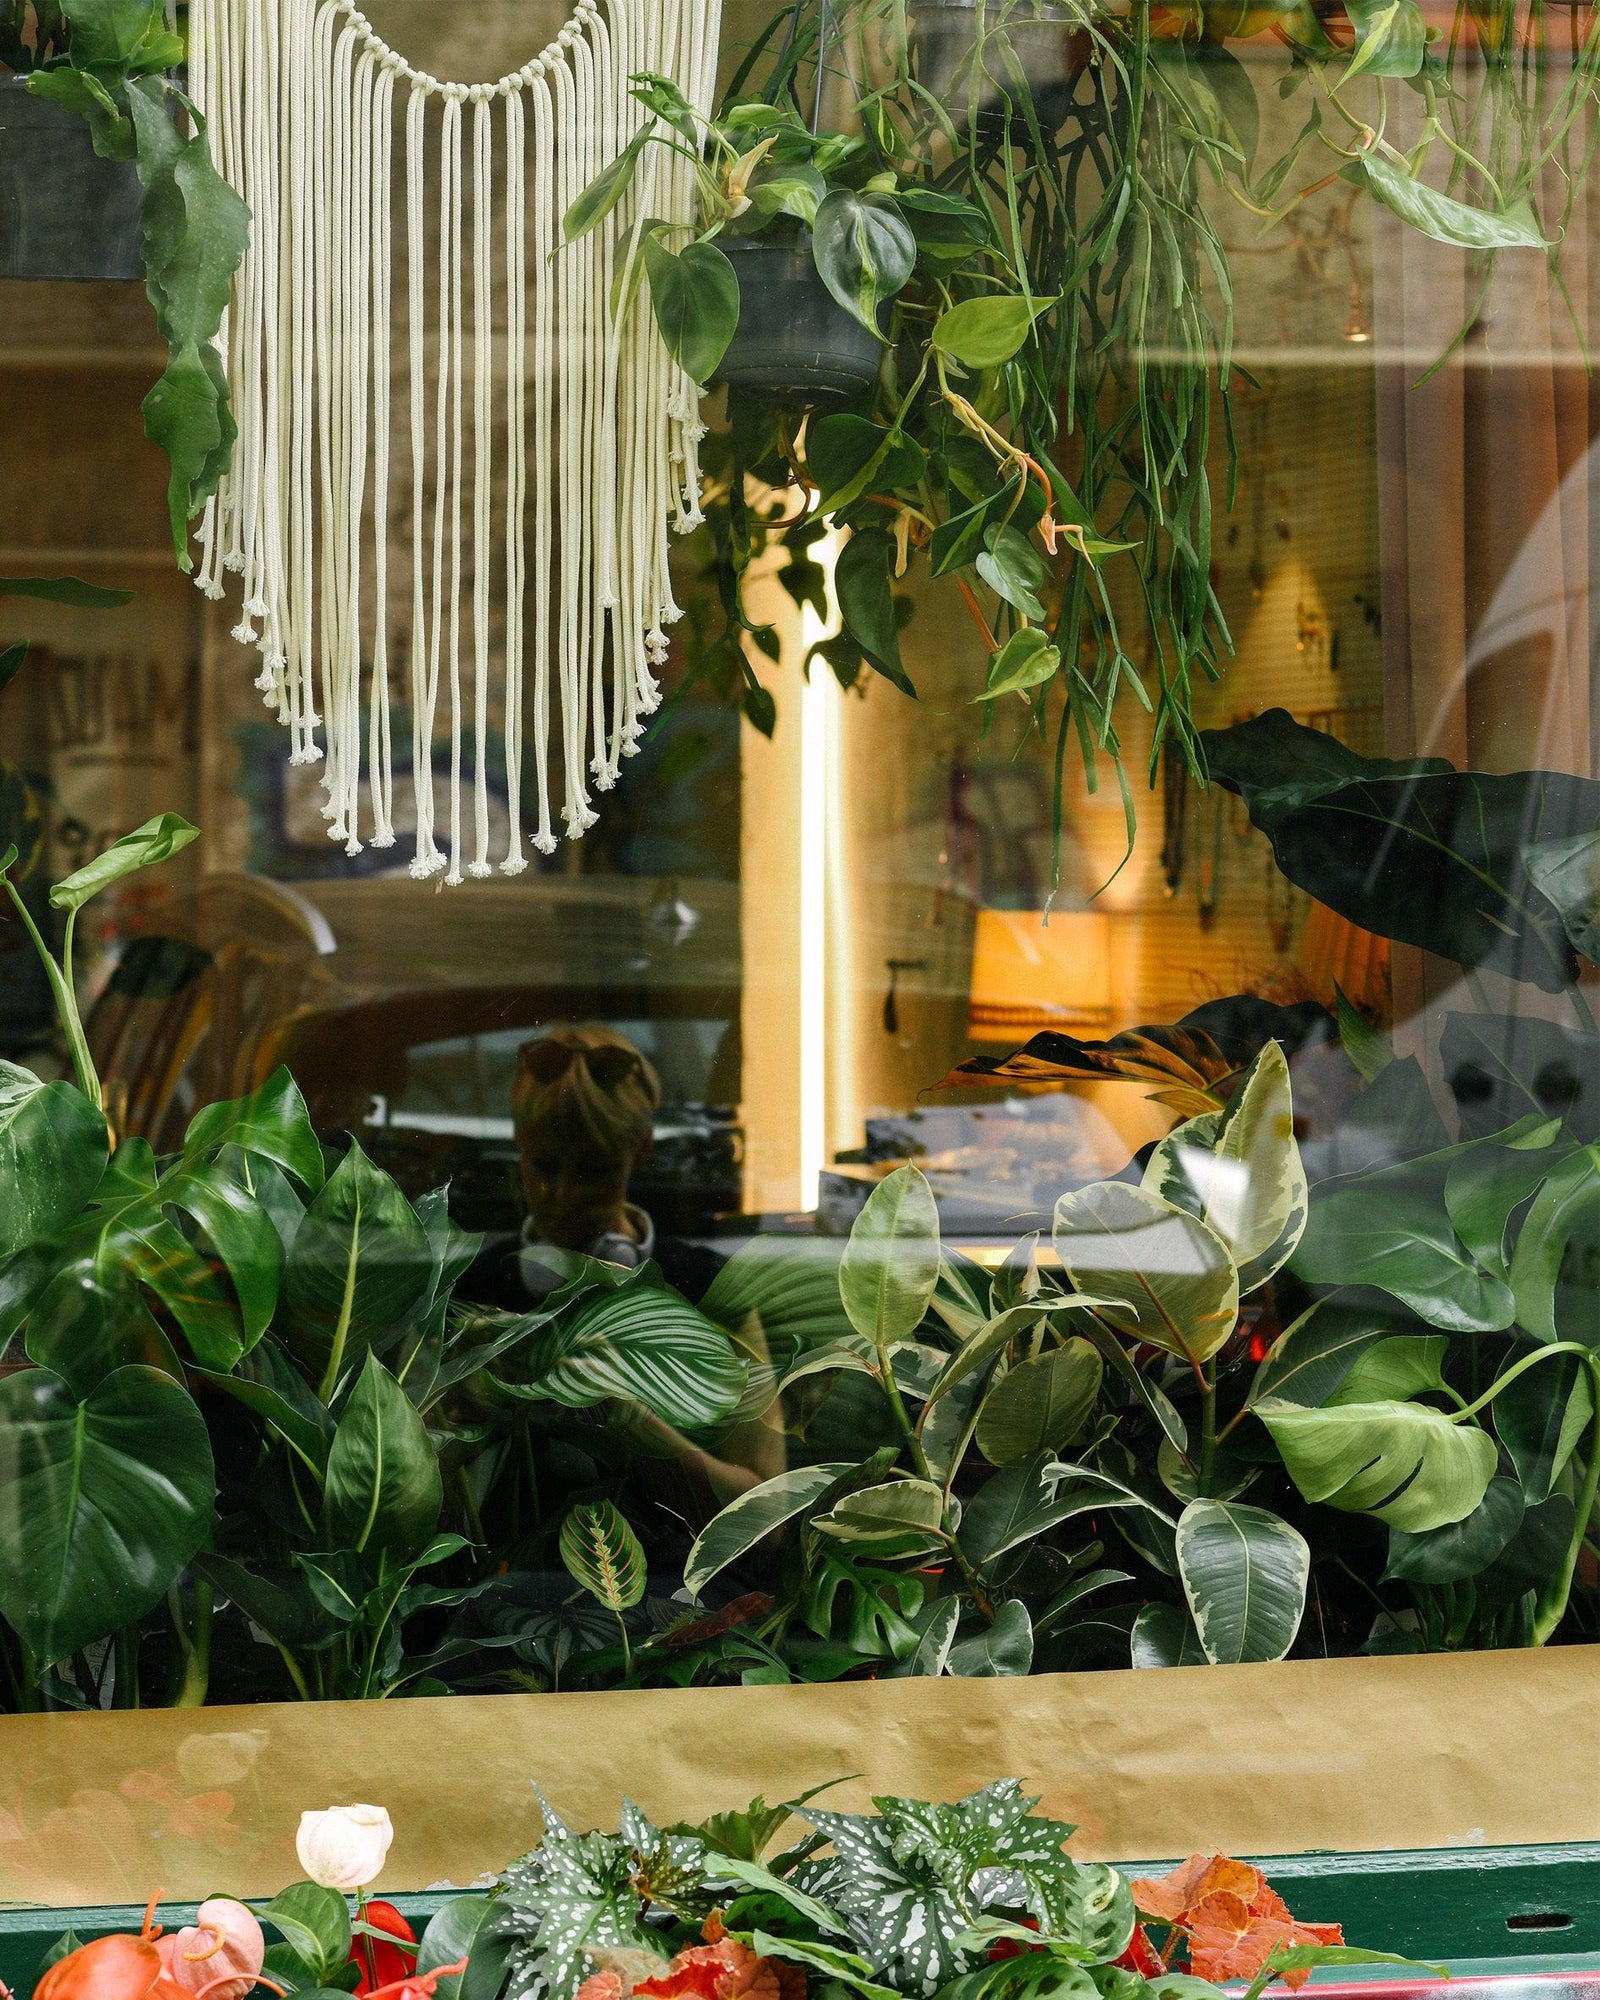
Hanging
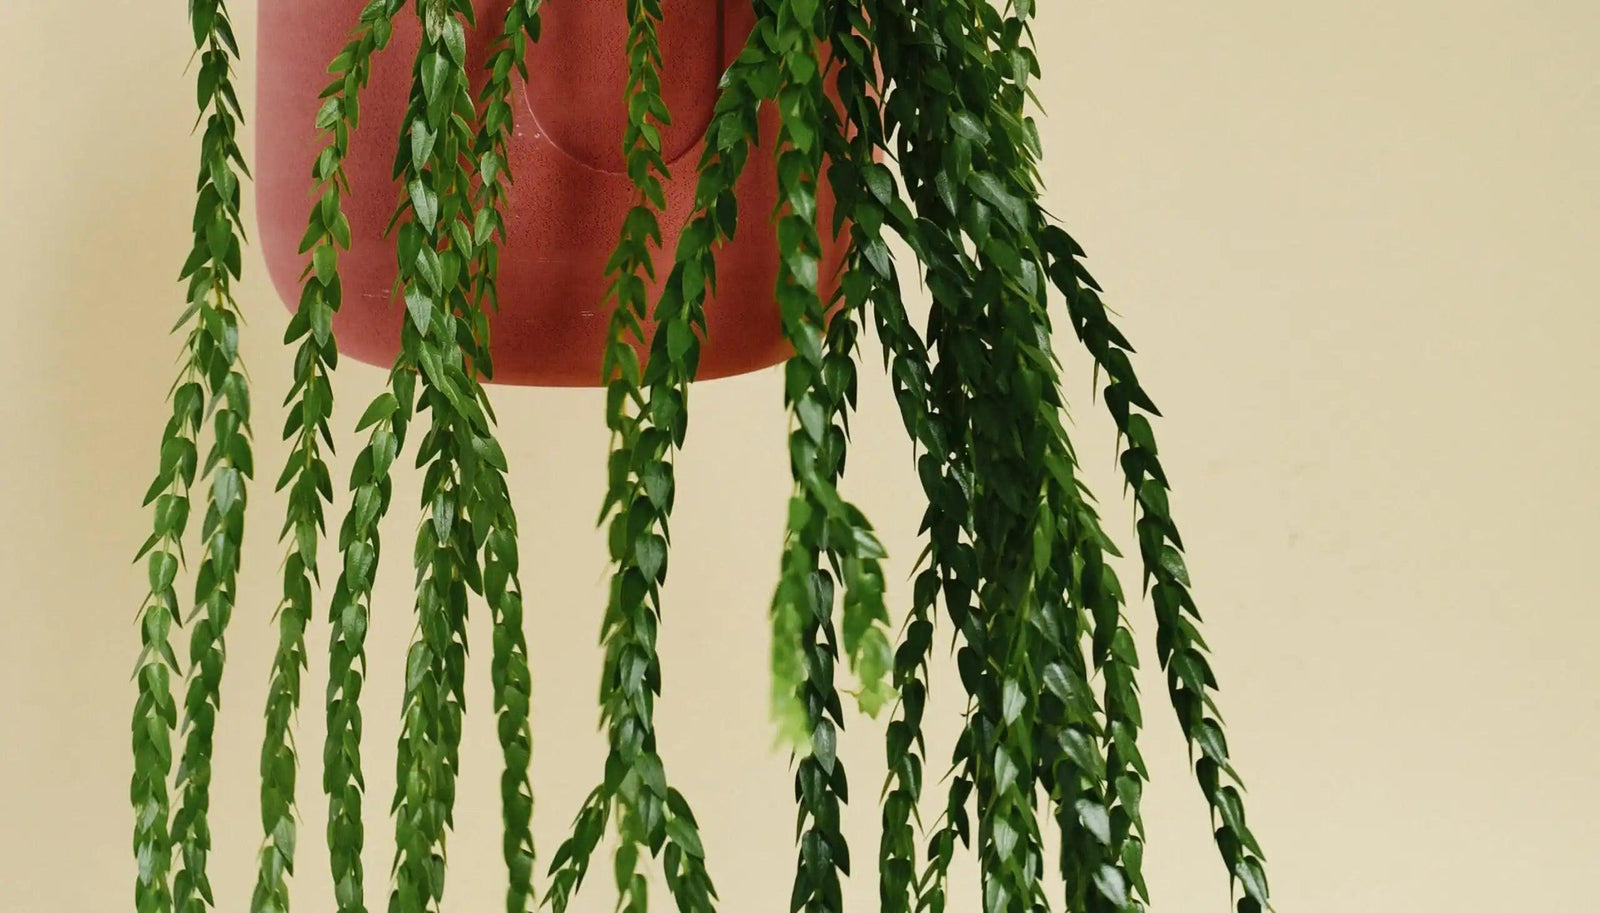
Shop our Hanging and Trailing Plants collection, featuring lush, cascading houseplants perfect for vertical spaces.
View collection

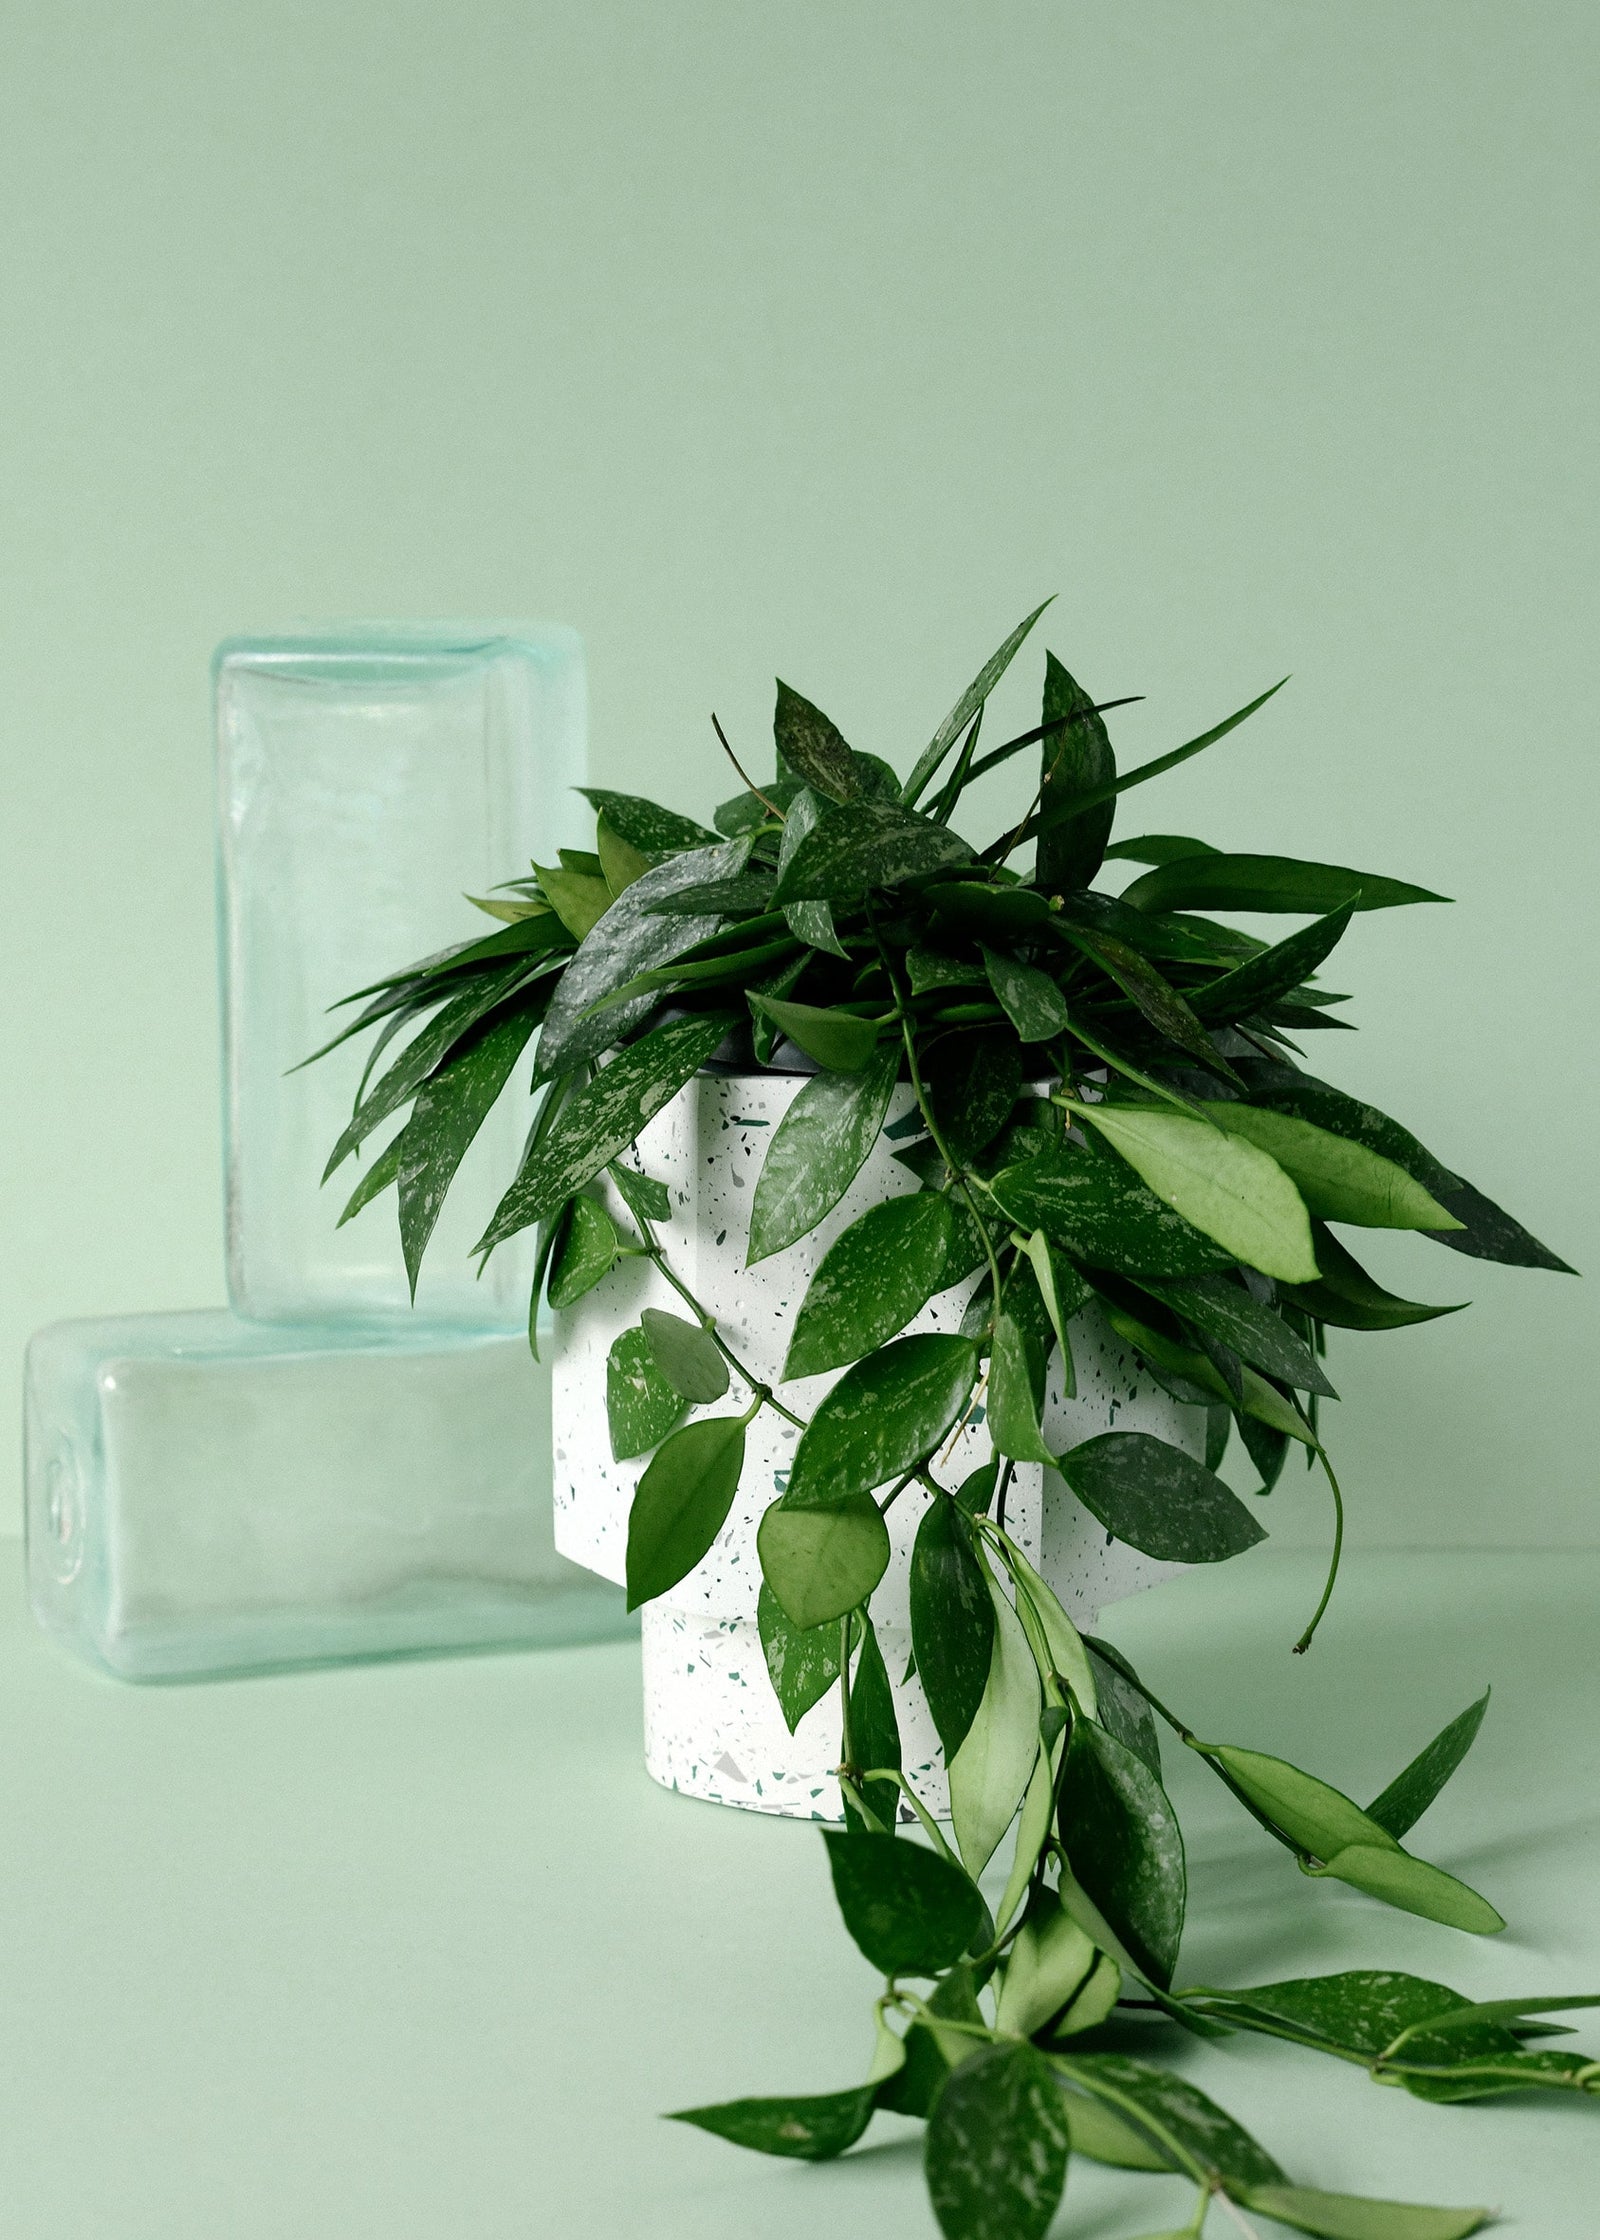
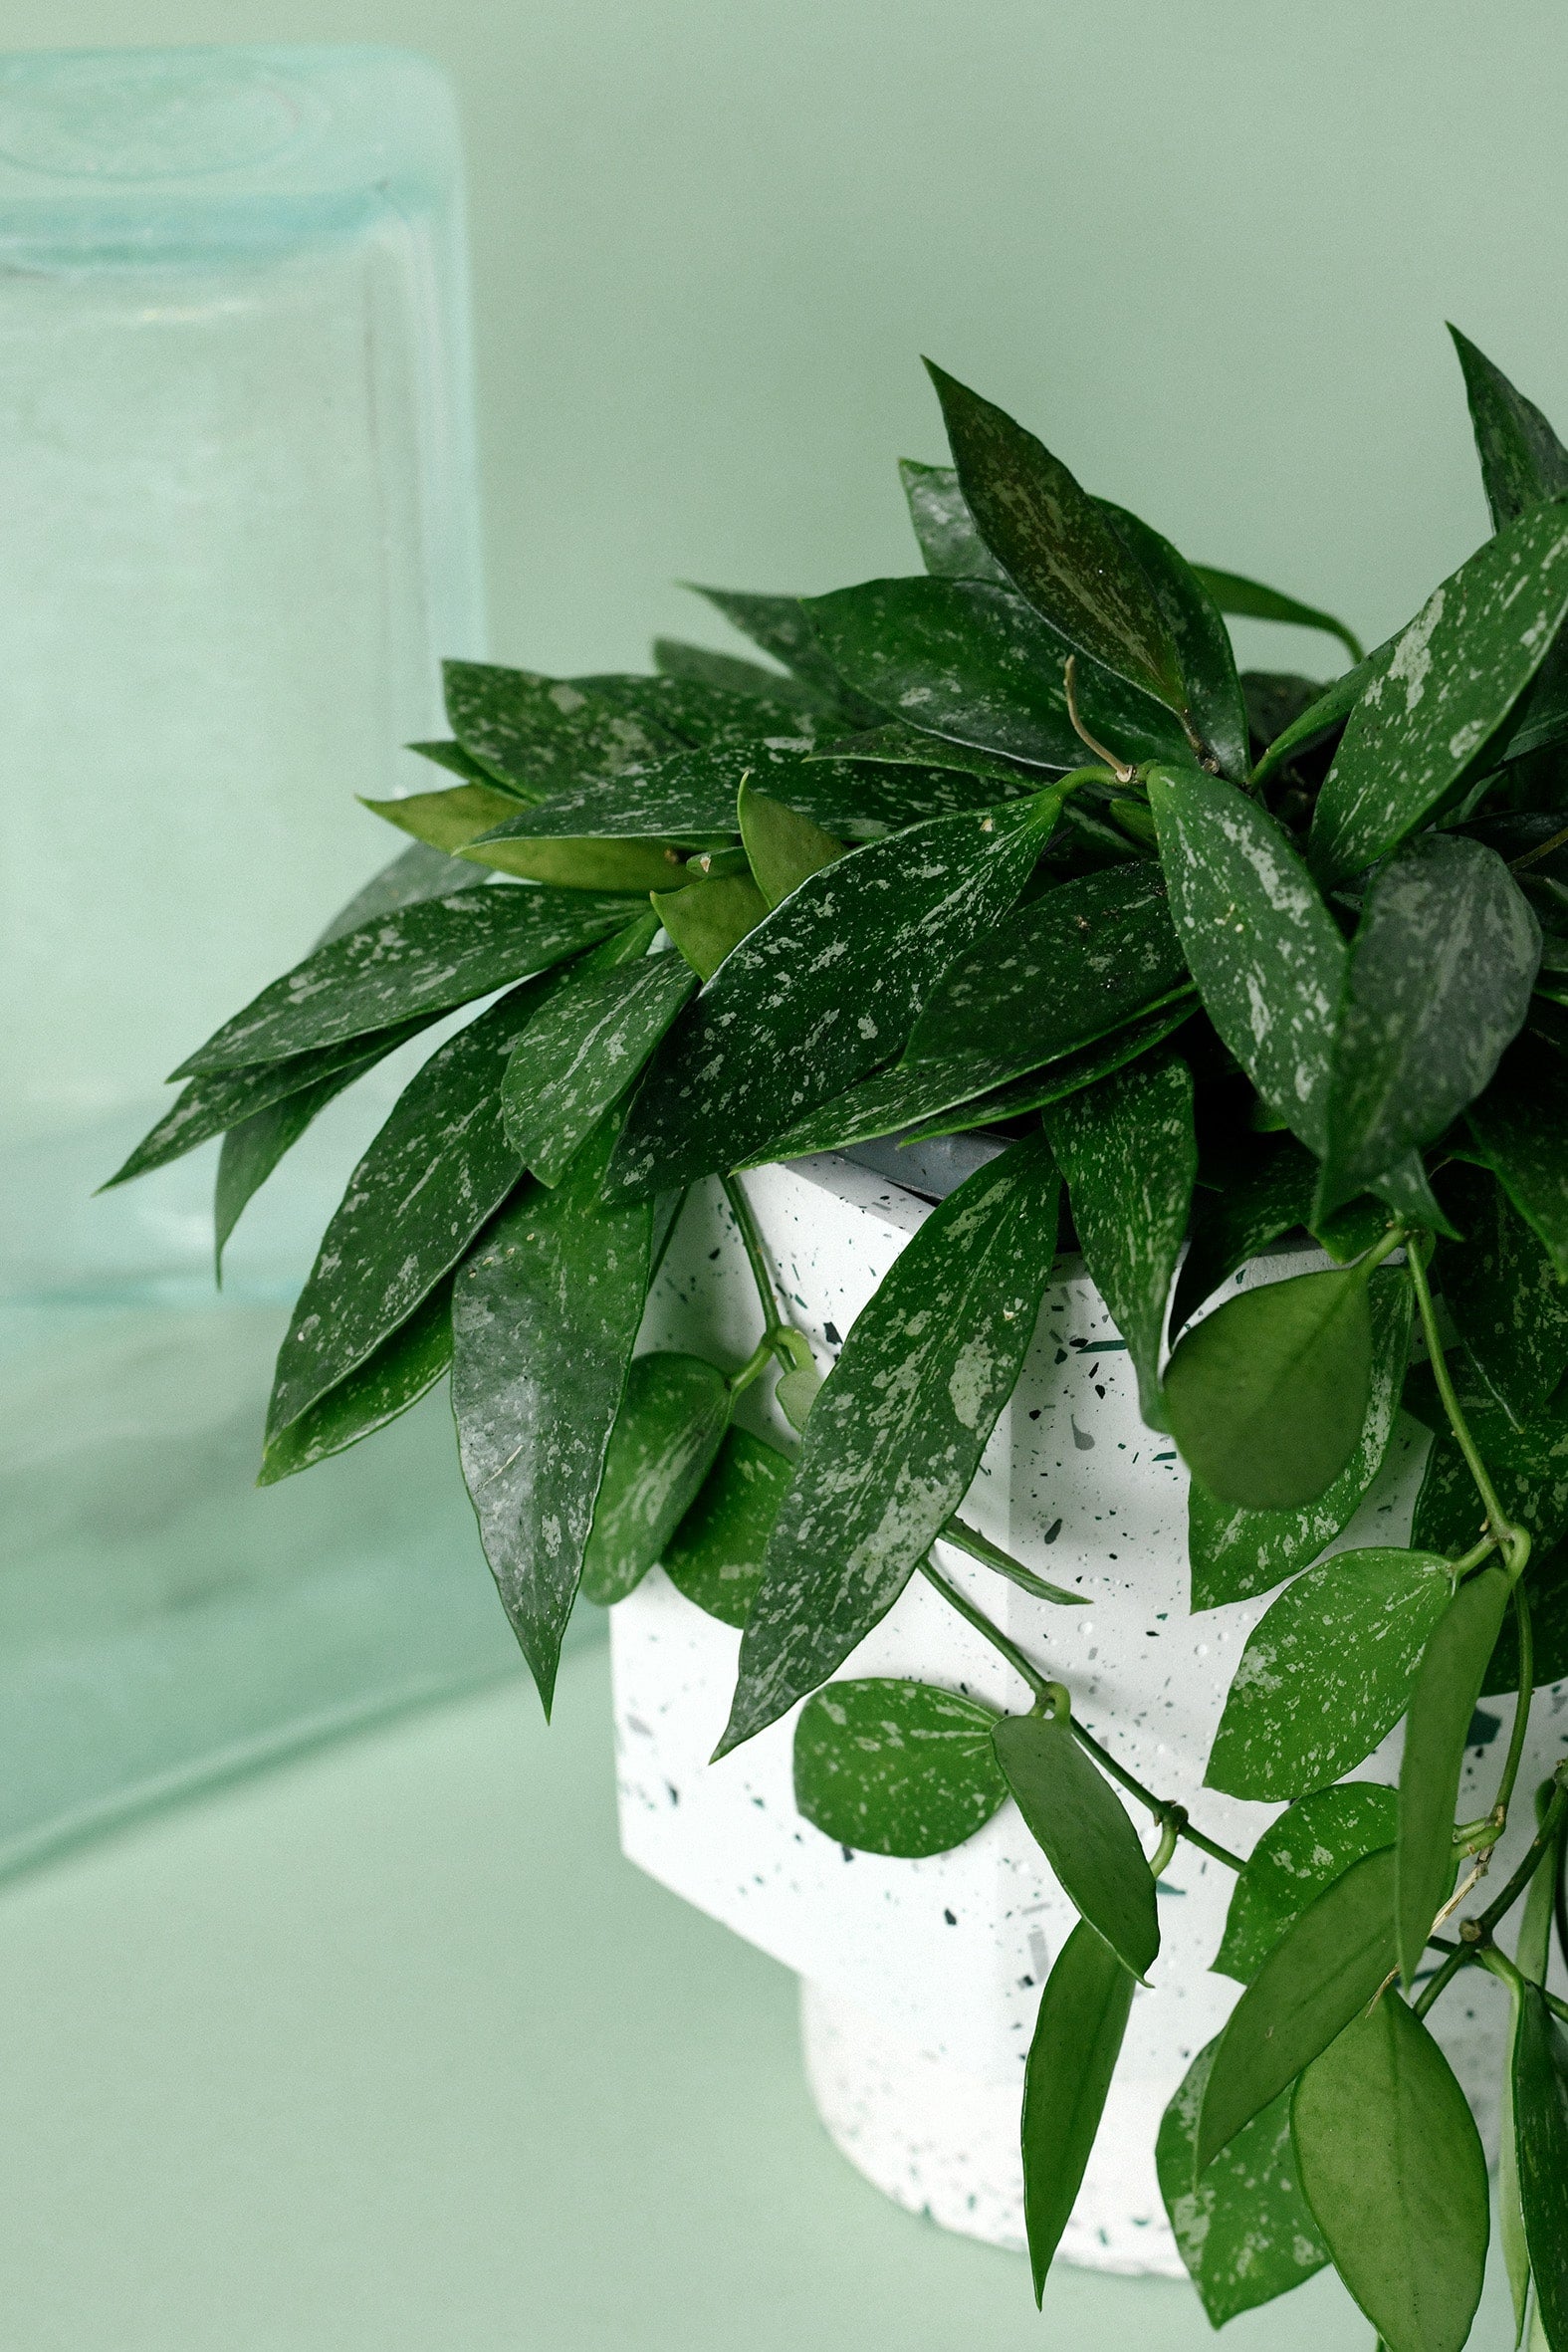
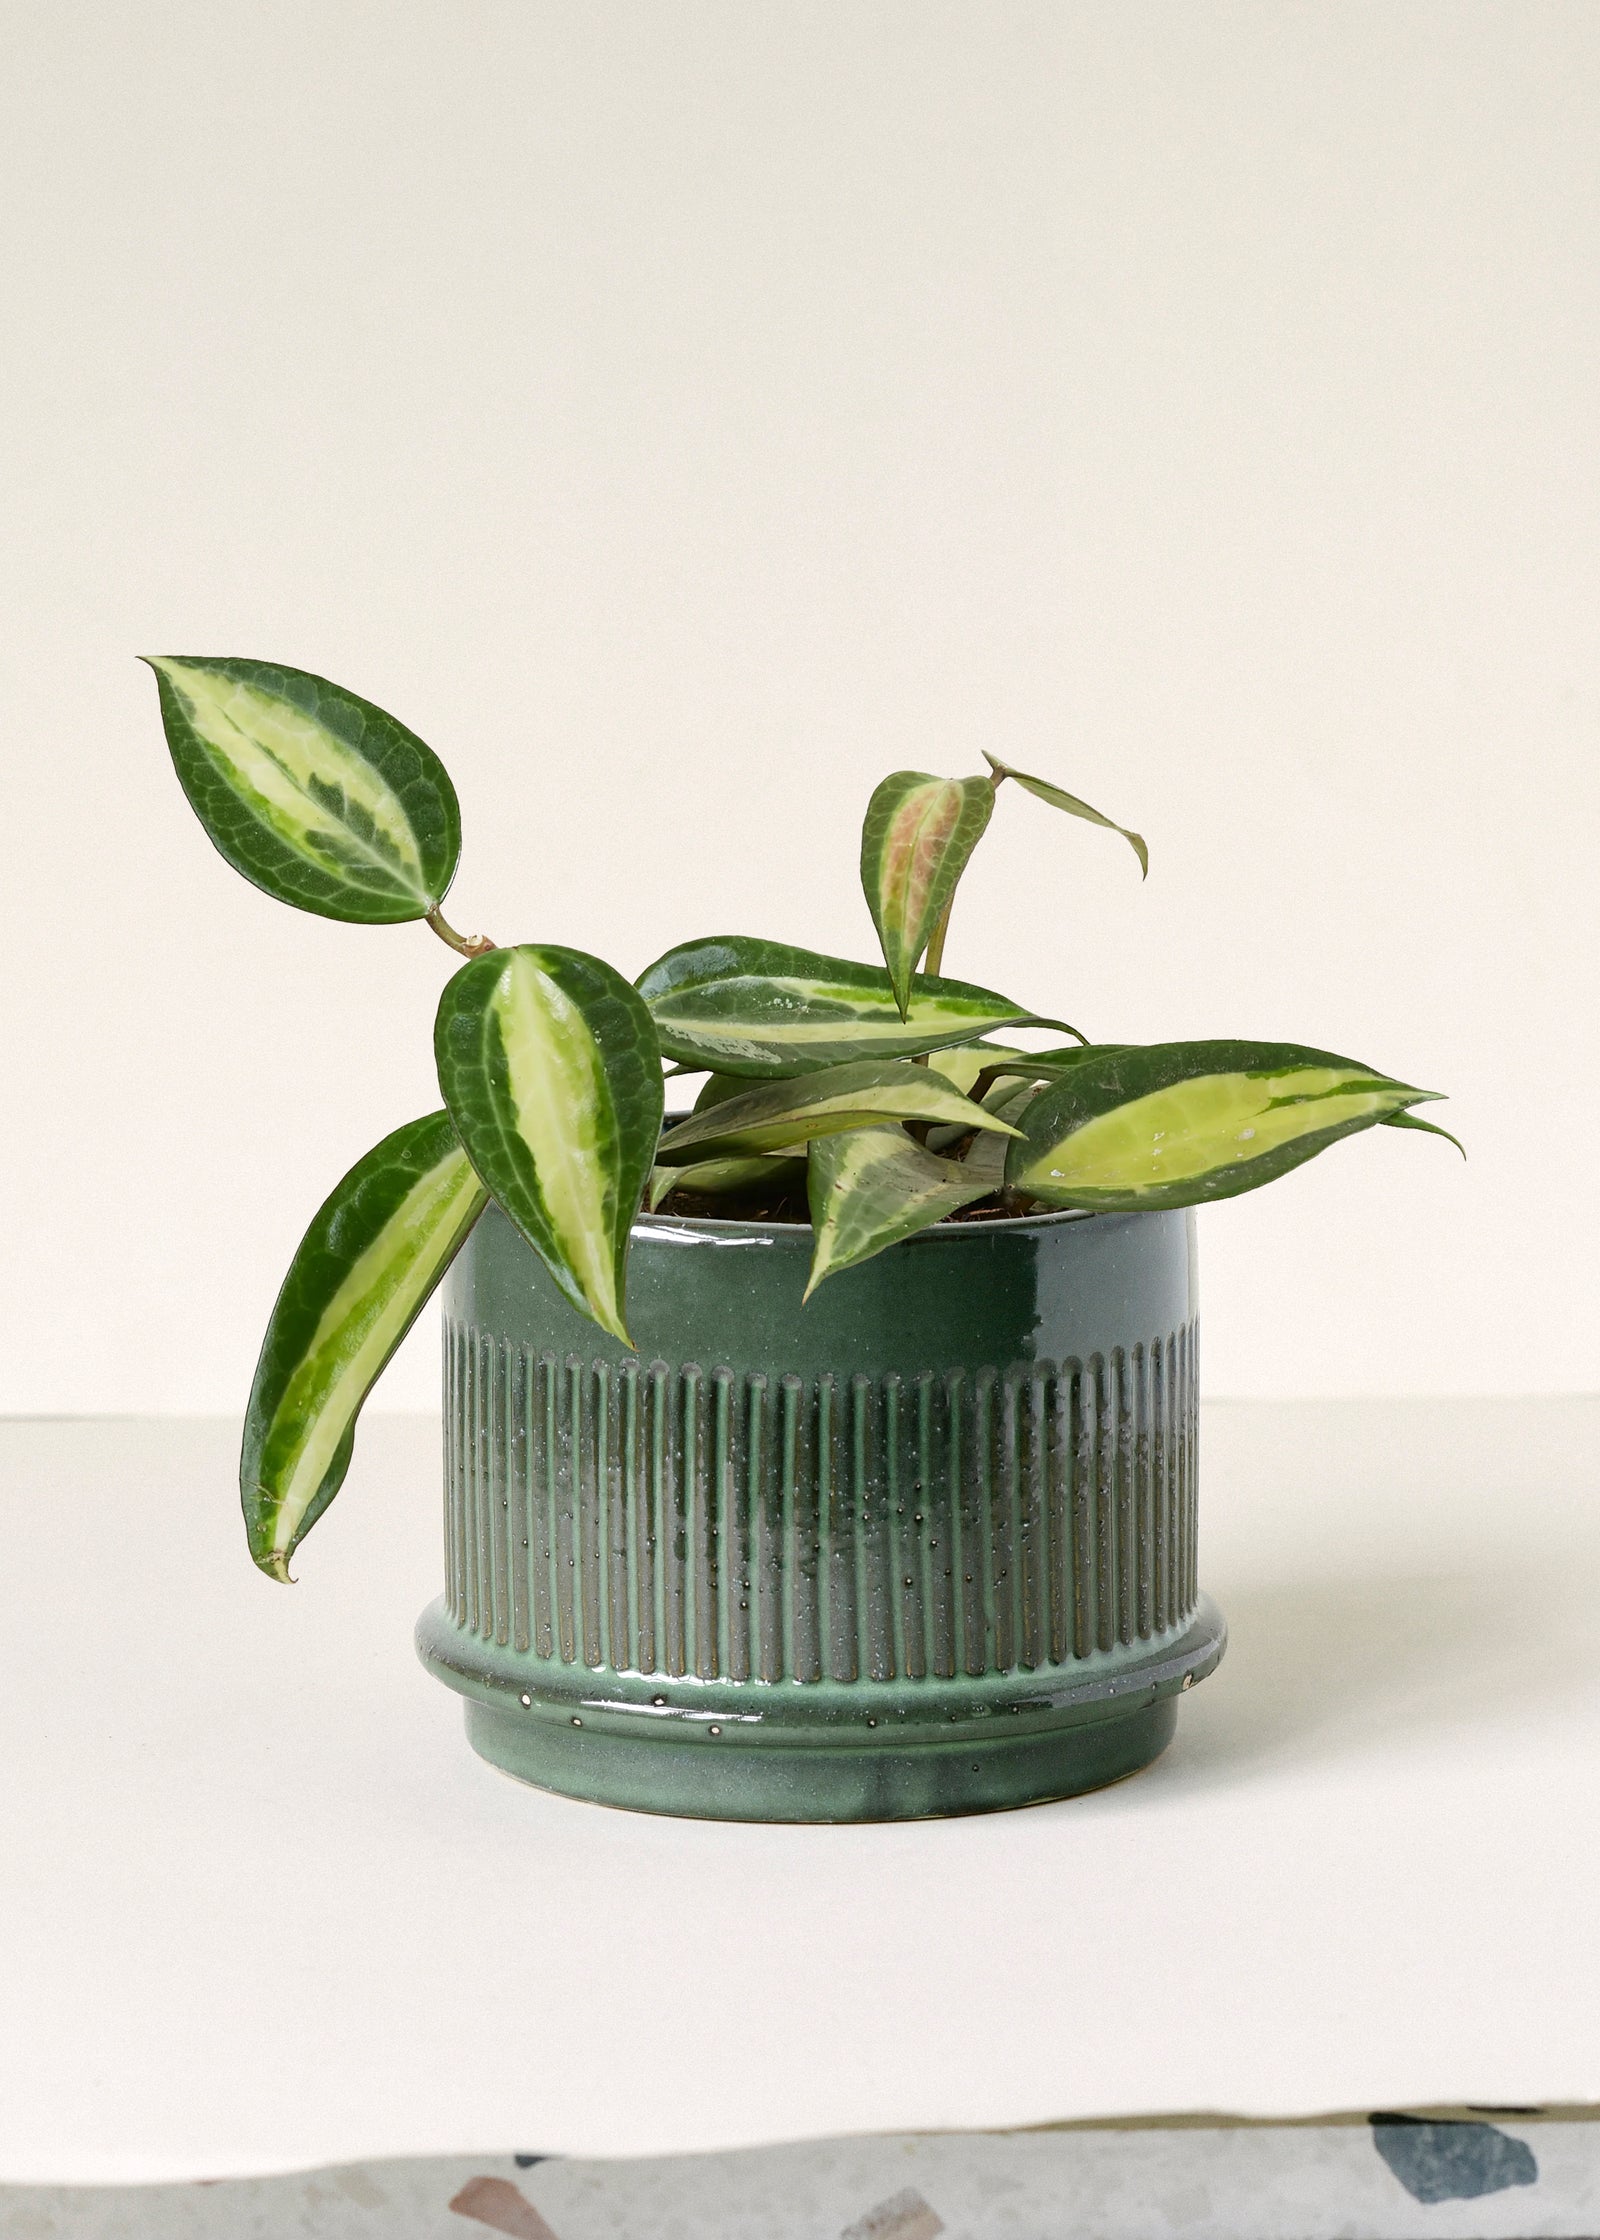
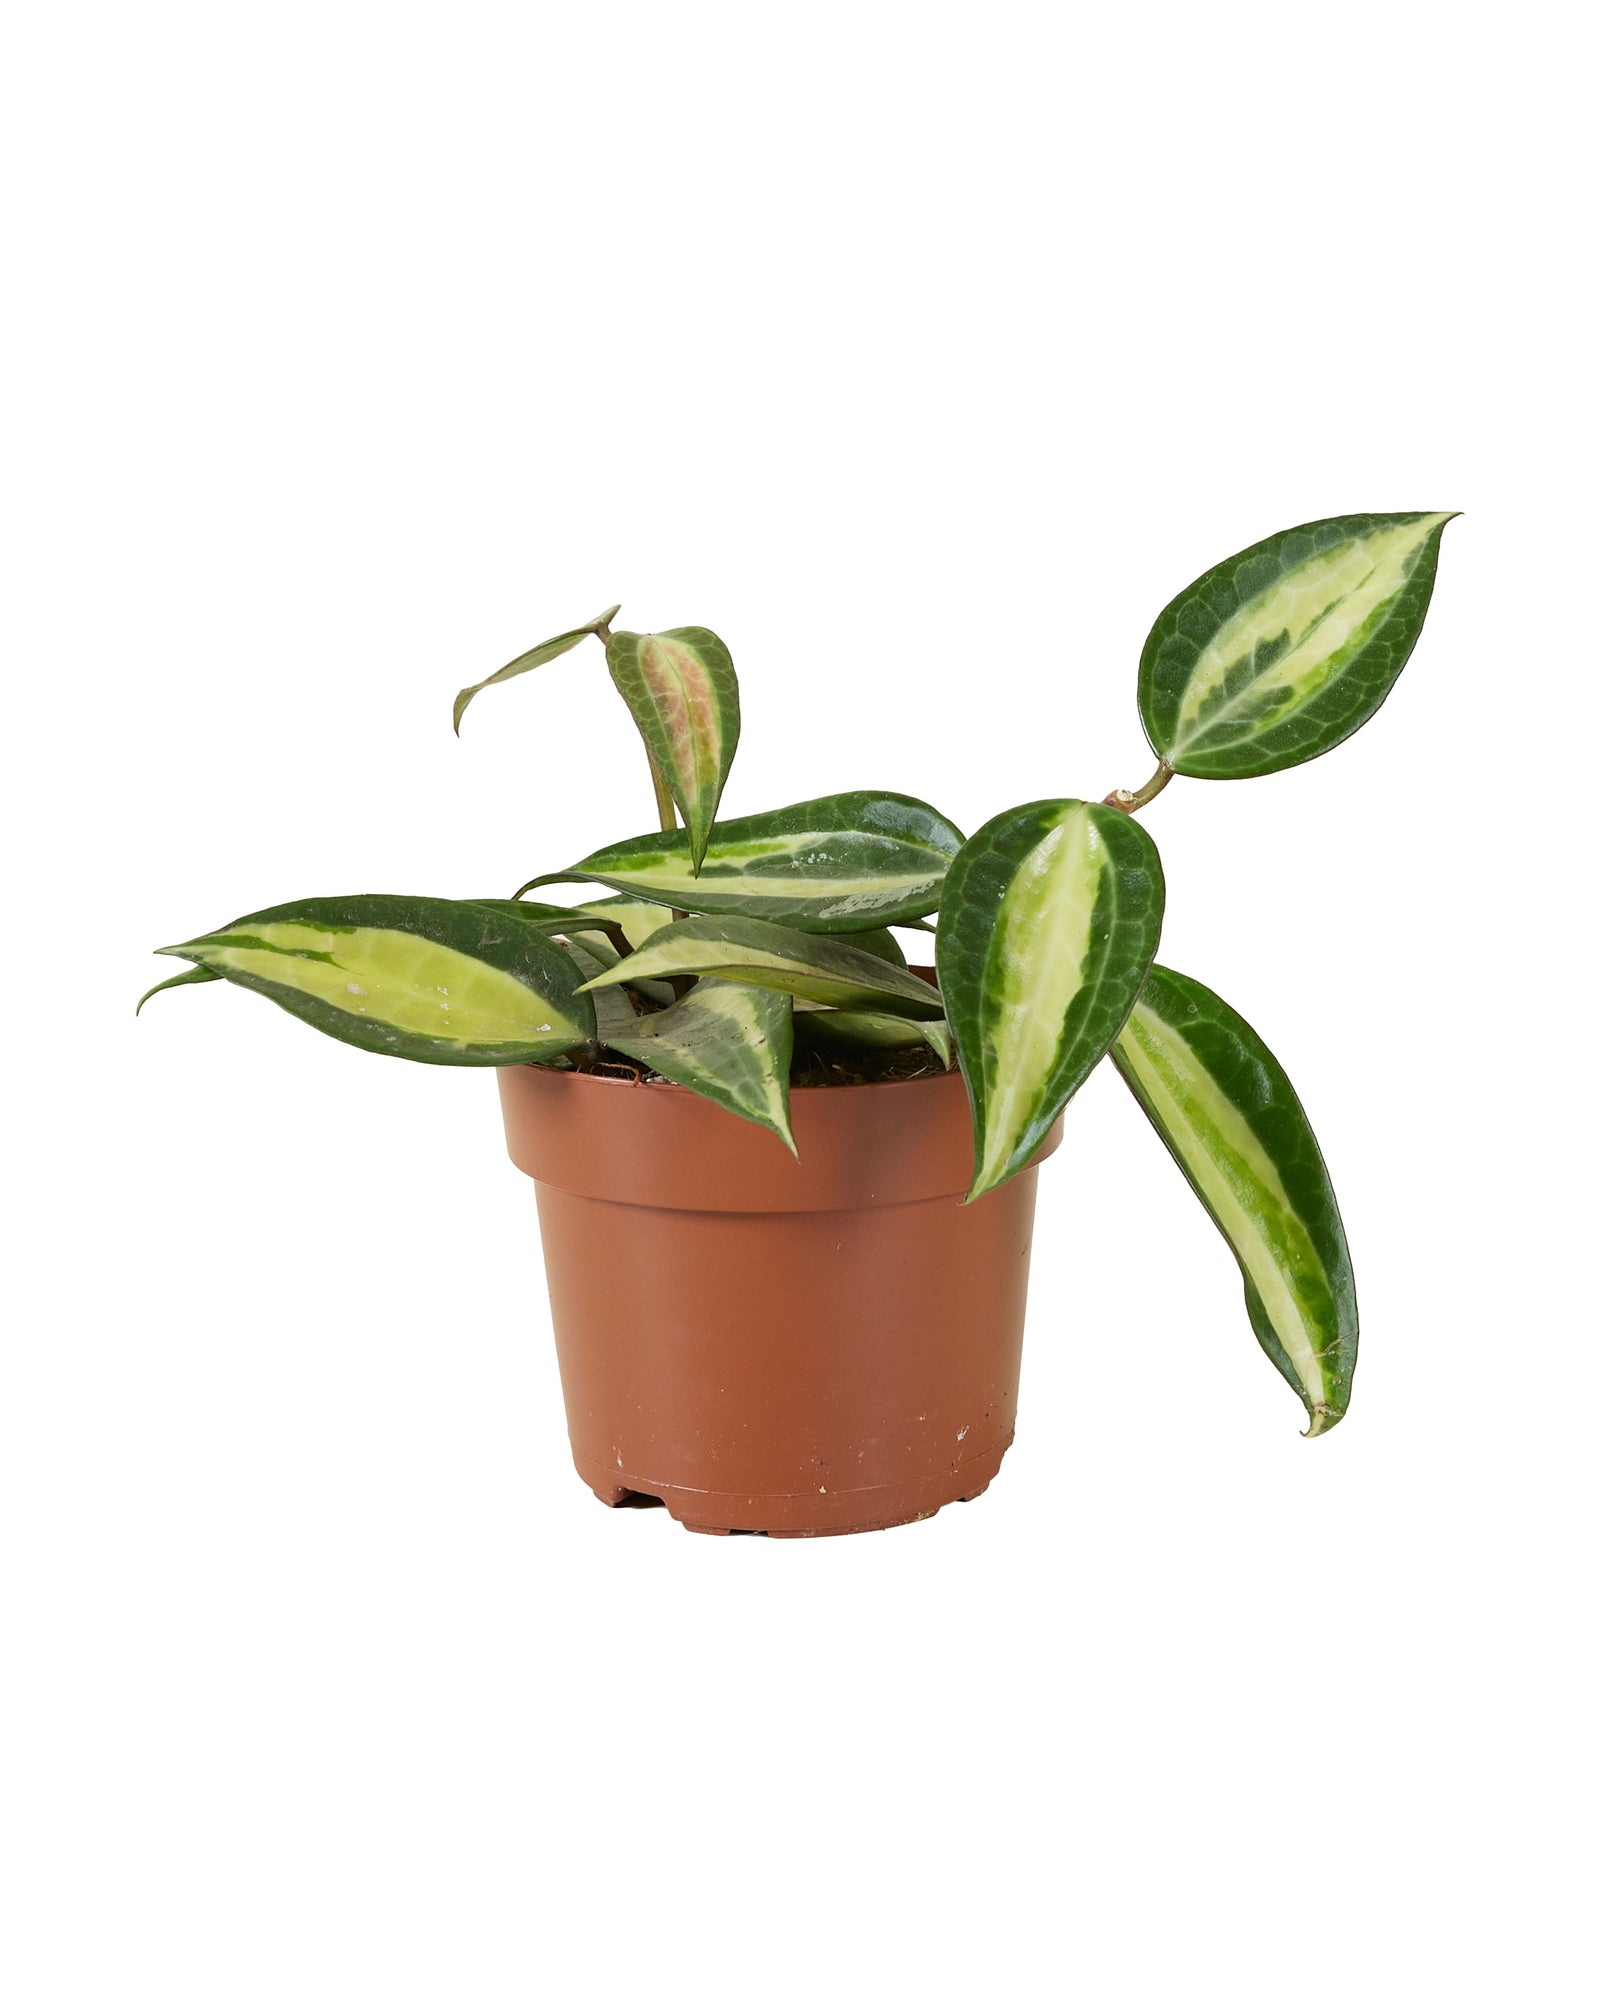
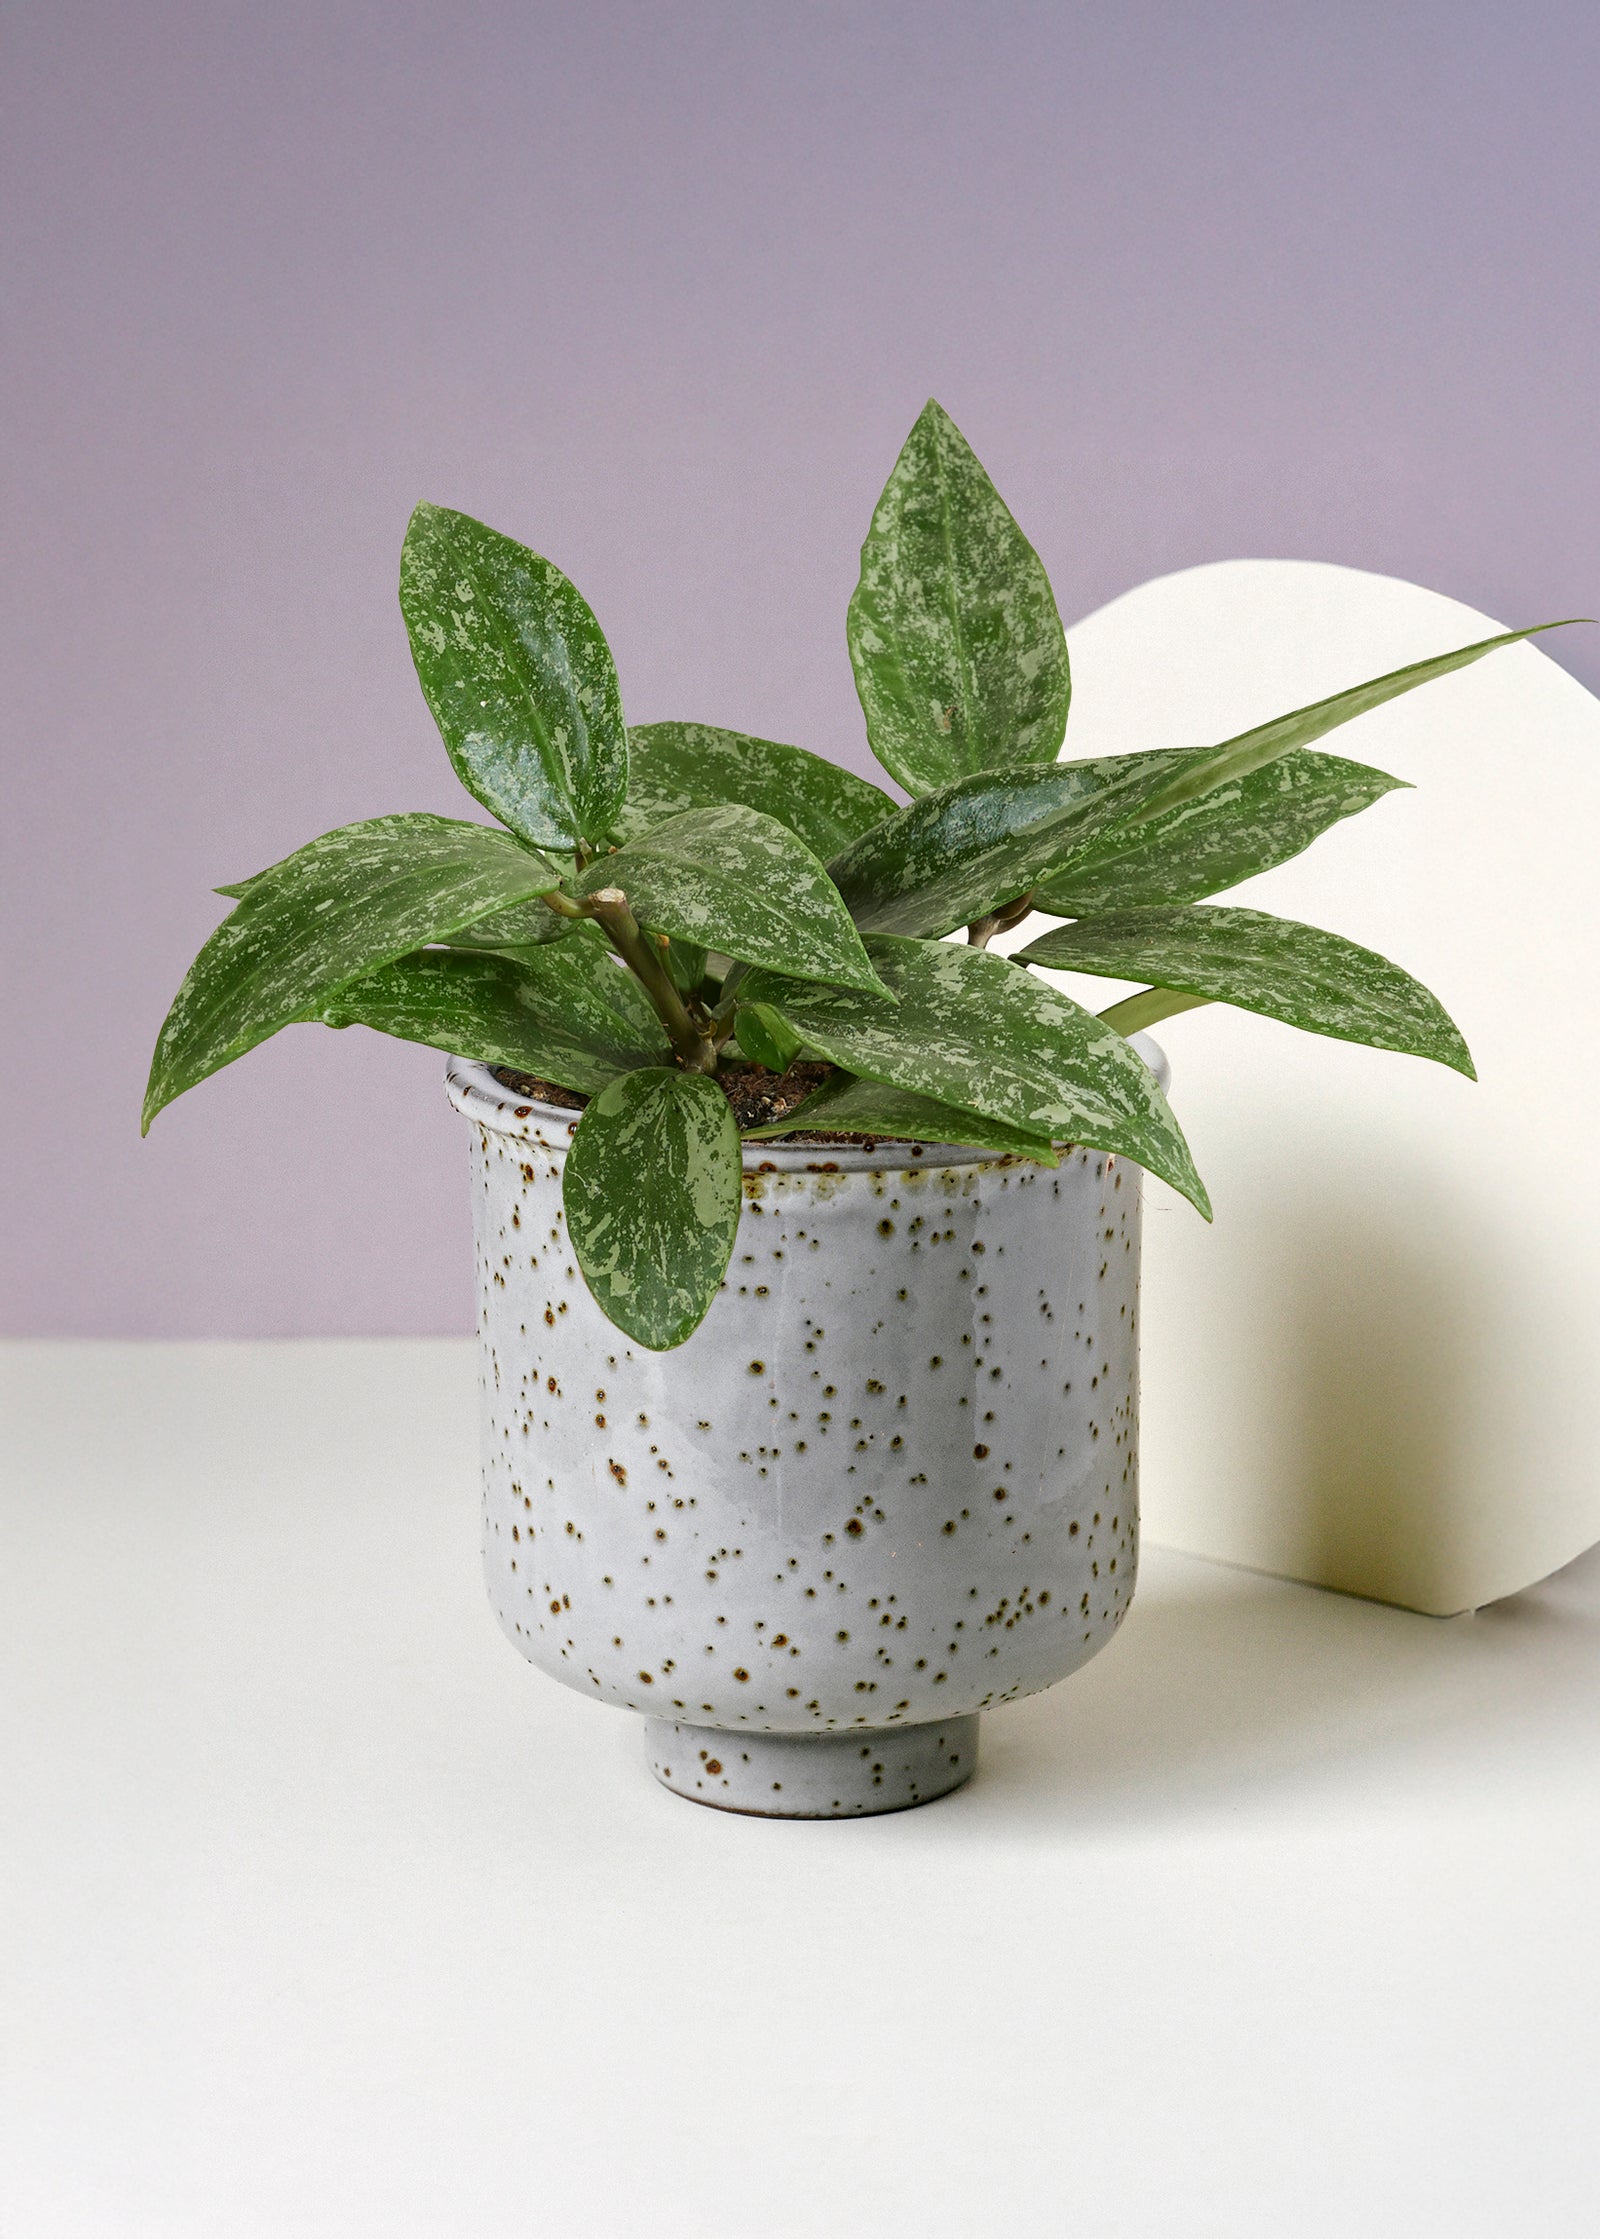
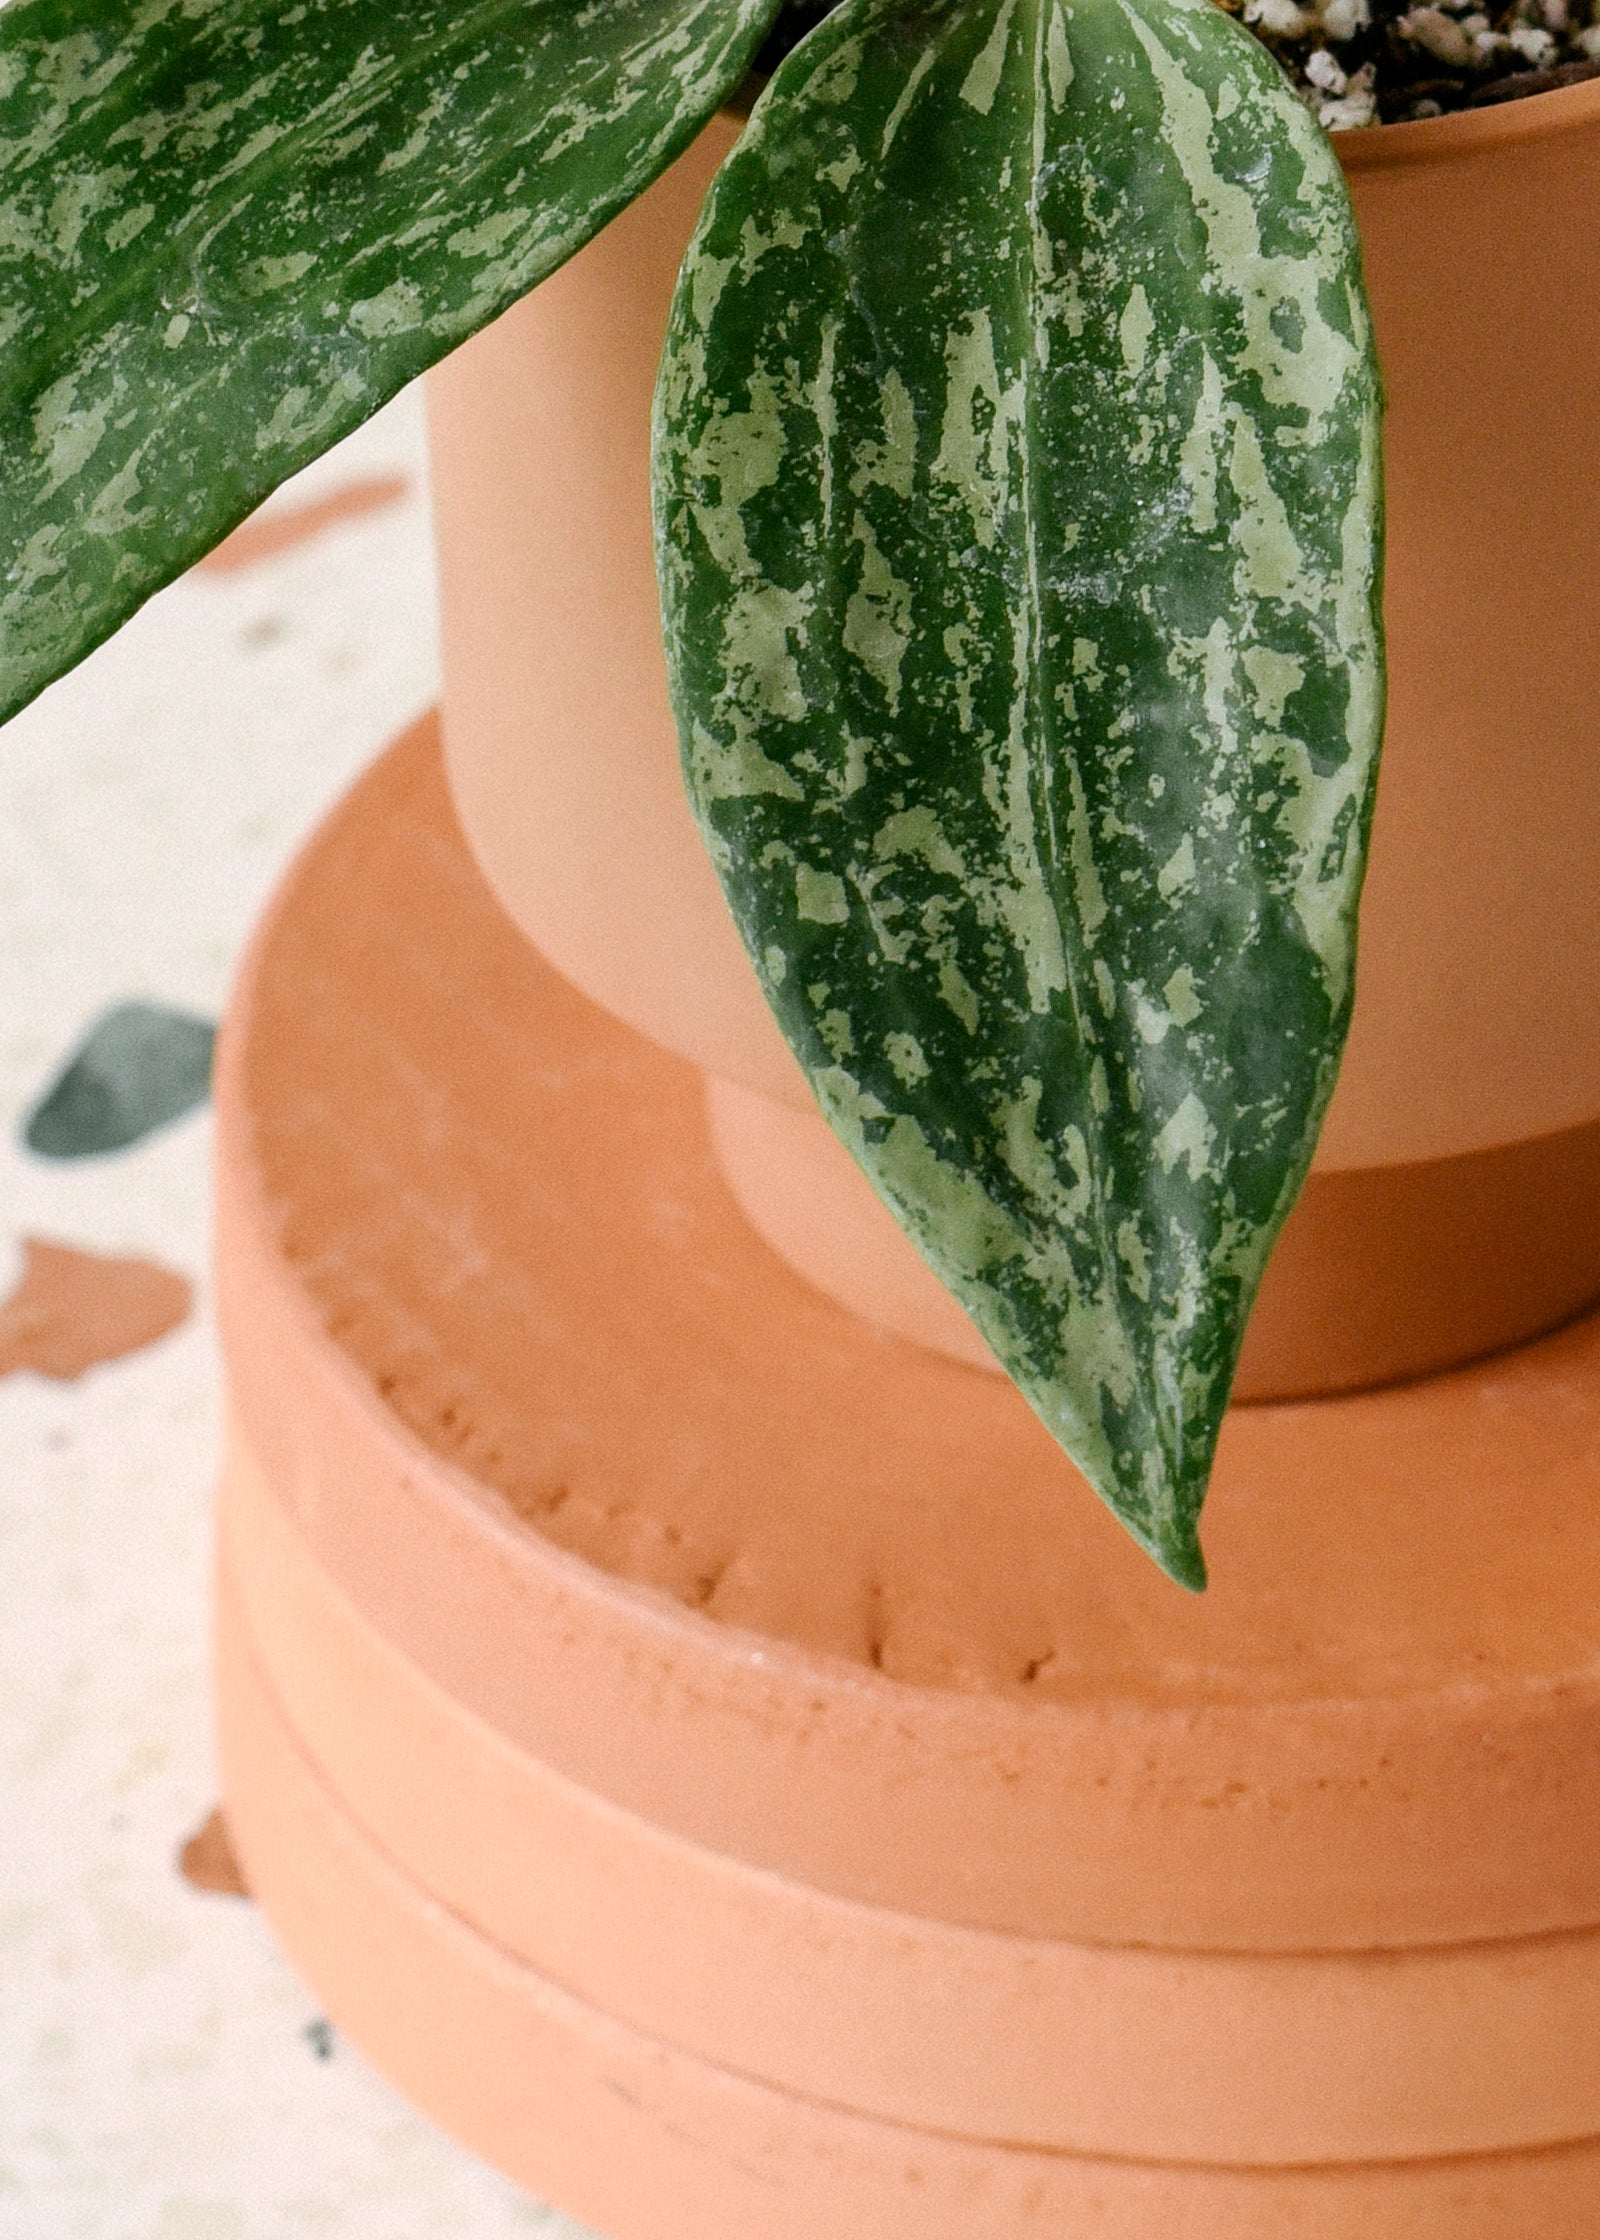
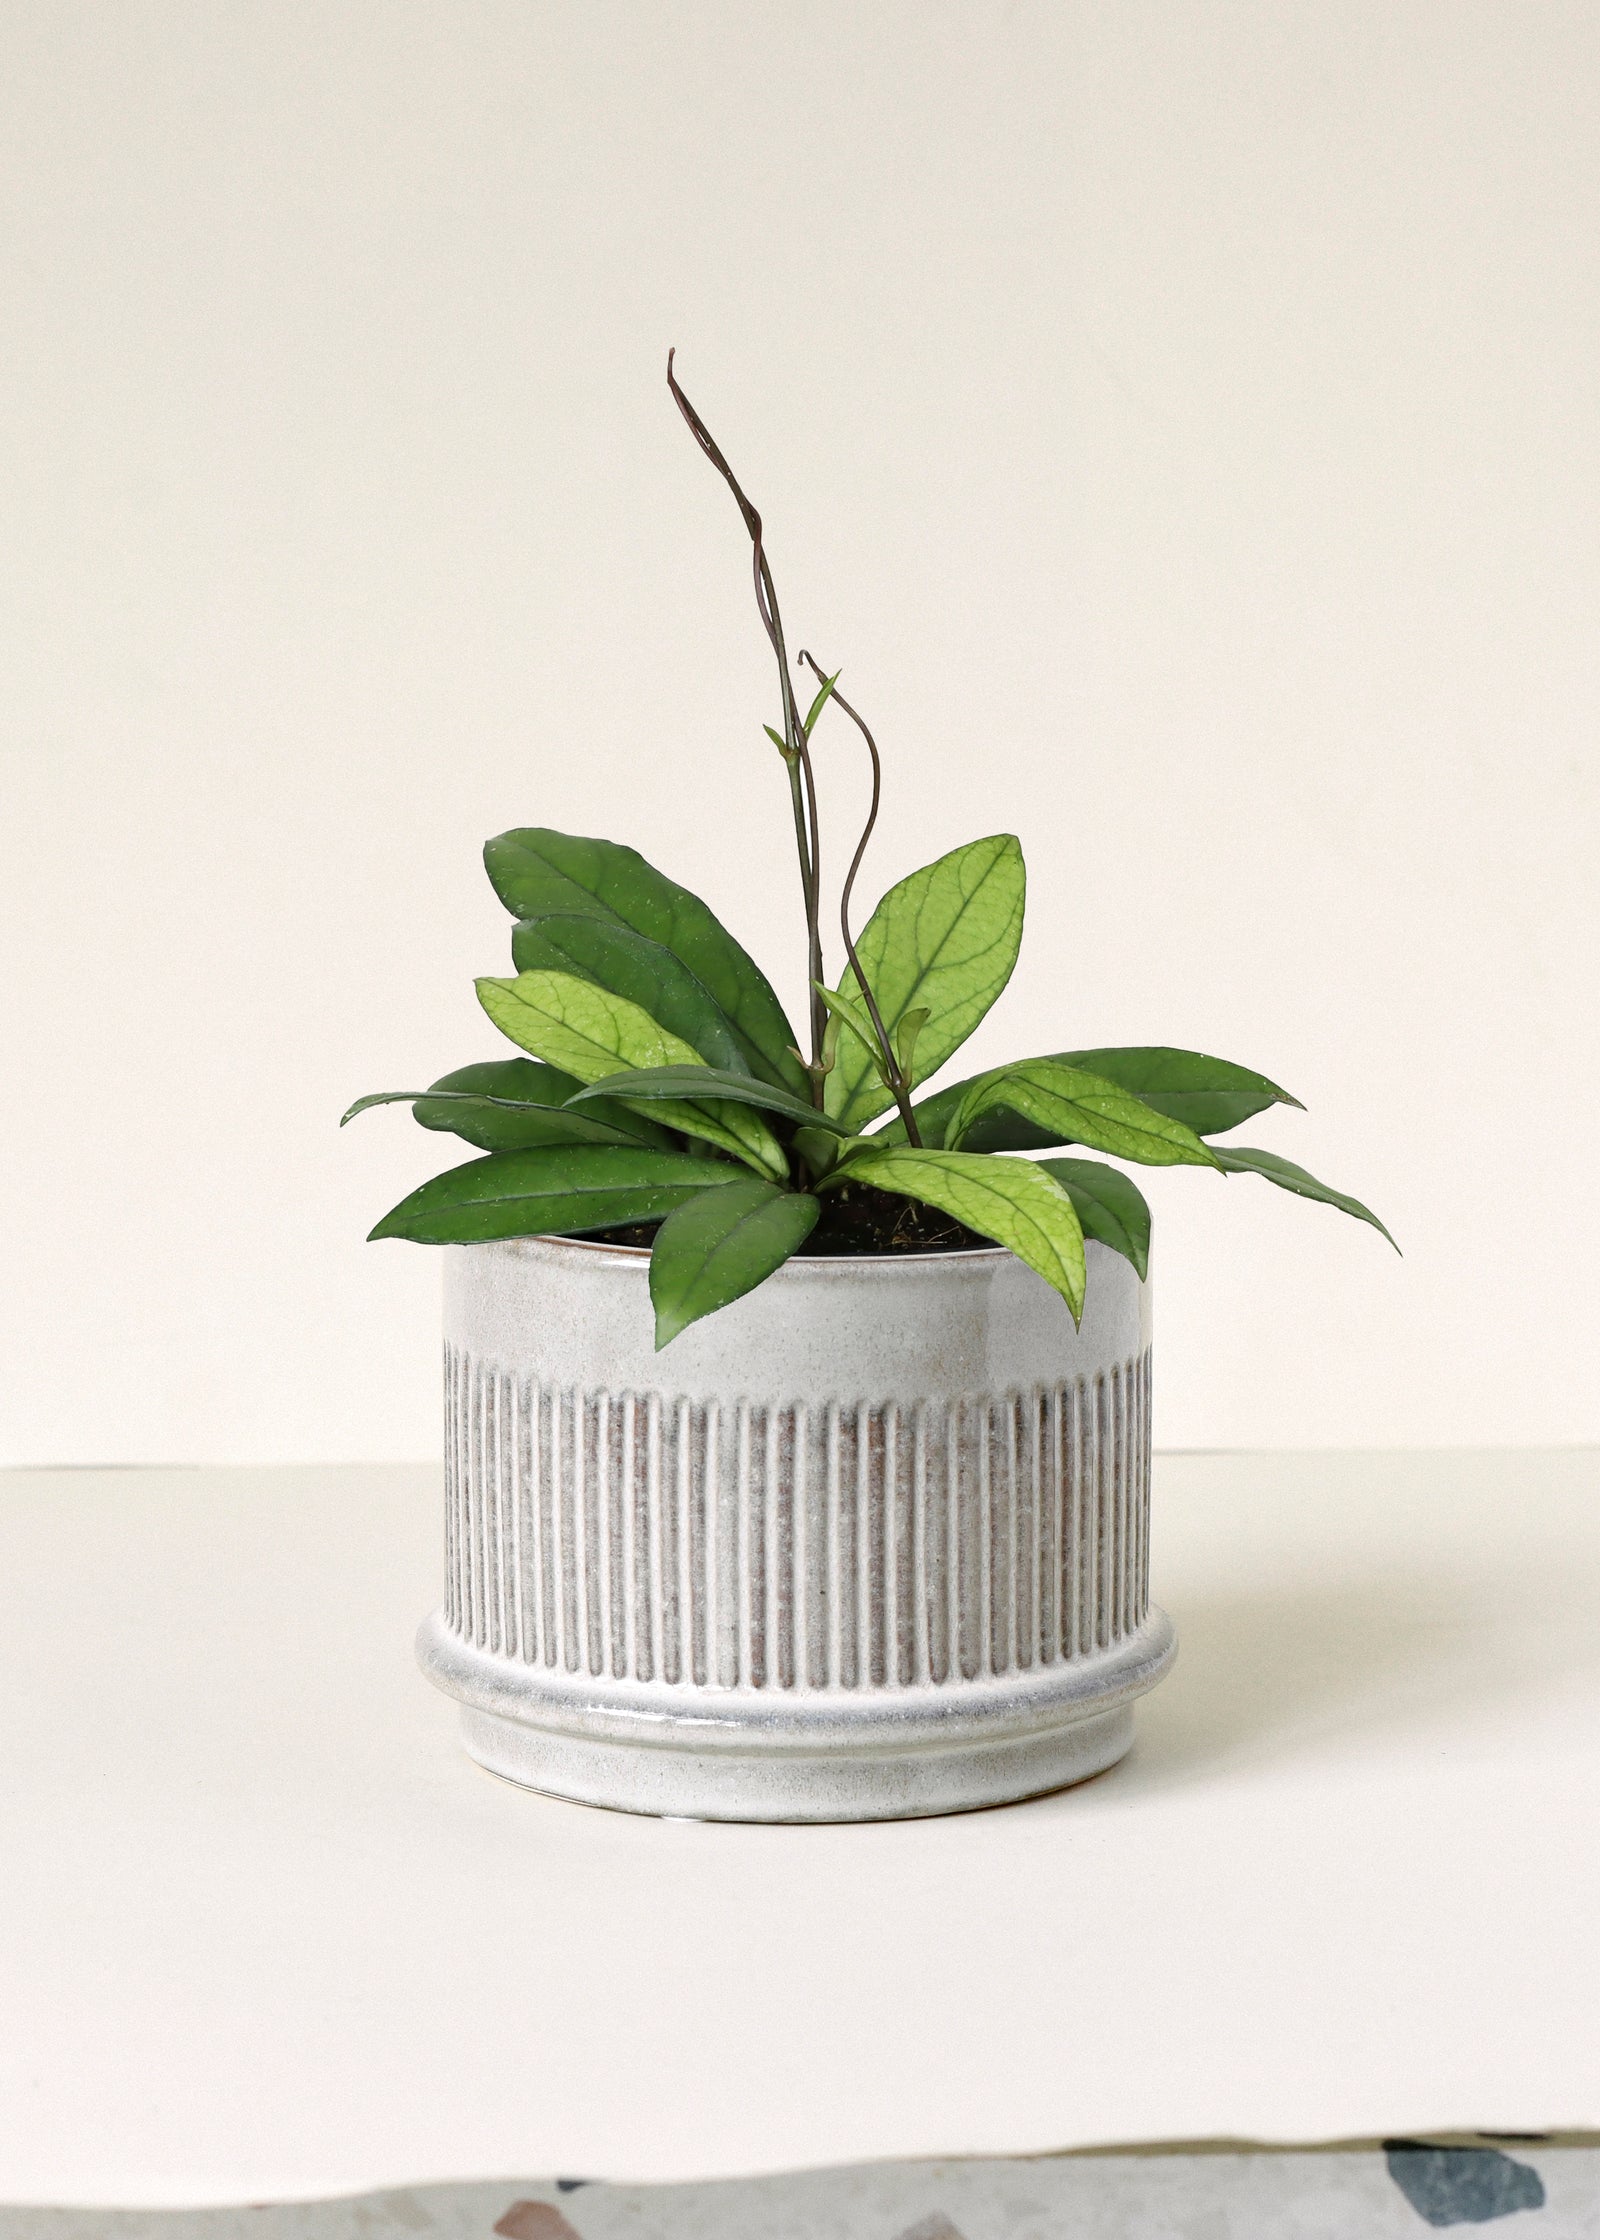
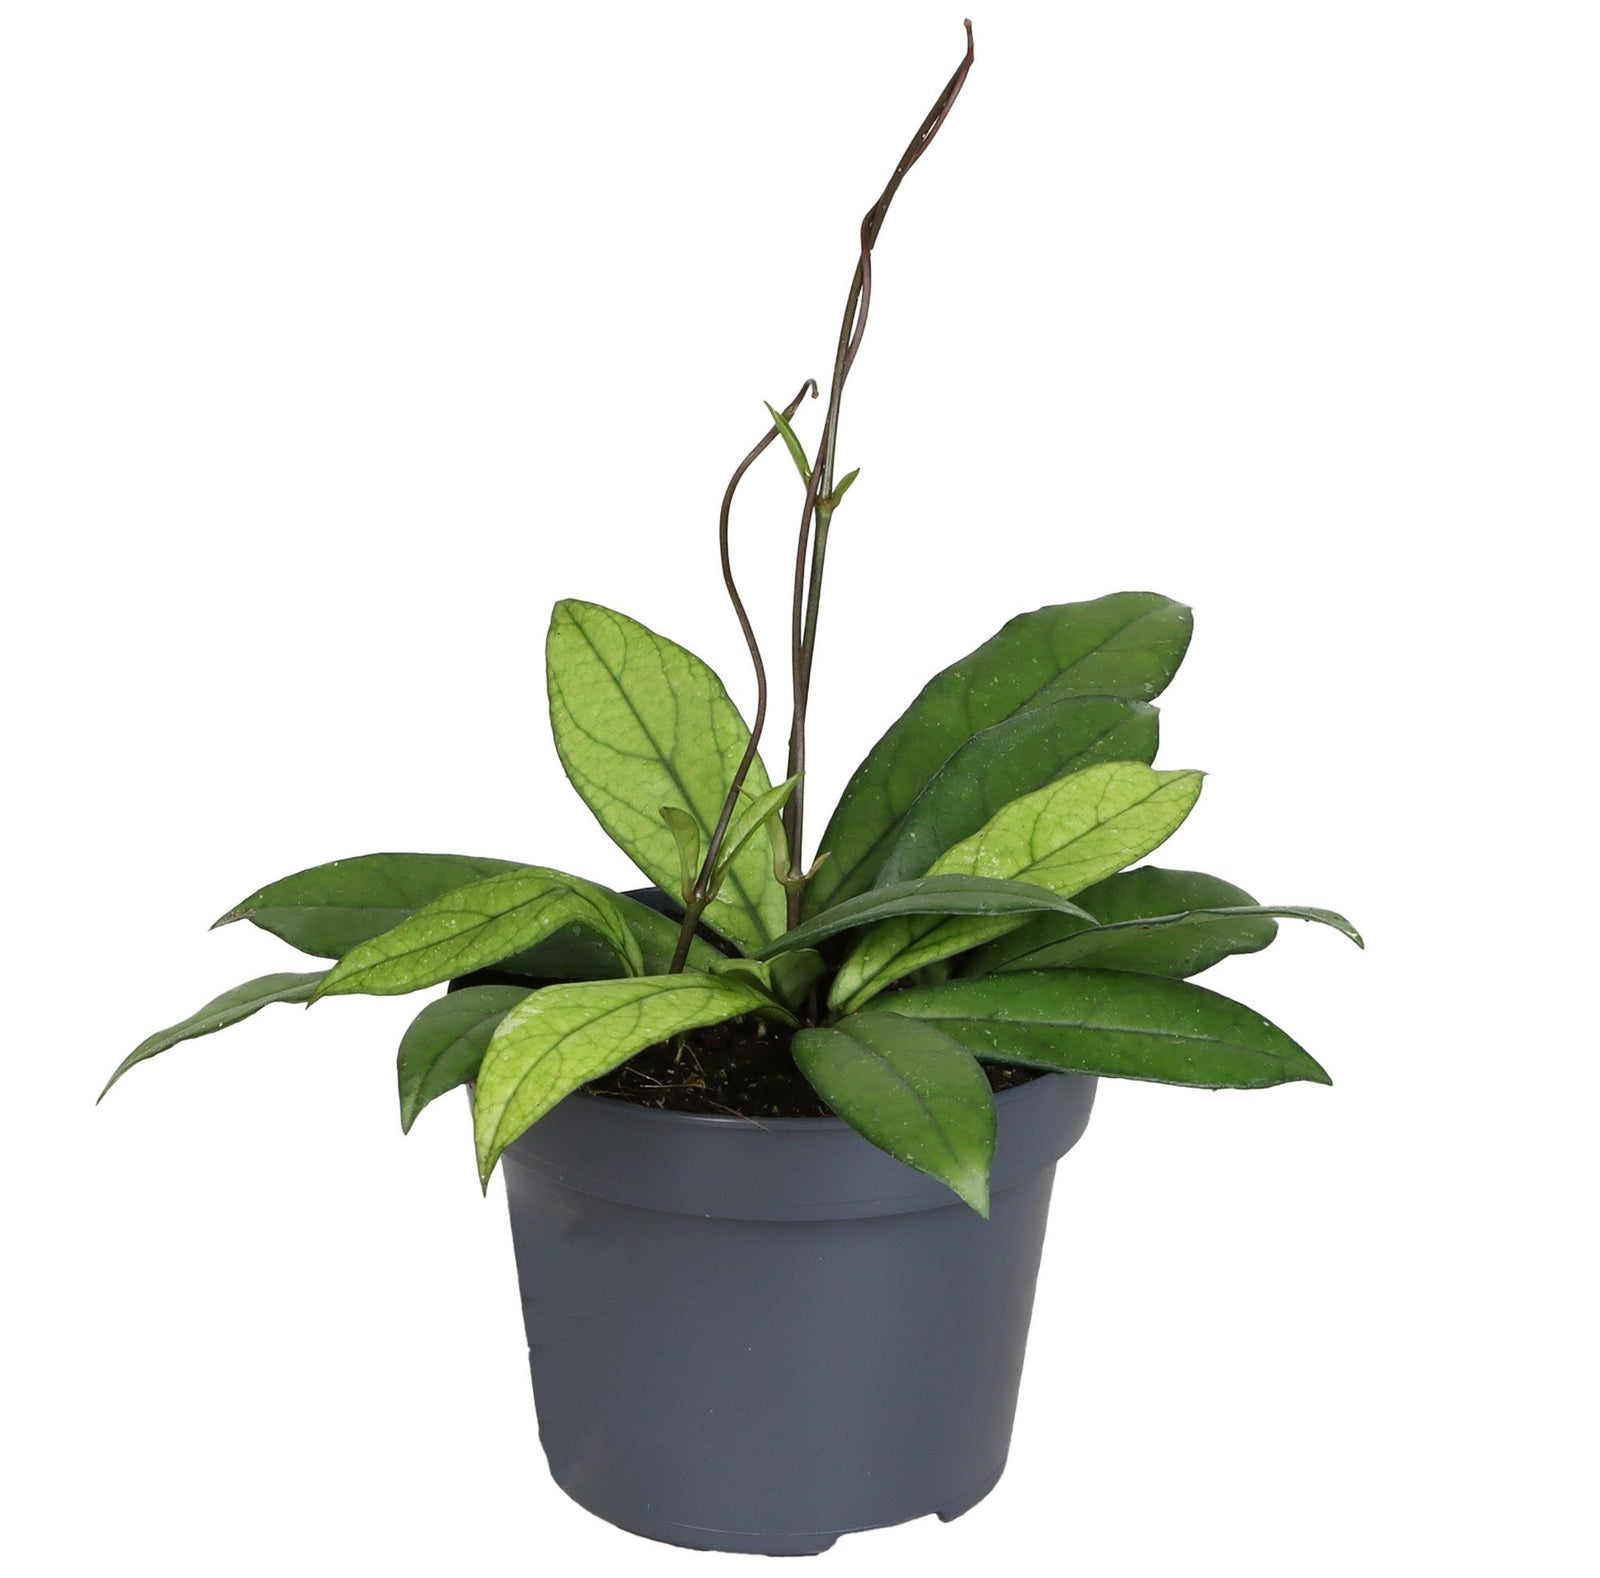
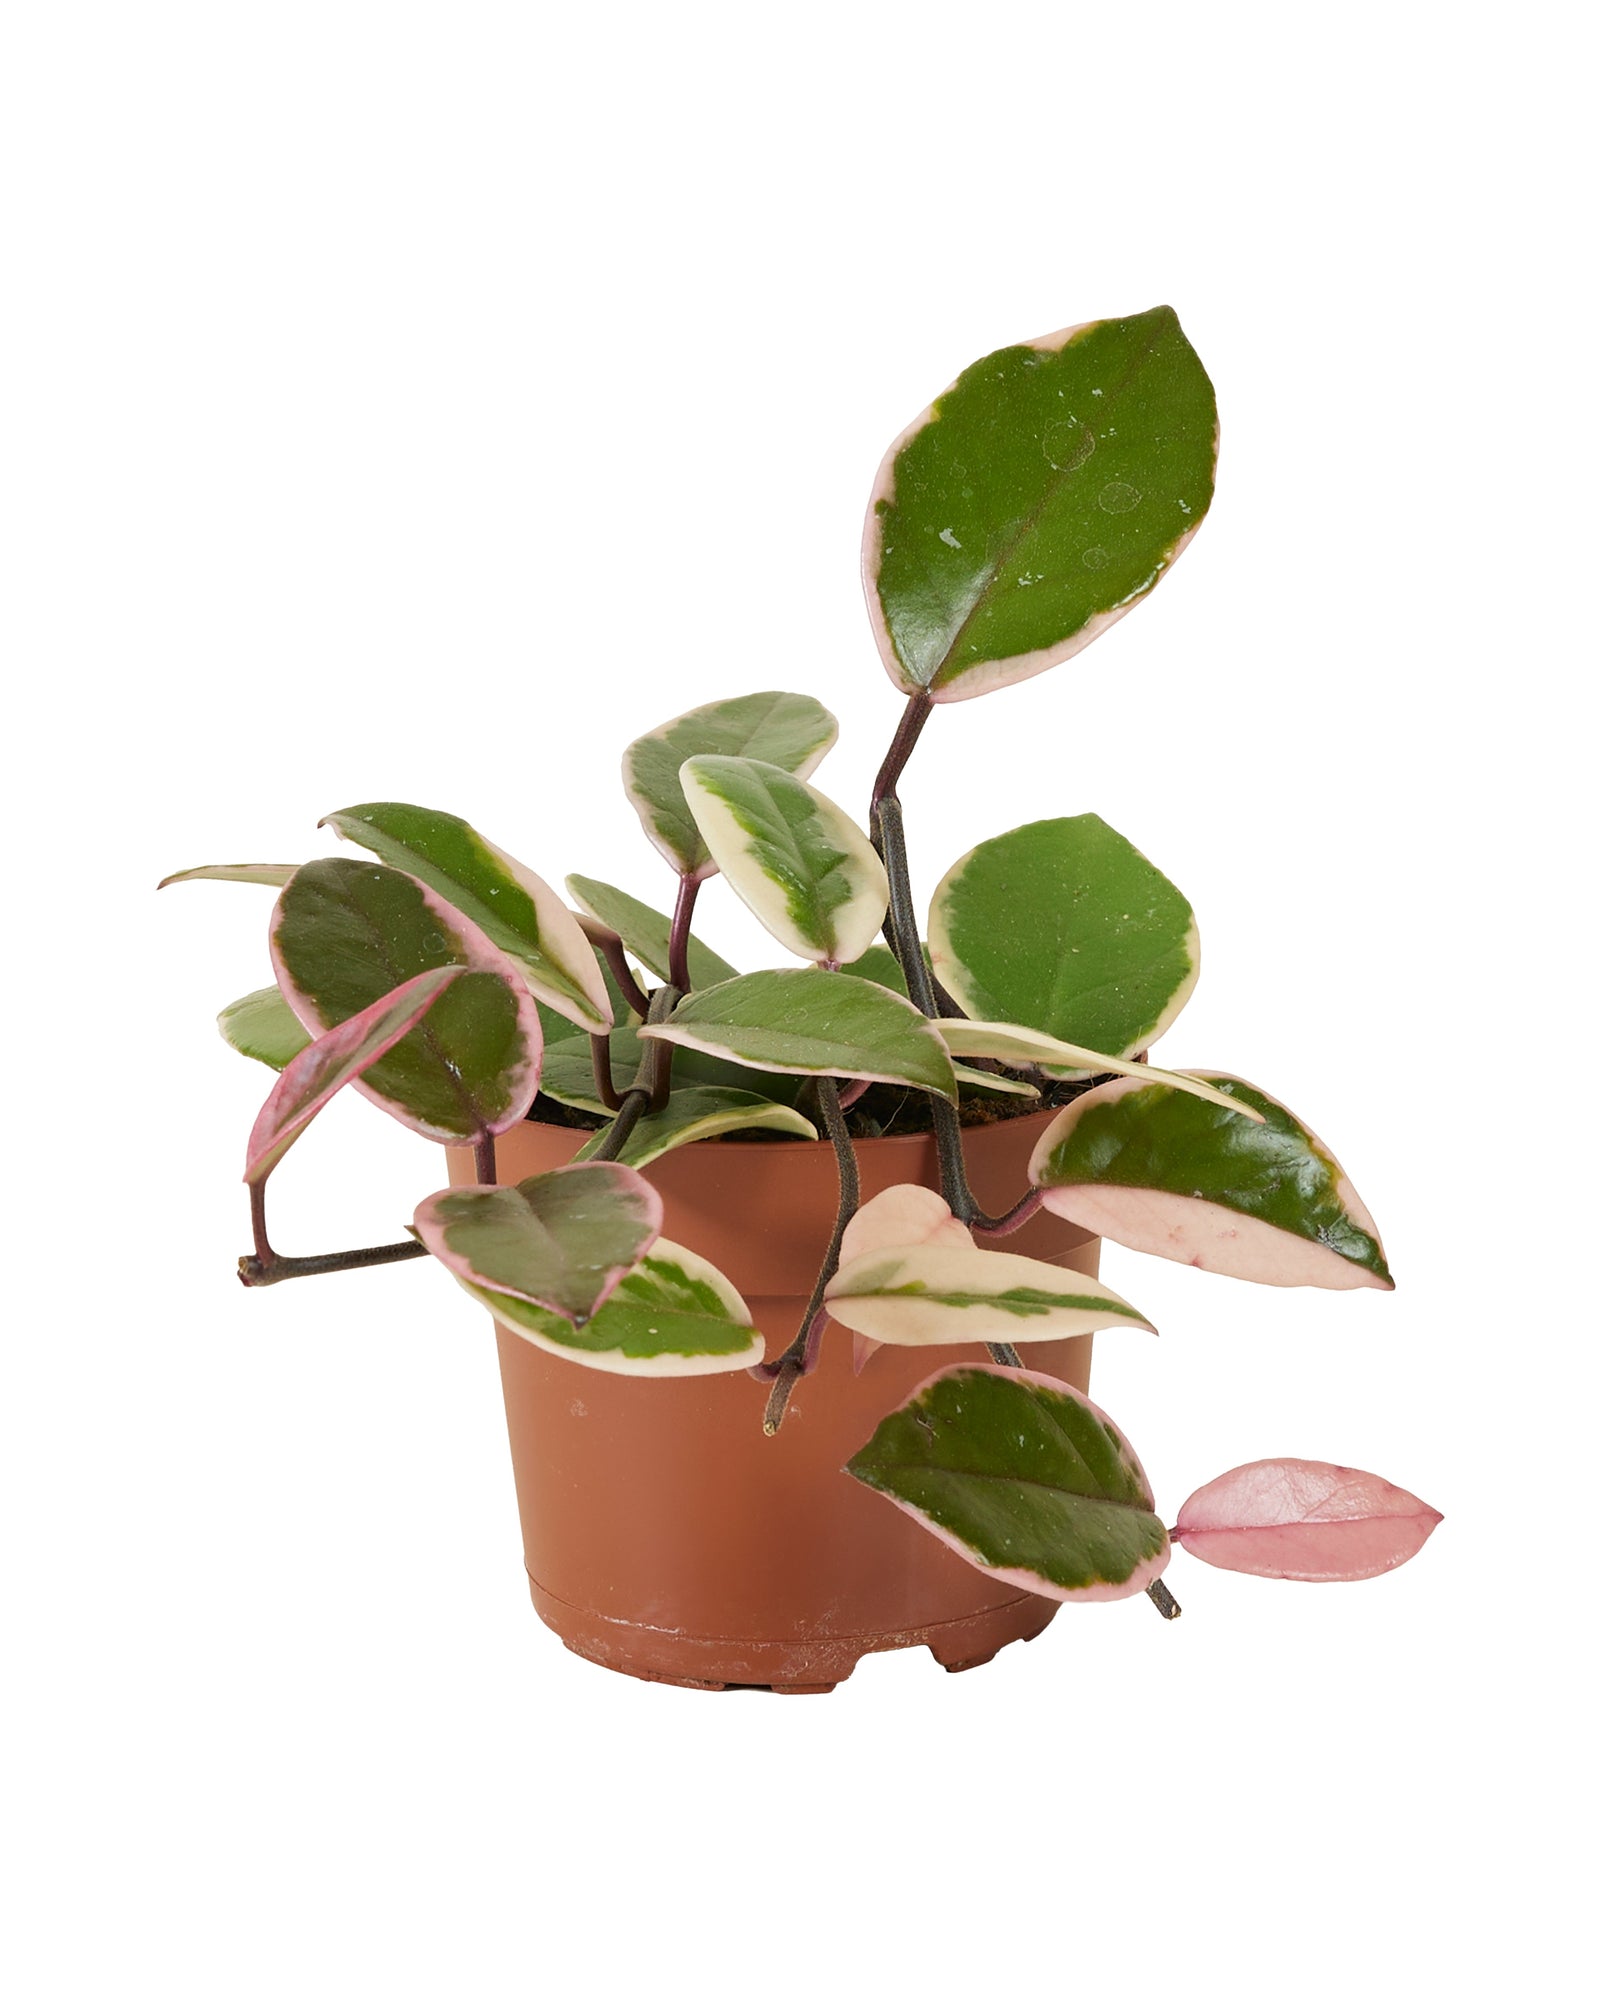
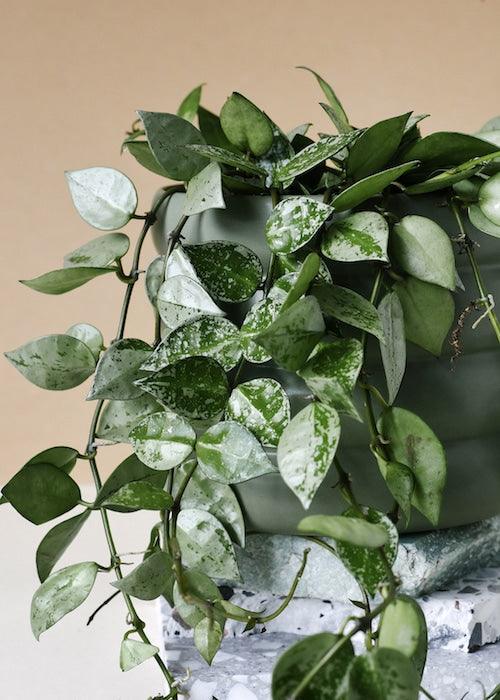
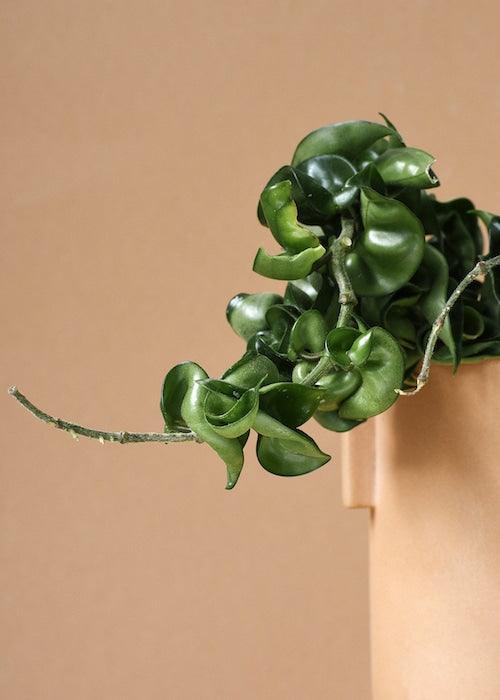
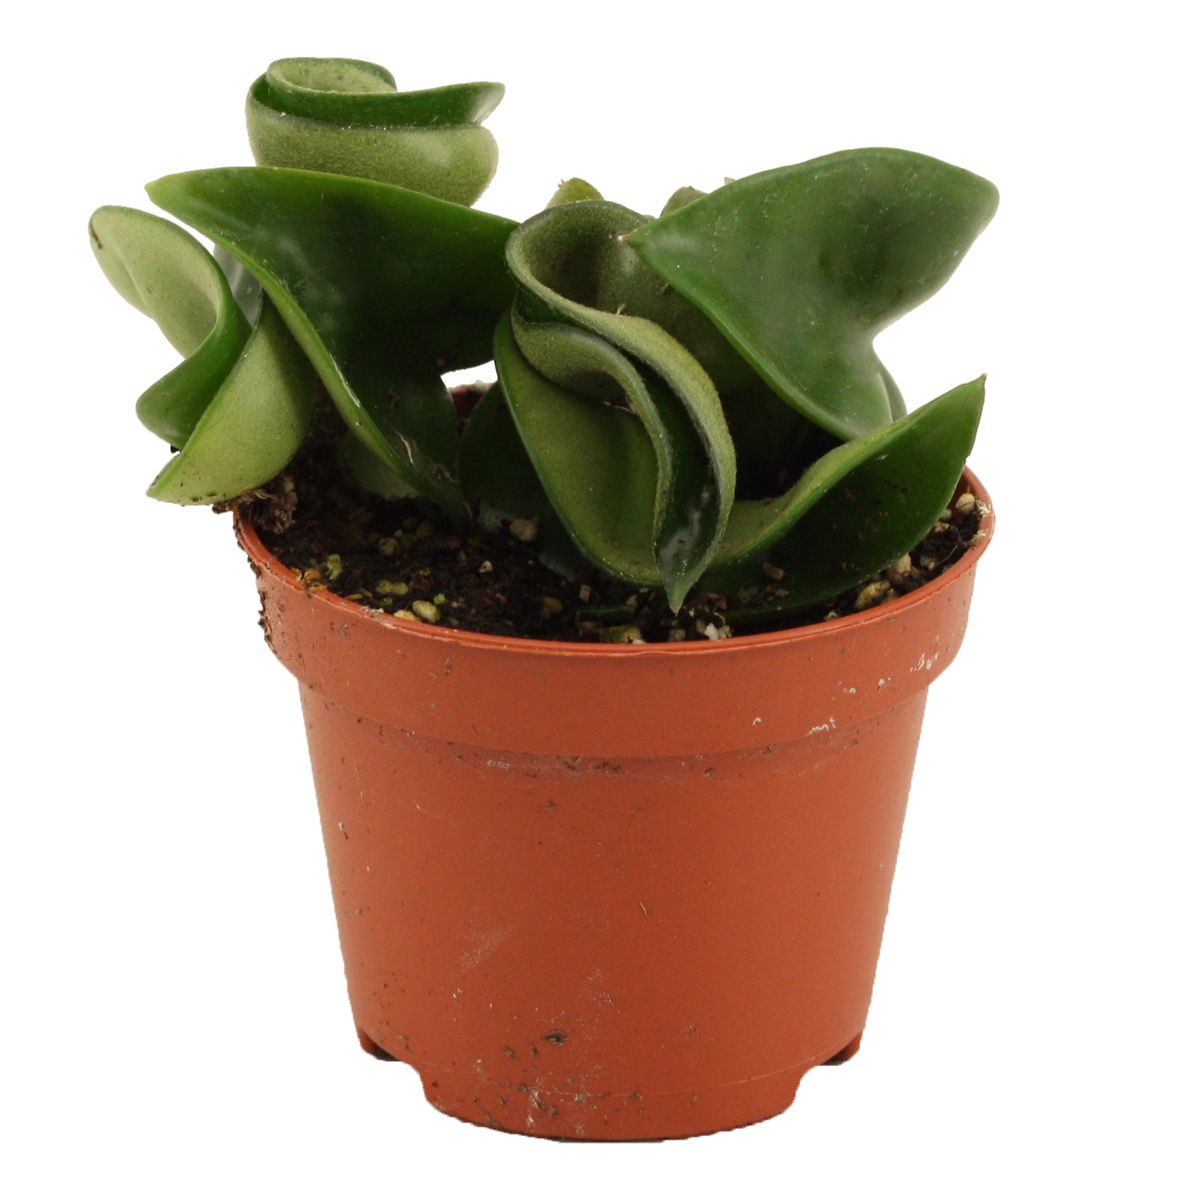
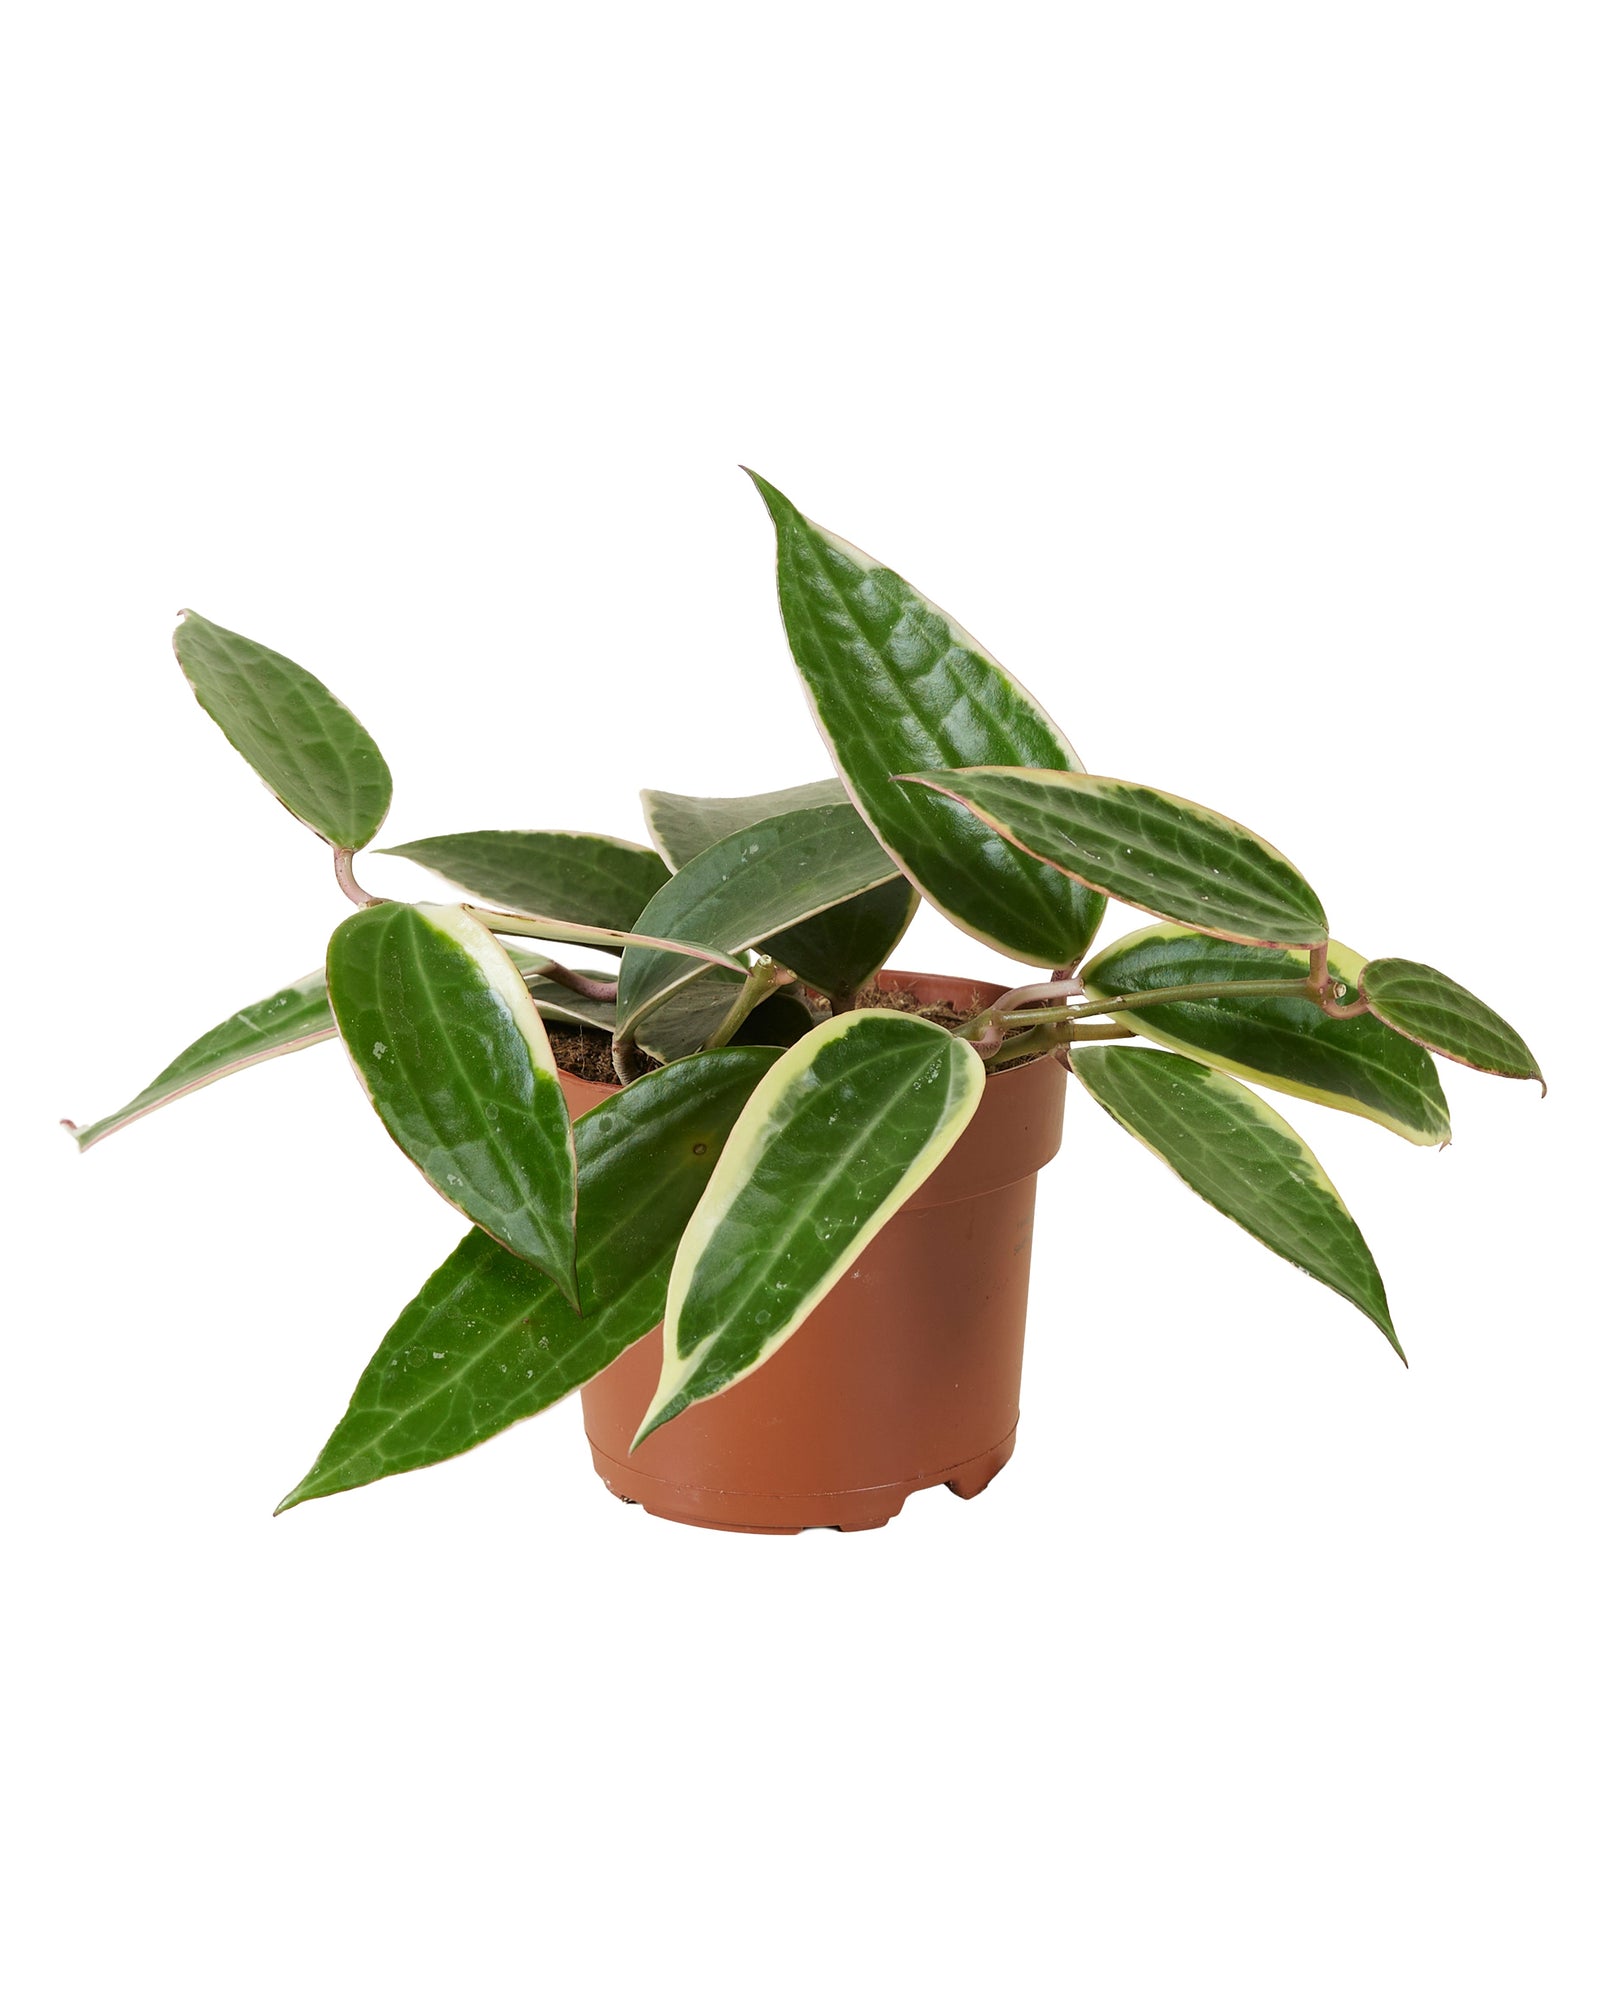
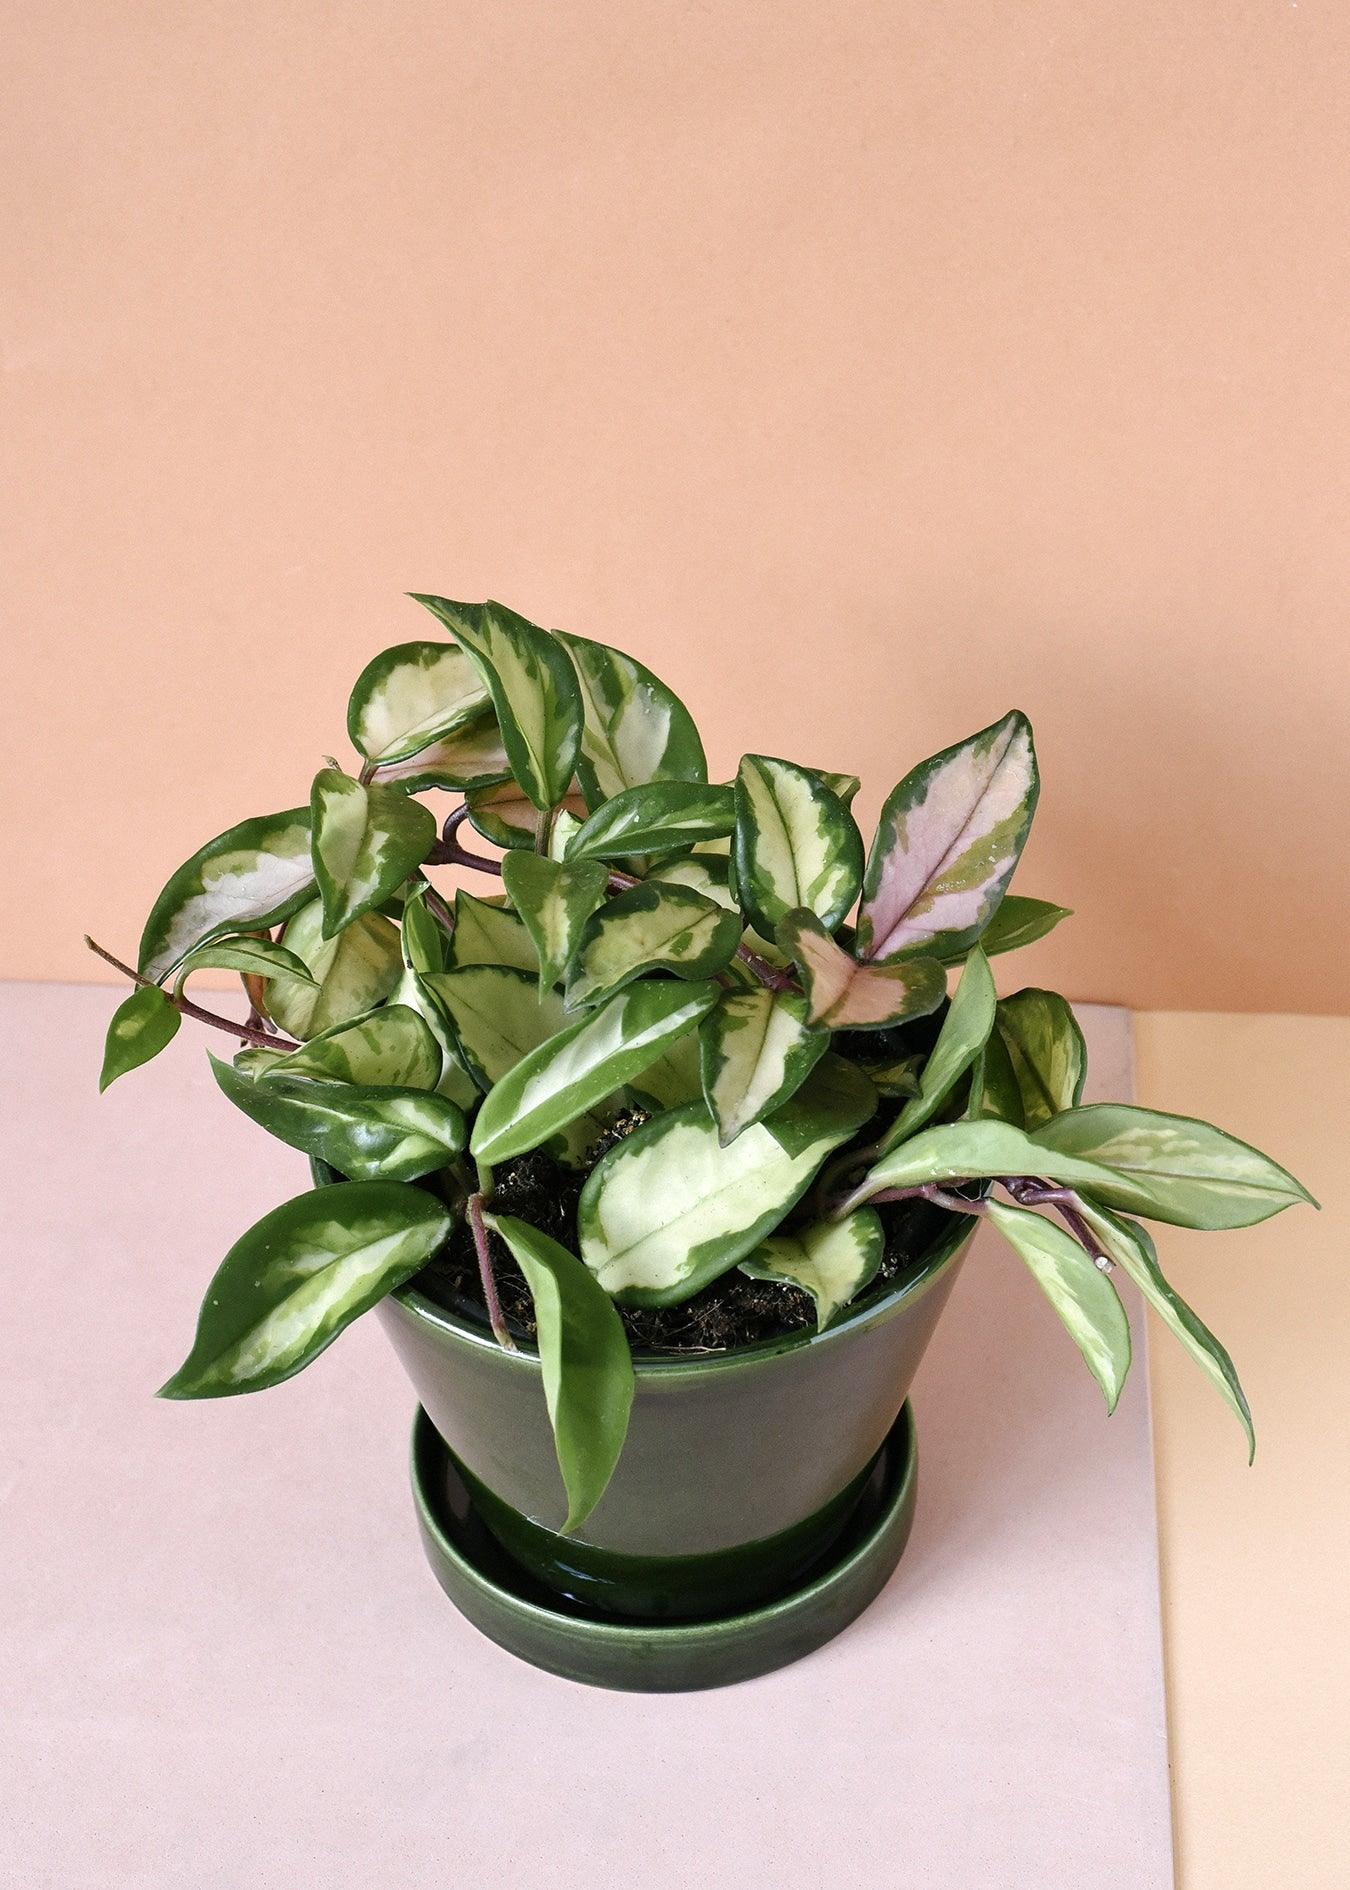
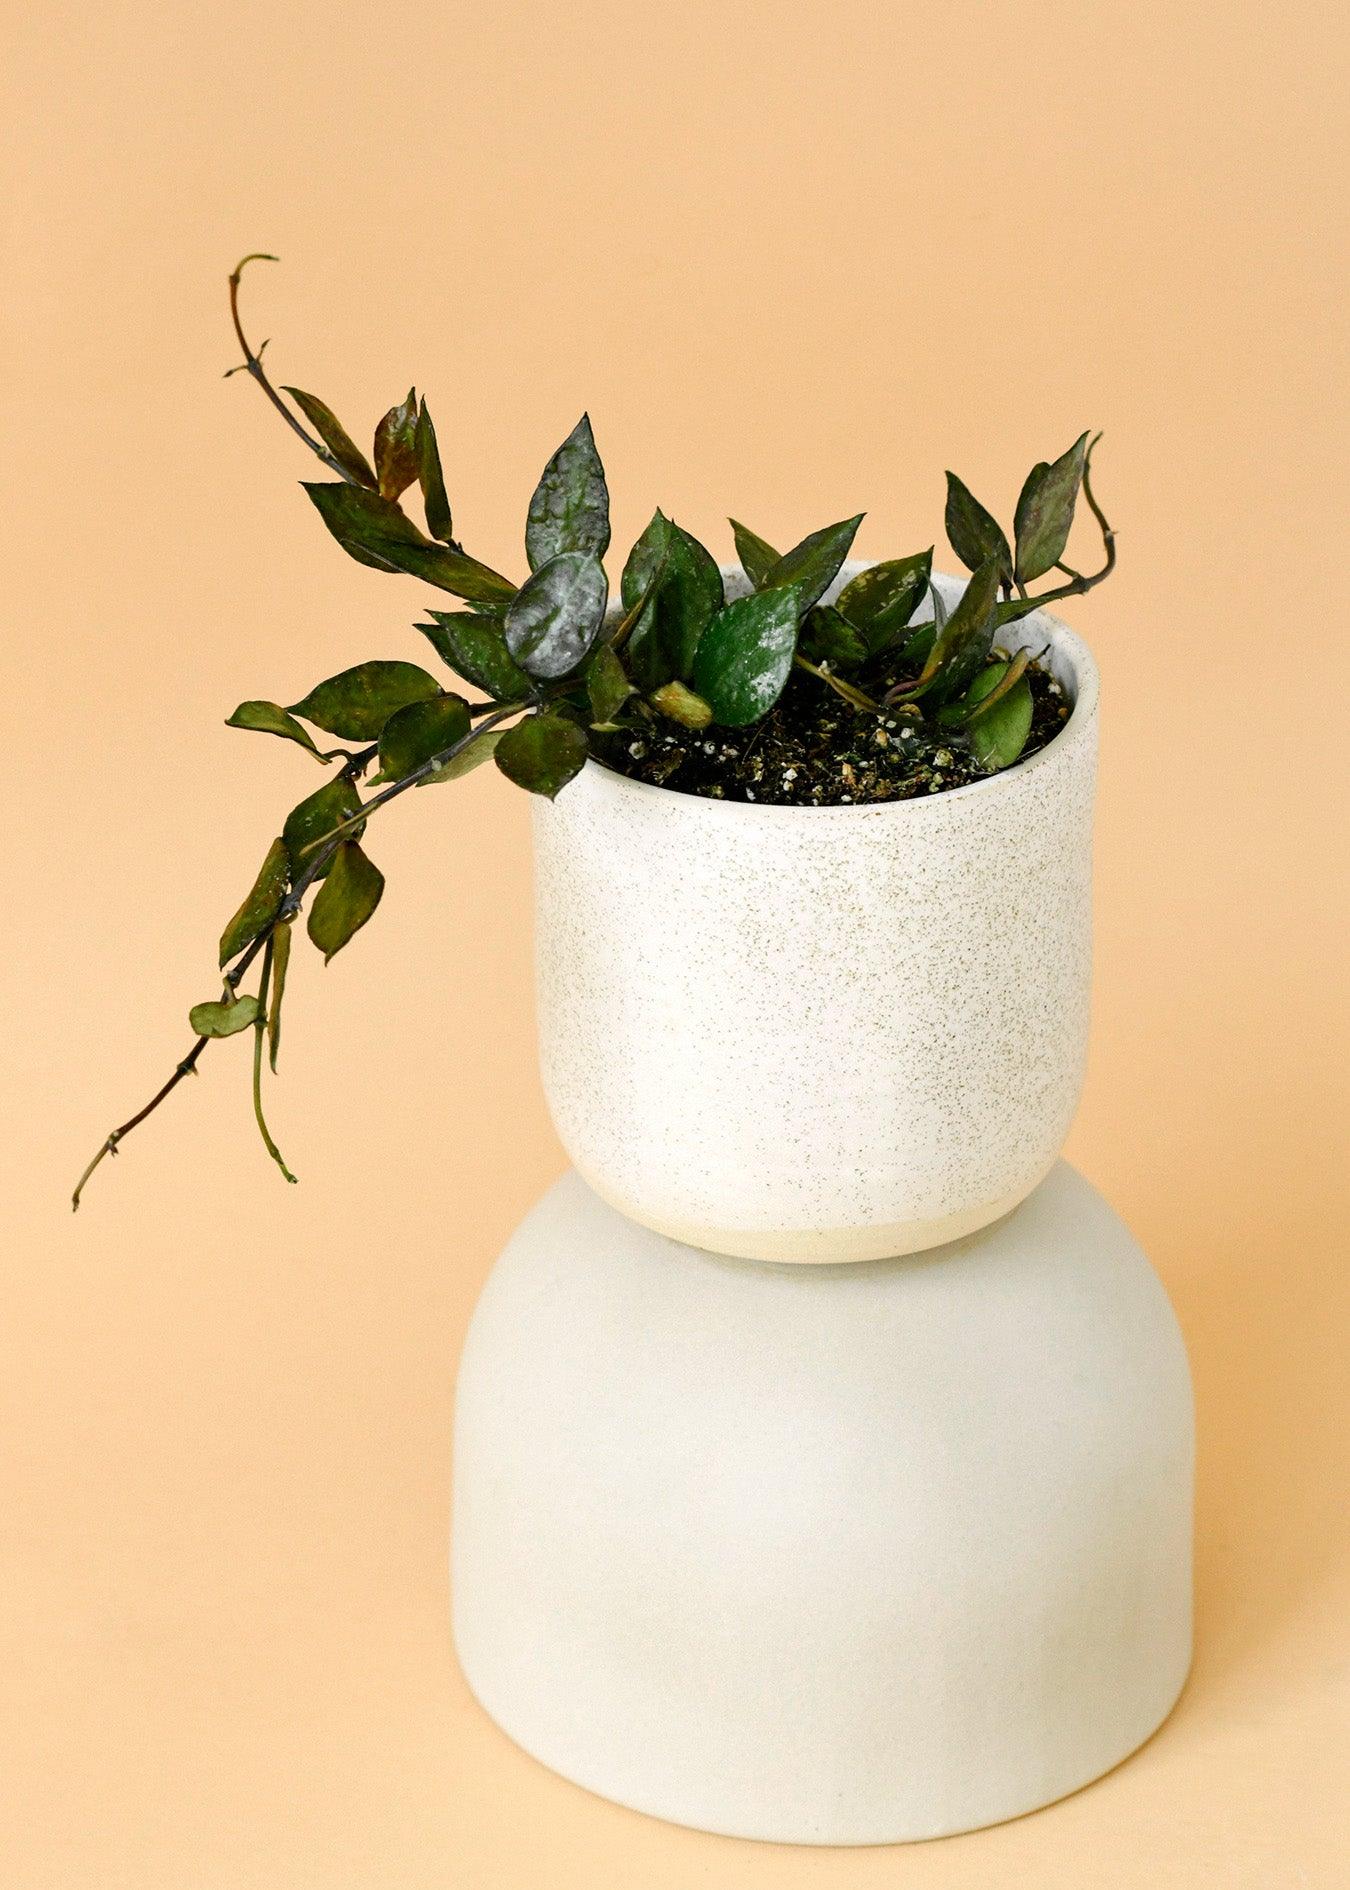
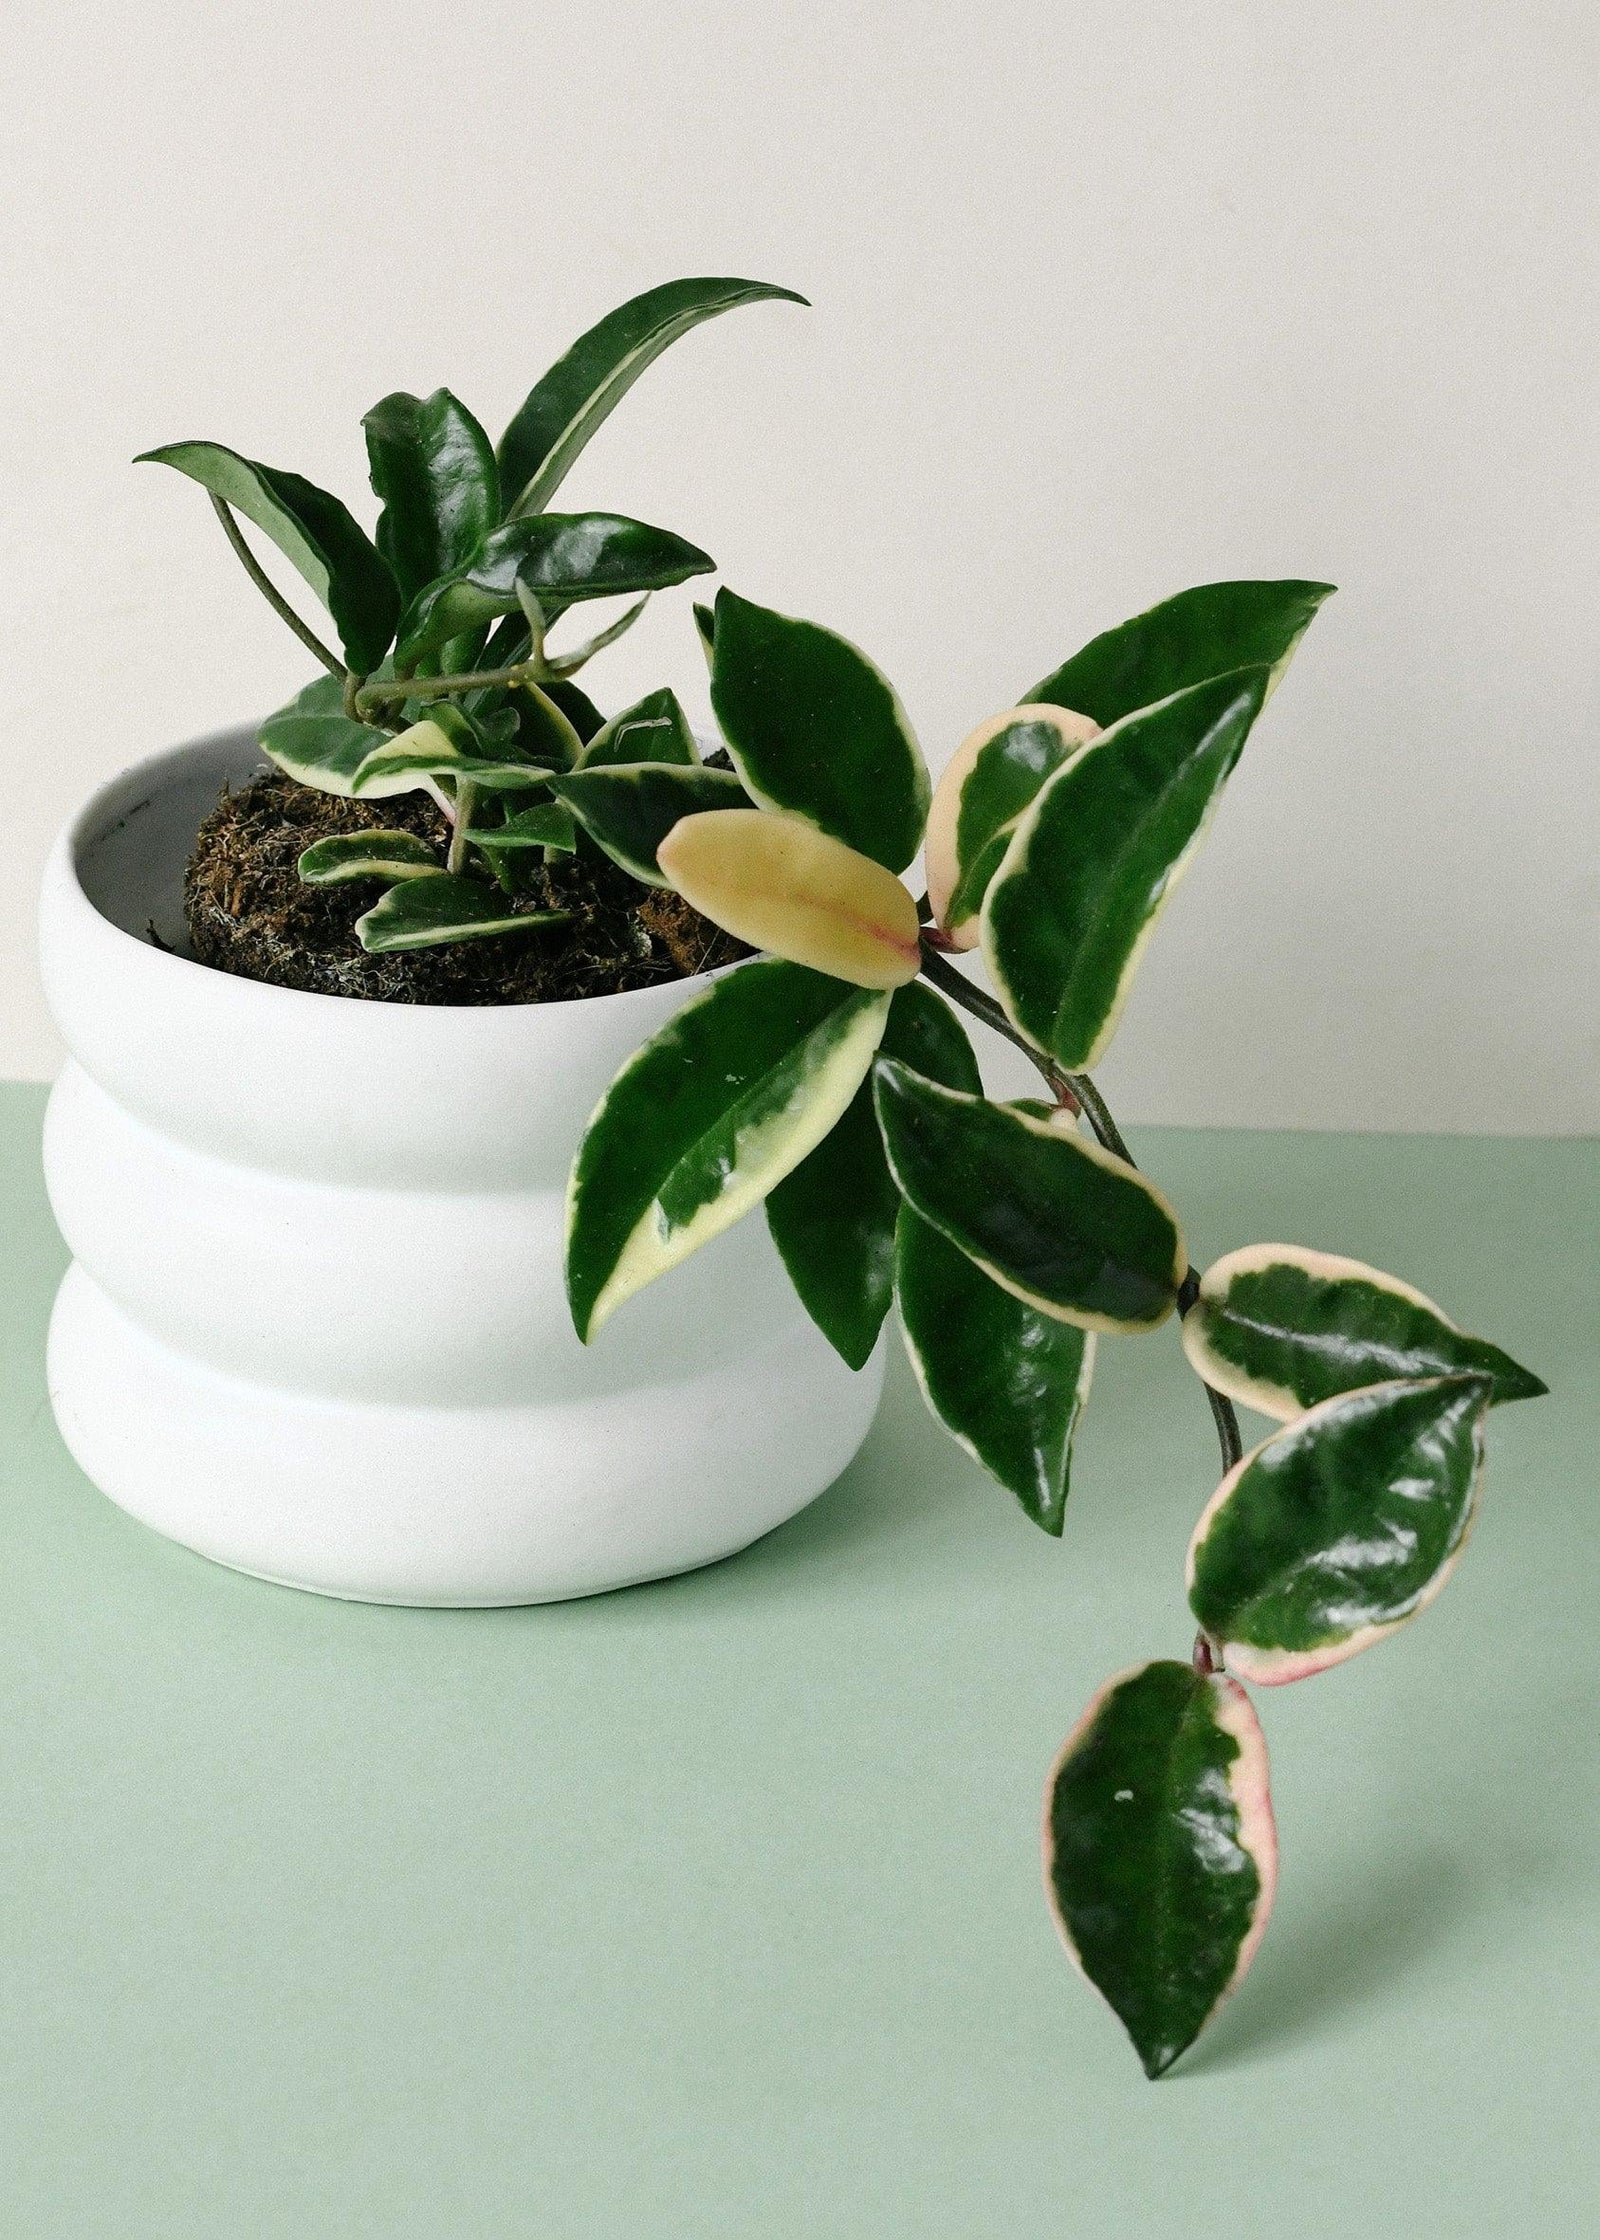
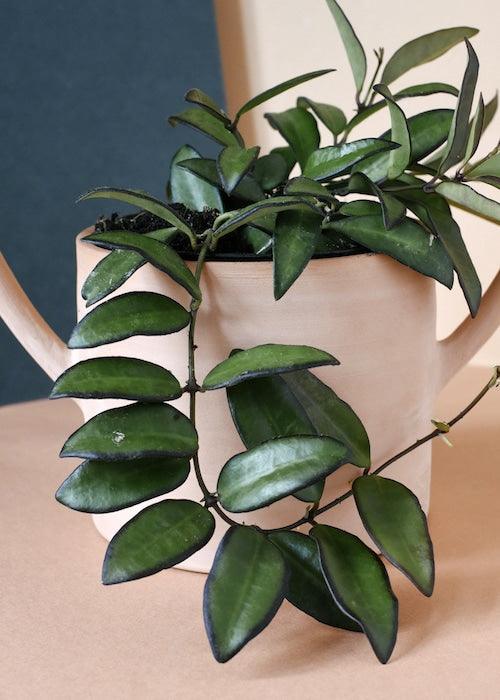
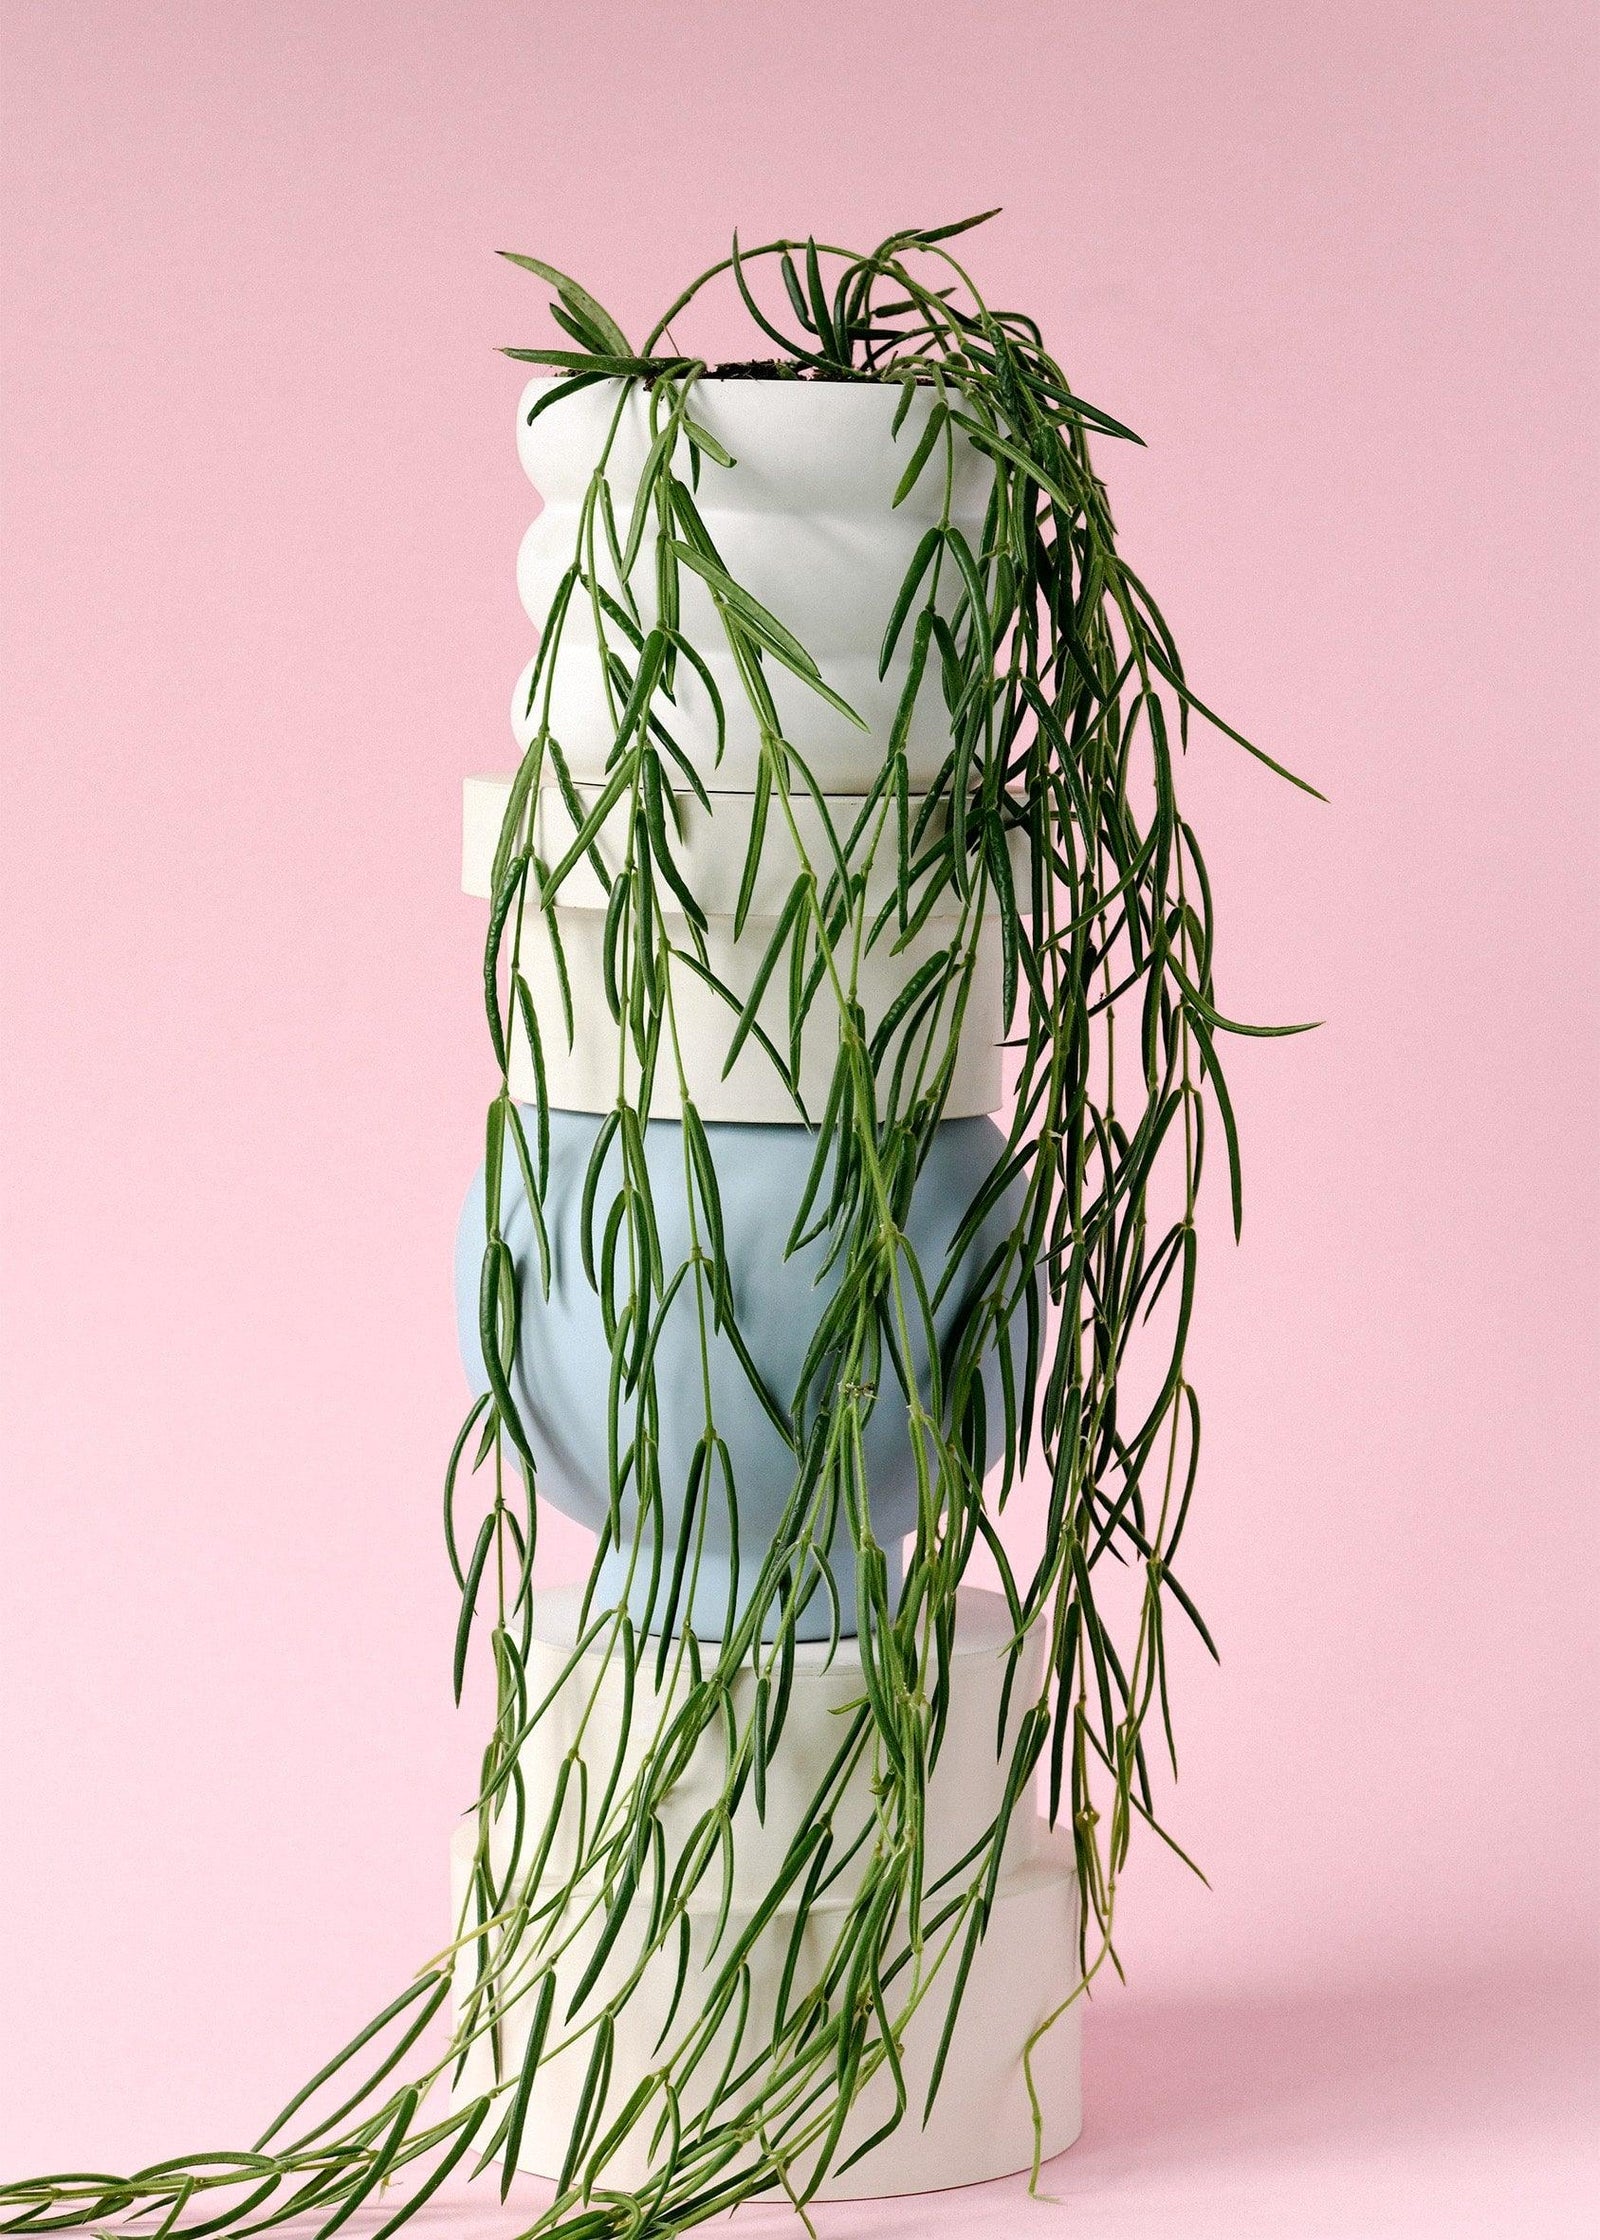
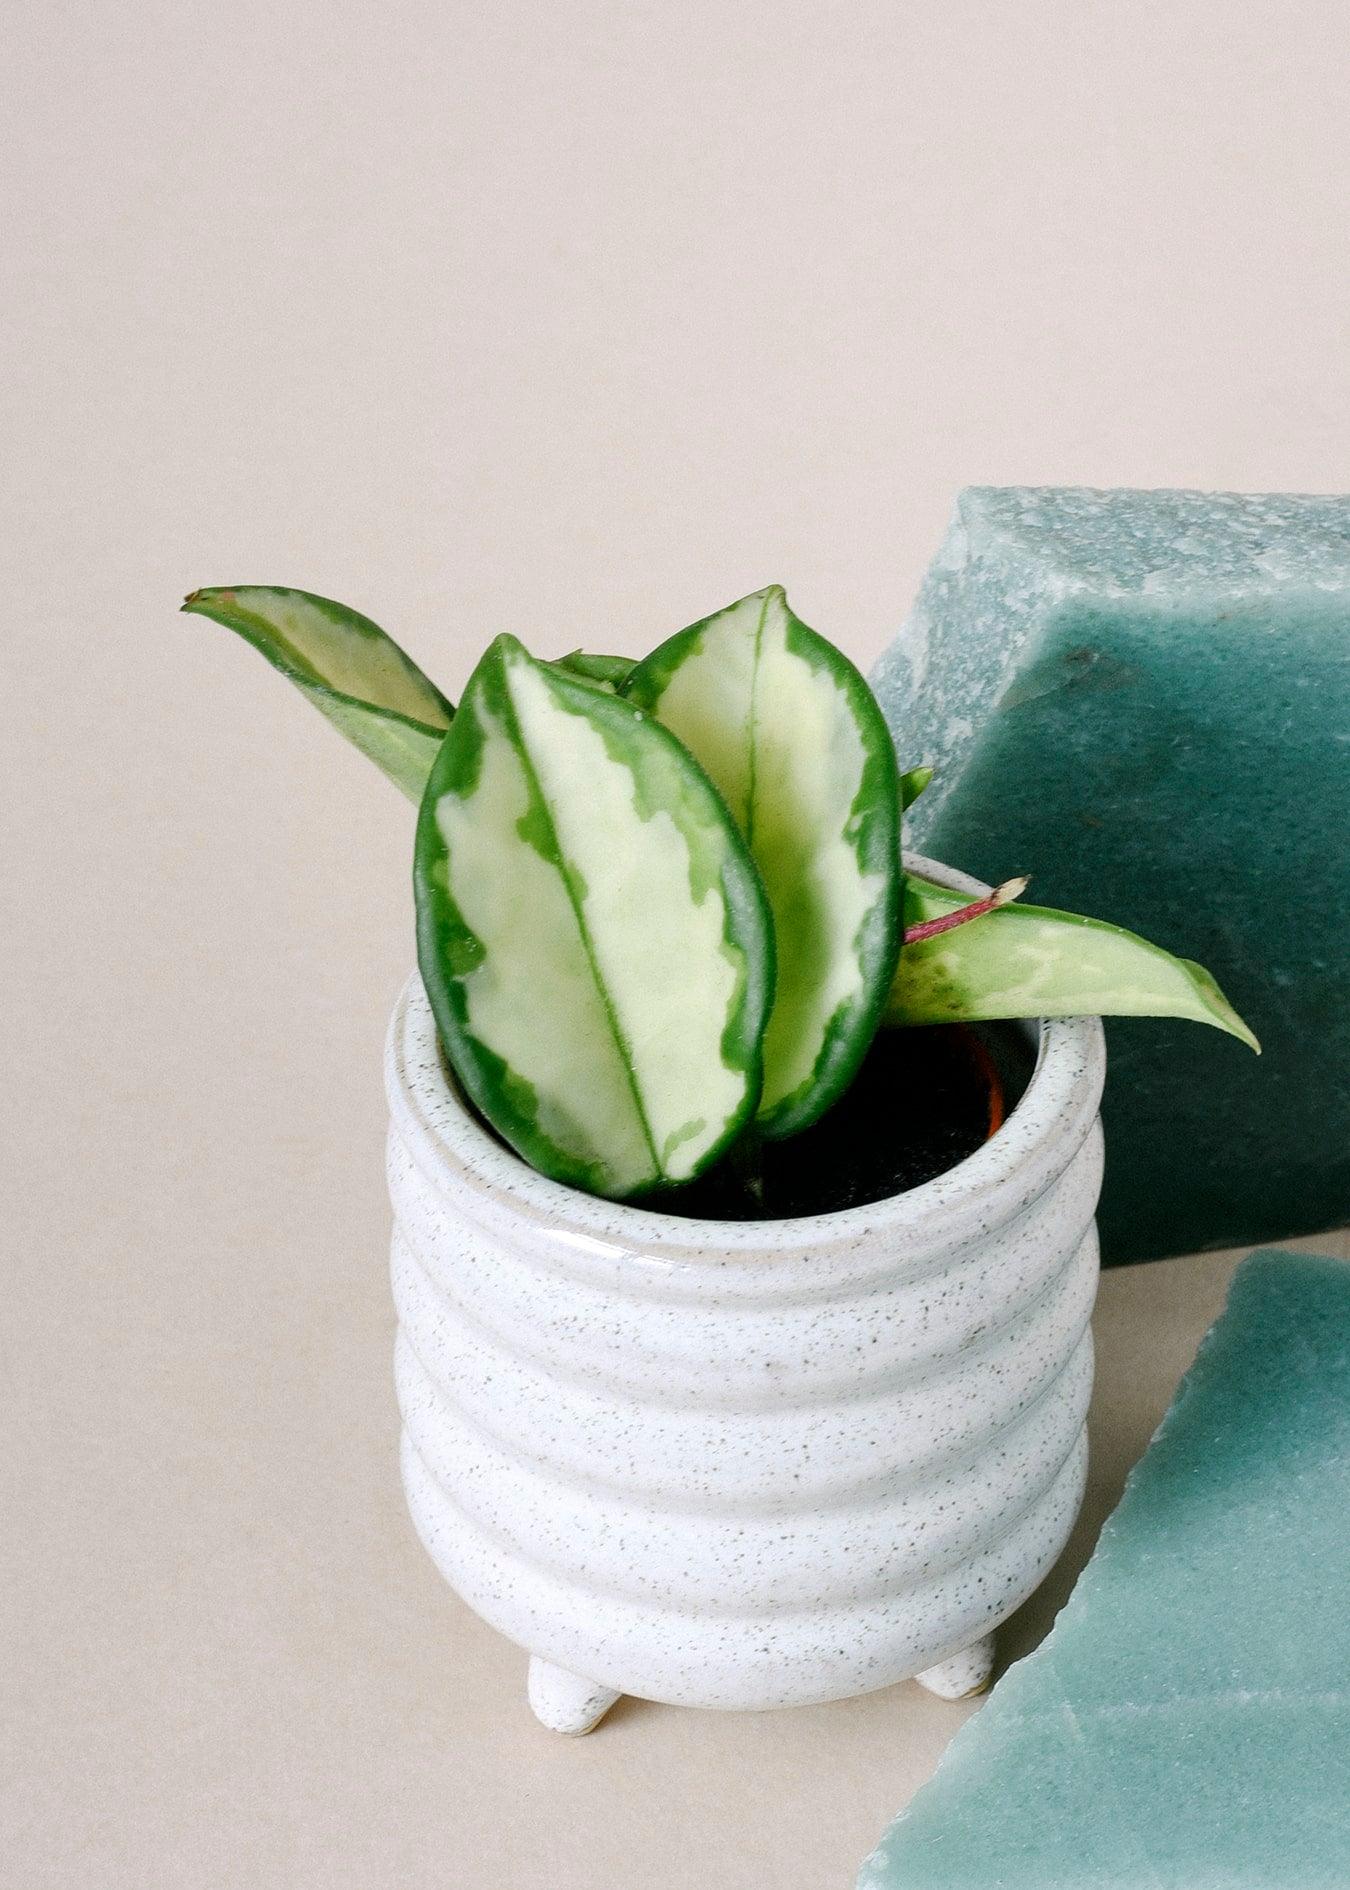
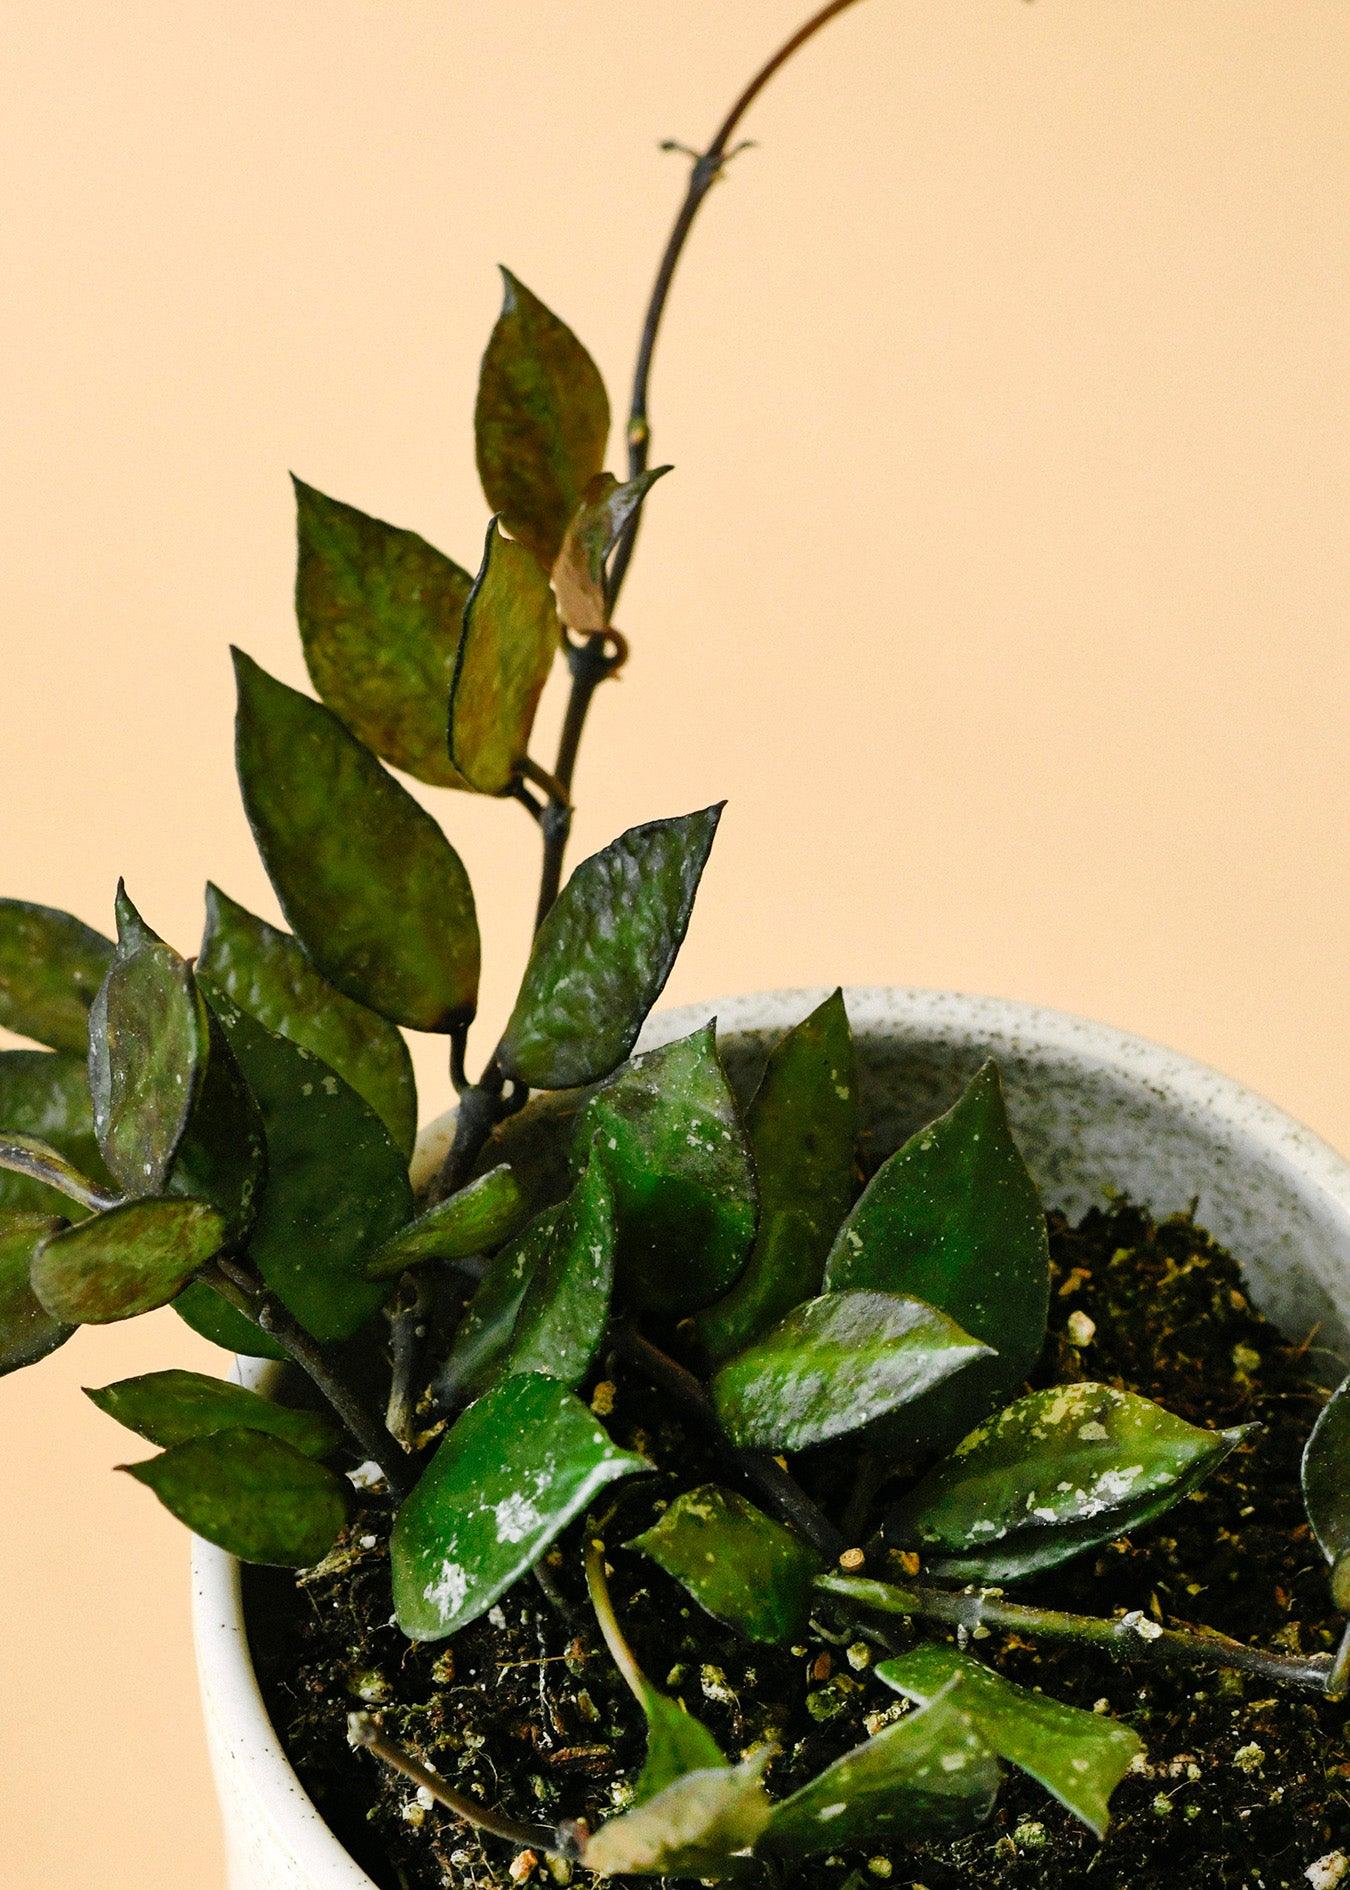
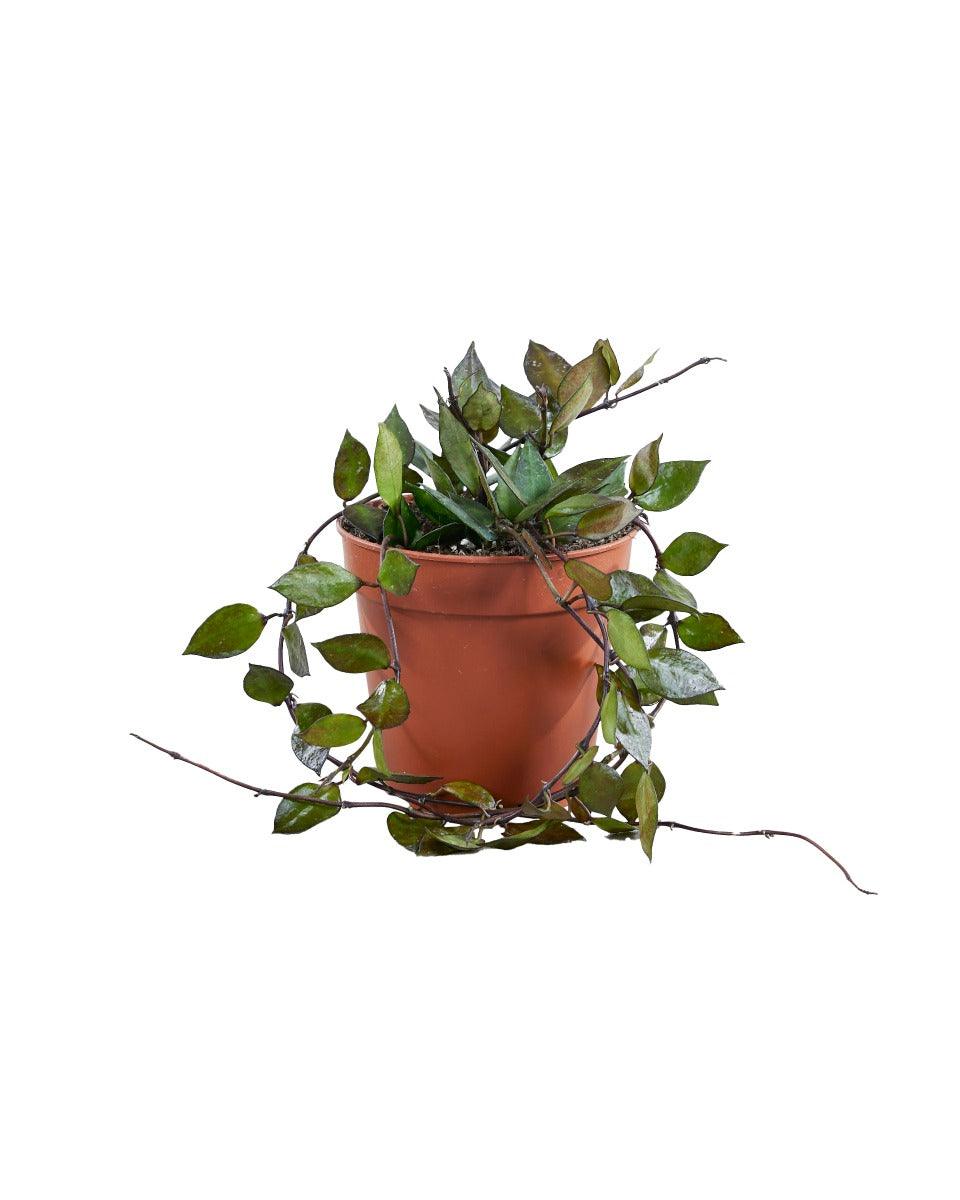
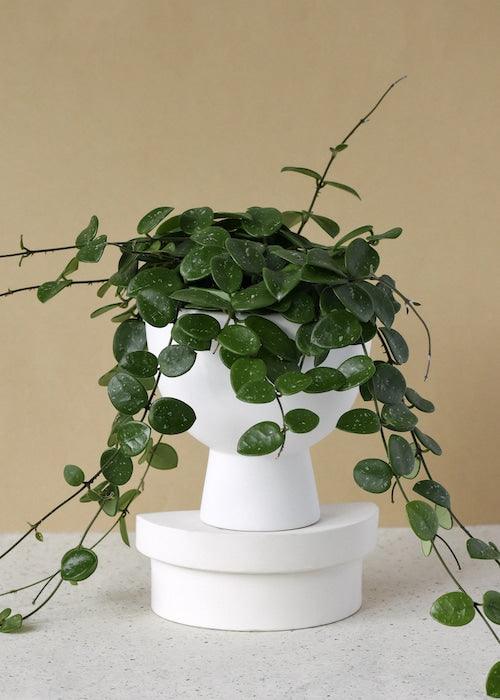
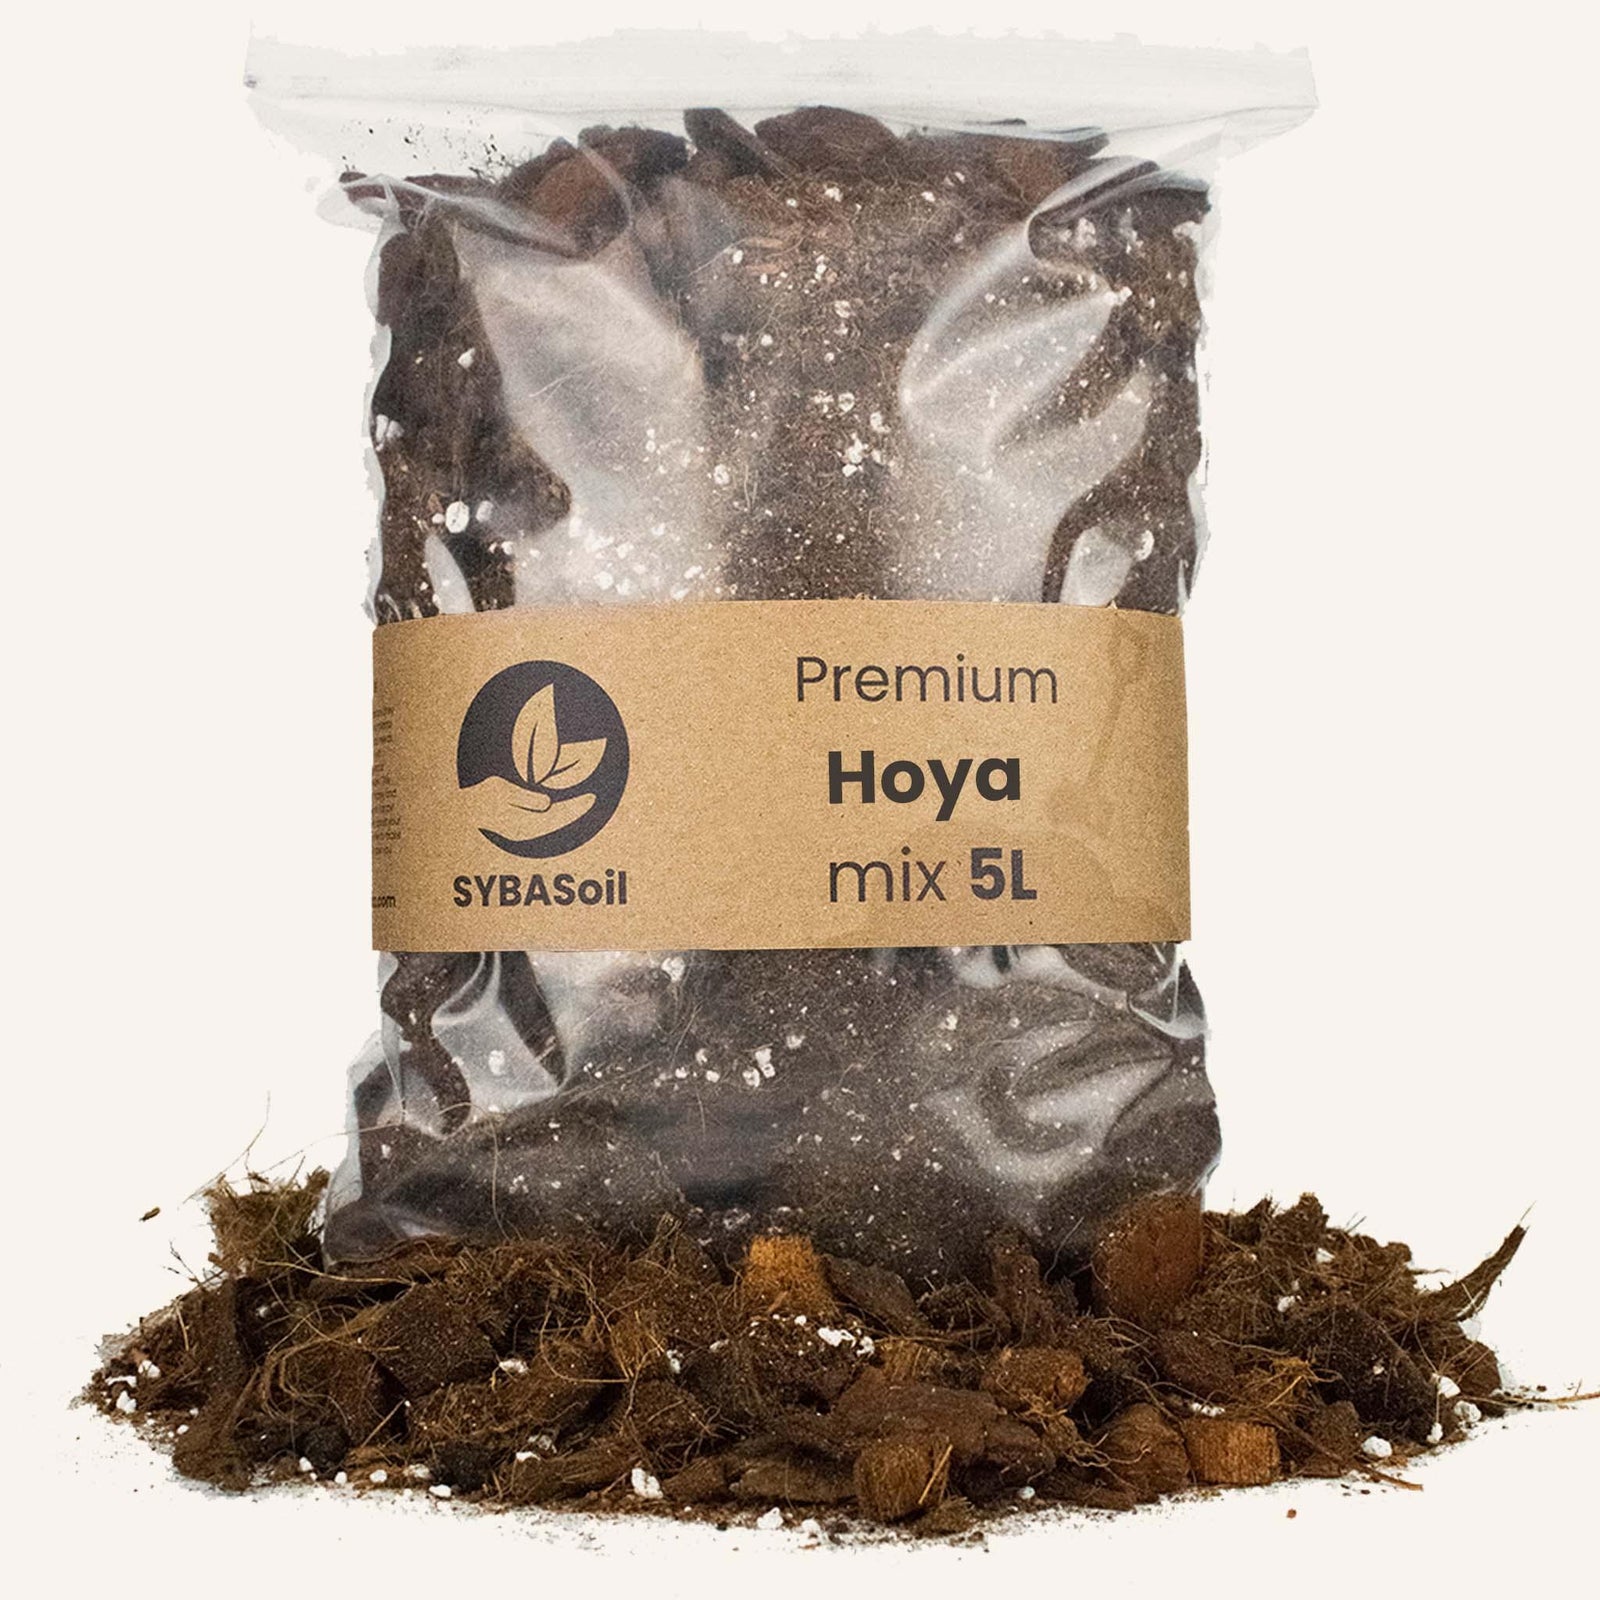
Hoya
Shop our Hoya collection, featuring stunning houseplants with waxy leaves and fragrant, star-shaped flowers. Limited time offer - buy three hoya, get the fourth free! Discount automatically applied at checkout.
View collection
Large Plants
Shop our Large Plants collection, featuring impressive houseplants that bring bold greenery to any room.
View collection

Low Light Plants
View collection
Medium Aglaonemas
View collection
Medium Alocasias
View collection

Medium Anthuriums
View collection

Medium Philodendrons
View collection
Medium Plants
Shop our Hoya collection, featuring stunning houseplants with waxy leaves and fragrant, star-shaped flowers.
View collection
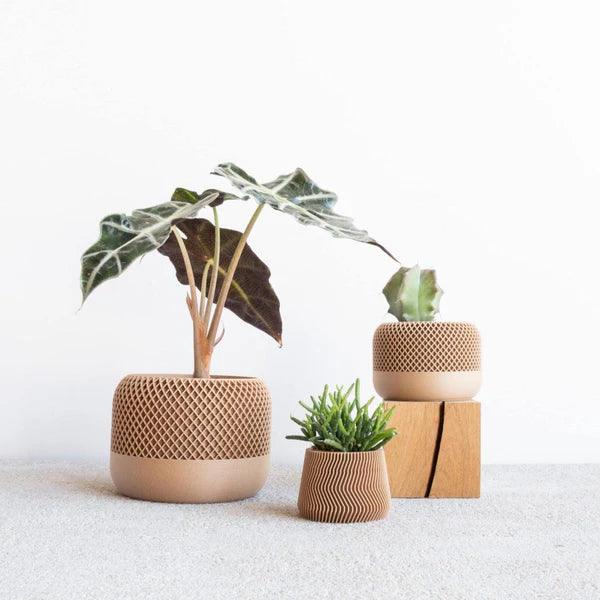
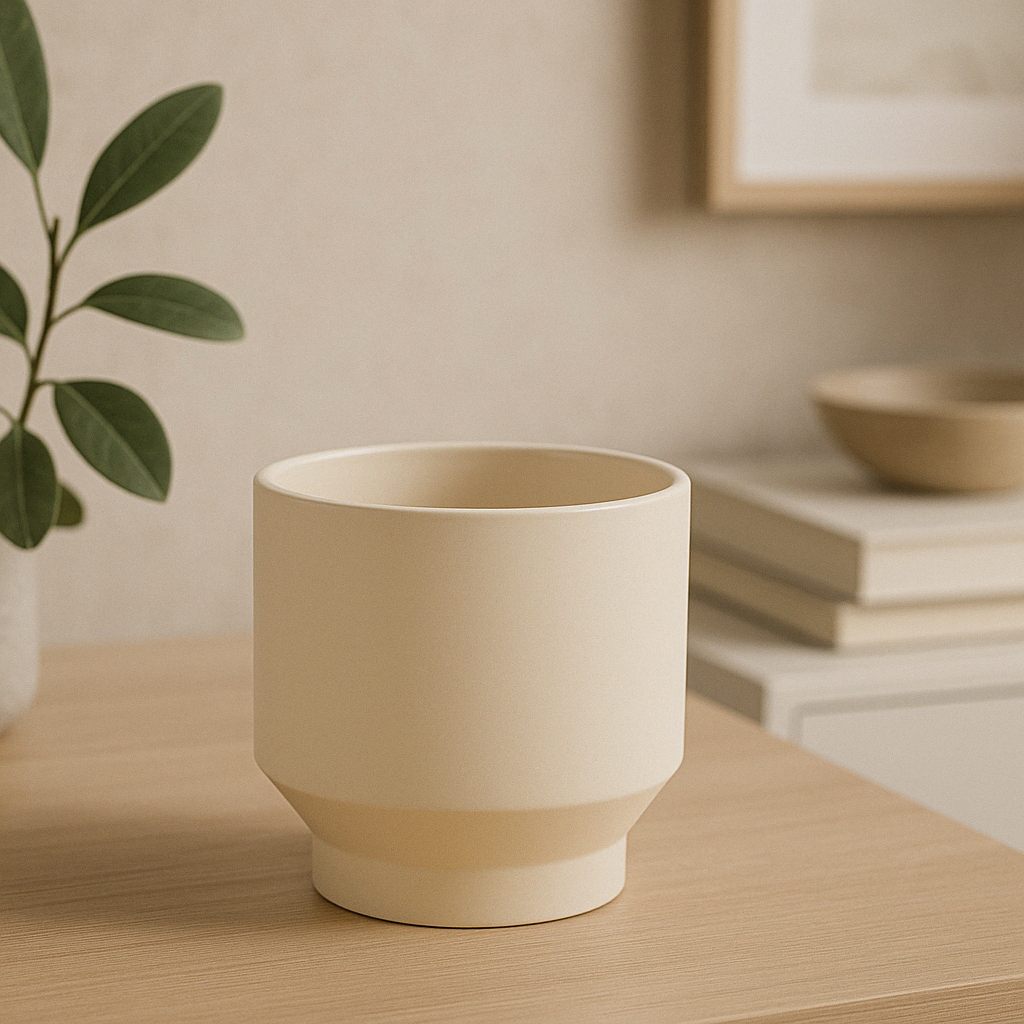
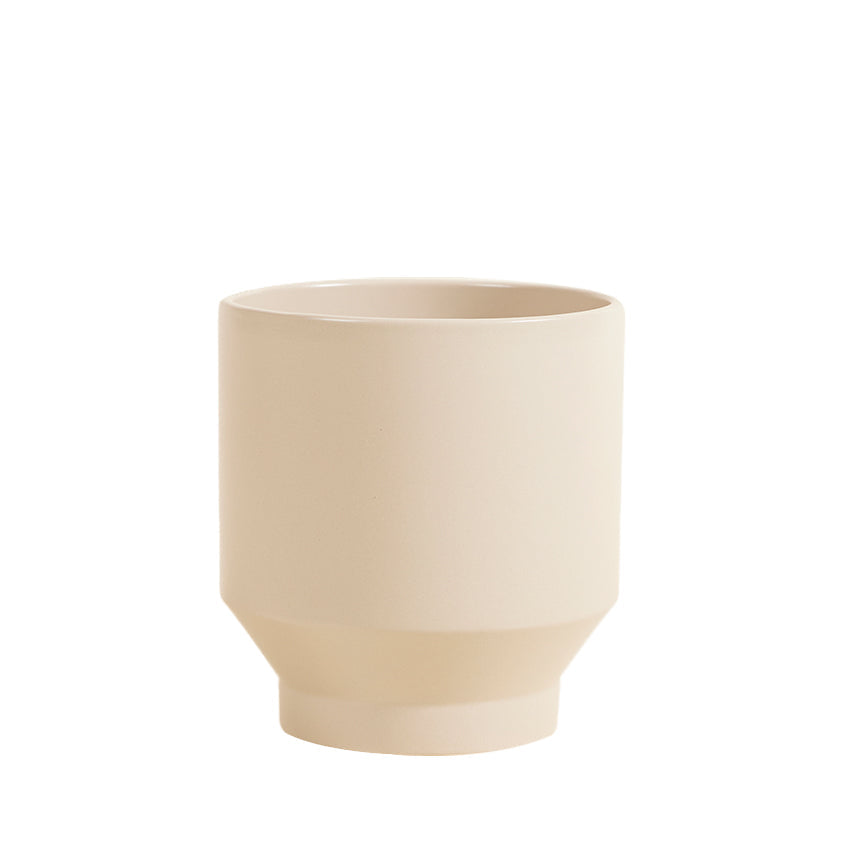
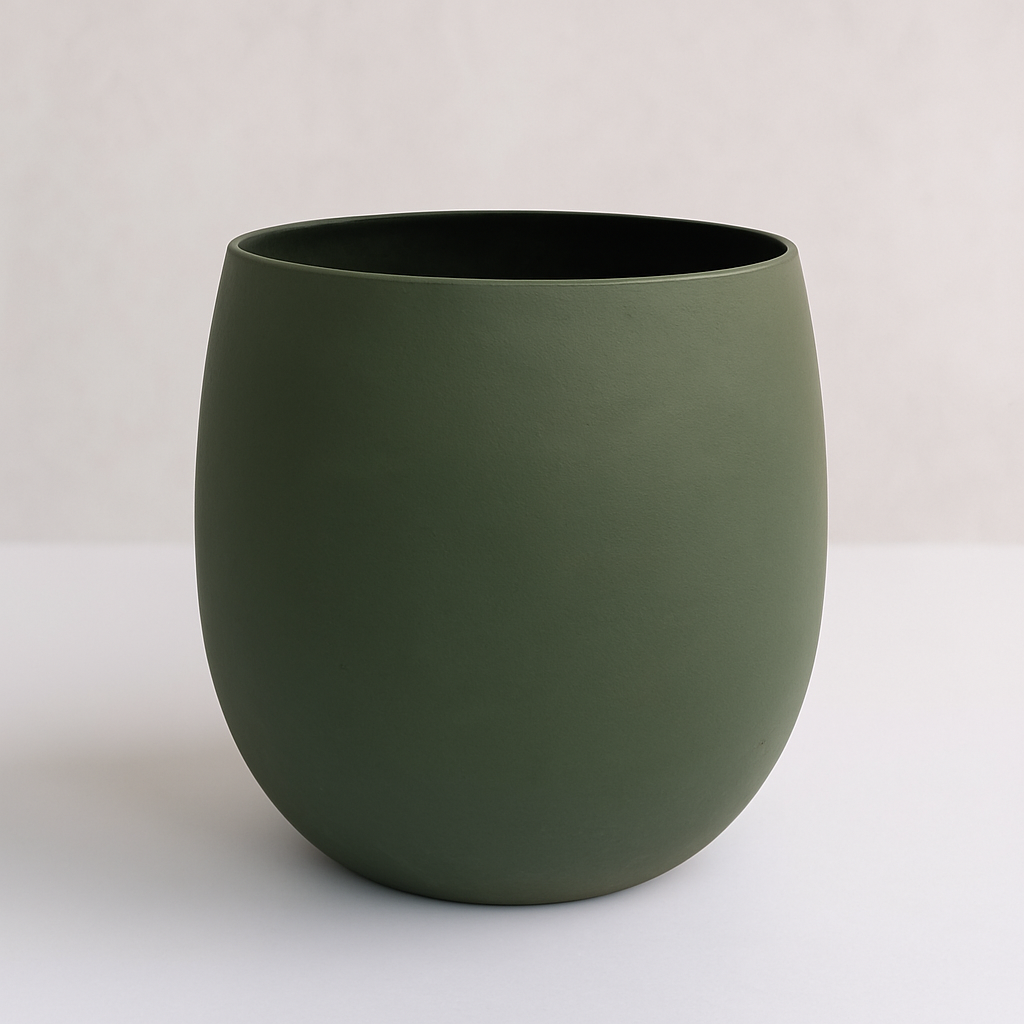
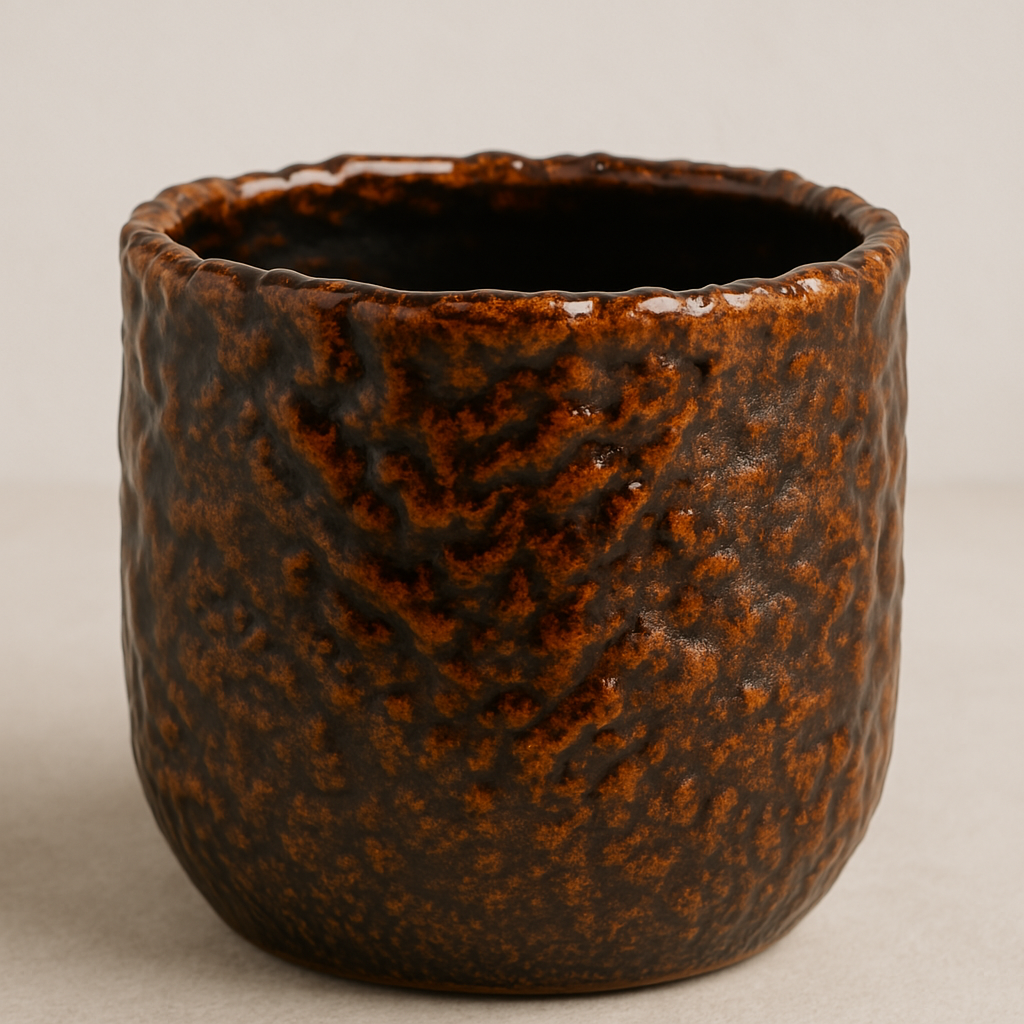
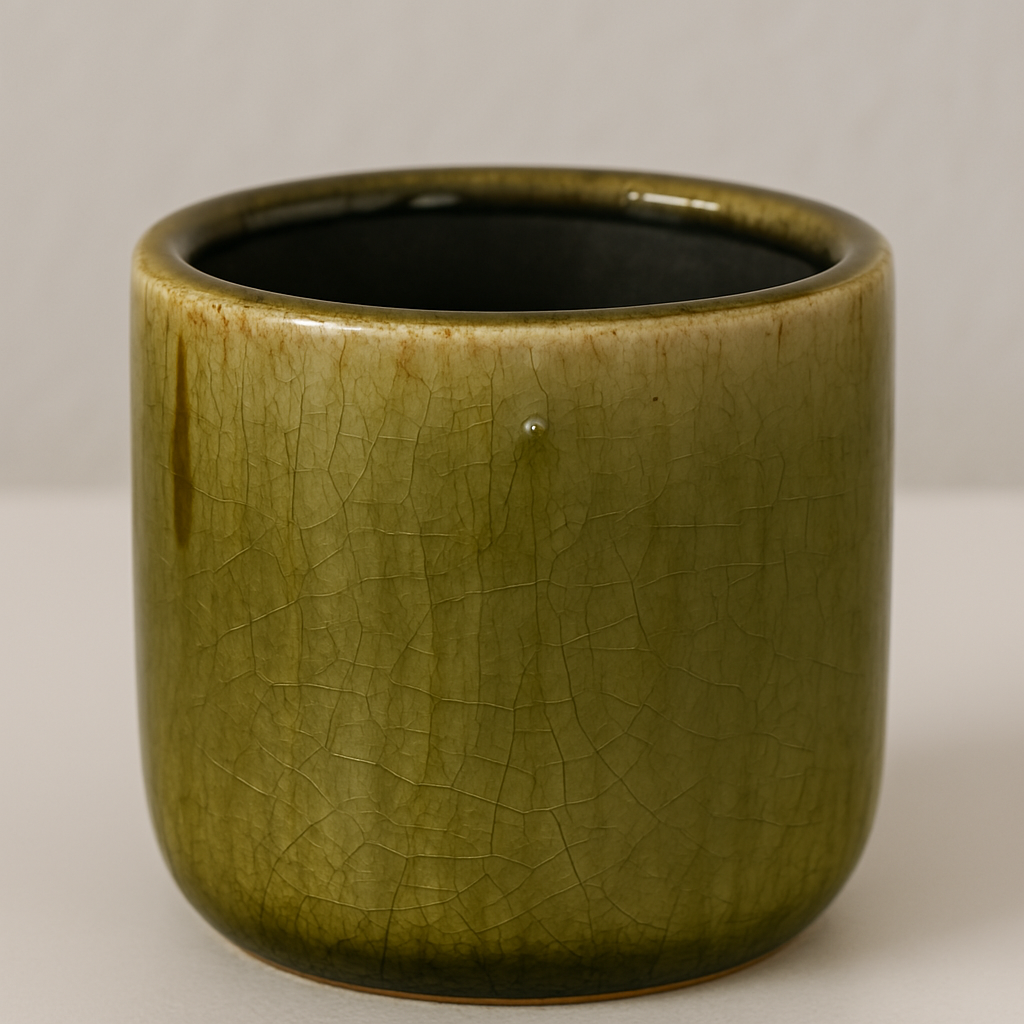
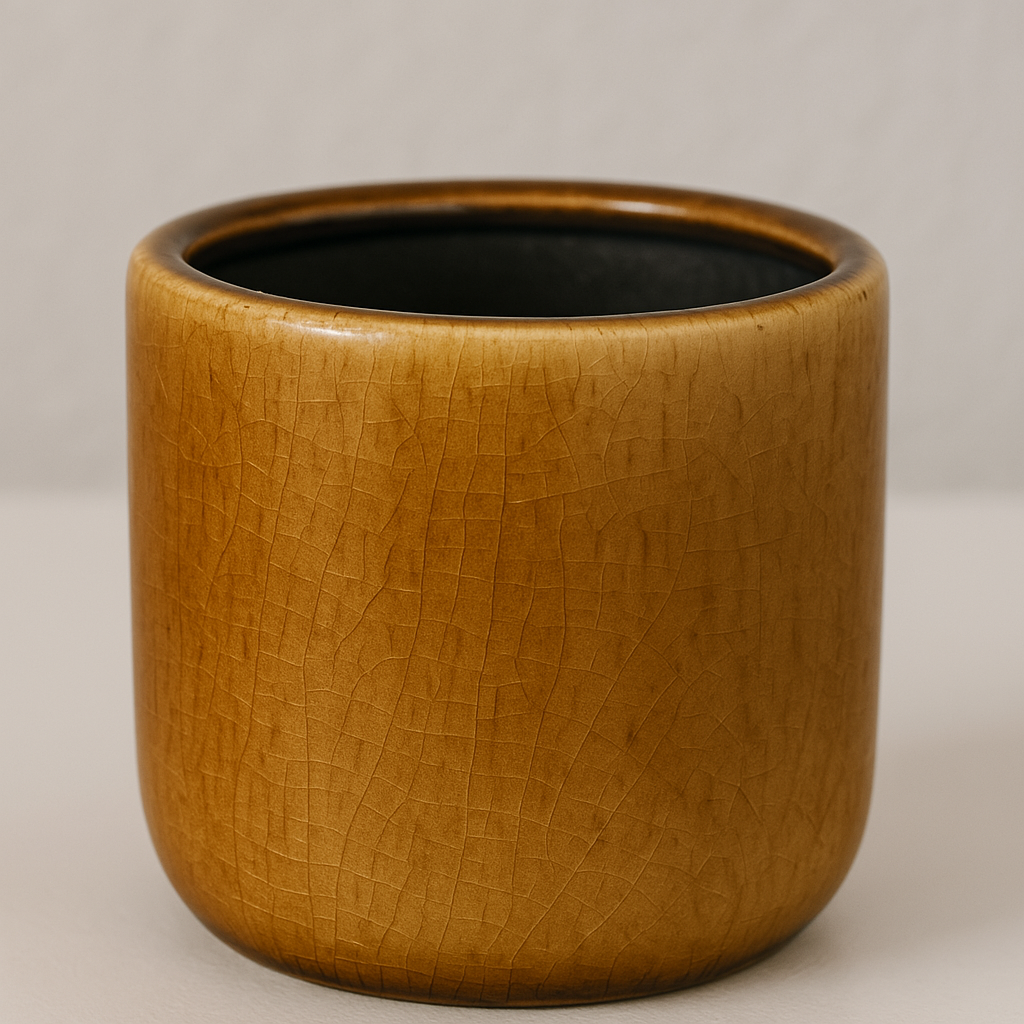
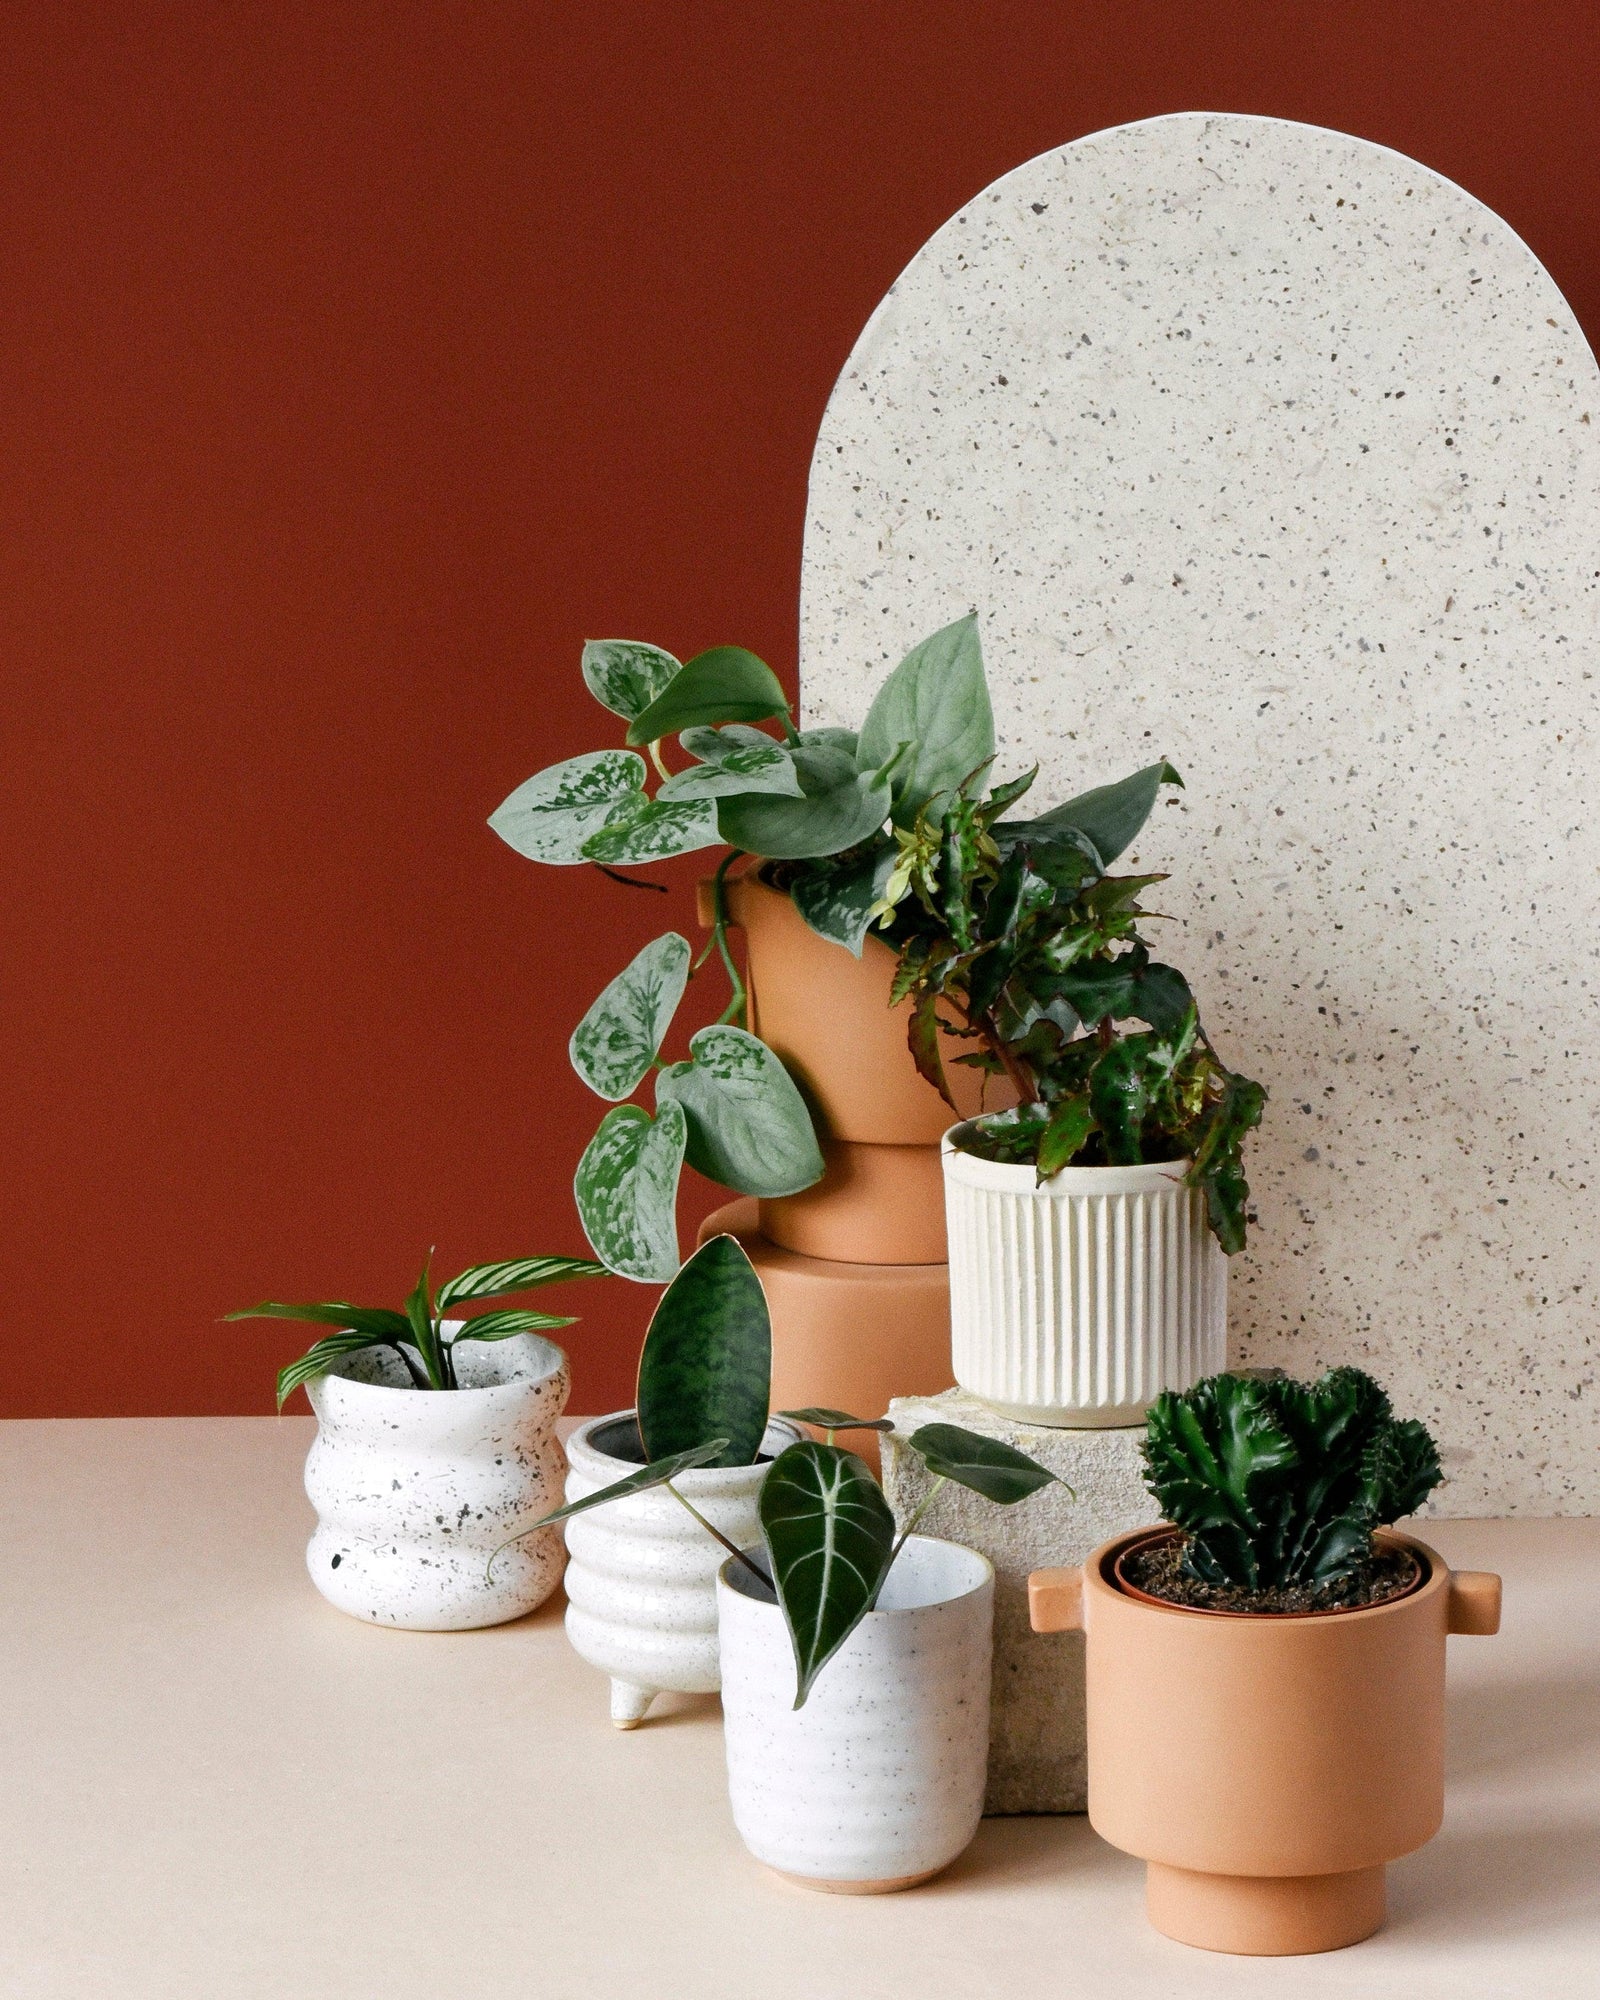
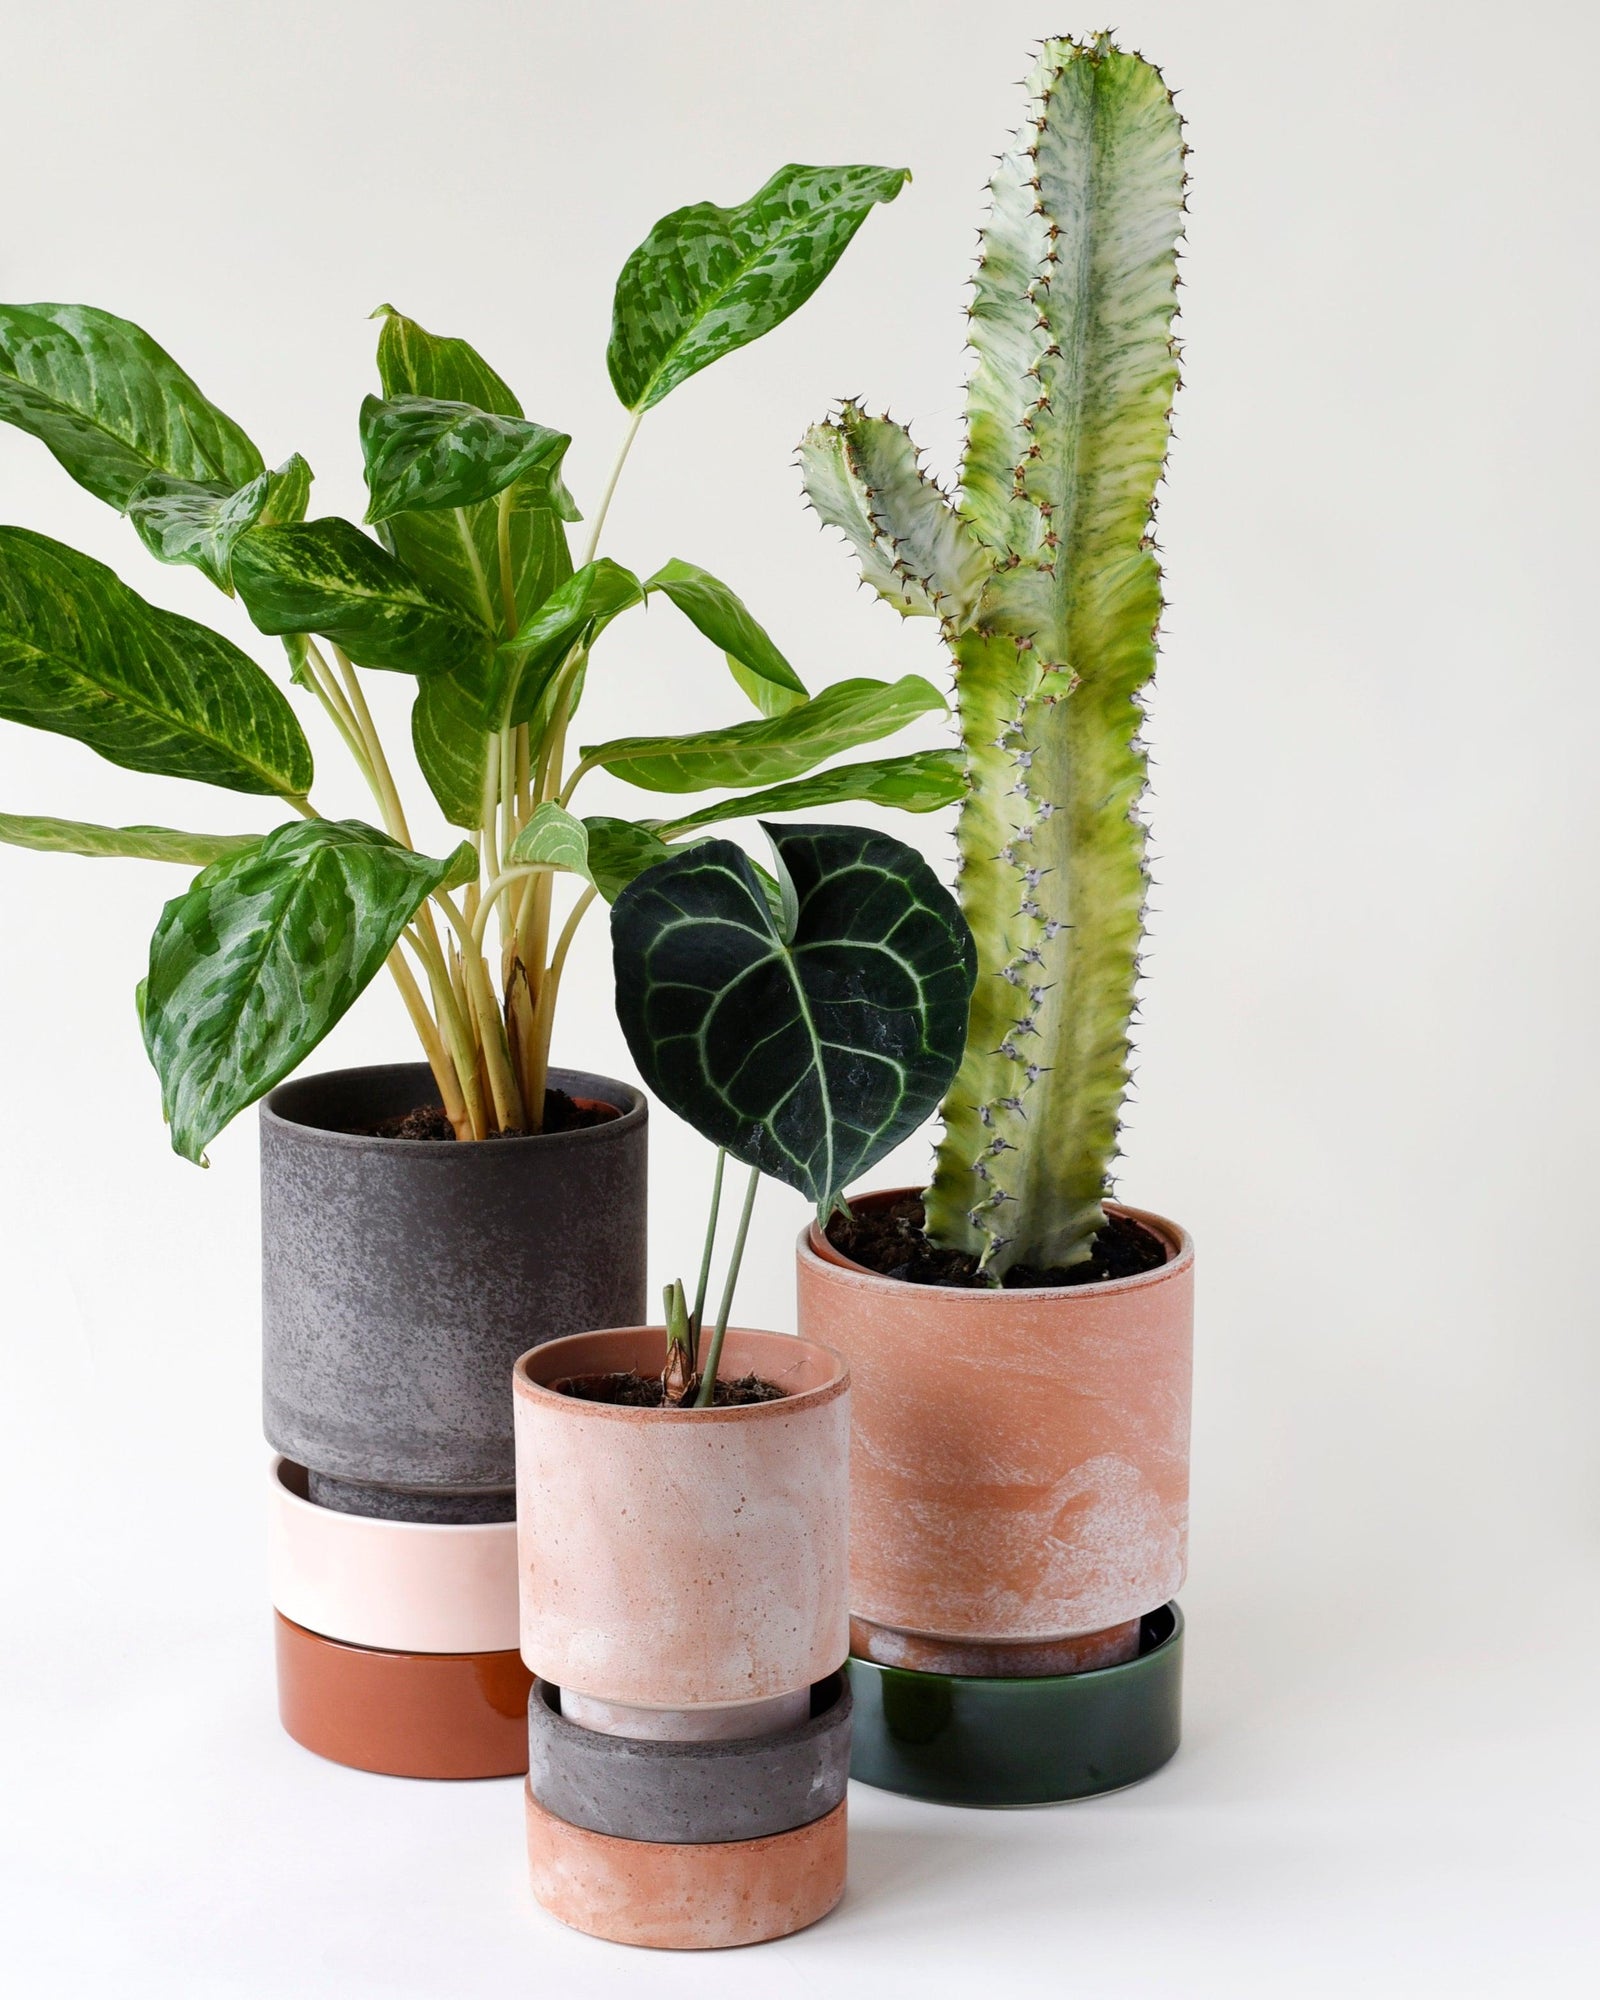
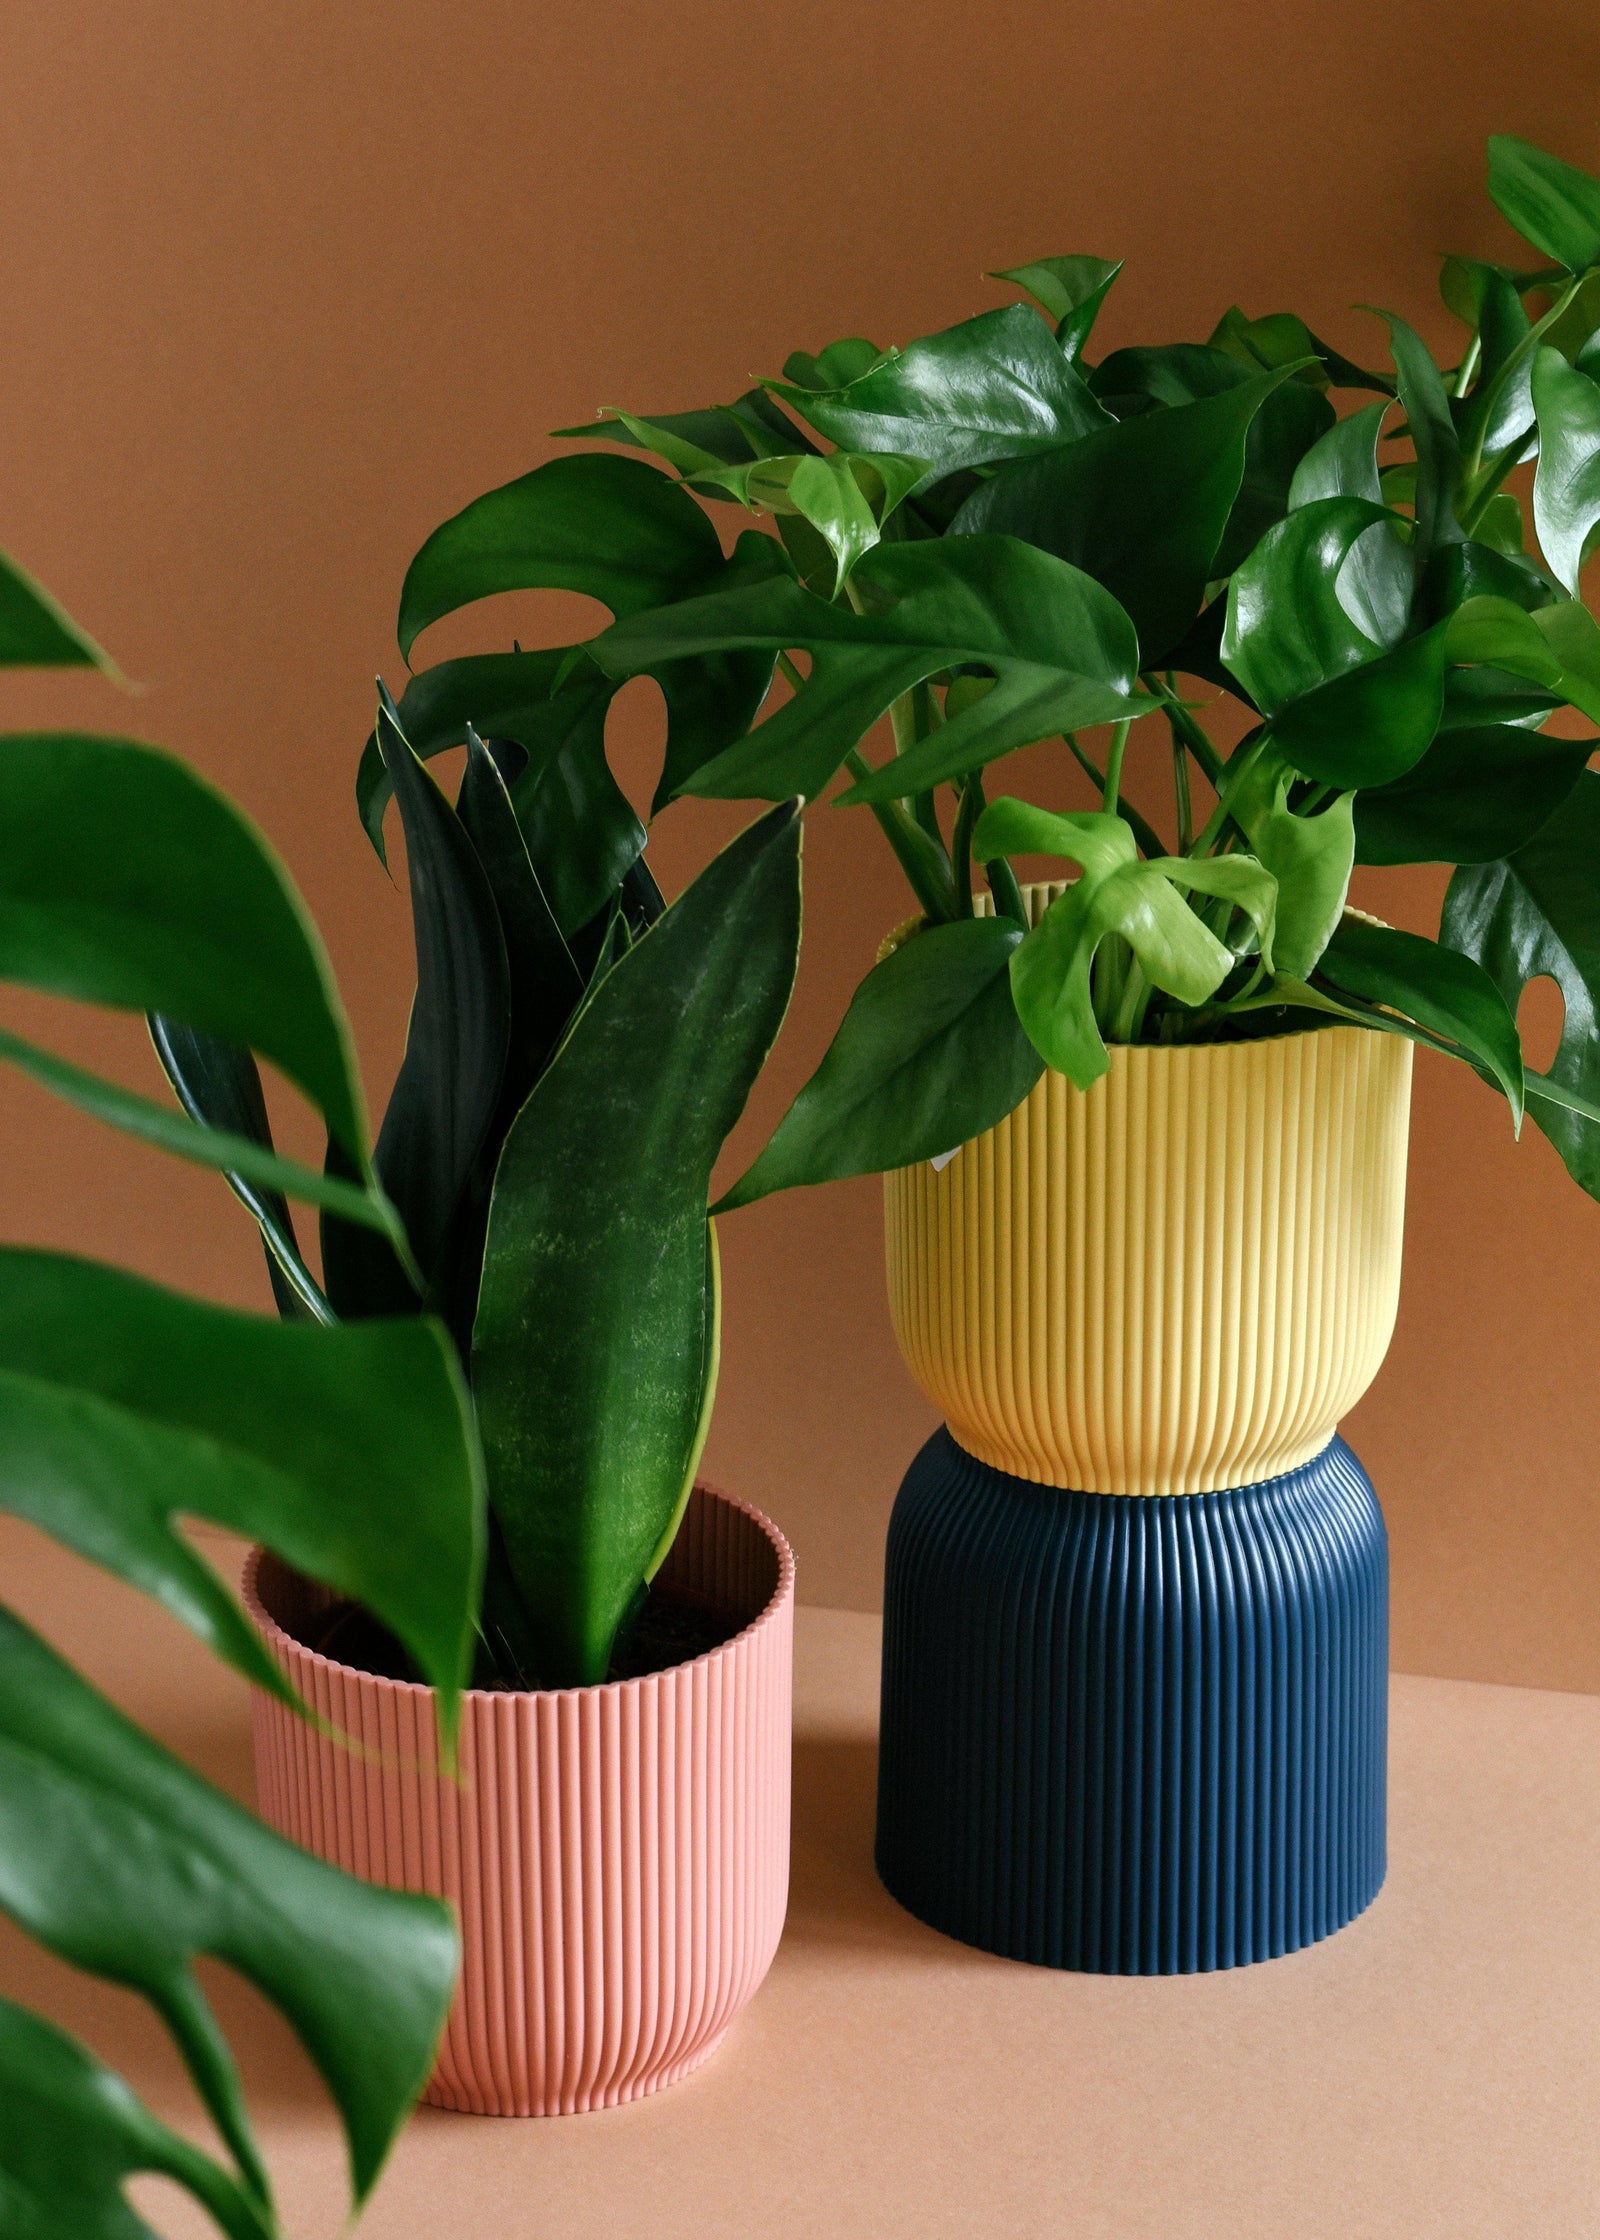
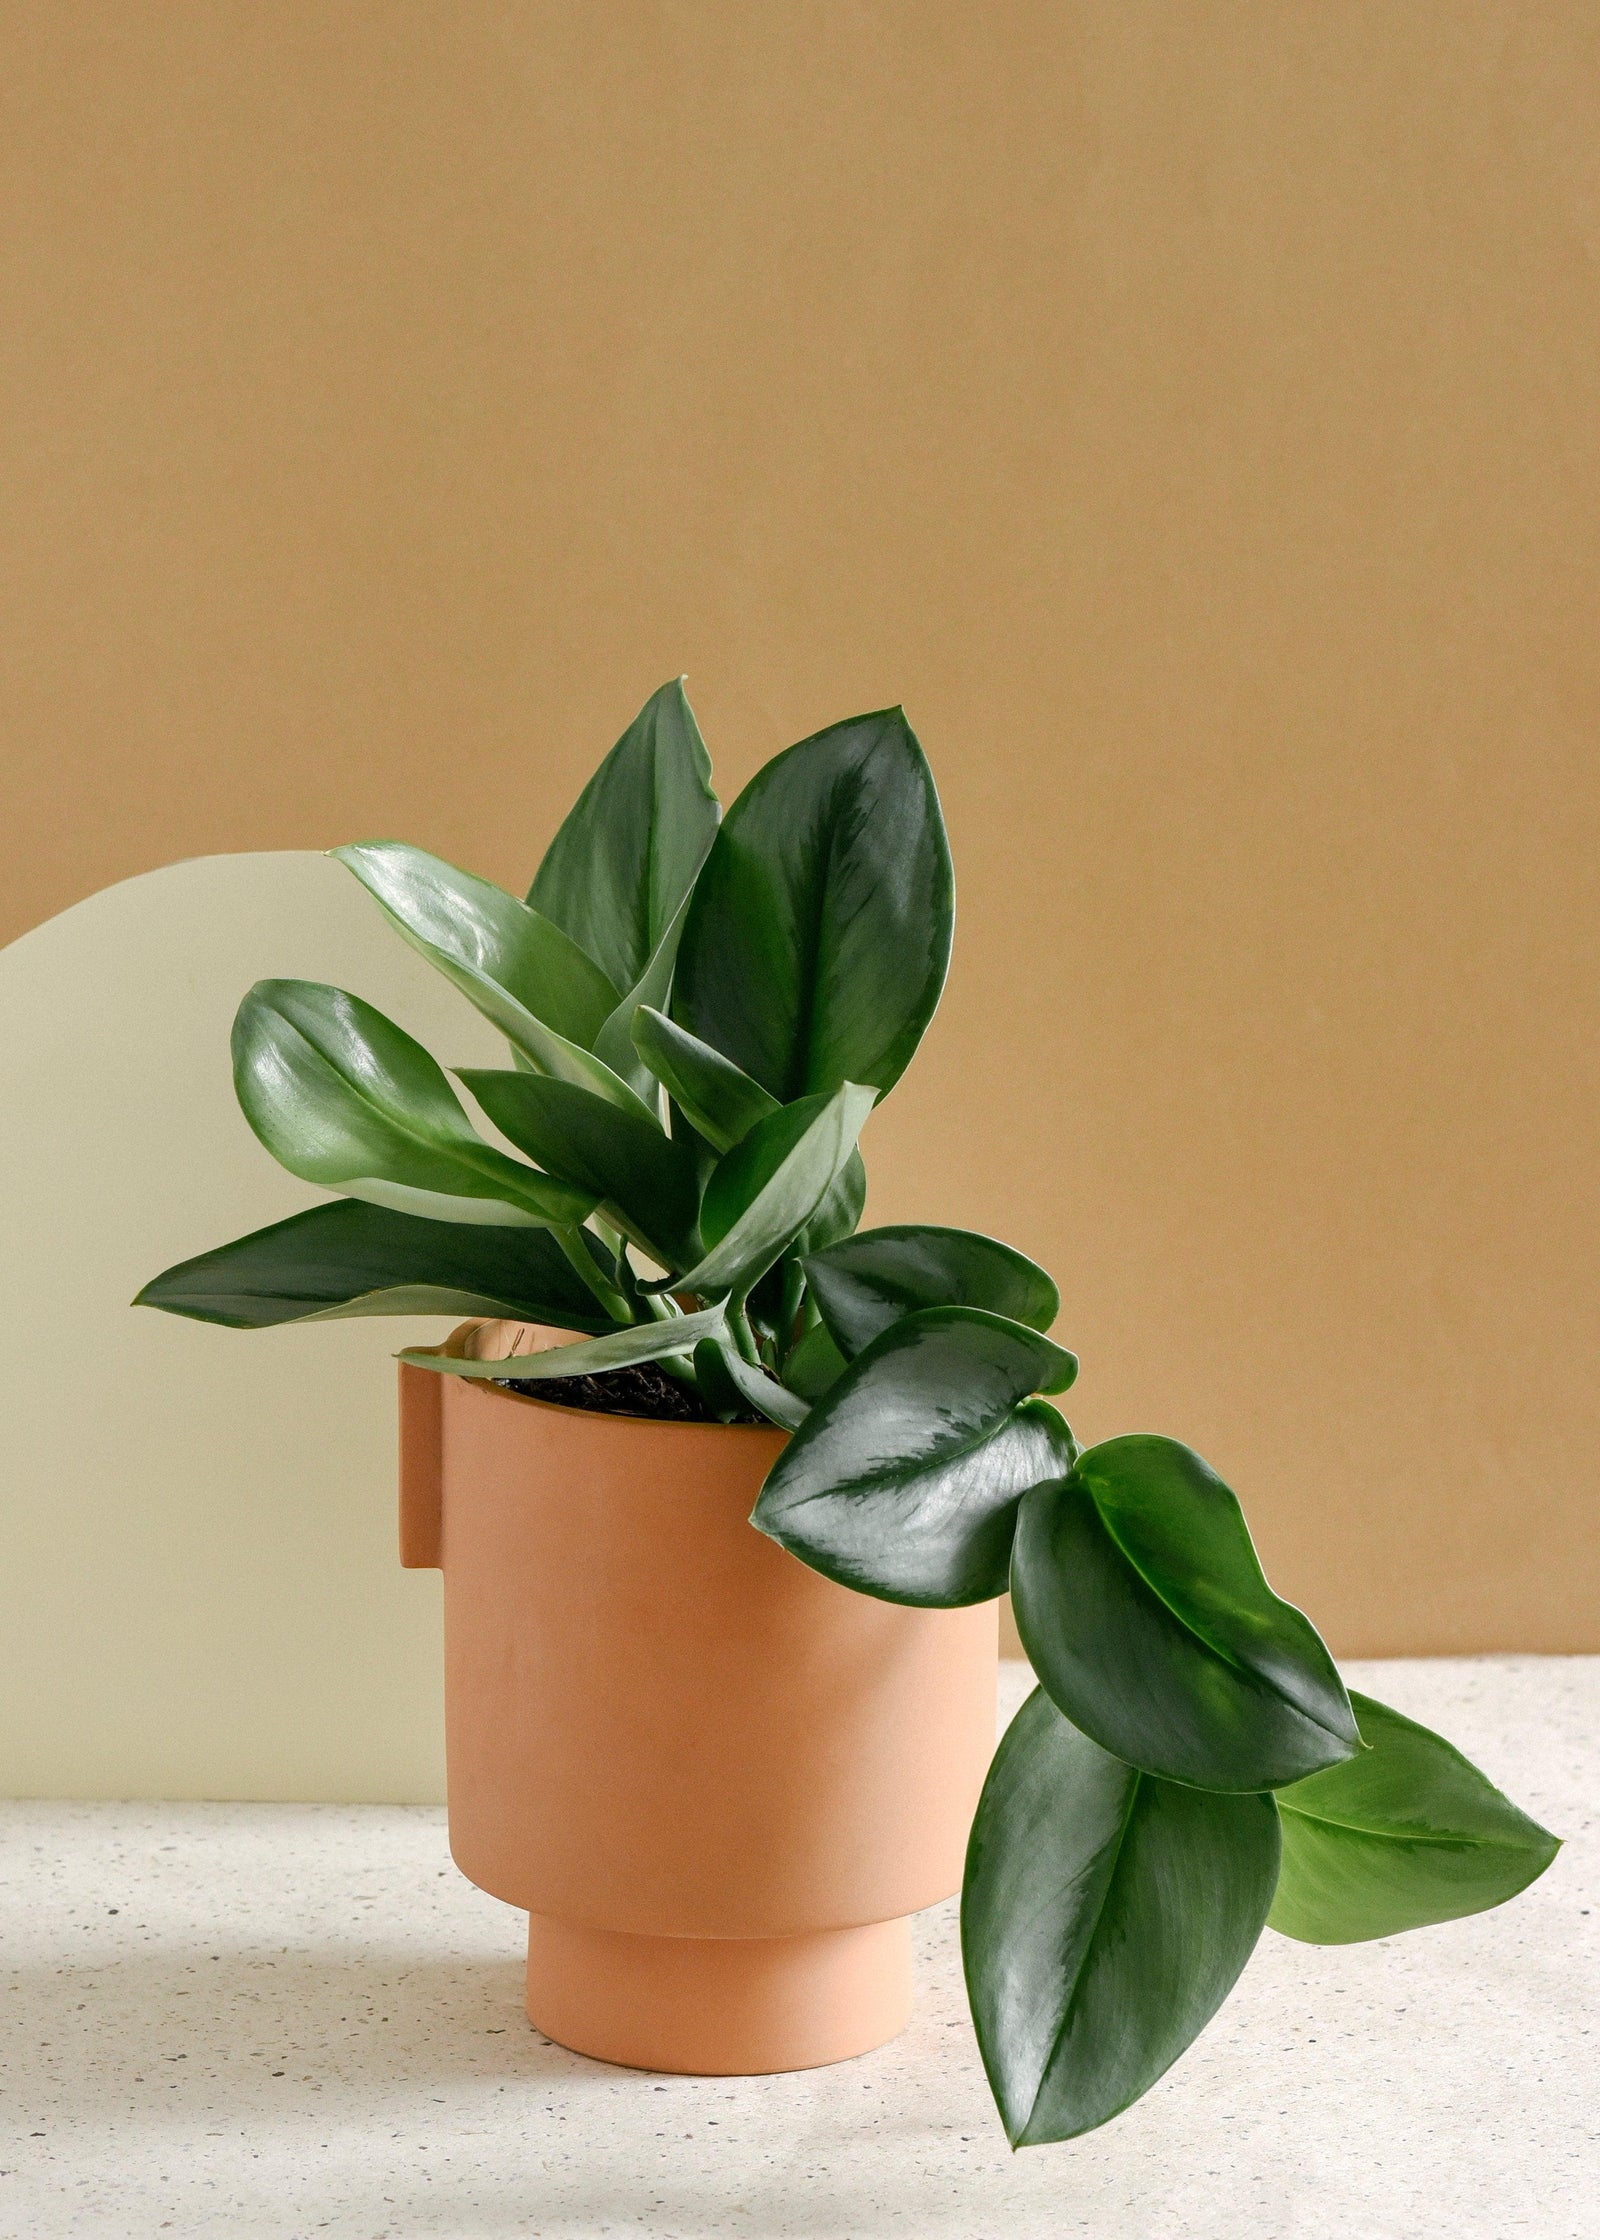
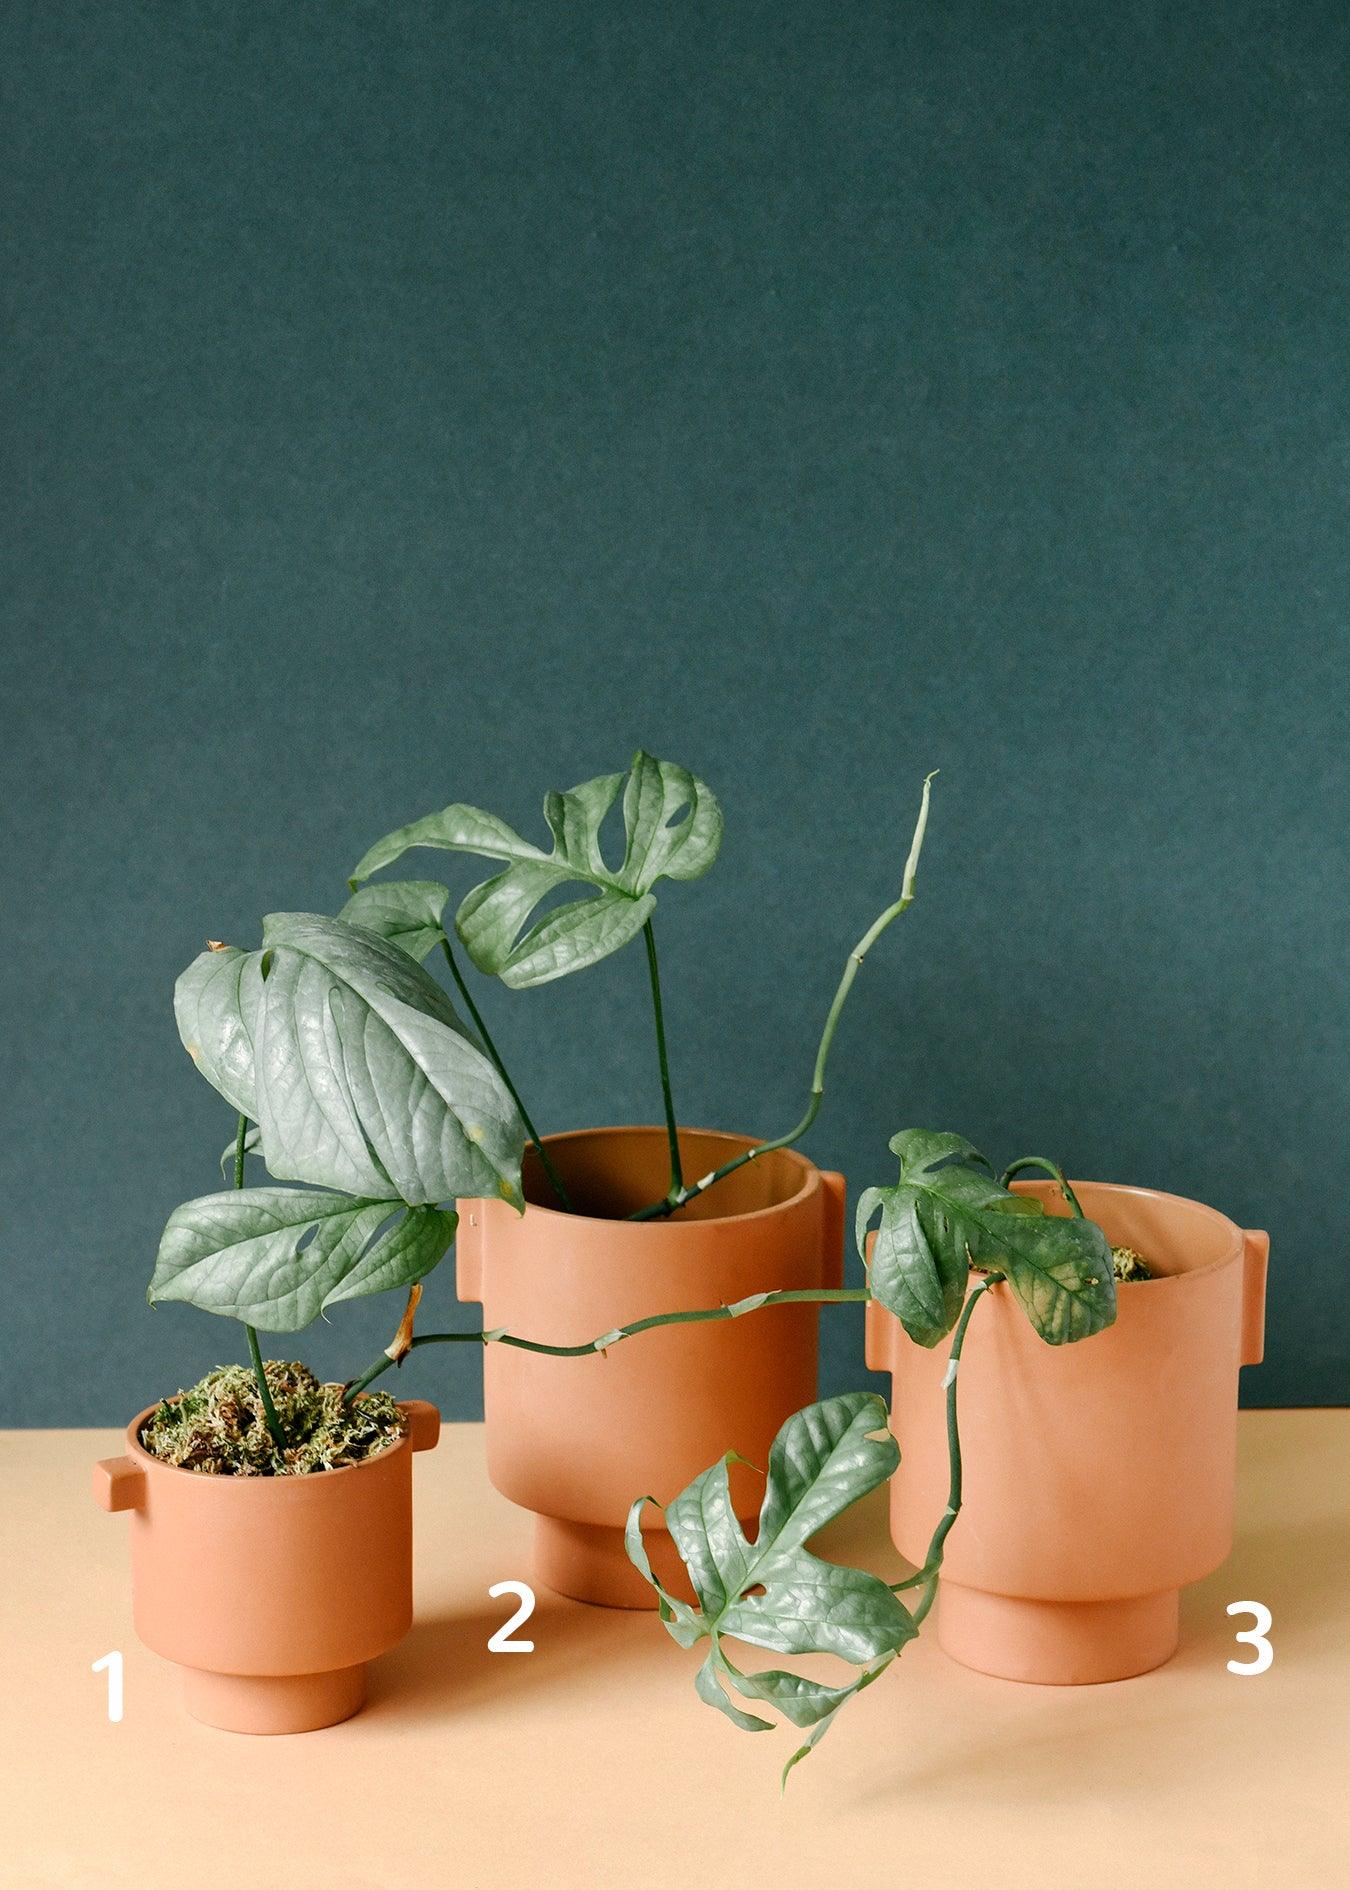
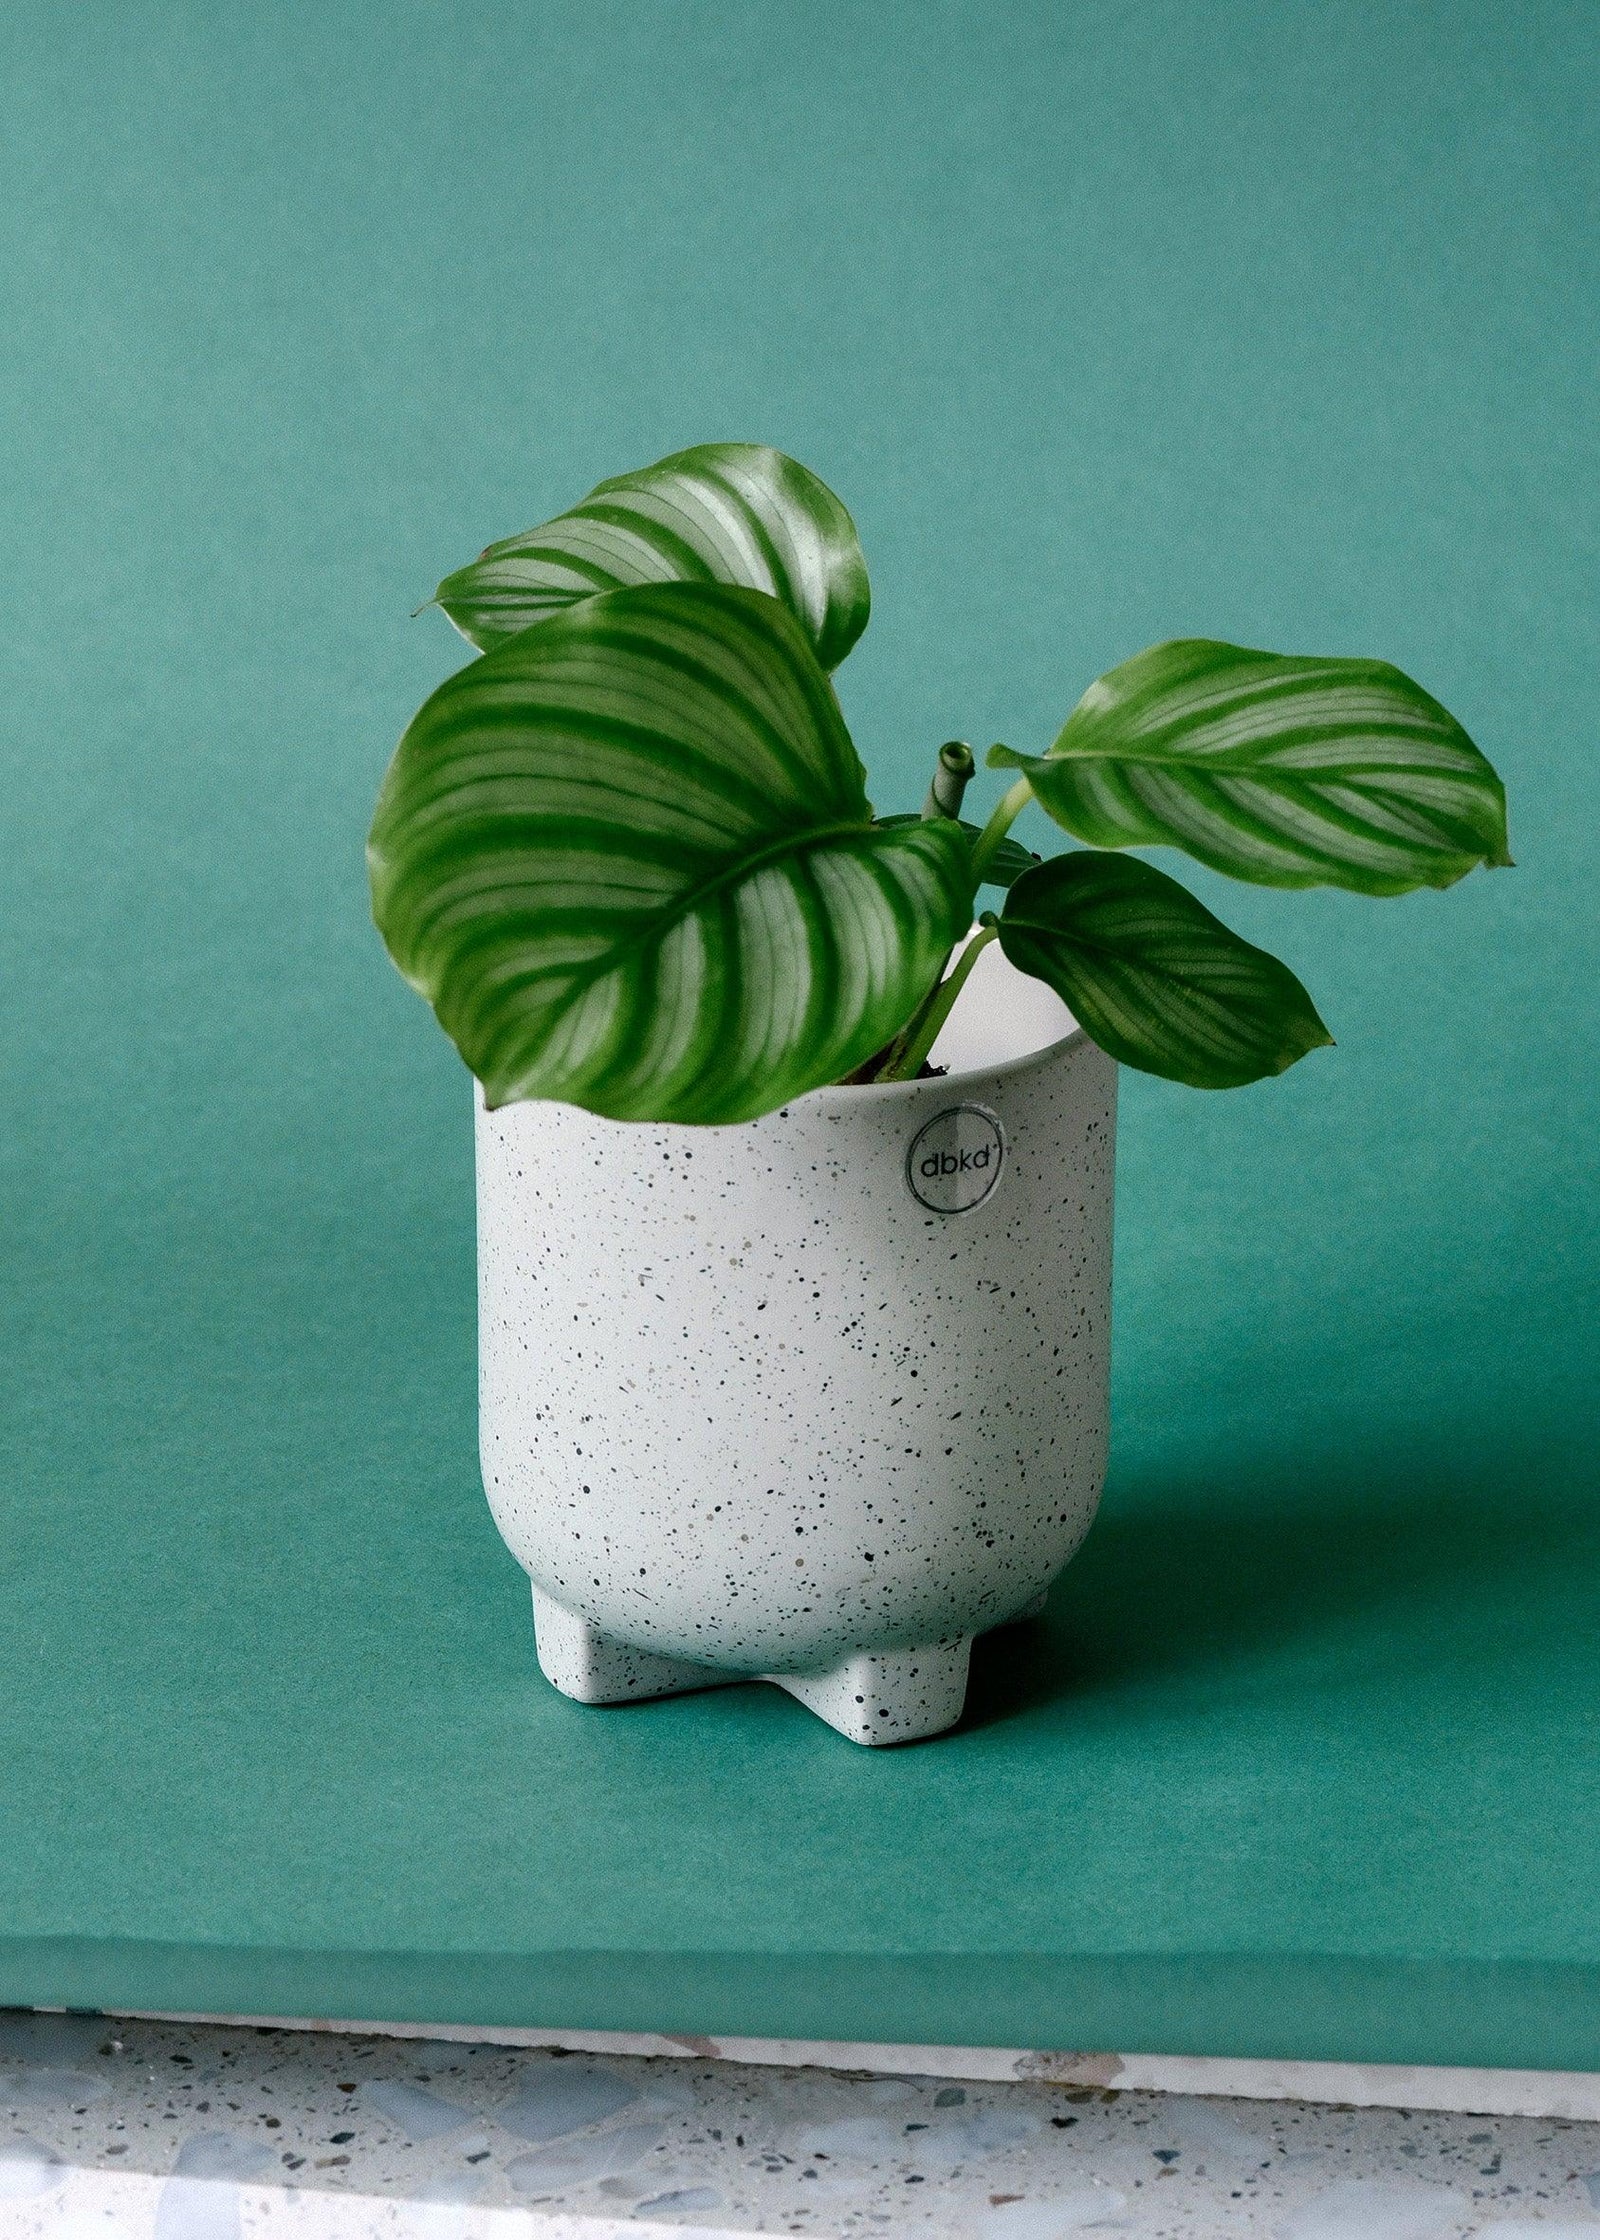
Minimum Designed Pots: Where Style Meets Sustainability
Elevate your indoor garden with Minimum Designed Pots, a perfect fusion of eco-conscious craftsmanship and timeless aesthetics. Available in versatile sizes of 6cm, 12cm, and 15cm diameters, these planters are custom-made to fit all Plant Circle plants seamlessly. Whether you're growing succulents, herbs, or your favorite houseplants, these pots provide a sustainable and stylish home for your greenery. Why Choose Minimum Designed Pots? Eco-Friendly Materials: Crafted with sustainable, biodegradable materials to reduce environmental impact. Waterproof Design: Simply place your nursery pot inside—no extra fuss, just effortless plant care. Timeless Natural Finish: Complements a variety of design styles, including Praha, Japan, Eden, Oslo, Savanne, and Apple. Lightweight & Durable: Perfect for everyday use, while being easy to handle and clean. Sizes for Every Need: From petite 6cm pots to larger 15cm options, there's a size for every plant in your collection. Whether you're a minimalist at heart or love bohemian touches, Minimum Designed Pots blend functionality with beauty, all while promoting a greener future. 🌿 Add these sustainable planters to your home and embrace a stylish, eco-friendly way to grow!
View collection
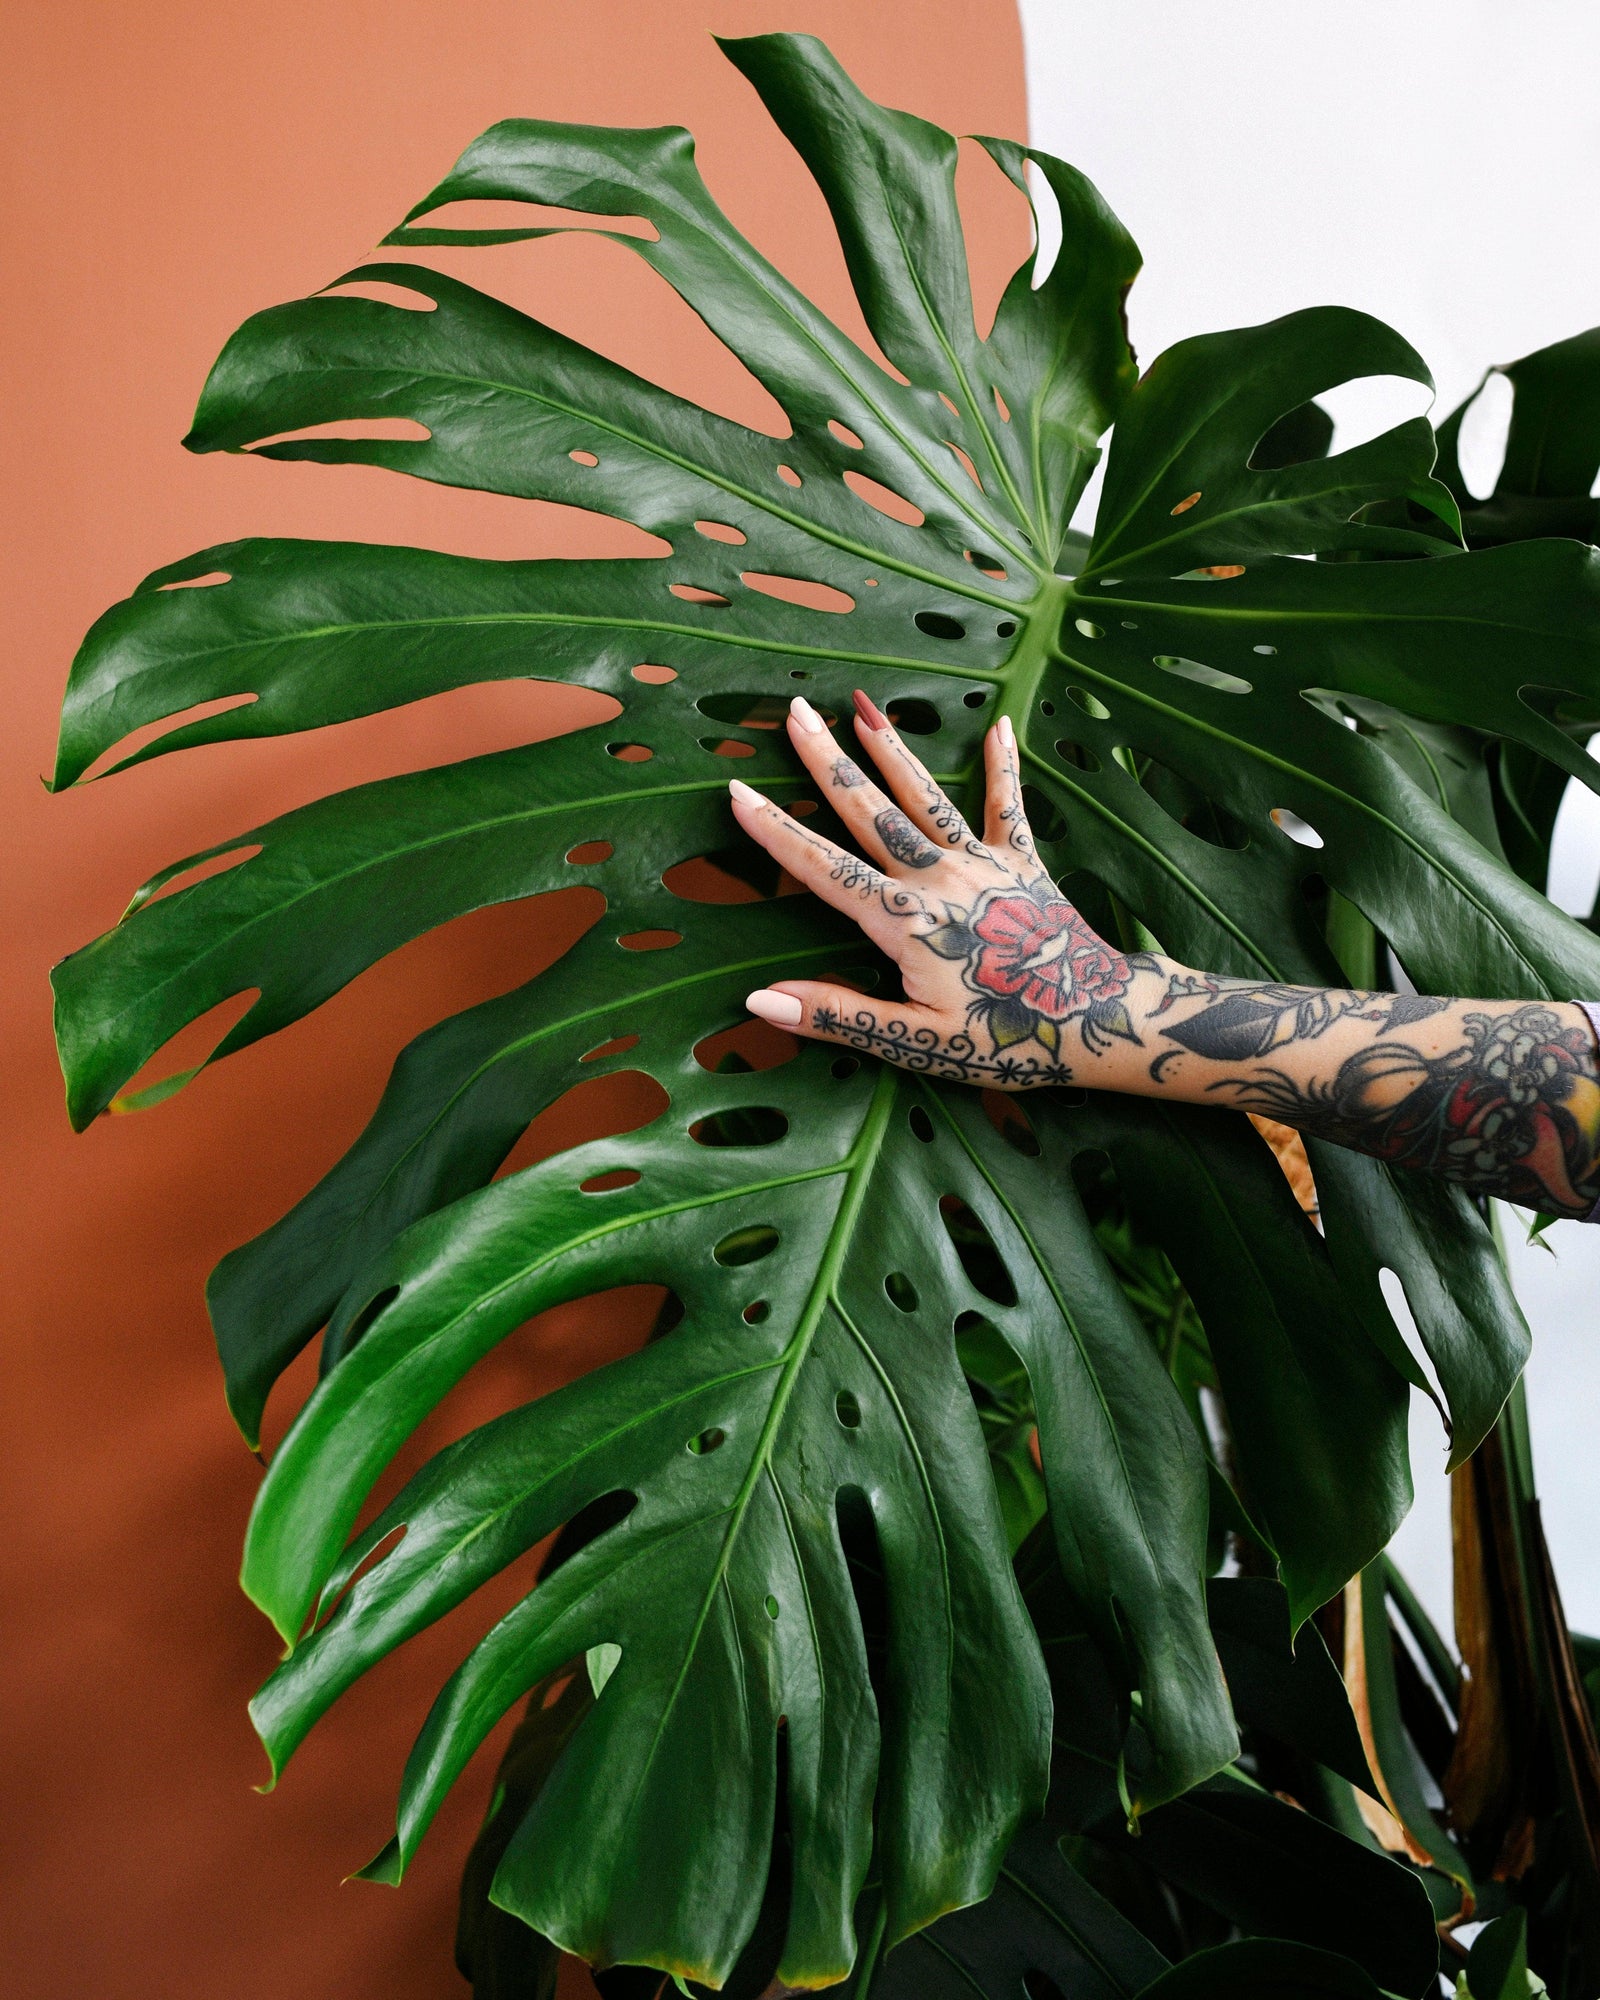
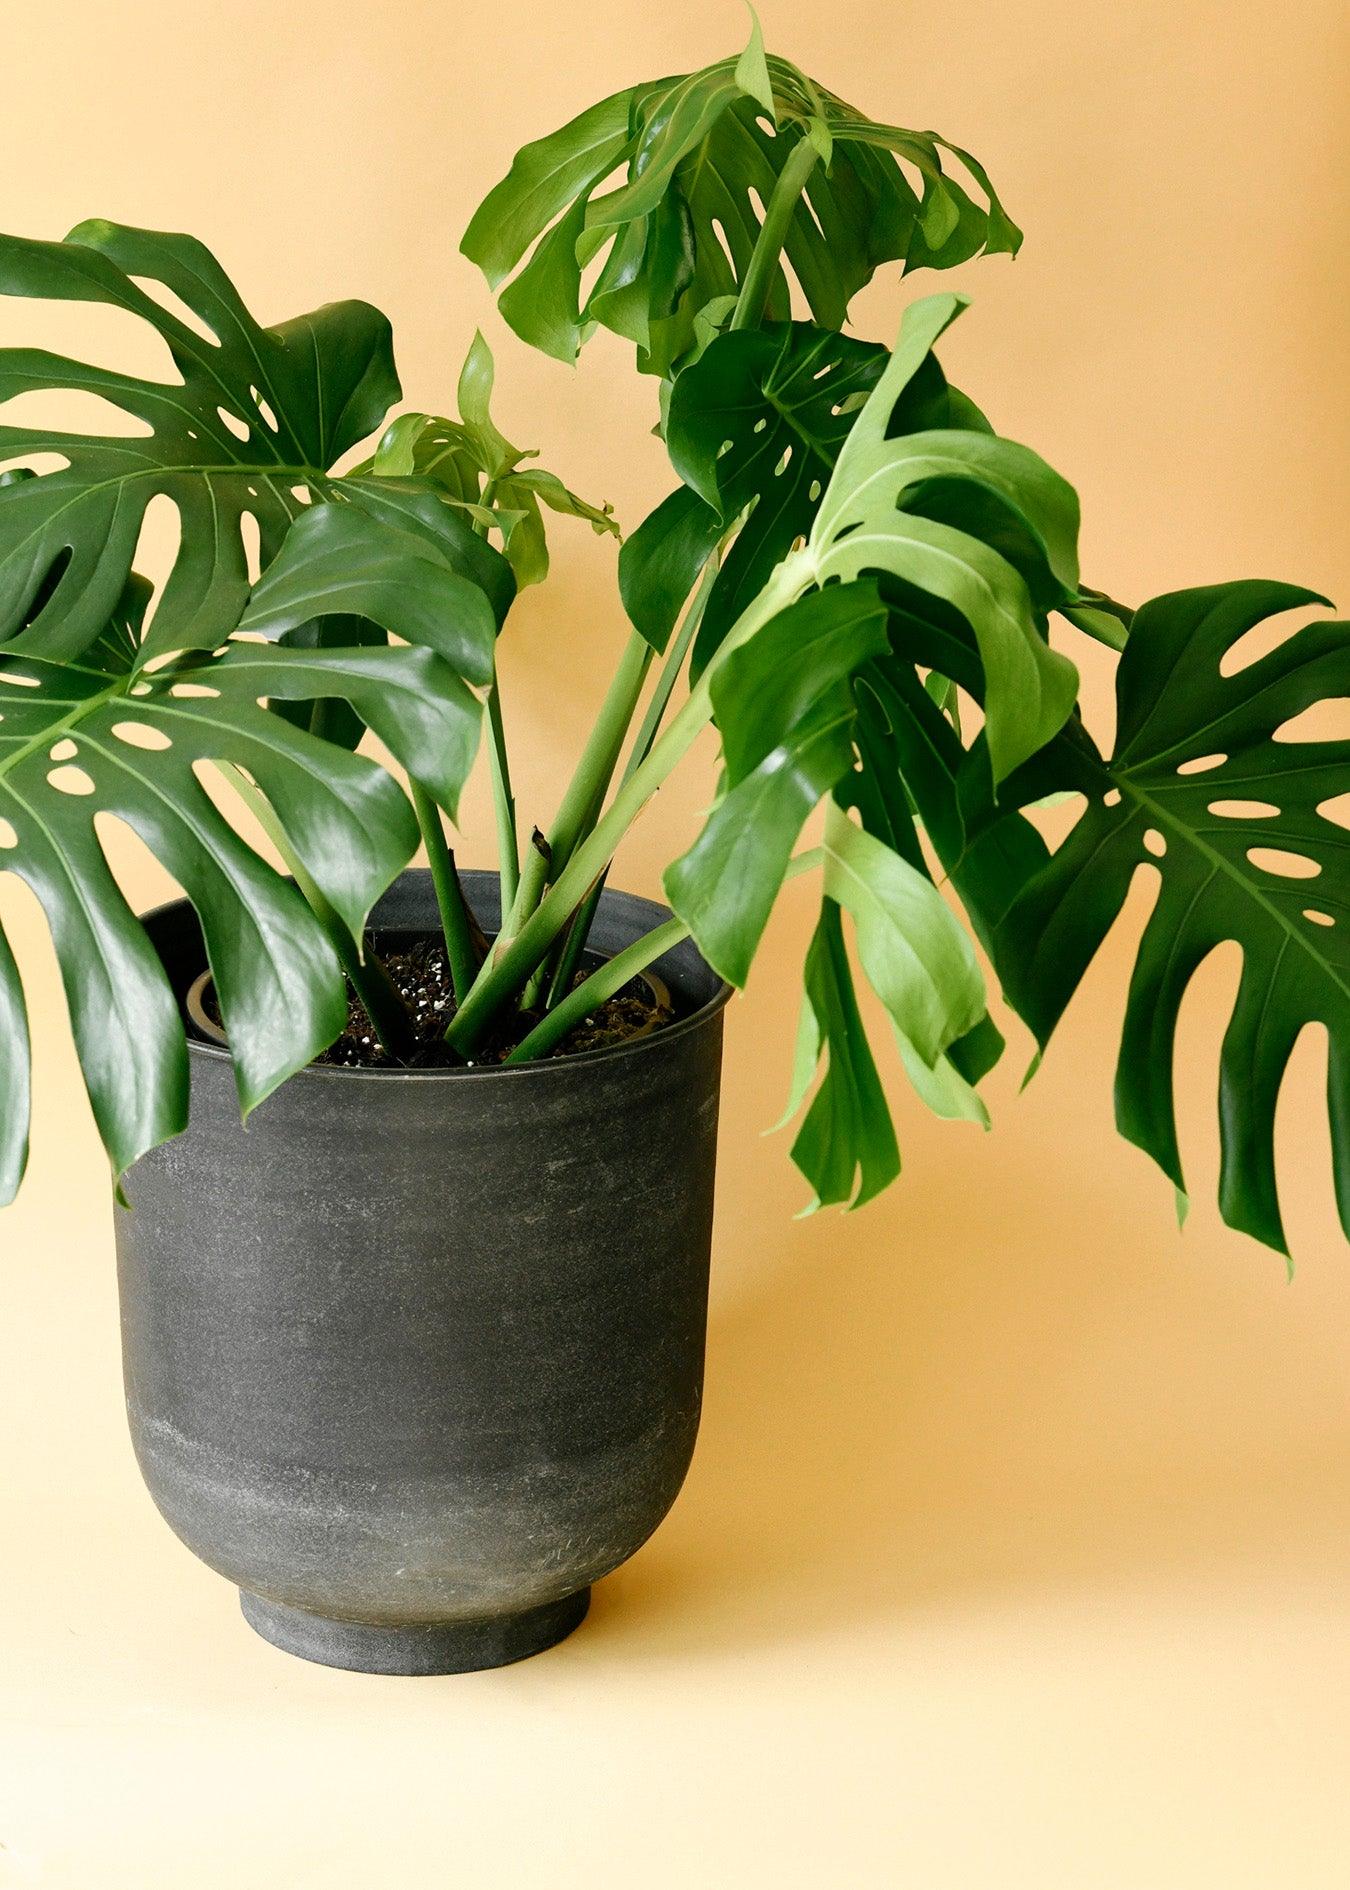
Monstera
Shop our Monstera collection, featuring iconic and rare varieties perfect for adding a tropical touch to your indoor space.
View collection
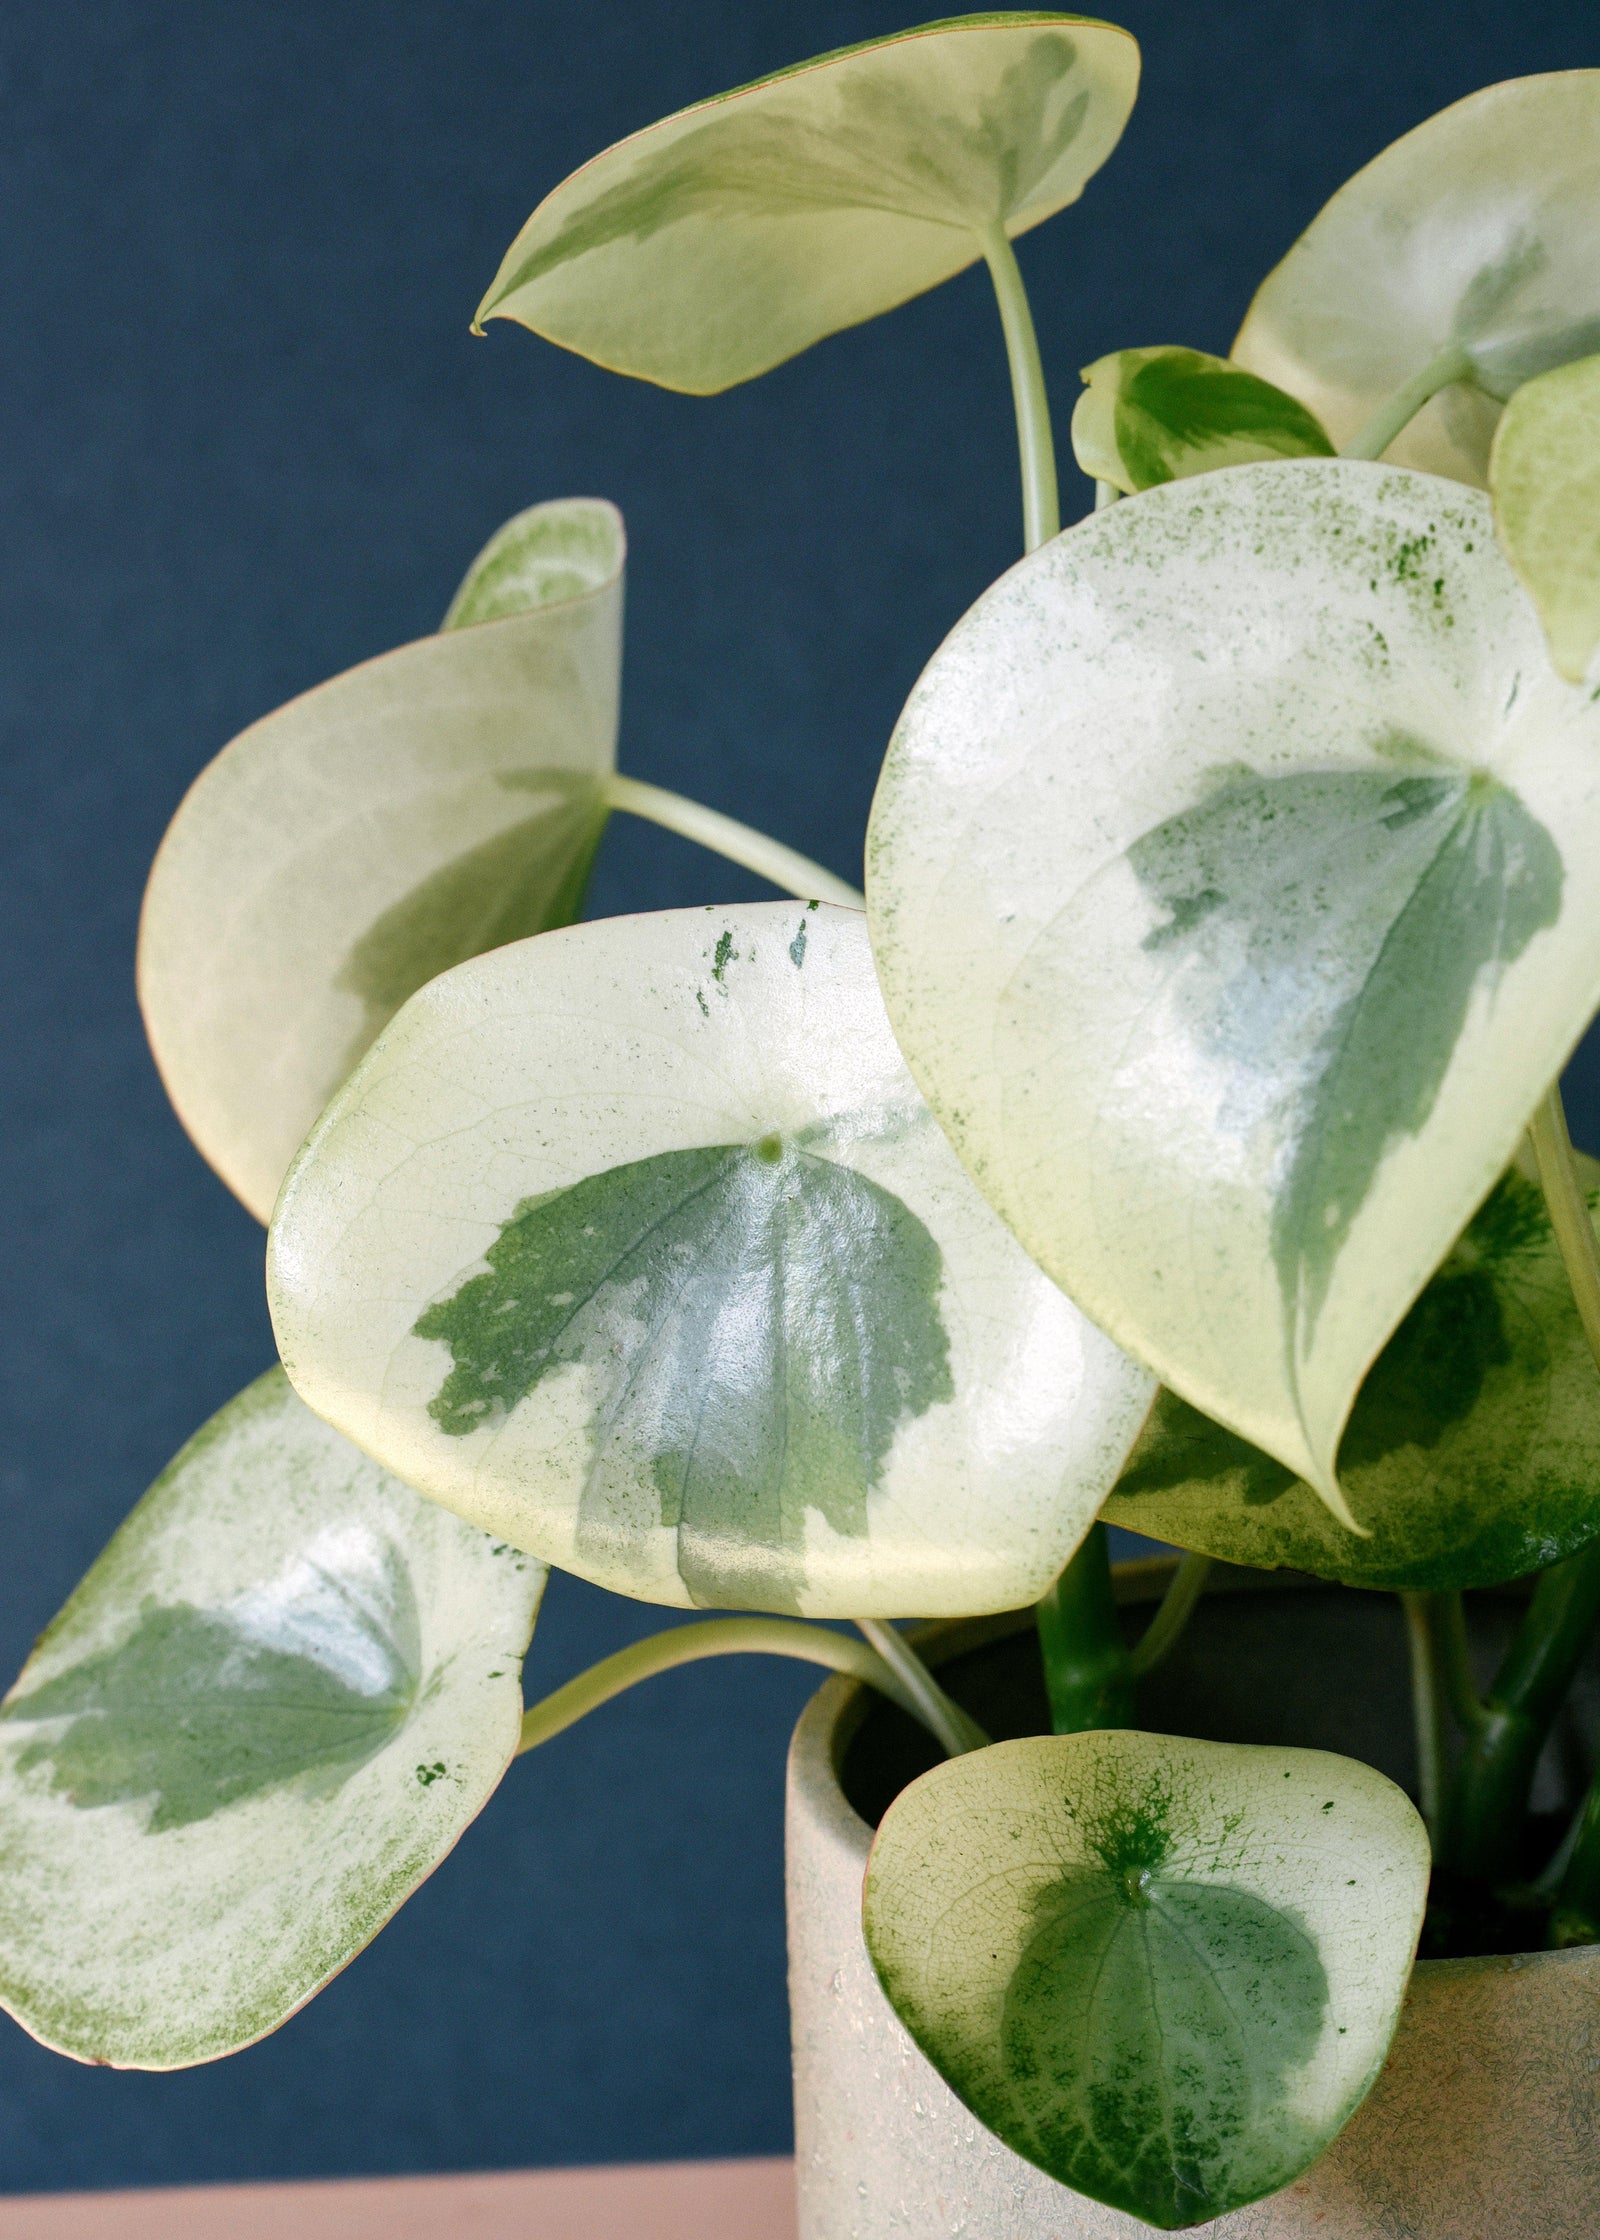
Peperomia
Shop our Peperomia collection, featuring compact, low-maintenance plants with unique, textured leaves.
View collection

Pet-Friendly Plants
As pet lovers and owners, we will do anything to make sure our furry friends are safe and healthy. However, that does not mean you cannot have houseplants! Even if your pet likes to nibble on your green babies at times. The plants in this section are pet-friendly. This means they are non-toxic to pets, so they are safe to have in your home along with your cat or dog! If you have smaller furry friends, such as bunnies, more care needs to be taken. While houseplants have the ability to transform your home into a livelier space, many plants can be toxic to pets that may decide to munch on a leaf or two. Luckily, there are a number of pet-safe plants that can add beauty to your home without being a threat to your furry friend. While the plants in this category are pet-friendly, it is still best to eliminate temptation and place all houseplants out of reach of your cat or dog. Because, even if all your houseplants are pet-friendly and unlikely to cause health issues, they might still cause a tummy ache if your pet decides to snack on it. Our favourite pet-friendly plants Prayer plants Prayer Plants are beautiful safe houseplants for pets, grown for their bold and striking foliage. Some of our very favourite plants belong into this category: Calathea, Maranta, Stromanthe and Ctenanthe. They are called prayer plants because they close up their leaves at night, like hands in prayer, before opening them up again at dawn. This daily movement is known as nyctinasty and is fascinating to witness. African violets African violets are for people who cherish both foliage and flowers on a plant! These compact non-toxic houseplants with furry leaves are available in a multitude of forms and colors. Given the right growing conditions, African violets can flower non-stop for months on end. We are sure your dog or cat will love them, too! Hoya Hoya have been popular houseplants for decades and with good reason. These plants are extremely durable and easy to care for. They also produce gorgeous, fragrant, star-shaped flowers. Their common name, wax plants, refers to their thick, fleshy leaves that feel somewhat waxy. Hoya have come back into trend recently, attracting many new fervent collectors. Luckily, these houseplants are safe for pets as well! Other pet-friendly, non-toxic houseplants include: Ceropegia Jewel orchids Pilea Peperomia Parlour Palm
View collection
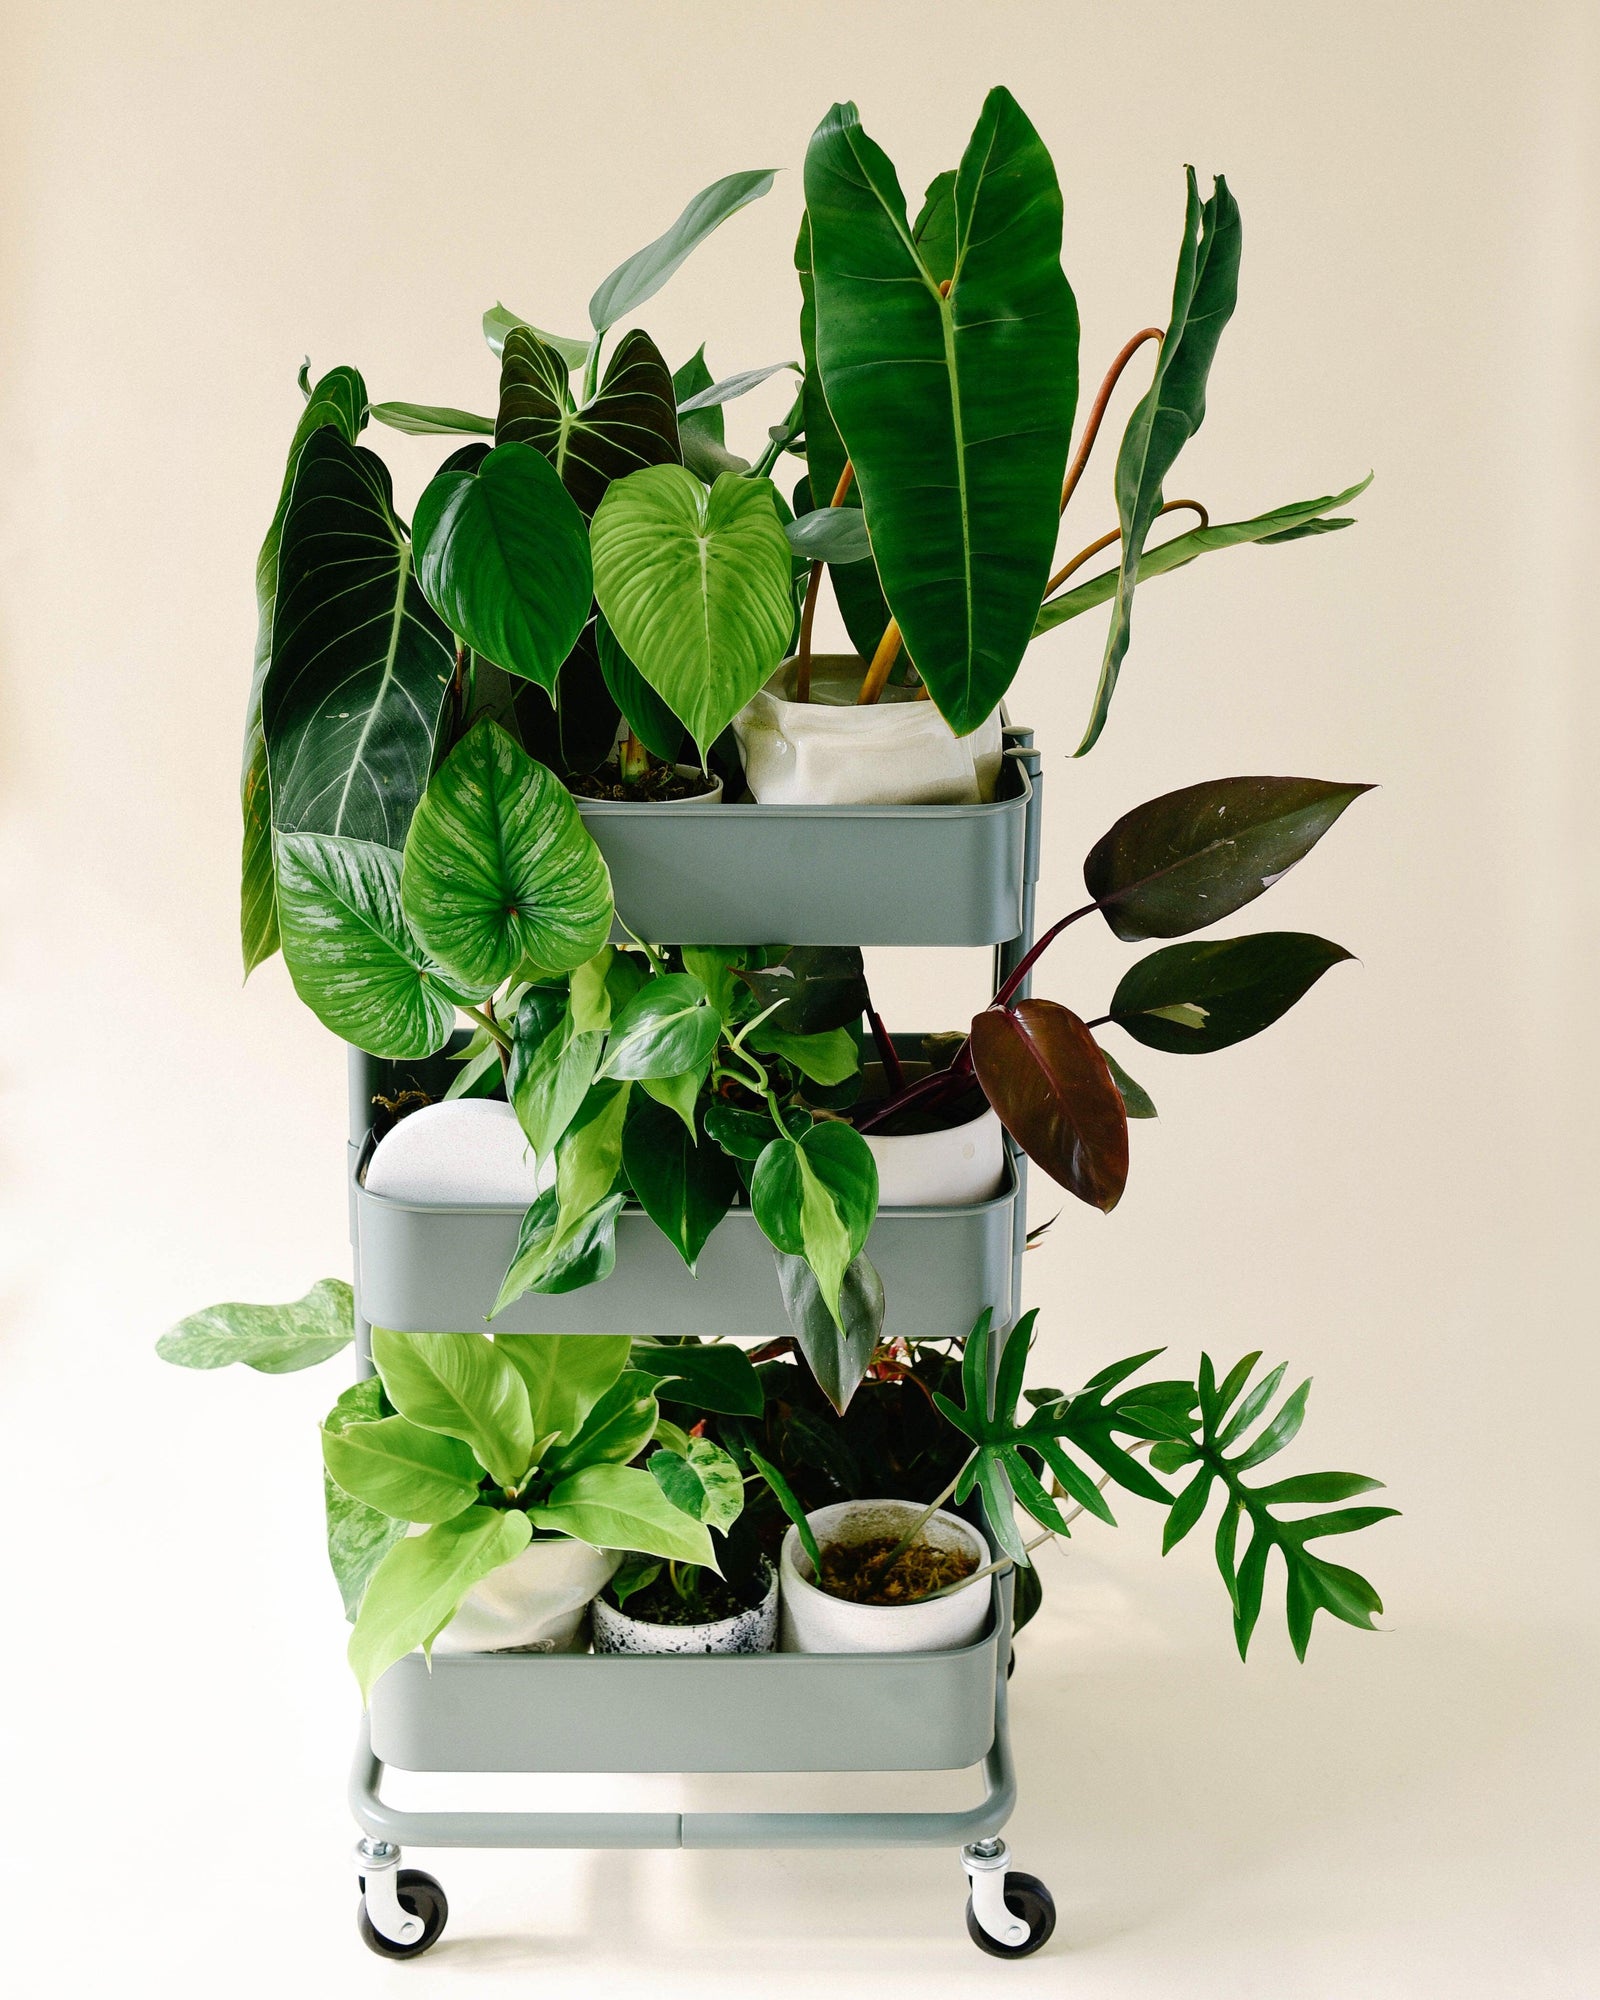
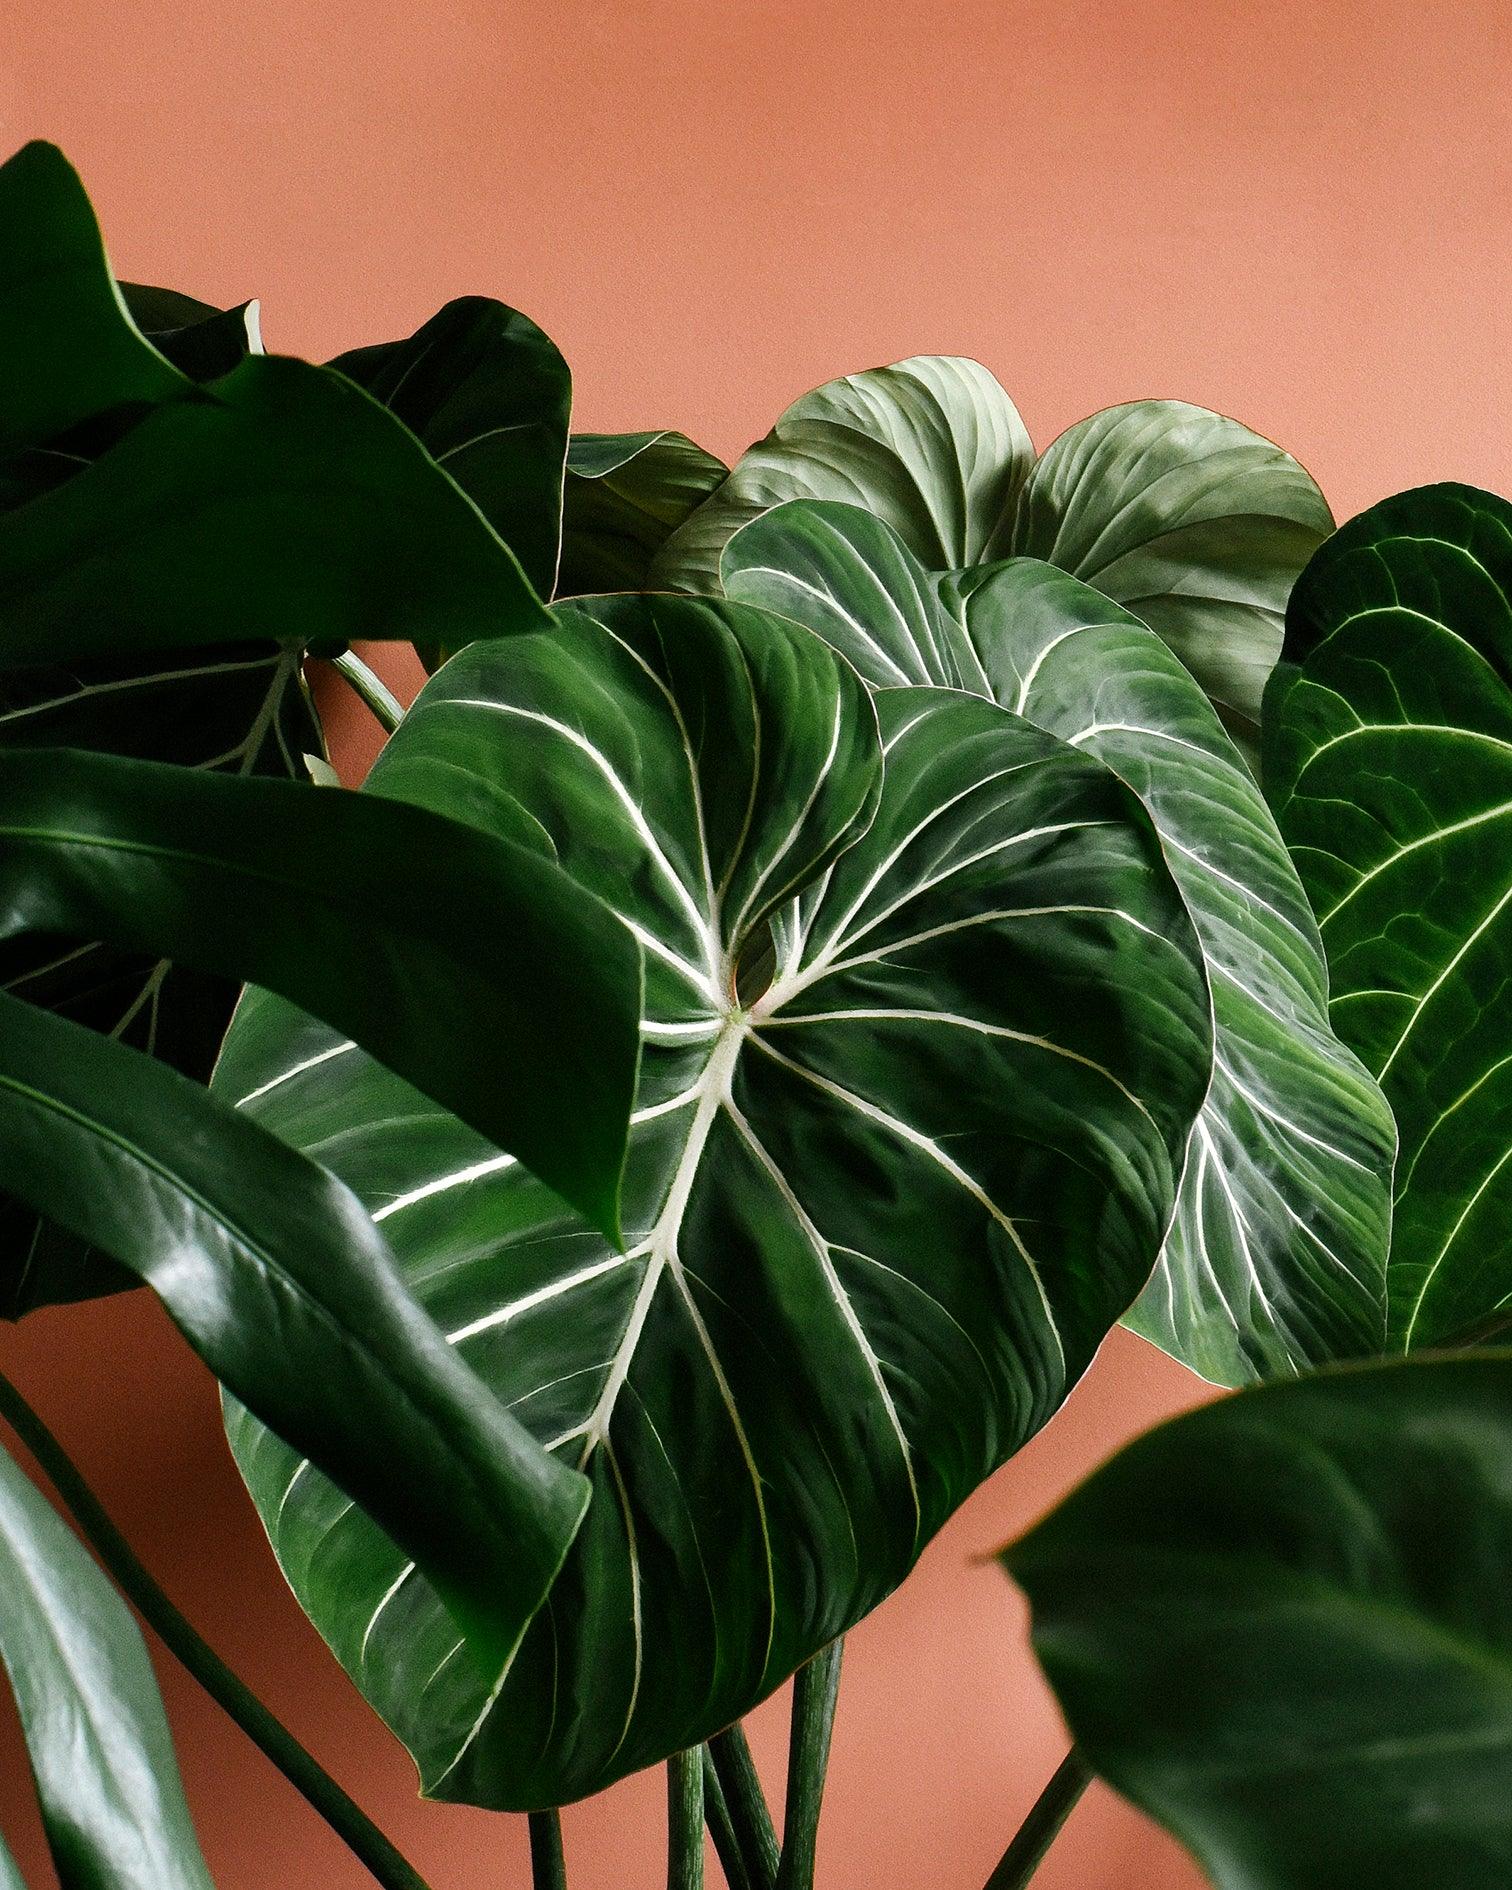
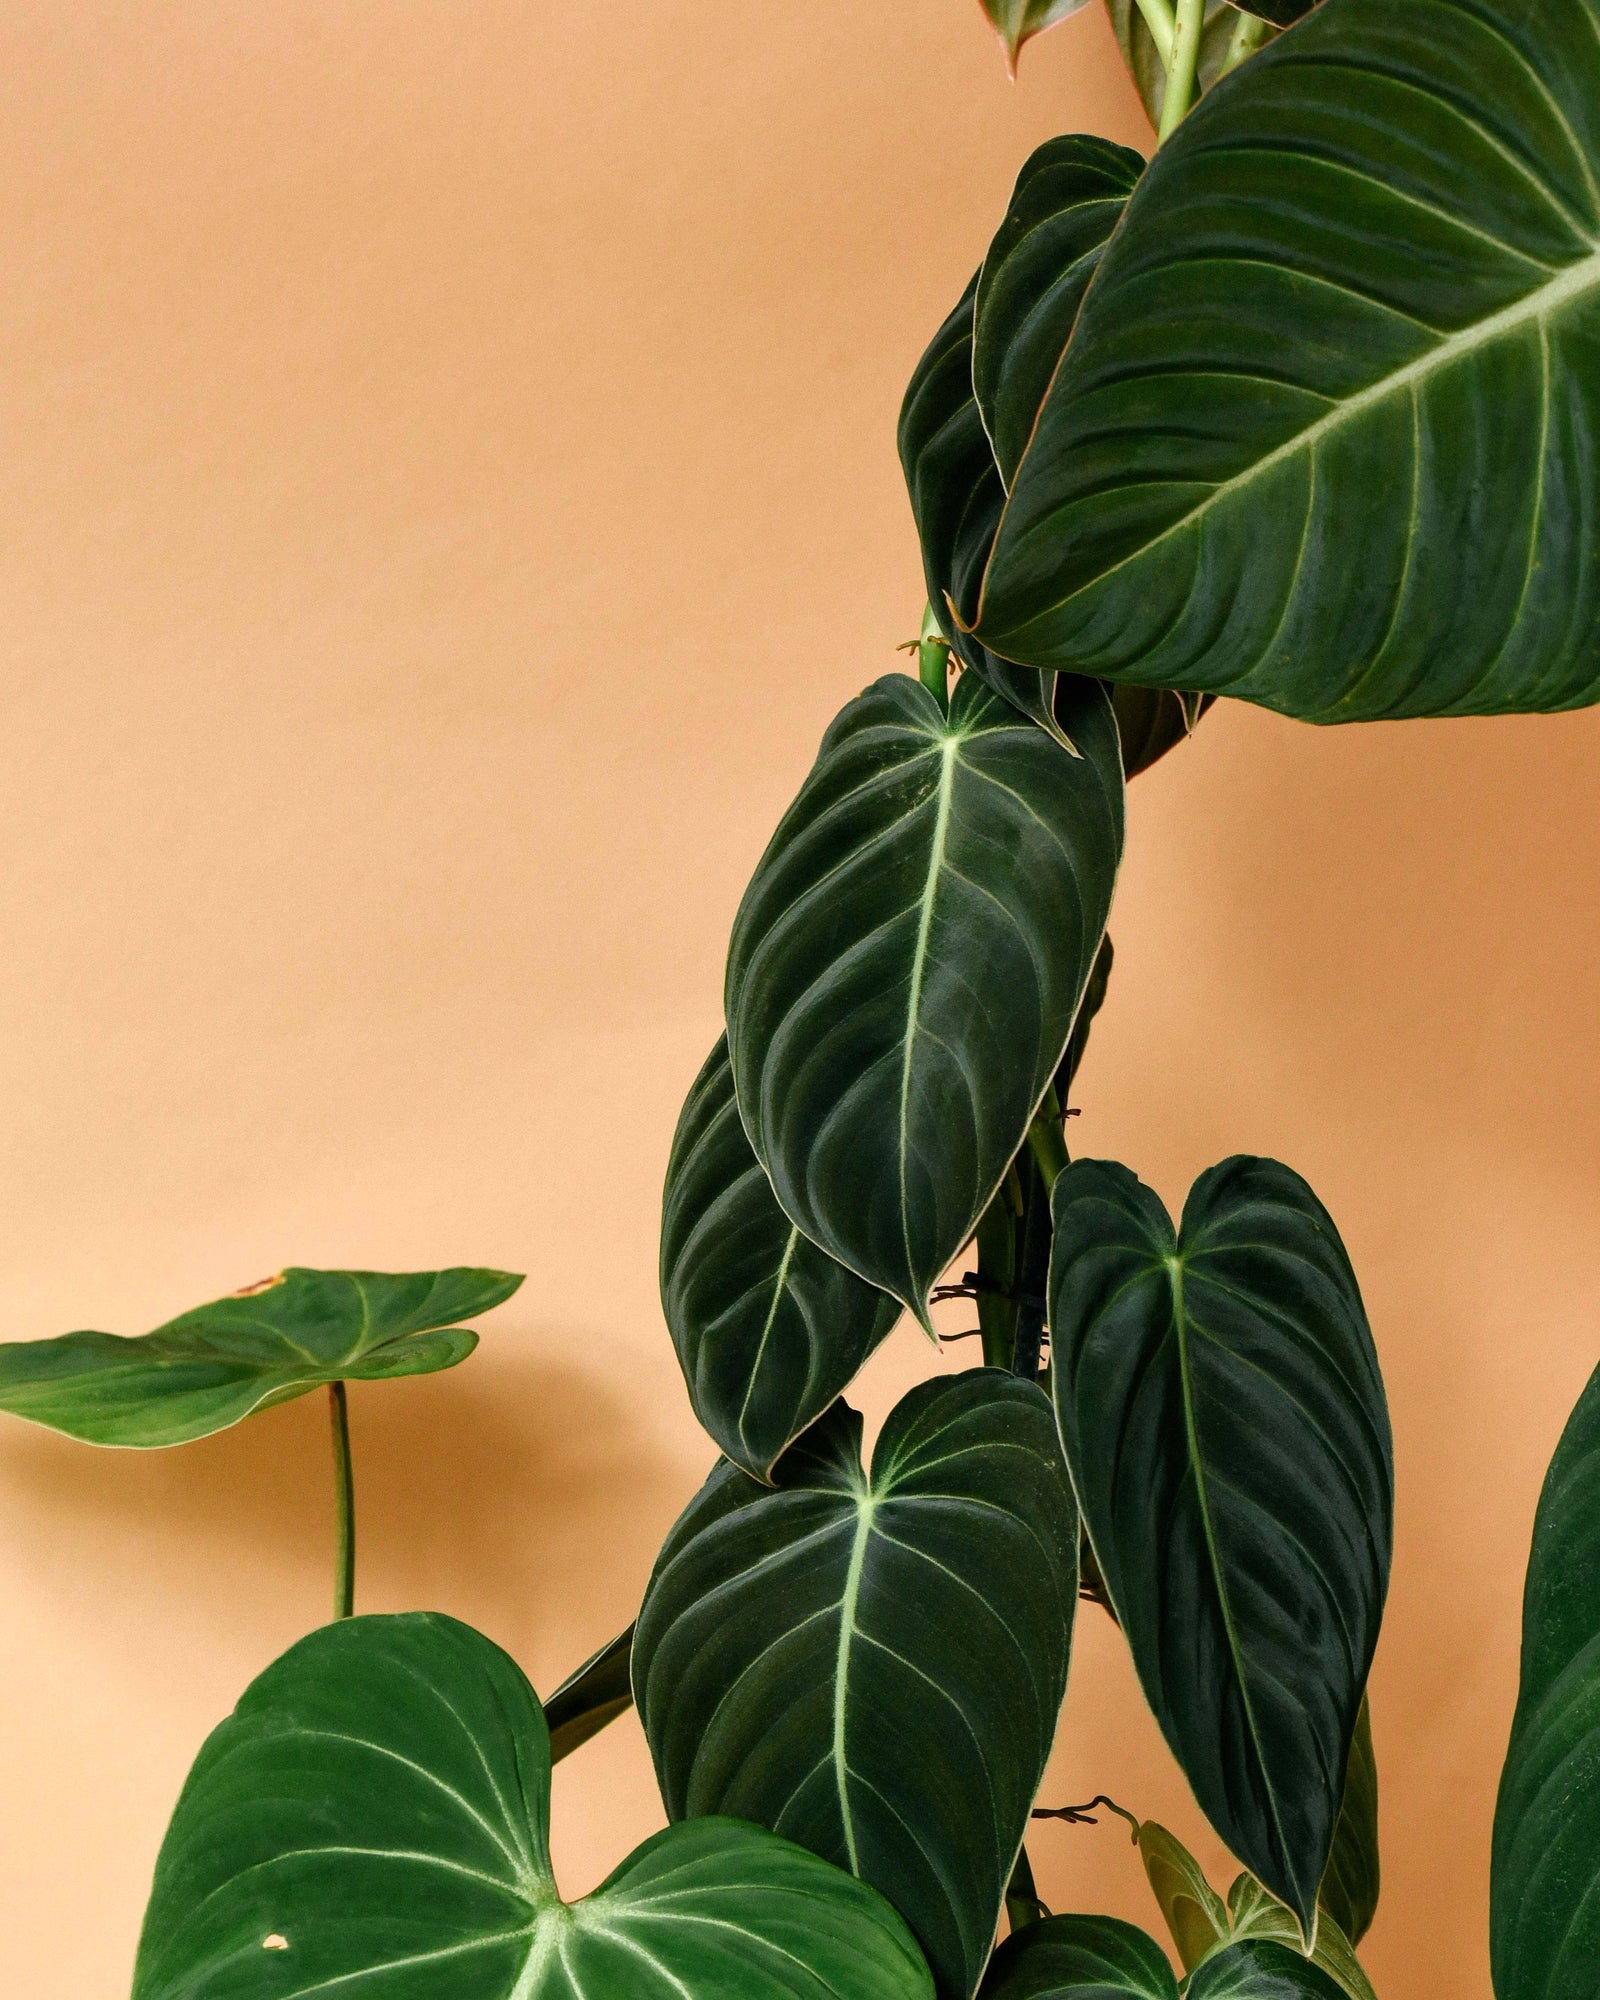
Philodendron
Philodendrons are admired for their remarkable beauty and diversity, coming in many shapes, sizes and hues - you are sure to find one (or 10) for you! Fun fact: In the Greek language 'Philo' means 'love' and 'Dendron' means 'tree hugger', describing the natural disposition of almost all Philodendrons to climb up trees.
View collection
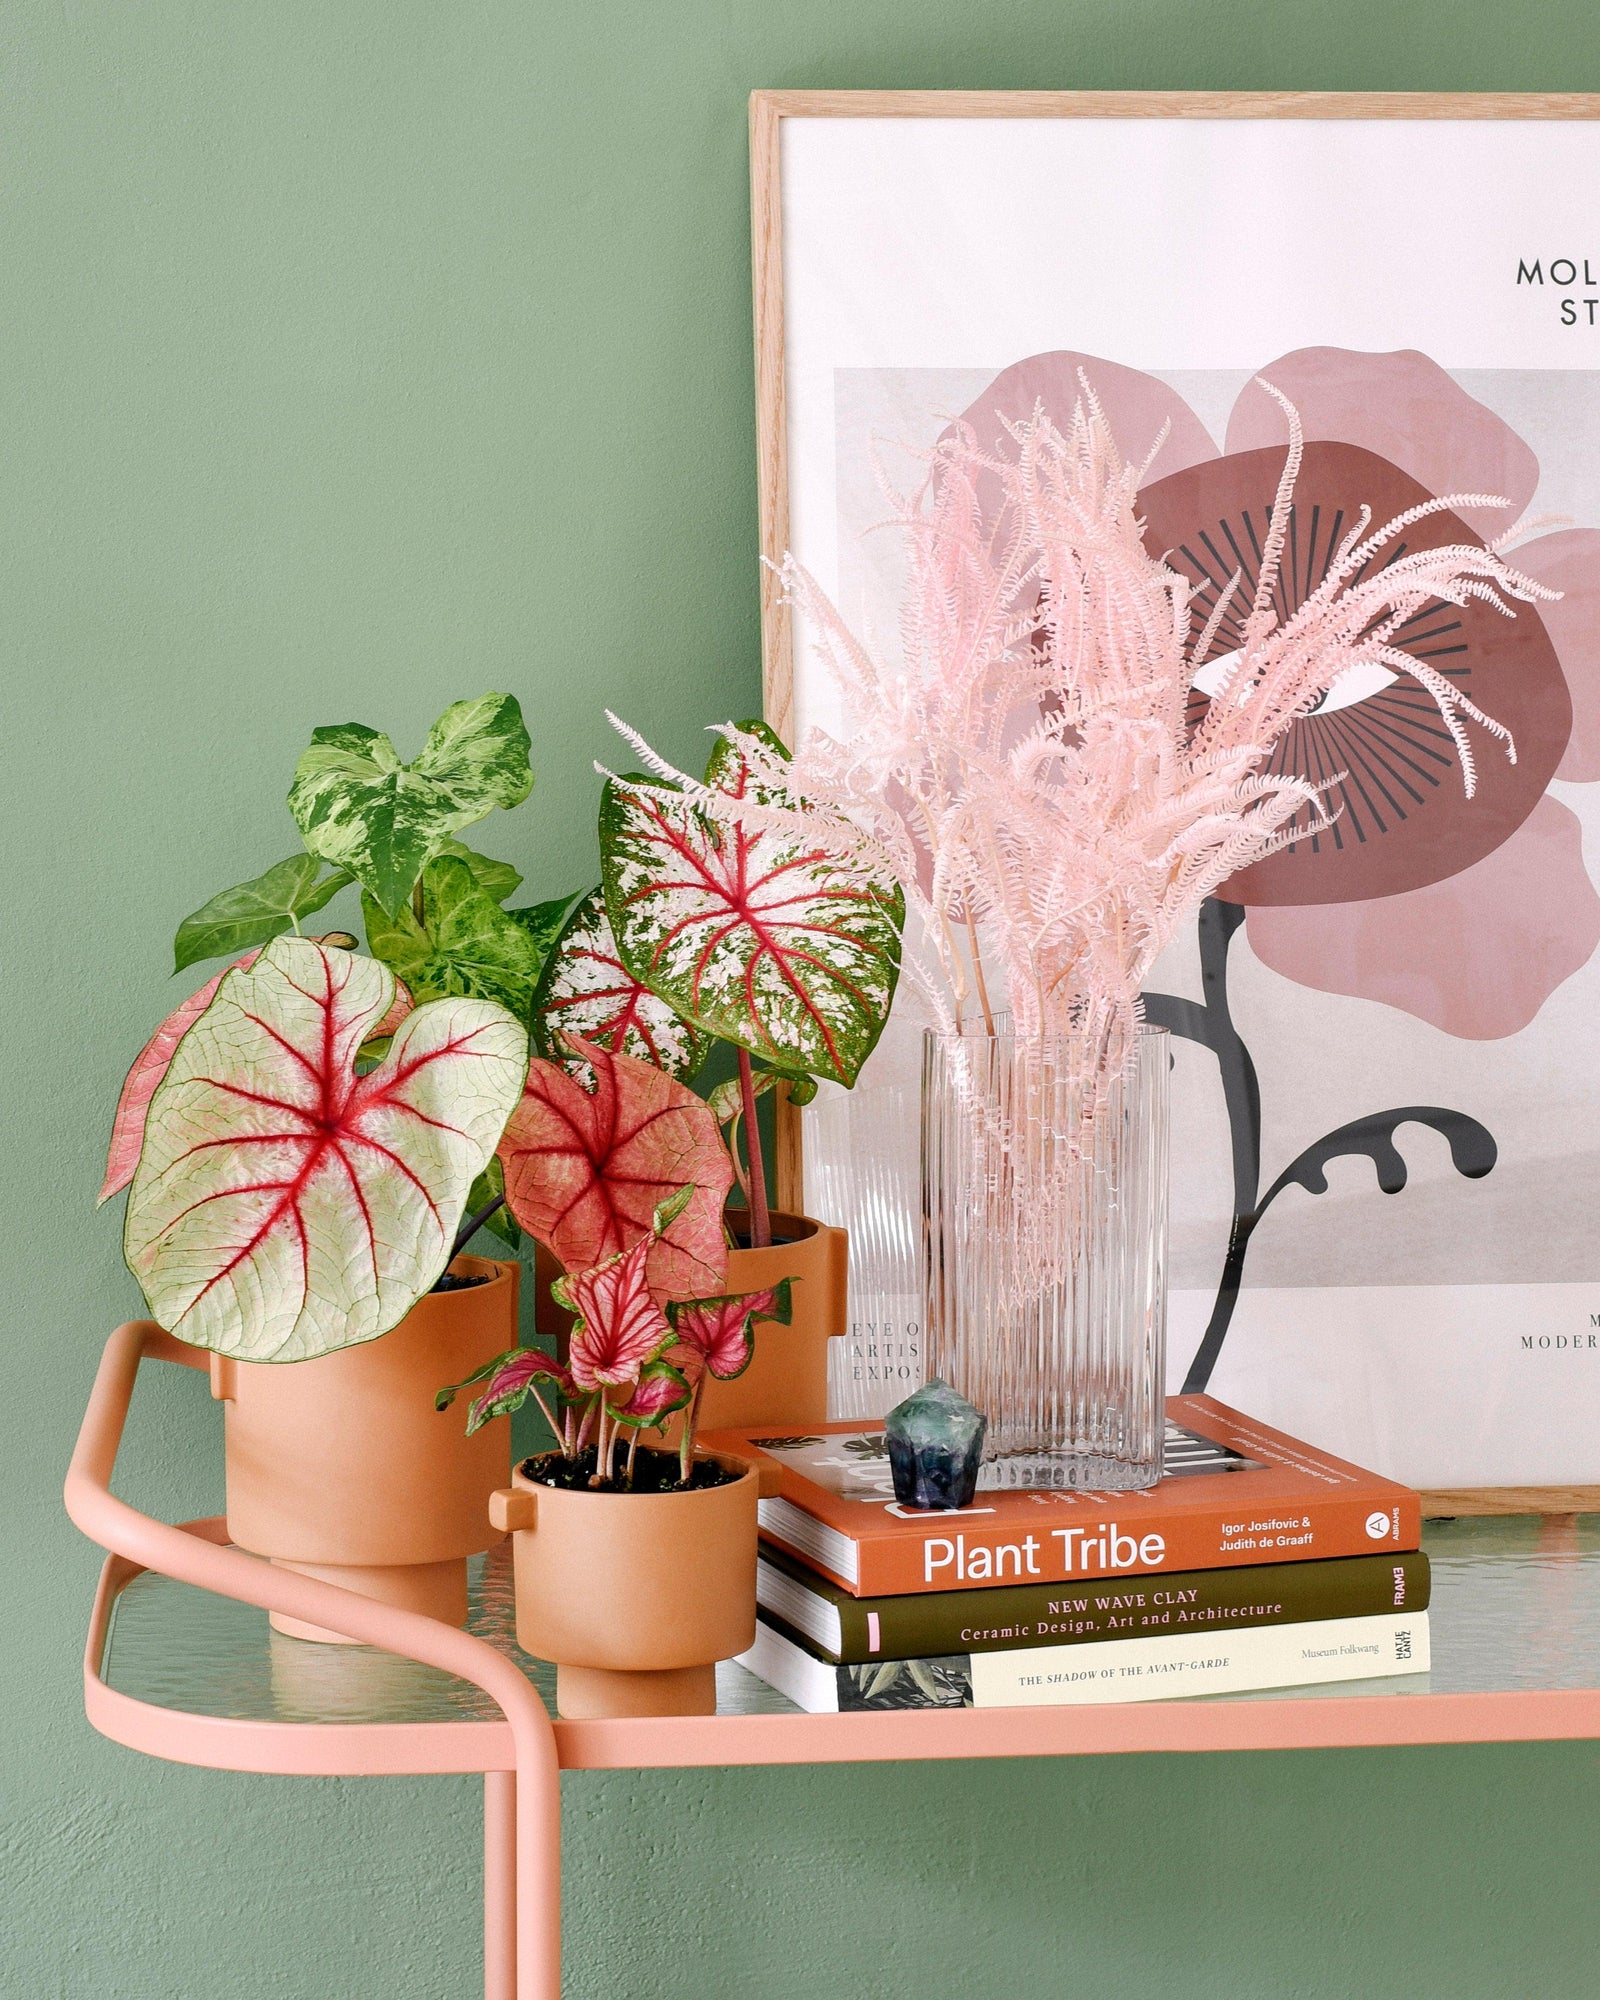
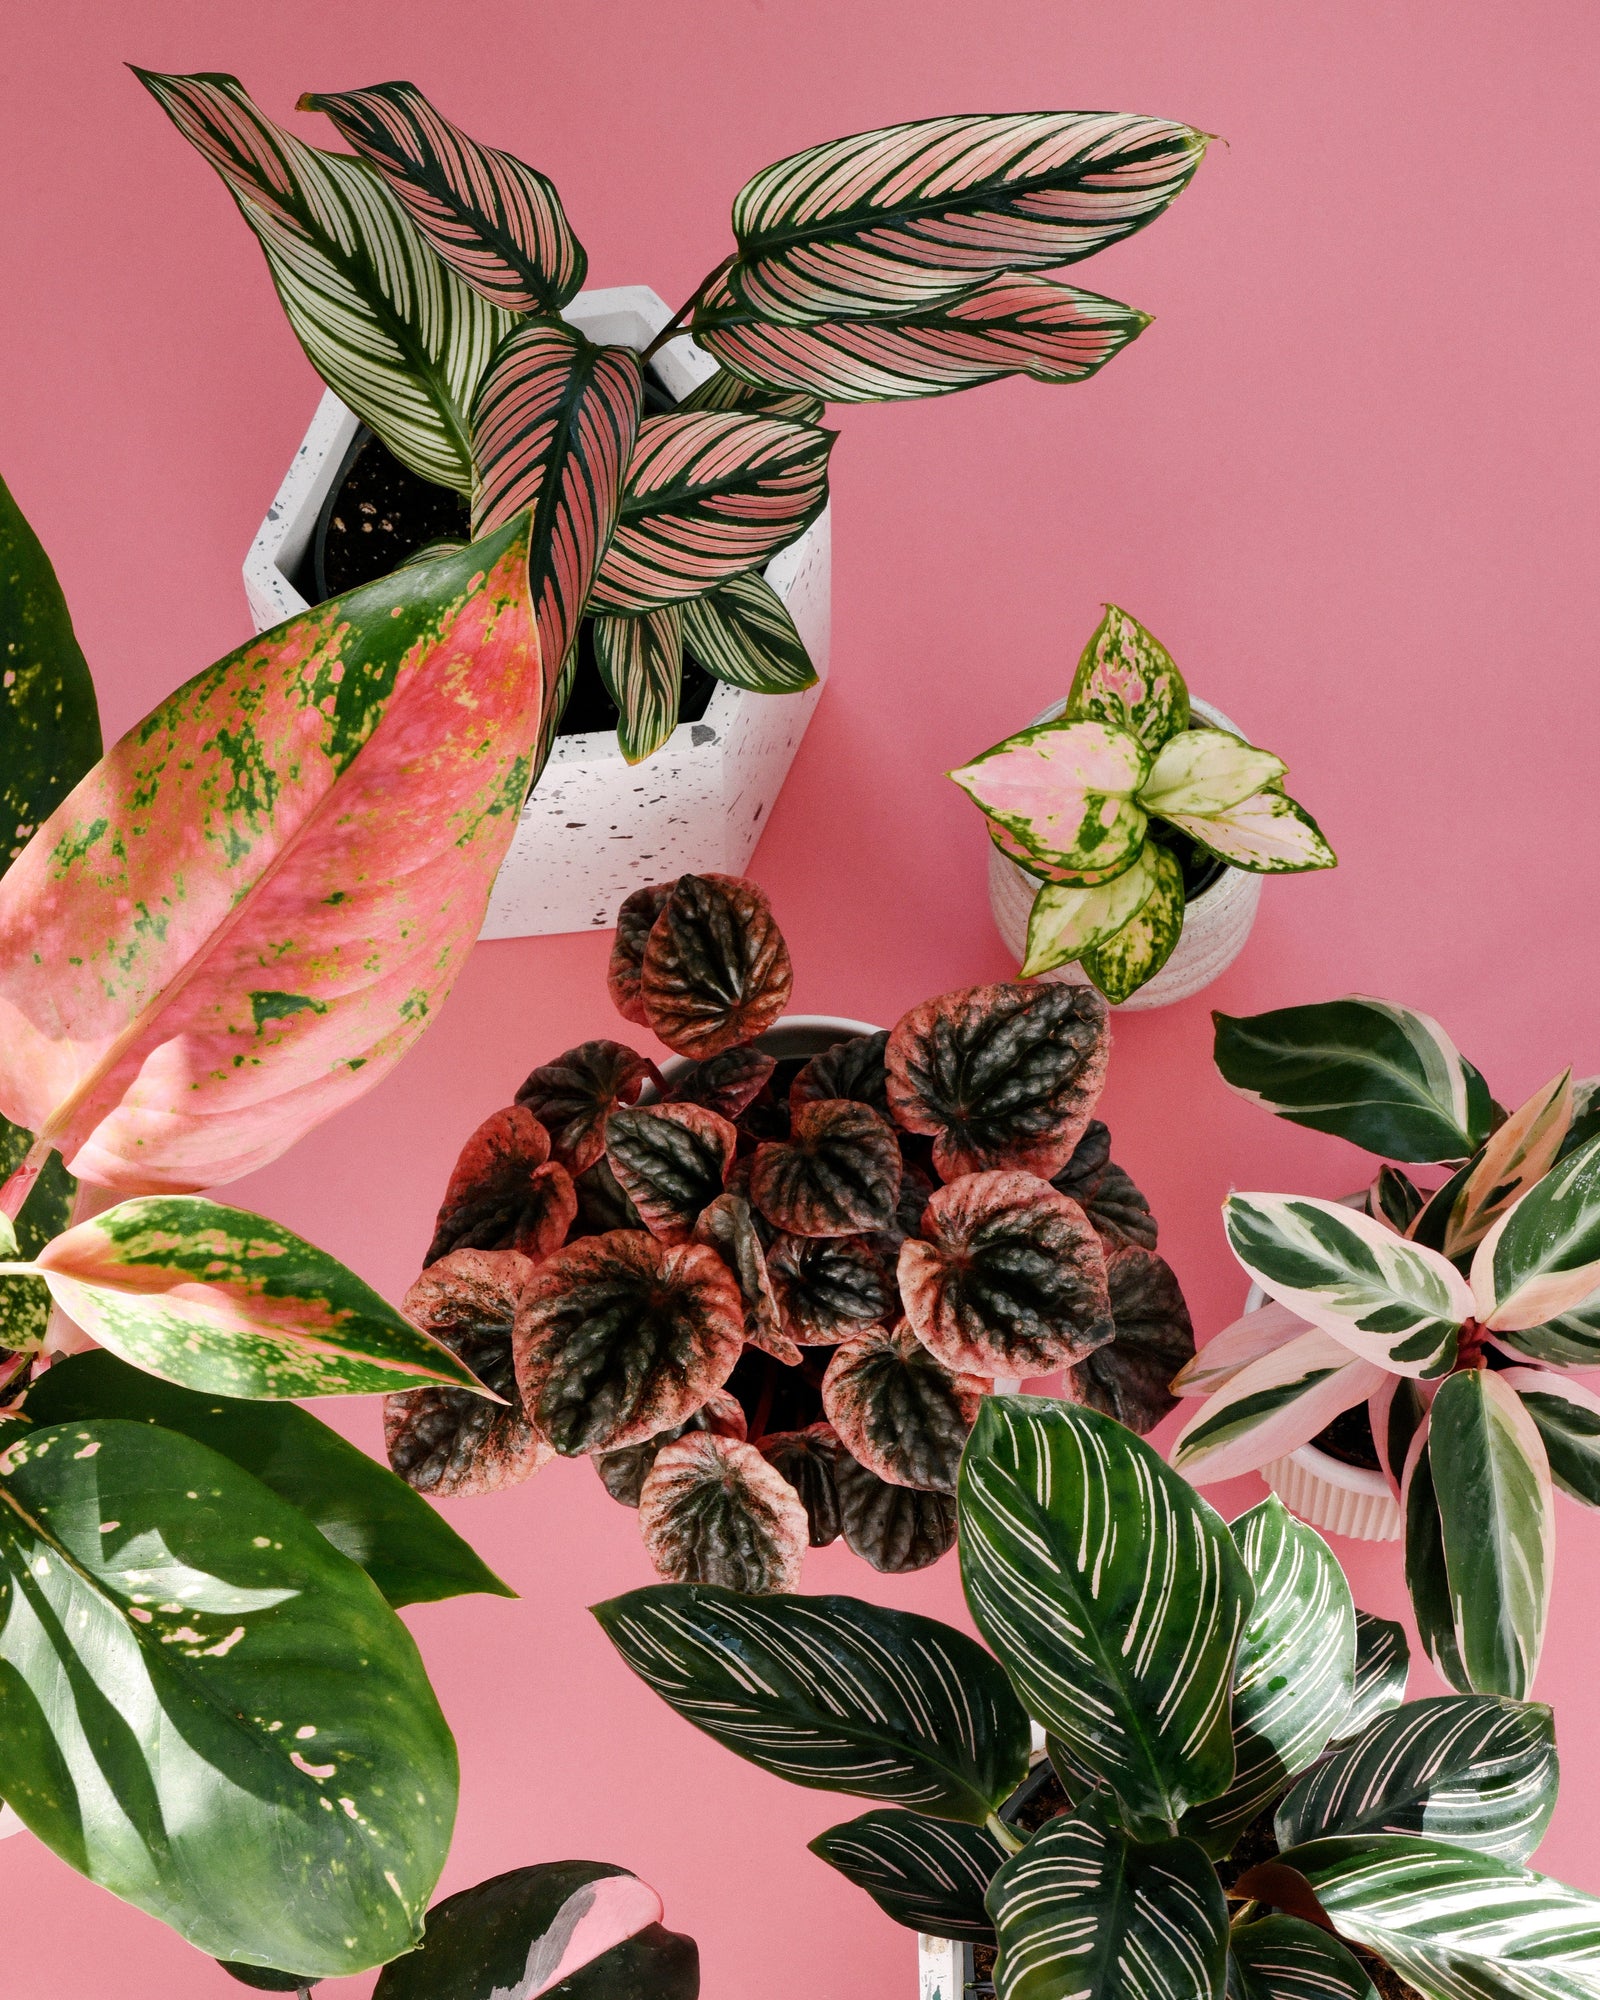
Pink Plants
Shop our Pink Plants collection, featuring vibrant houseplants with stunning pink foliage.
View collection
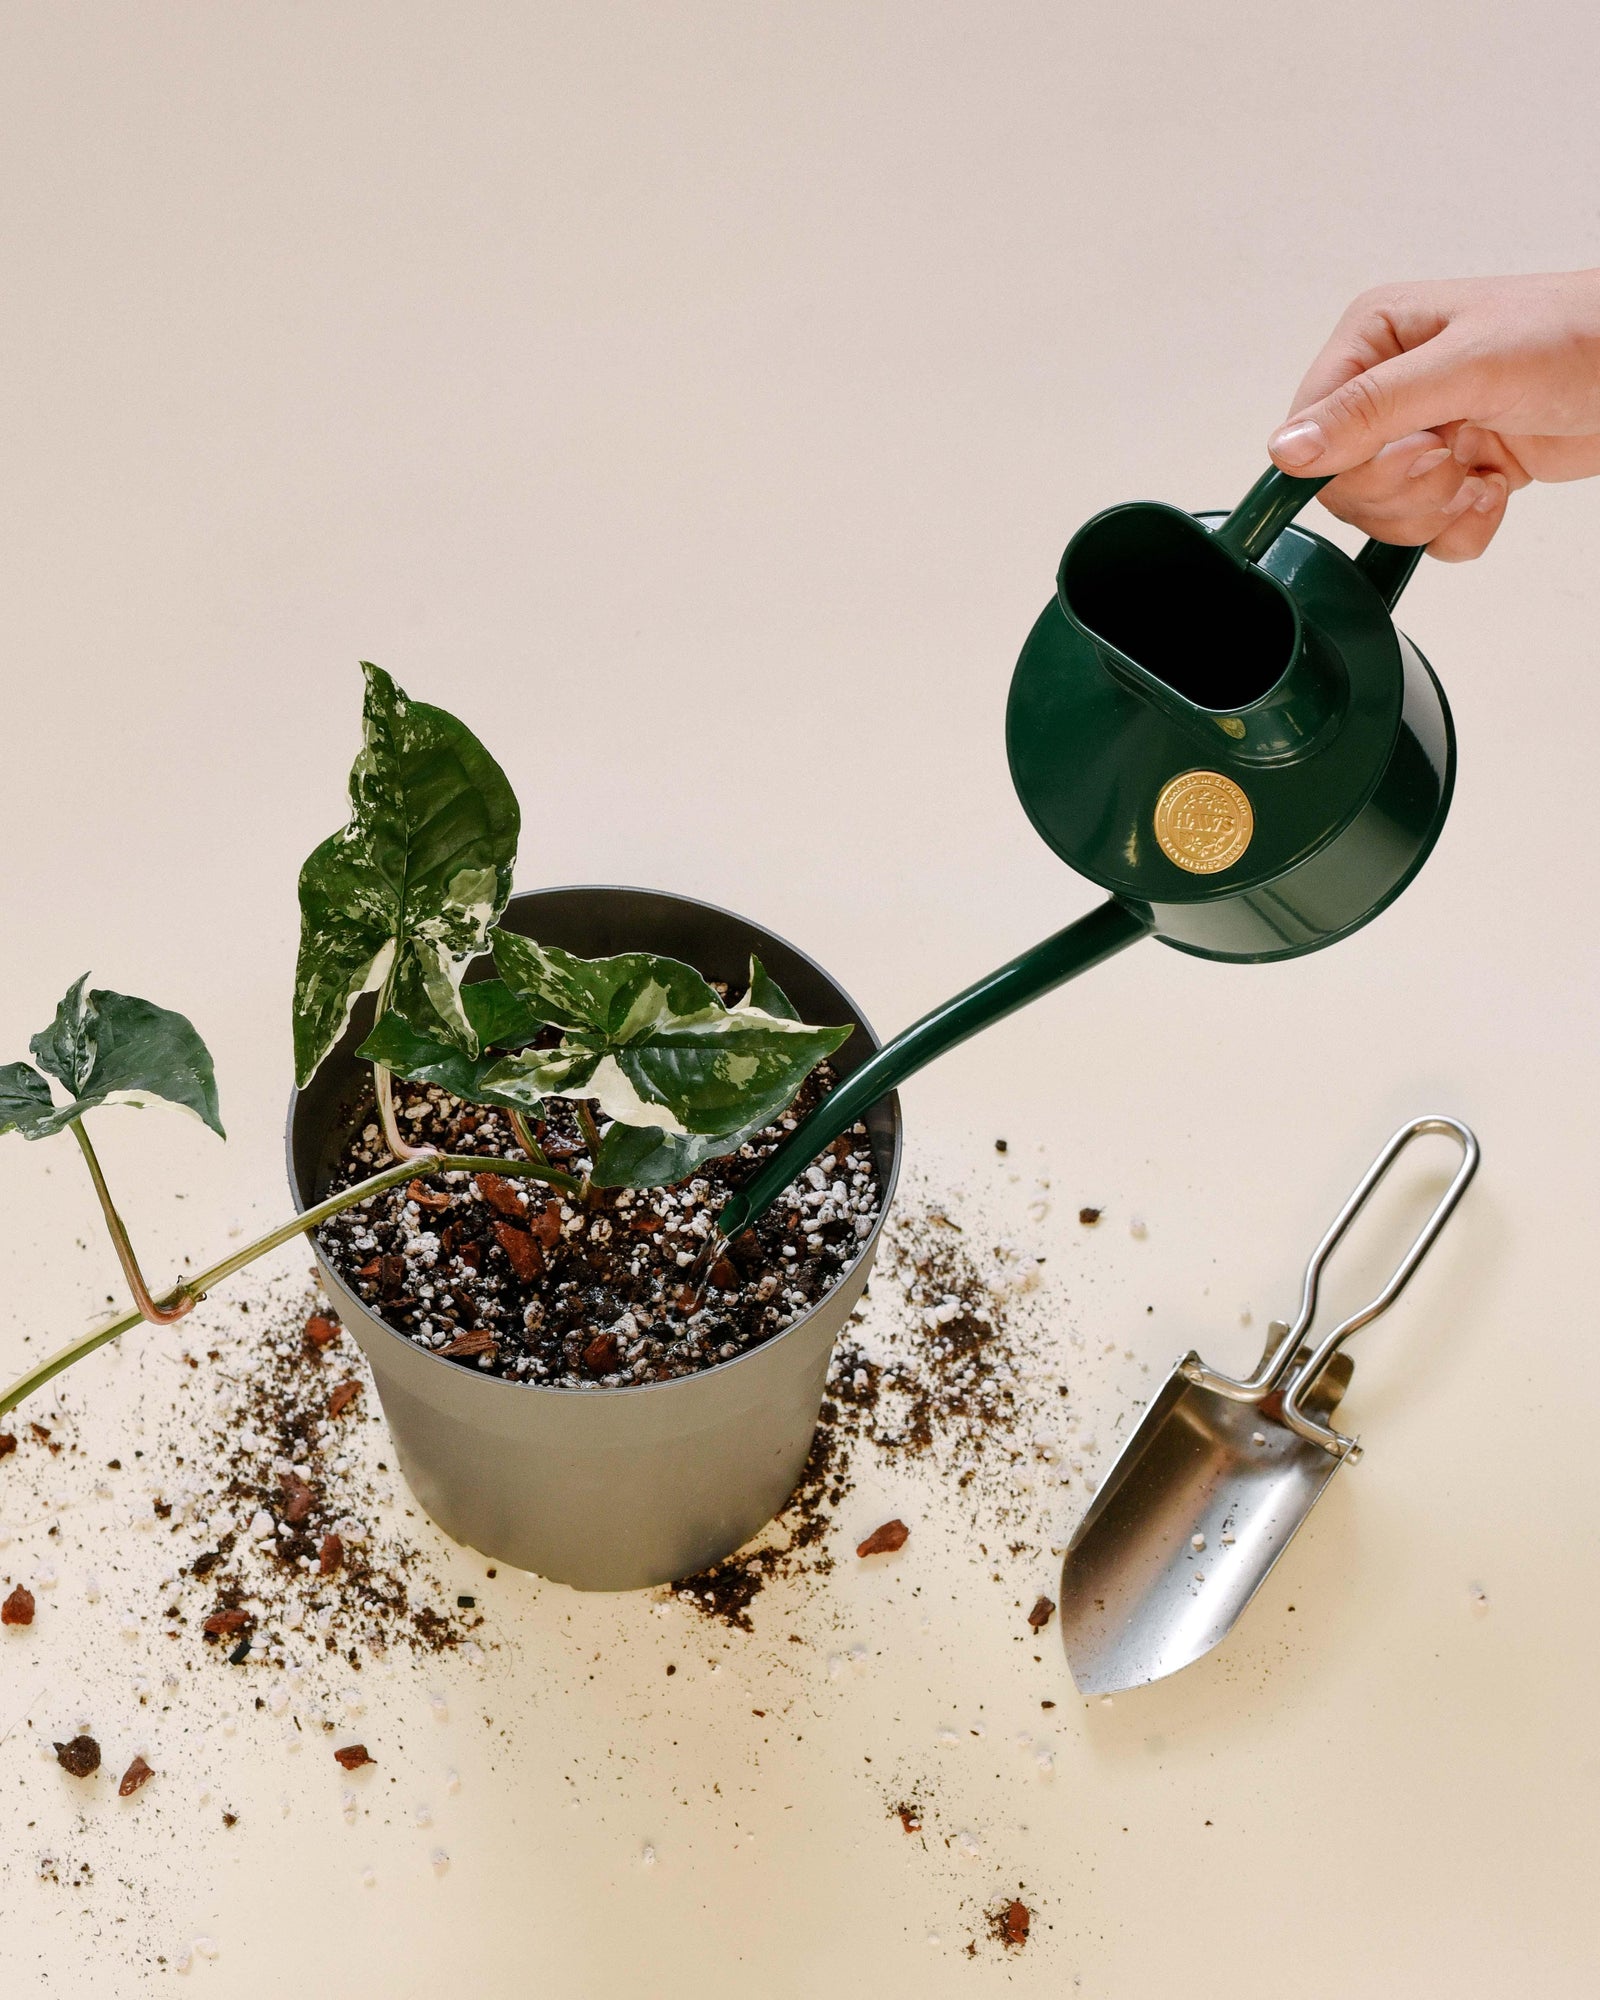
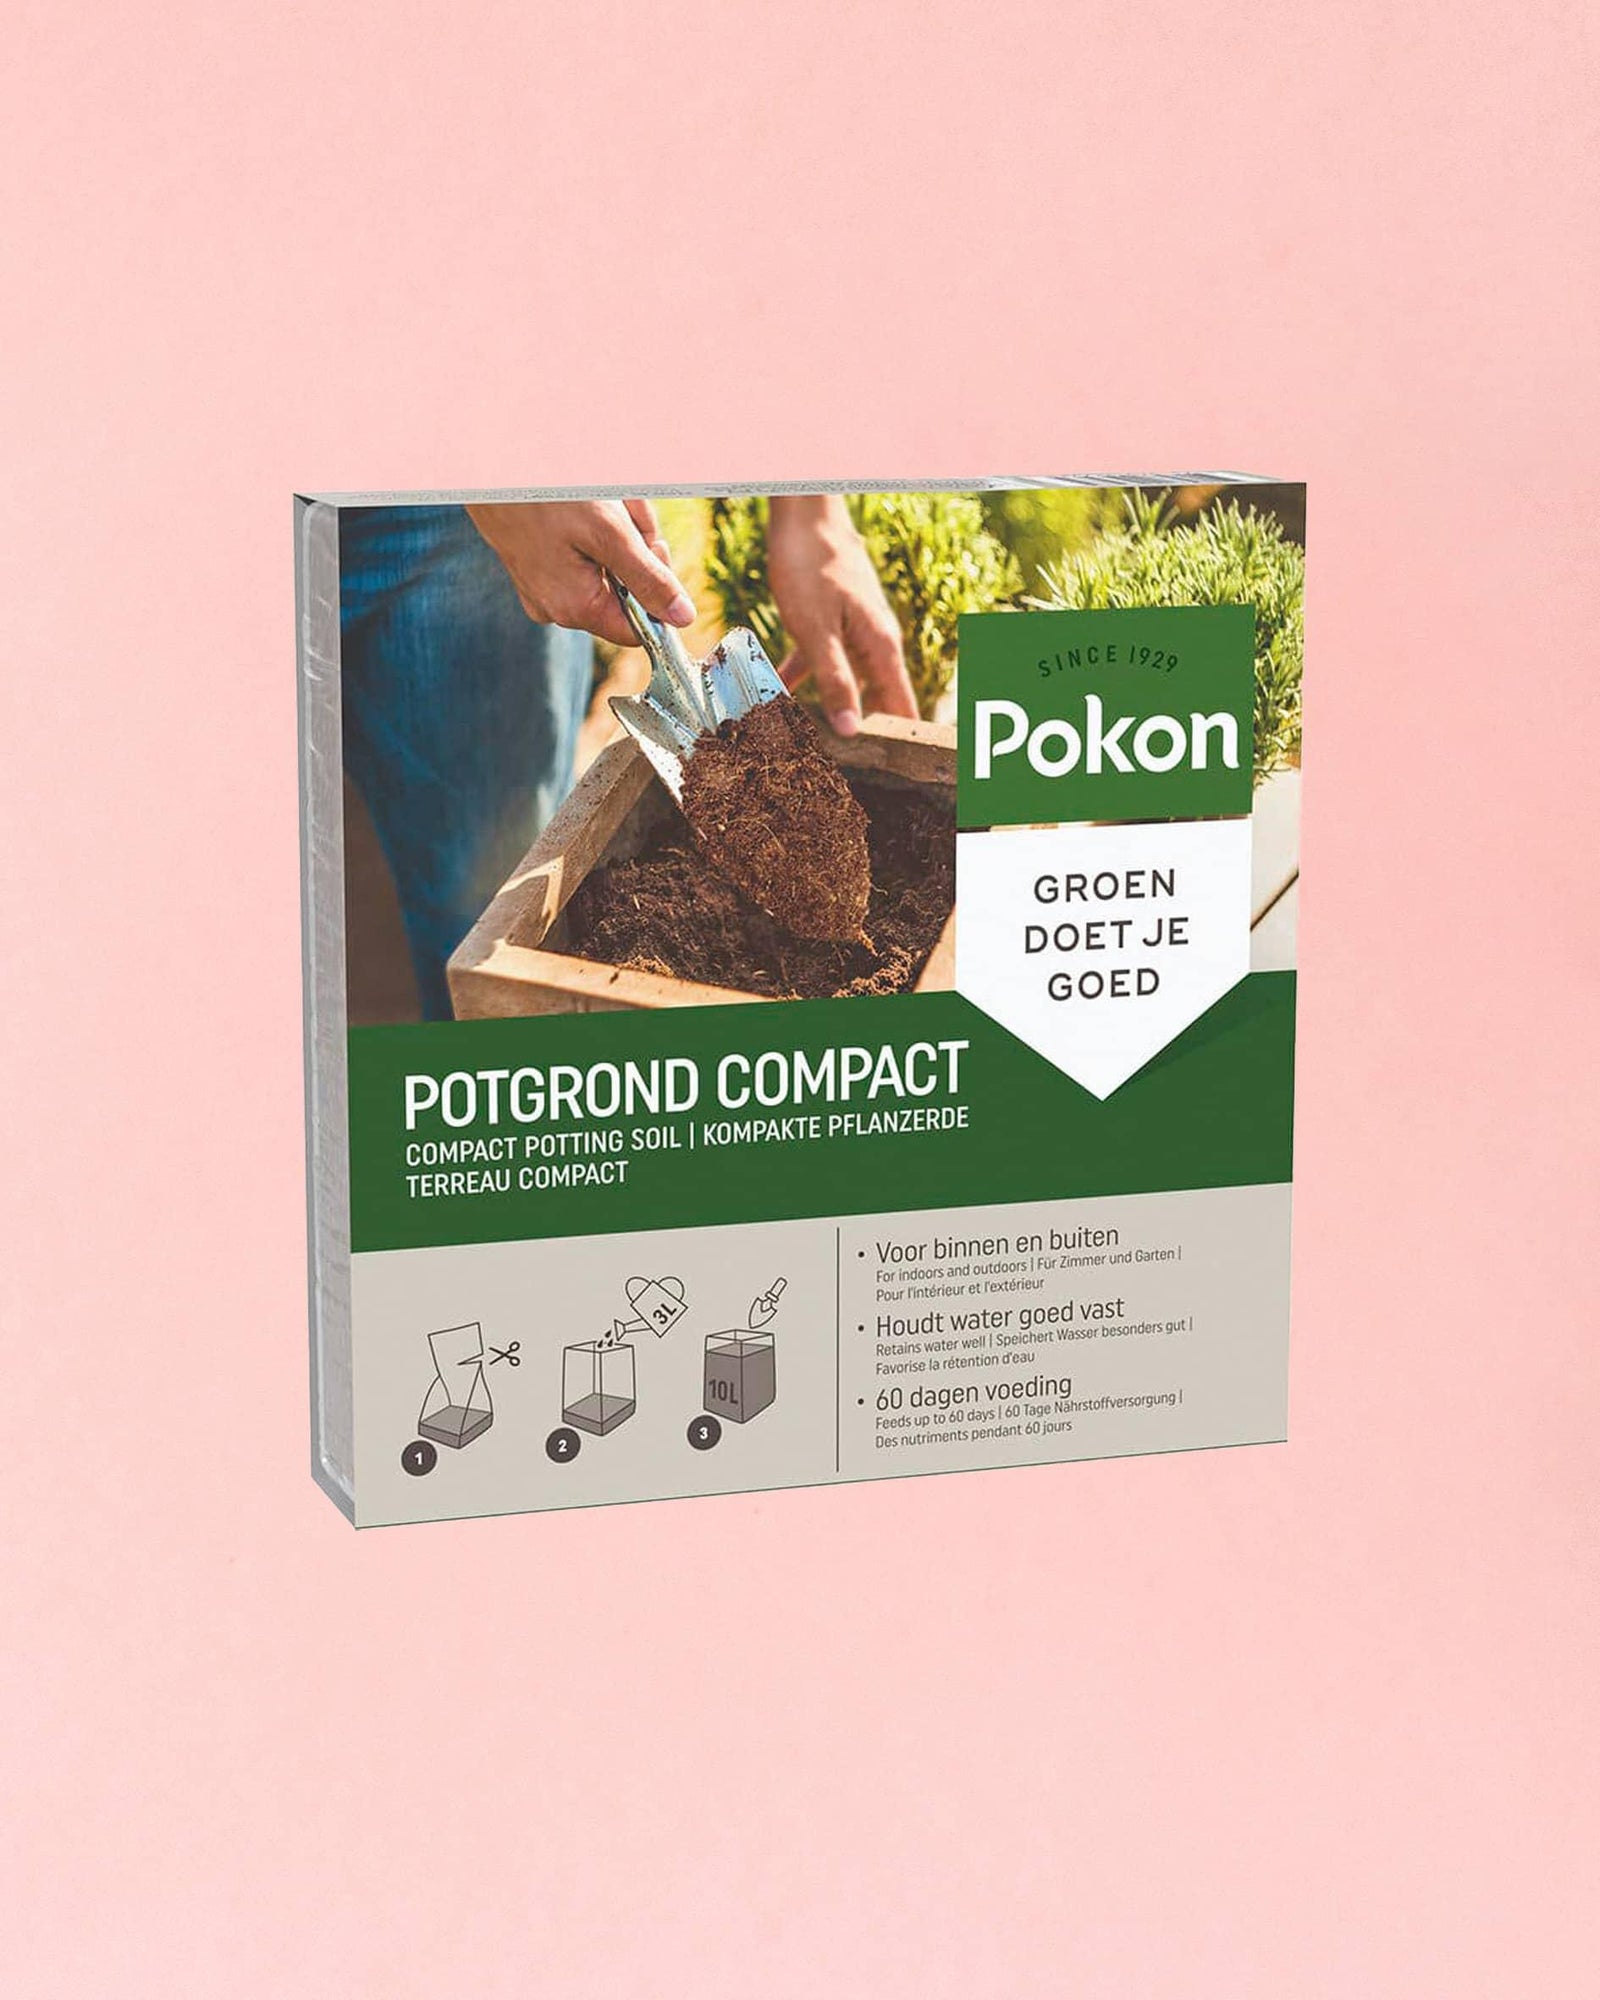
Plant Care Essentials
Shop our Plant Care Essentials collection, featuring everything you need to keep your houseplants thriving.
View collection
Plant Circle | Plantthatplant
View collection
Plants by Size
Shop our plants by size
View collection
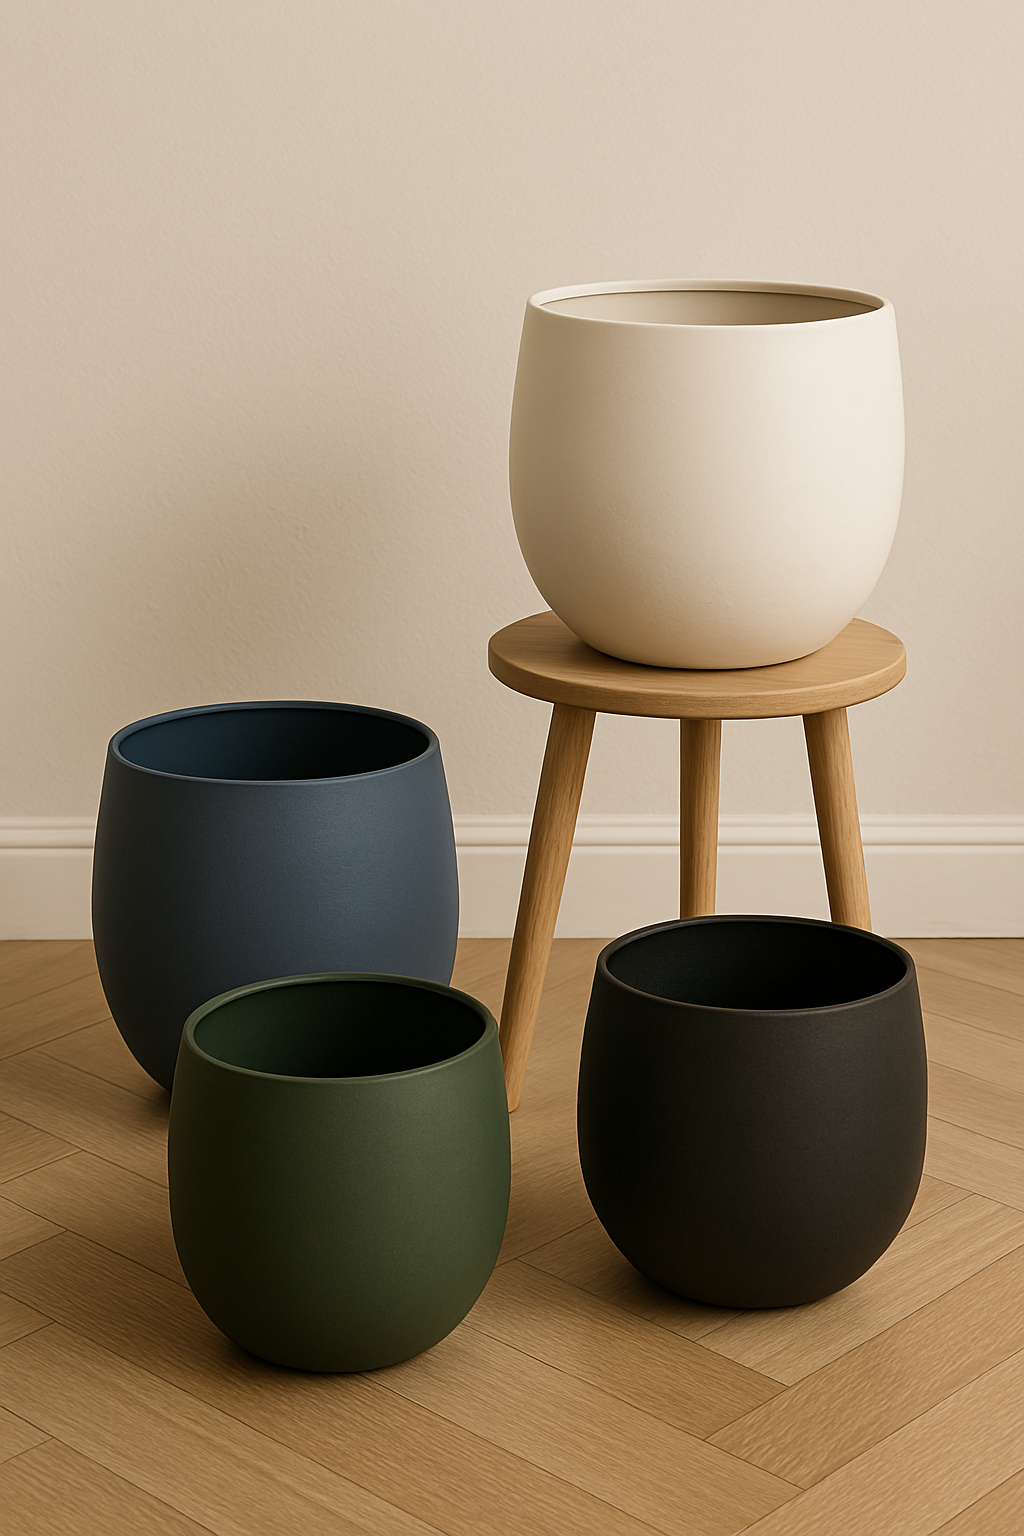
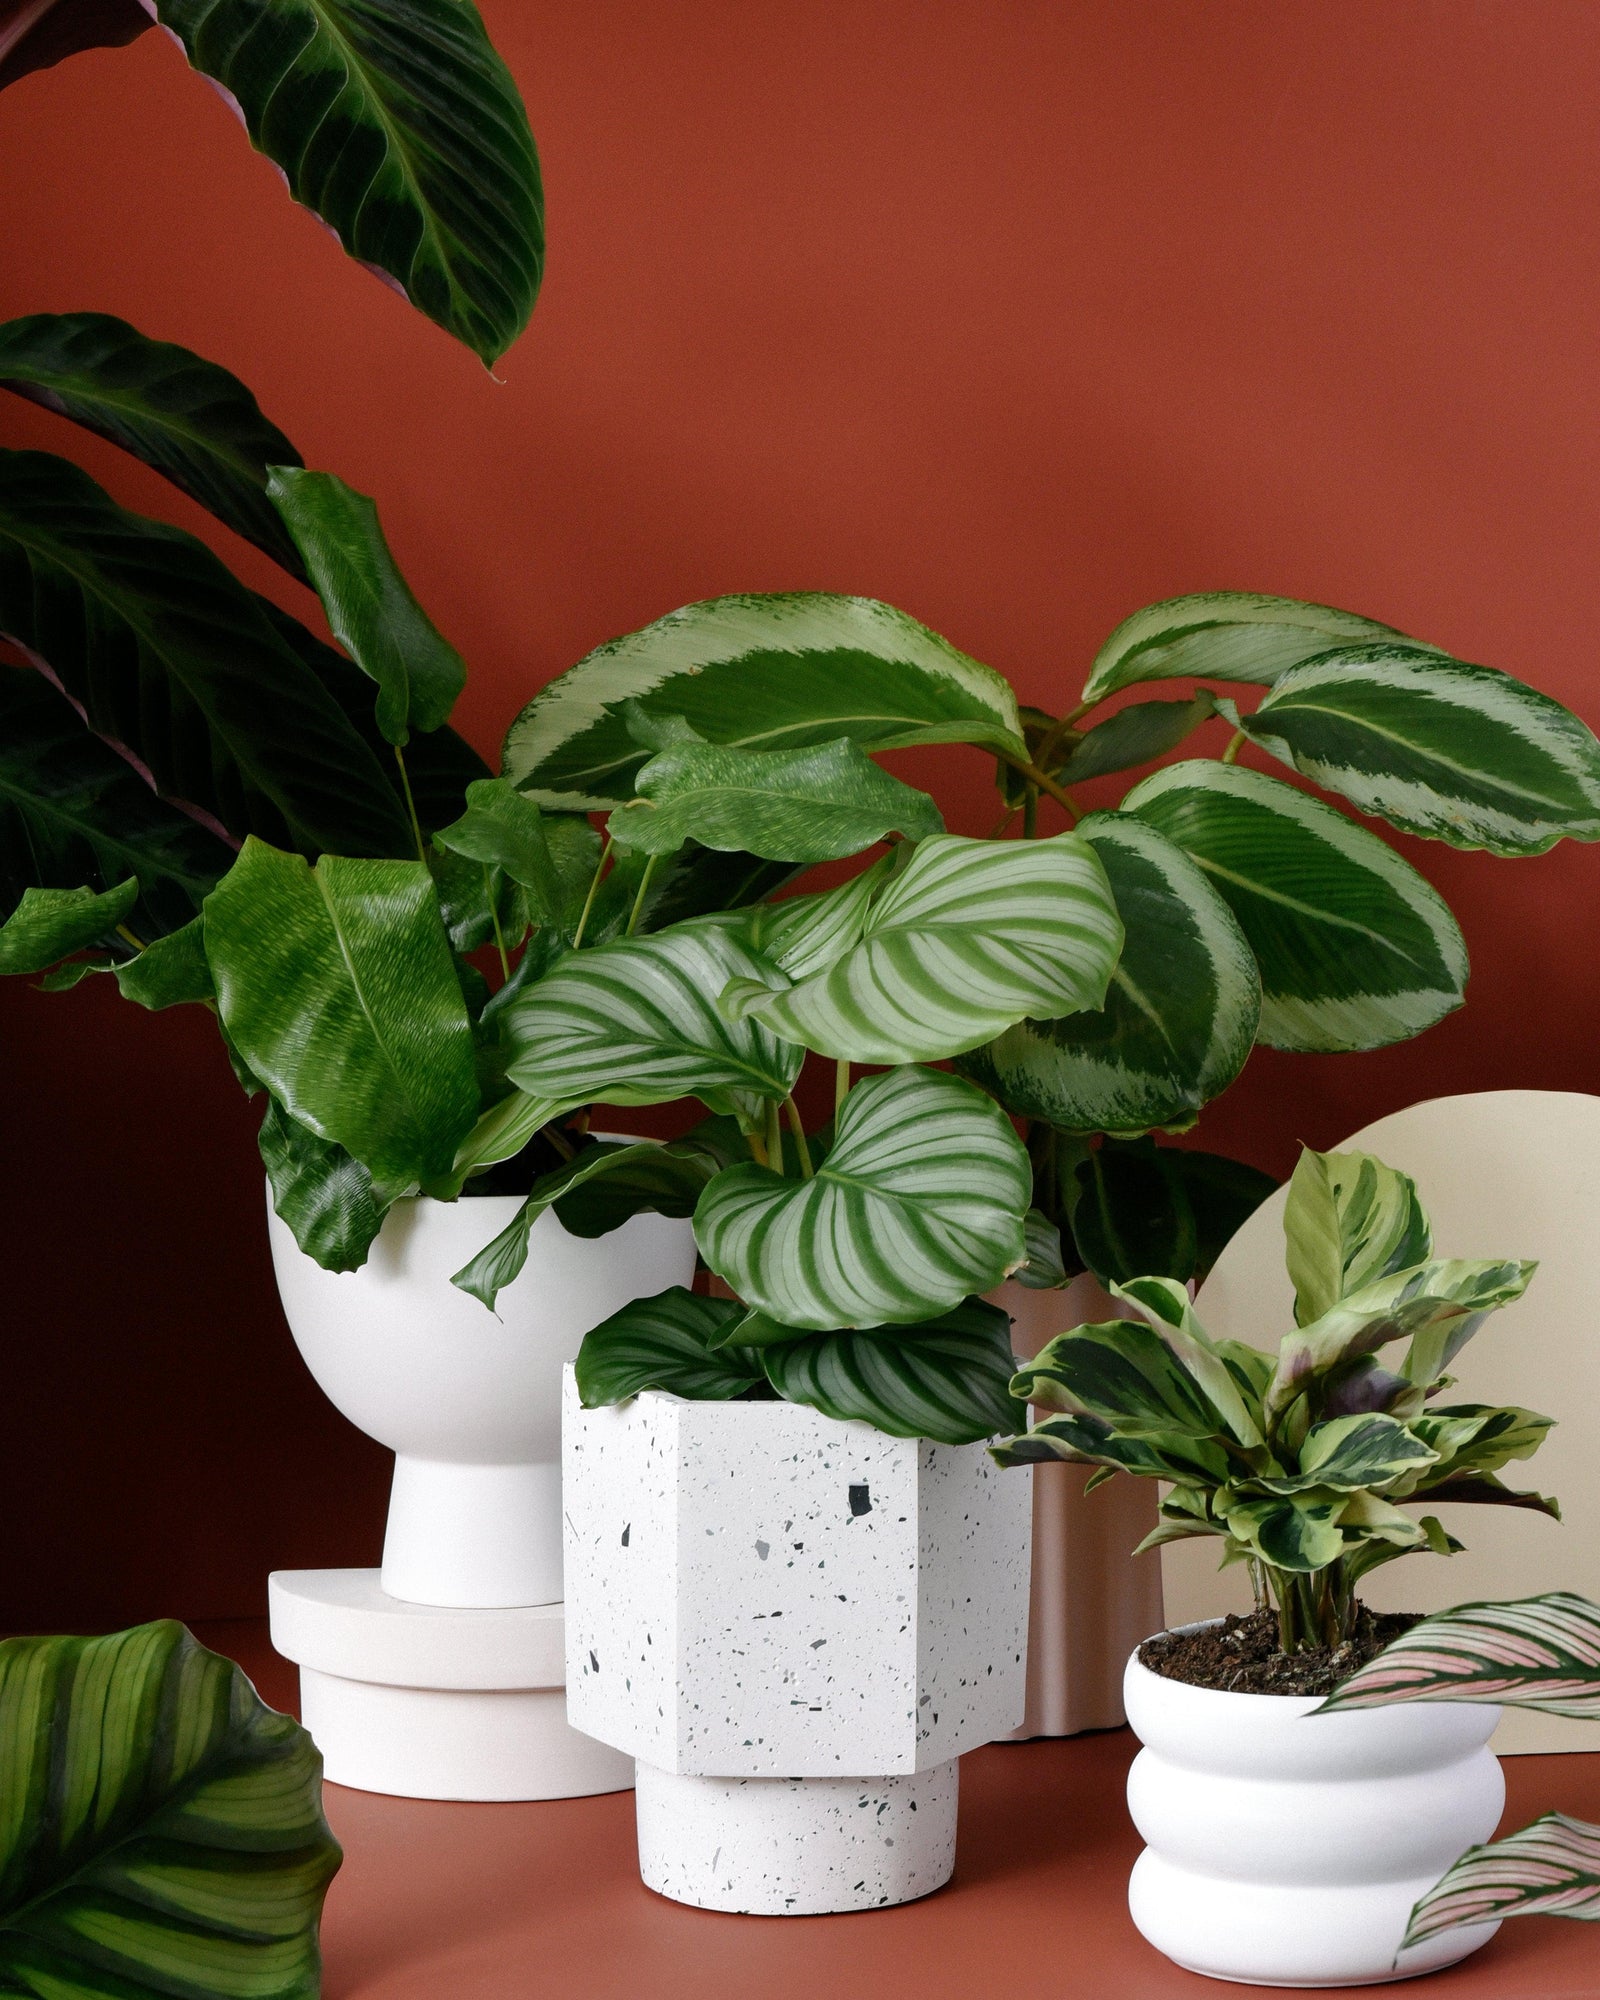
Pots and Planters
Shop our plant pots and planters!
View collection
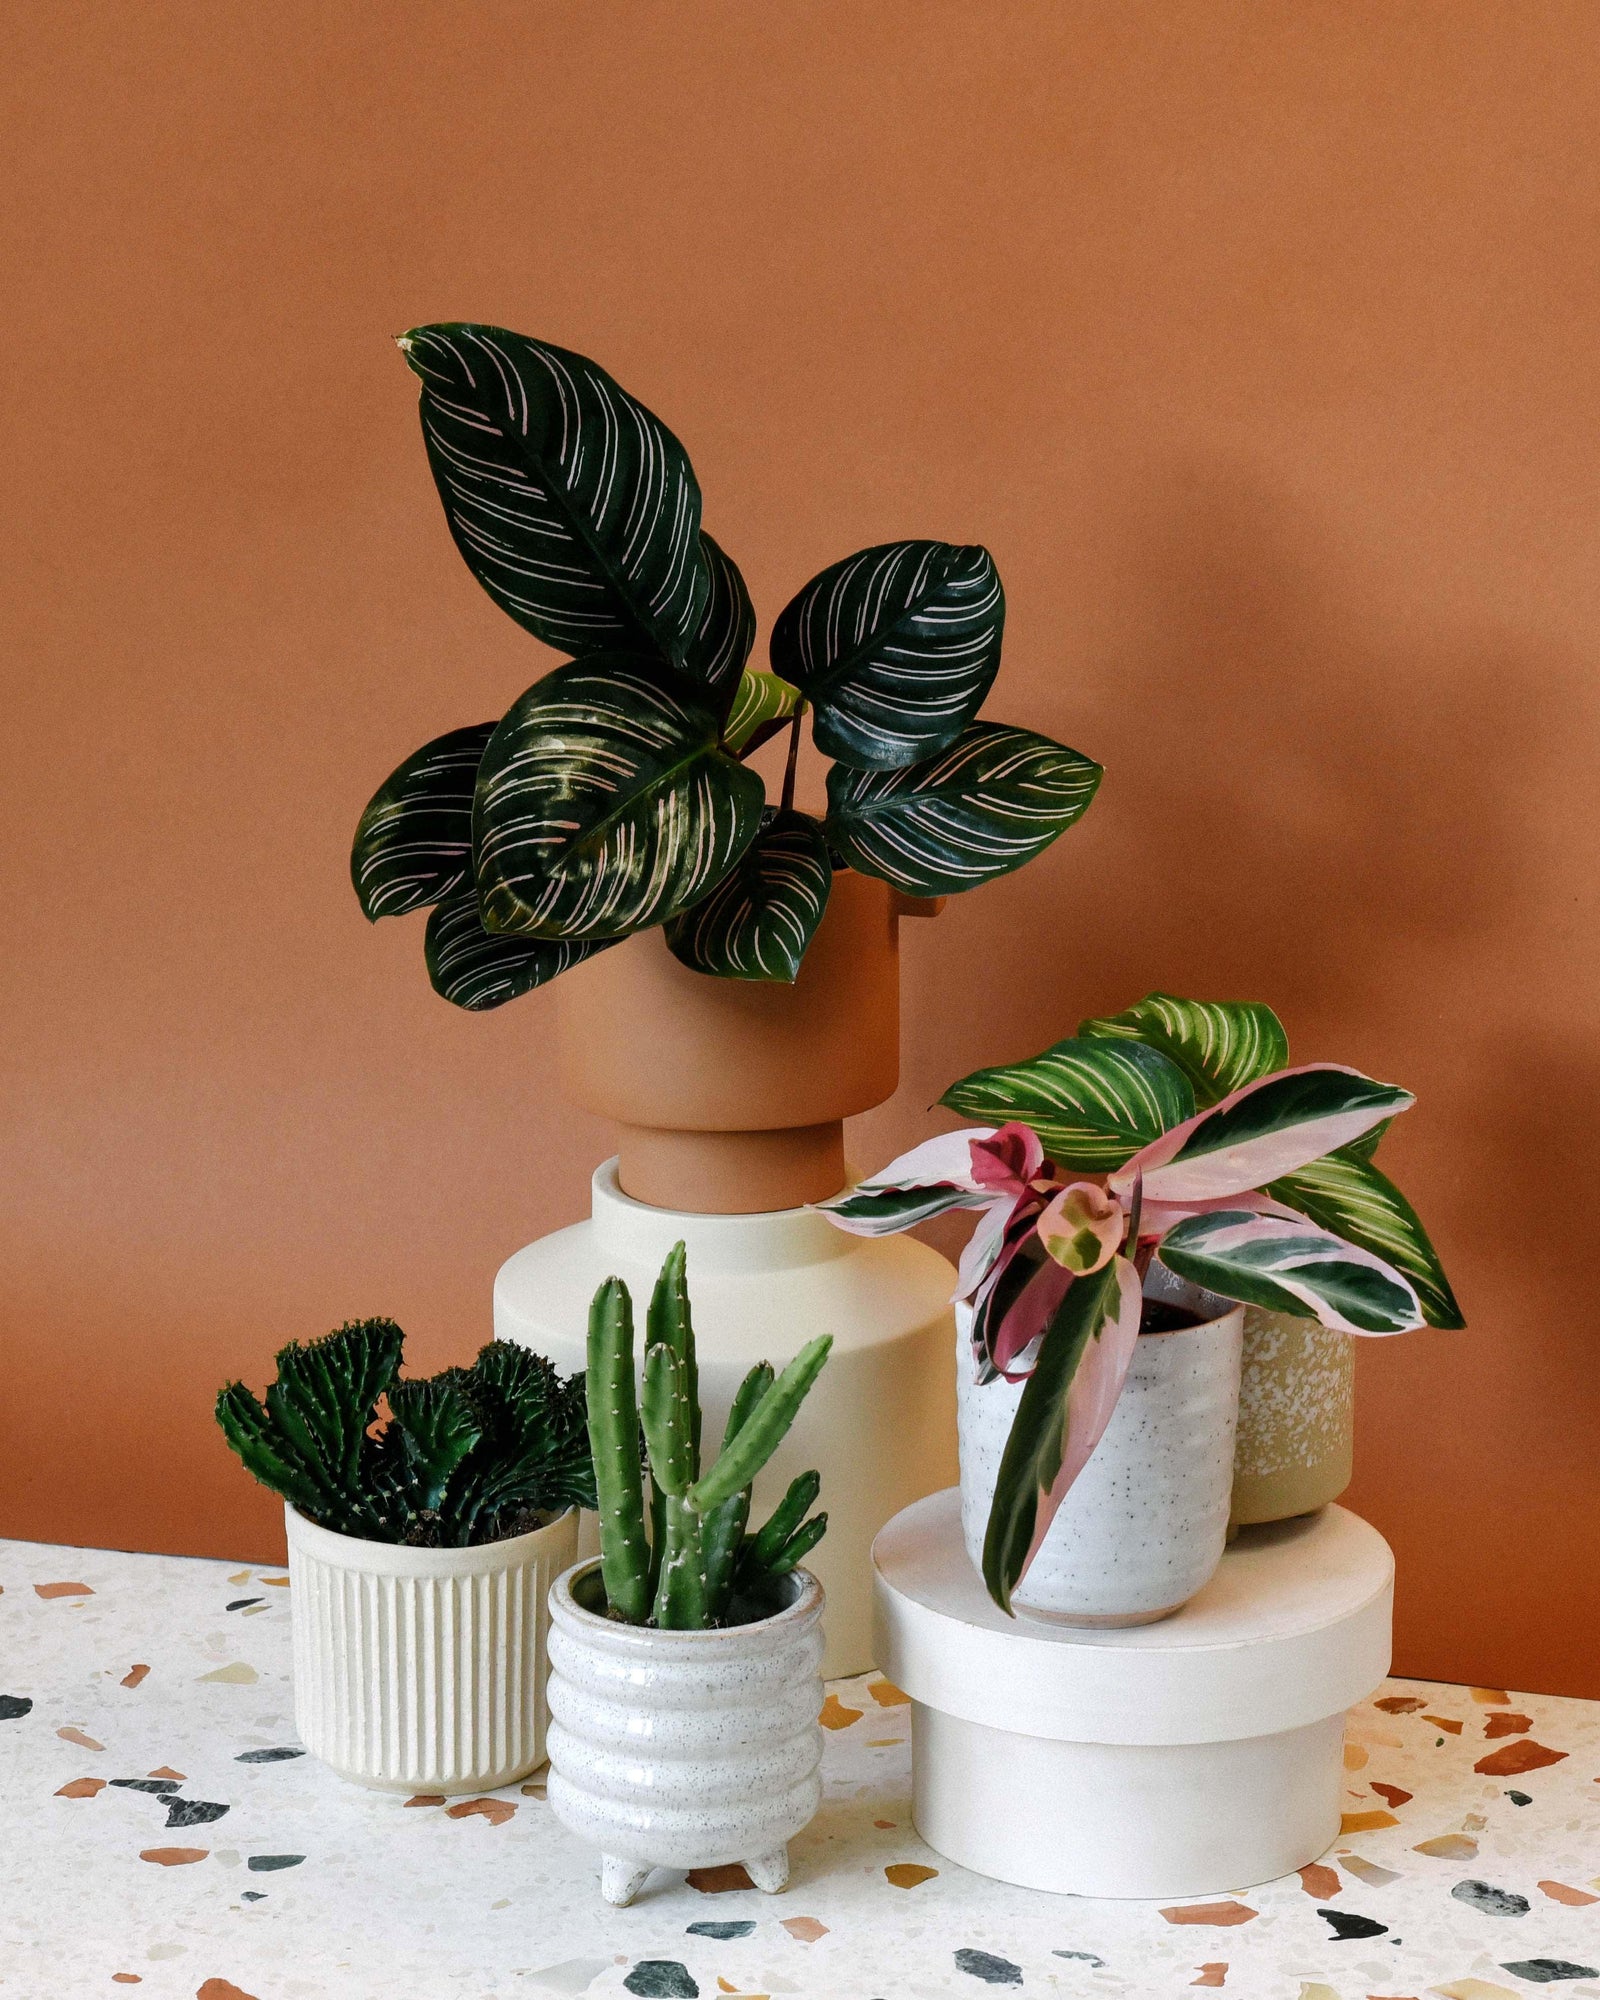
Prayer Plants (Calathea)
View collection
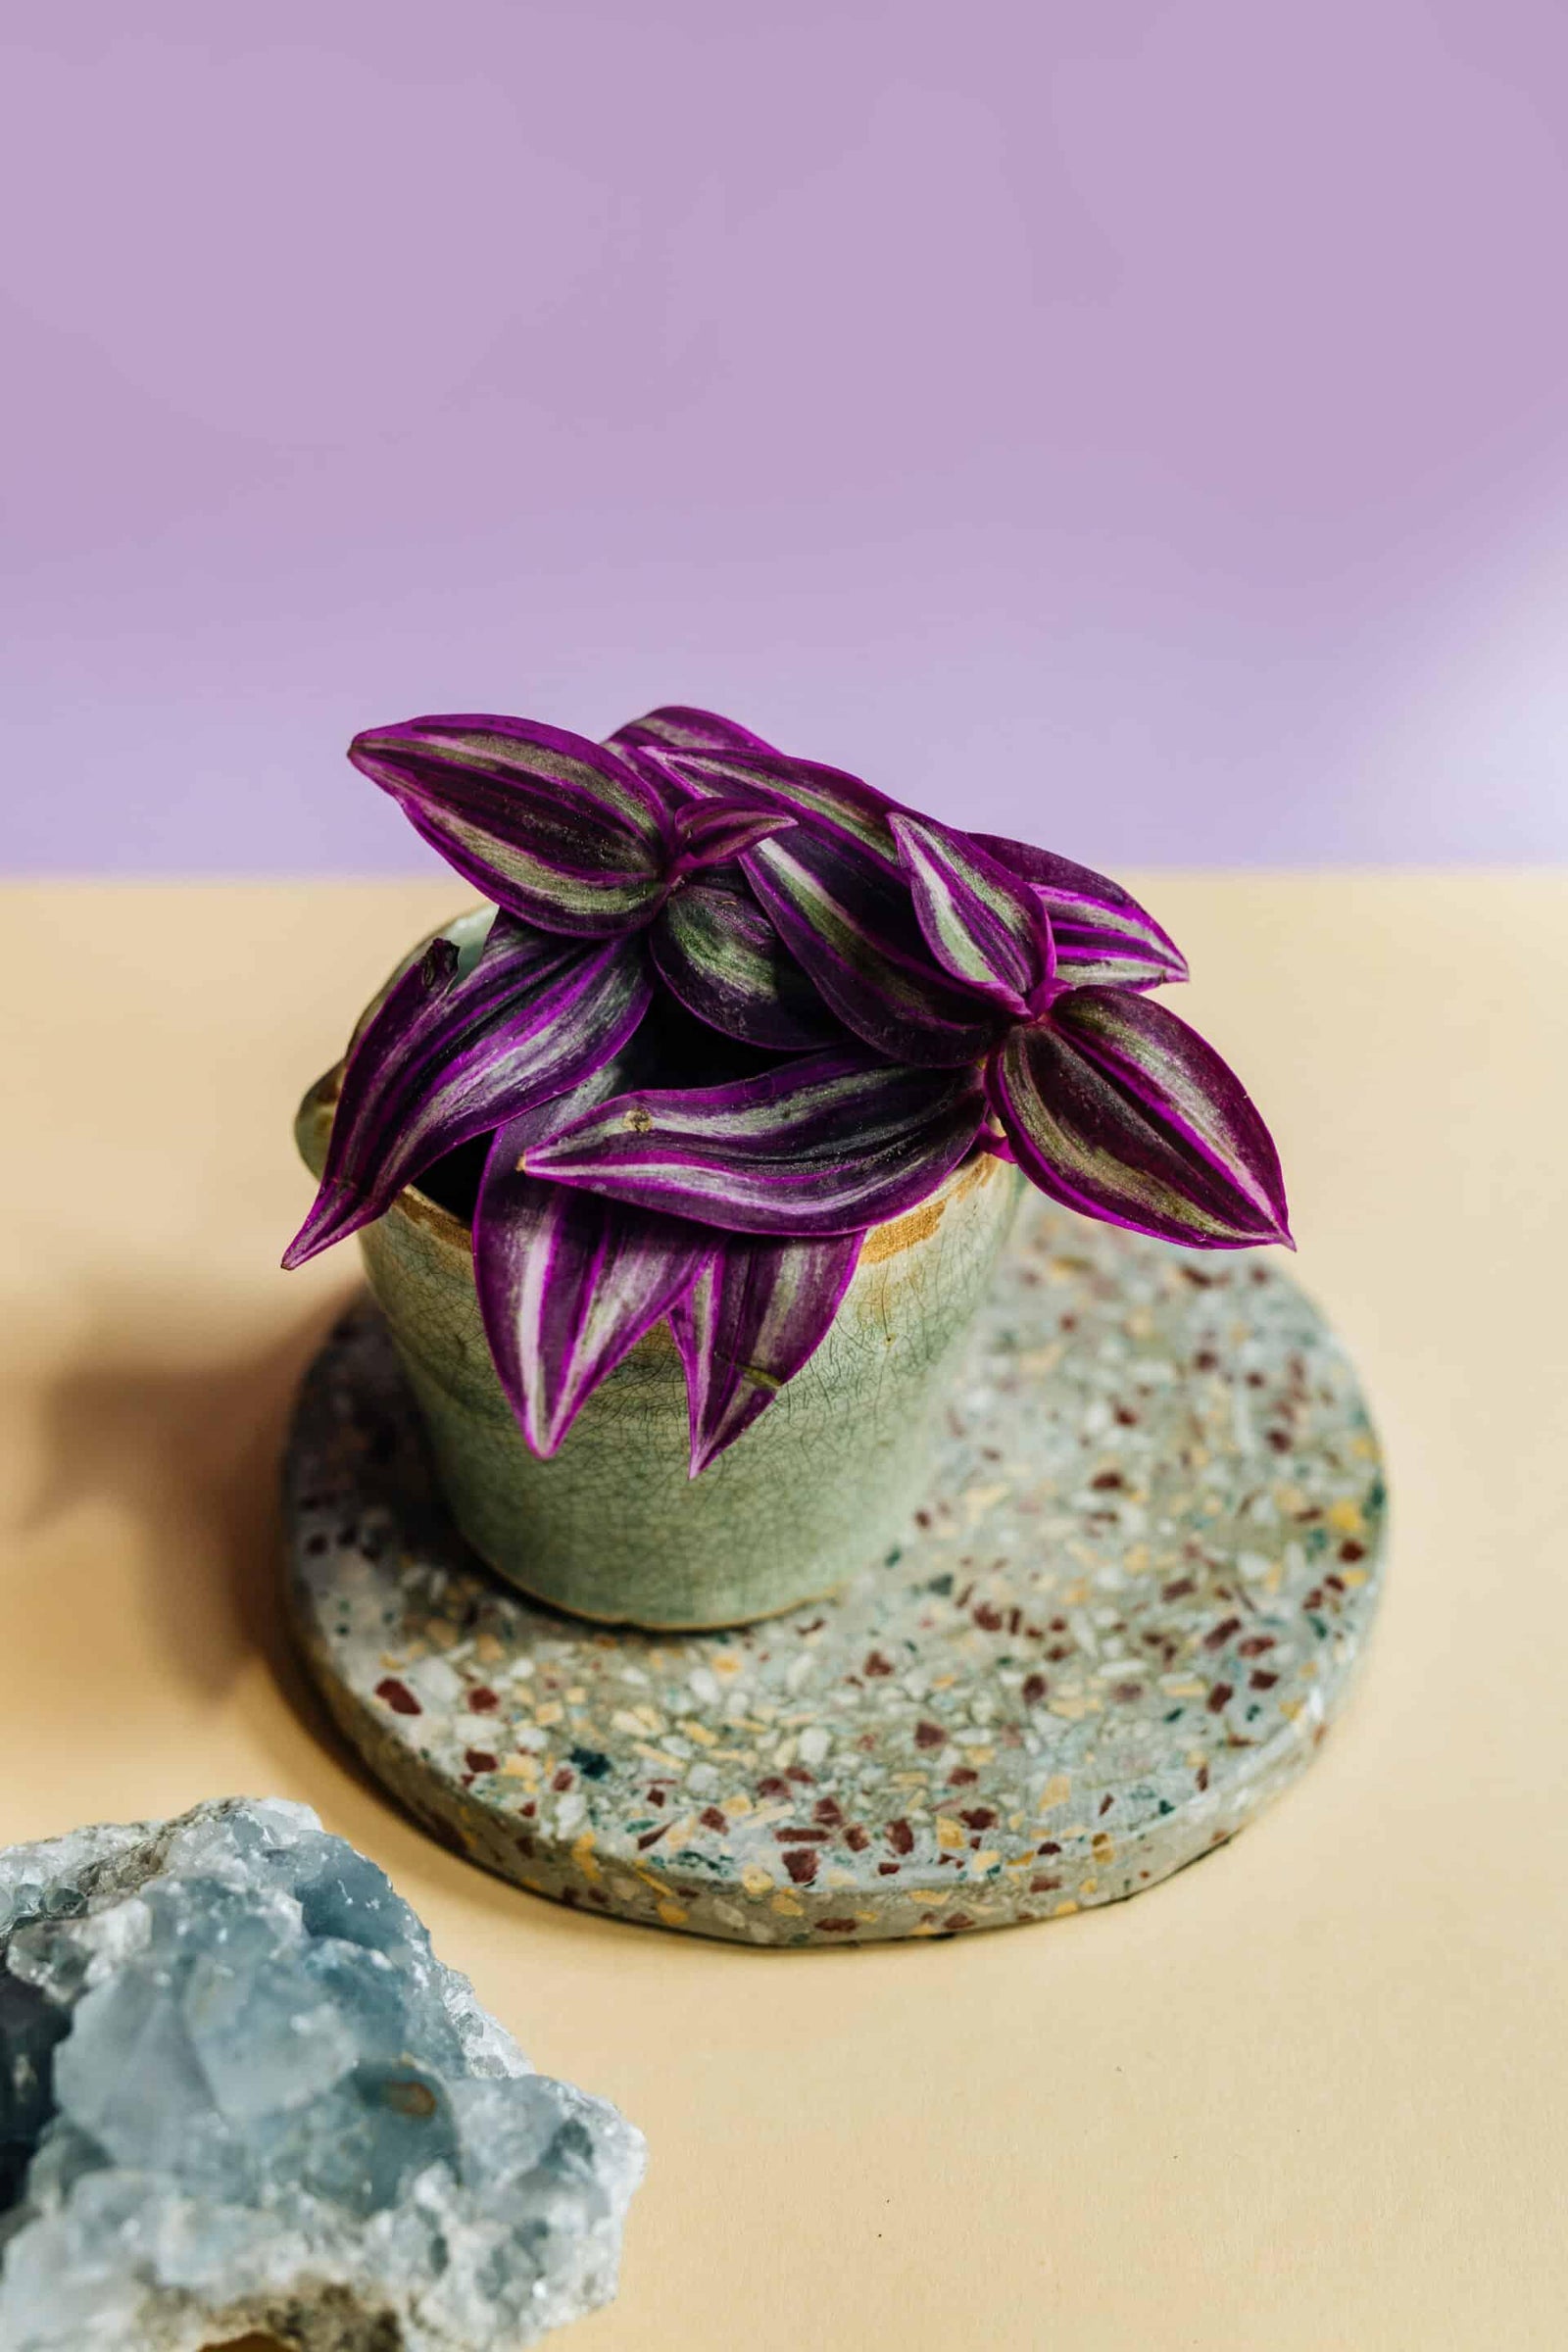
Purple Plants
For the plant lover that can't get enough of quirky and colorful purple plants! Add a little magic and wonder to your home with this collection.
View collection
Rare
Need something more unique? Shop the rare plant collection of specialty plants designed to impress The True Plant Lover
View collection
Rare Medium Plants
View collection
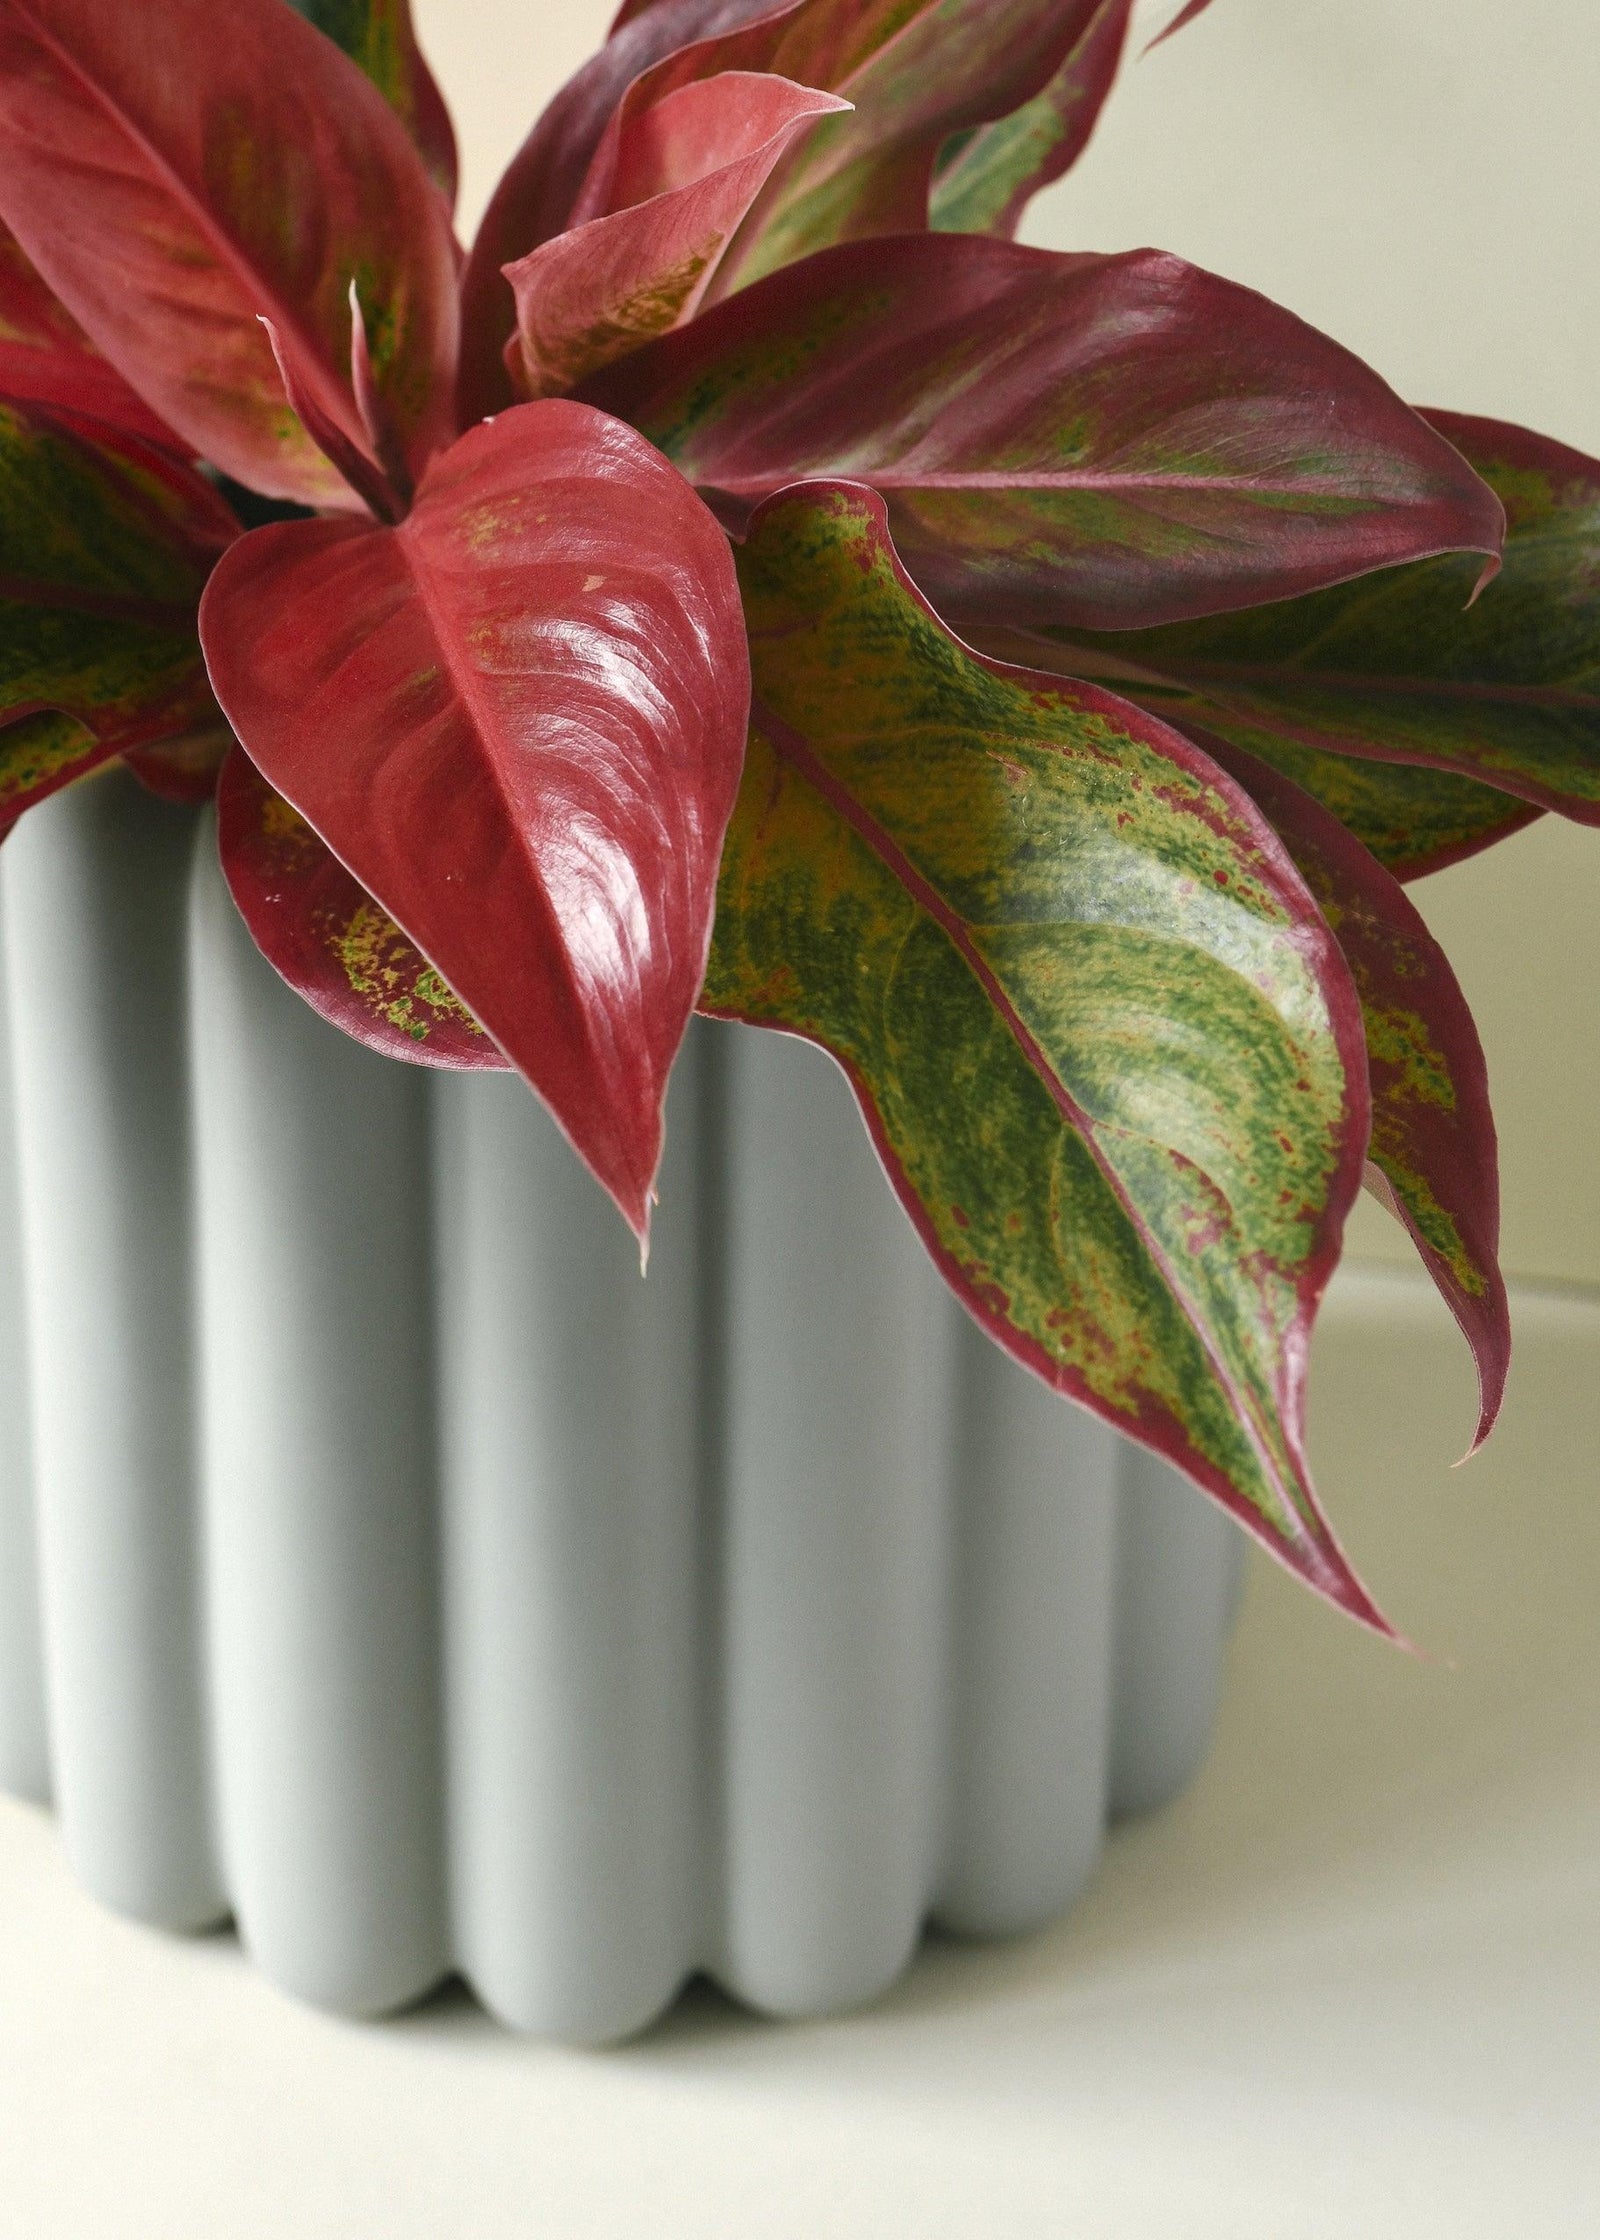
Red Plants
Shop our selection of plants coming in beautiful red shades - from crimson to burgundy and beyond - there's something for every red lover!
View collection
SALE
View collection

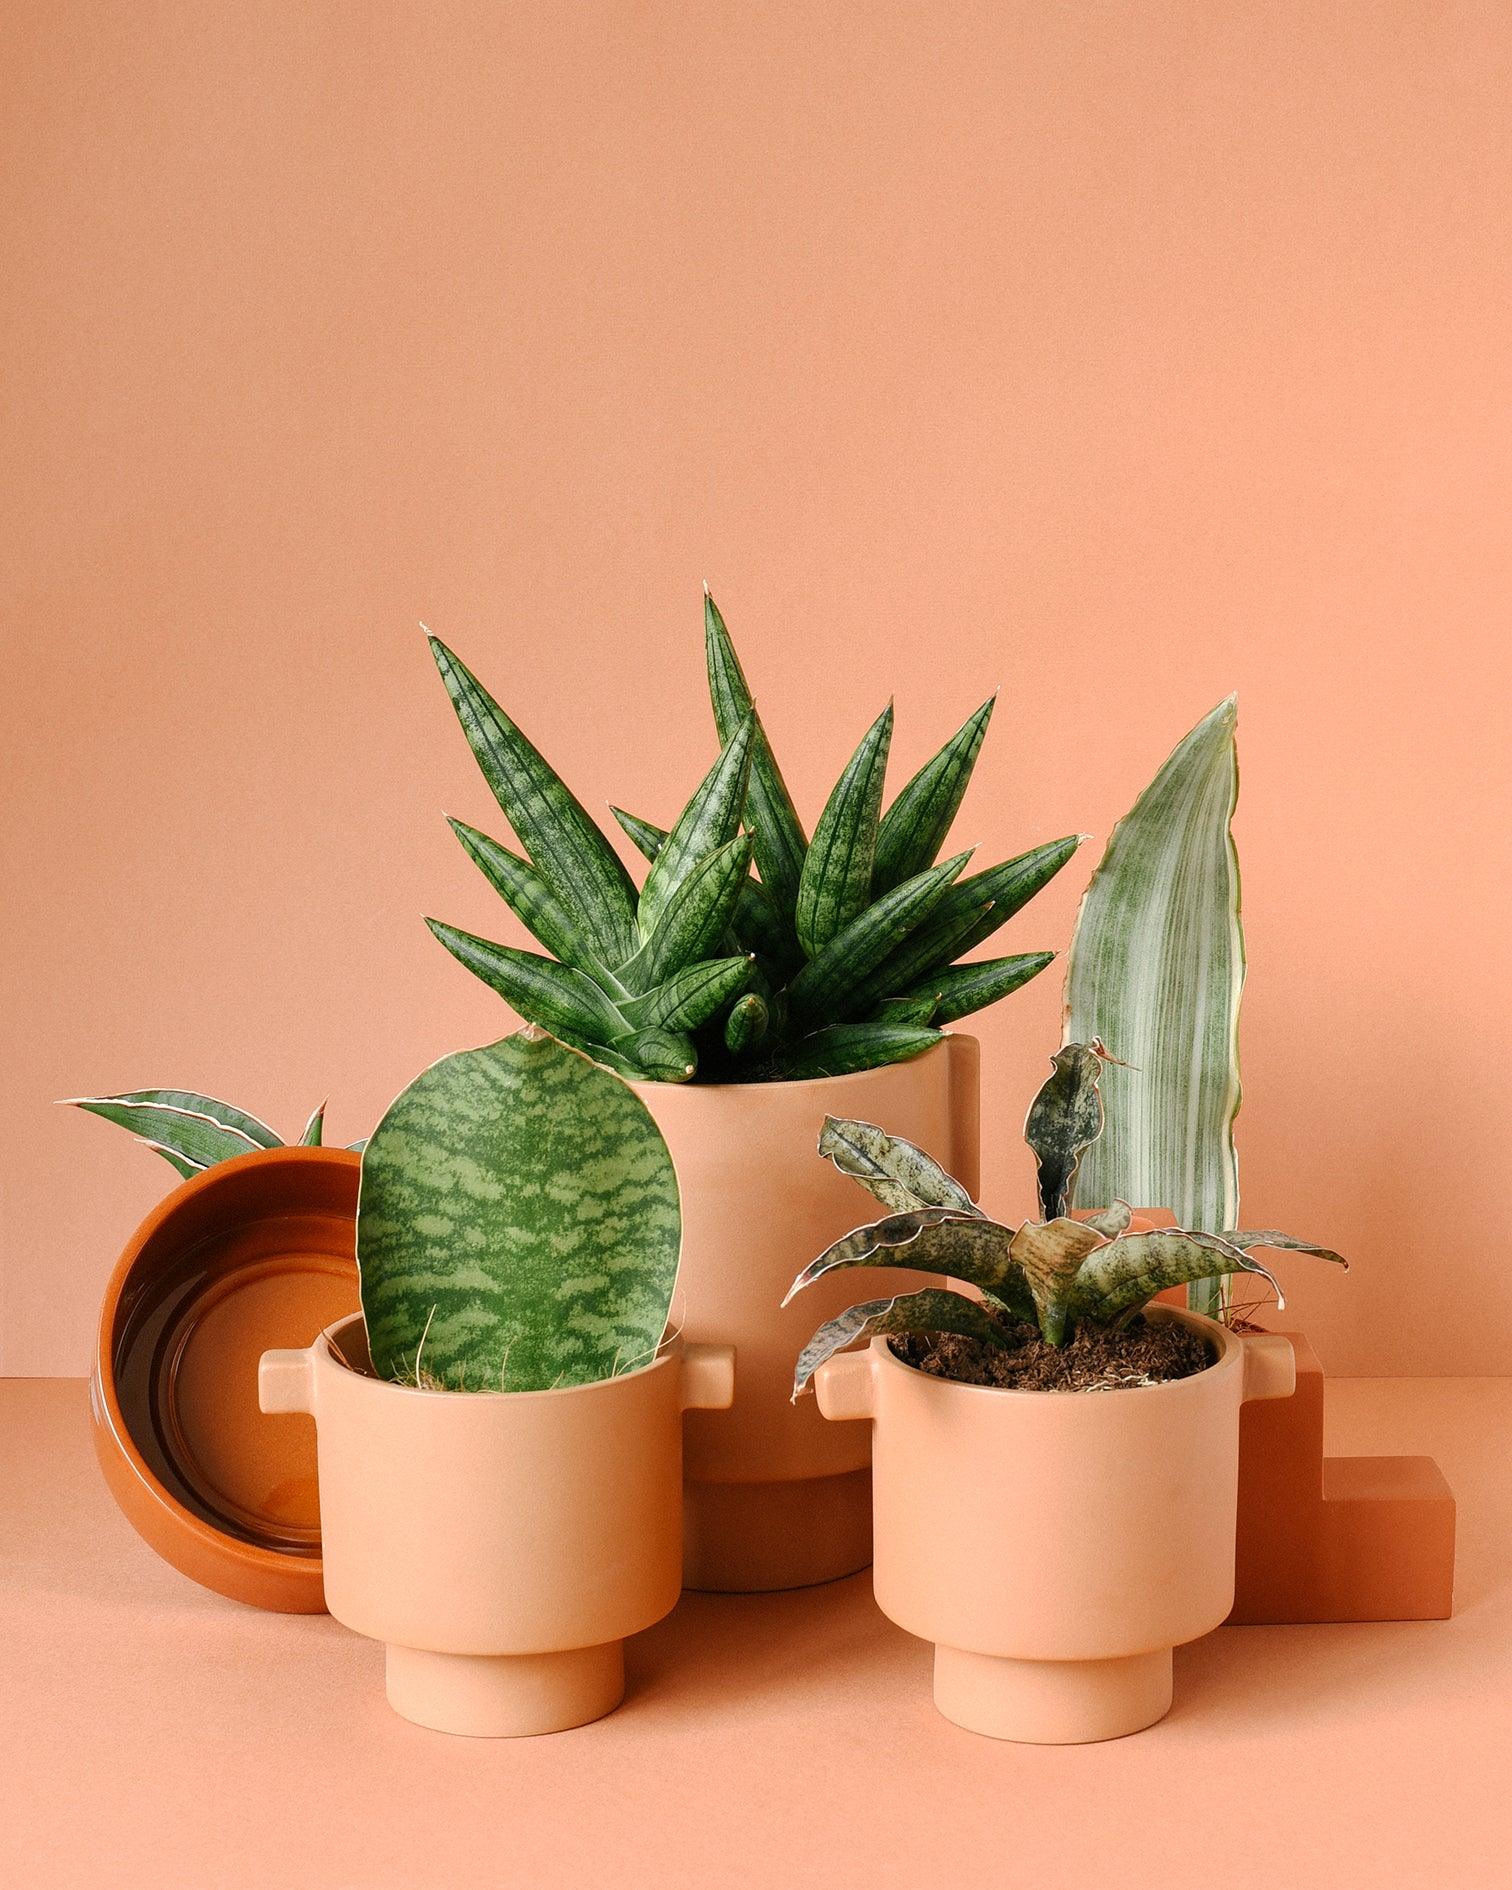
Sansevieria
View collection
Scindapsus
View collection
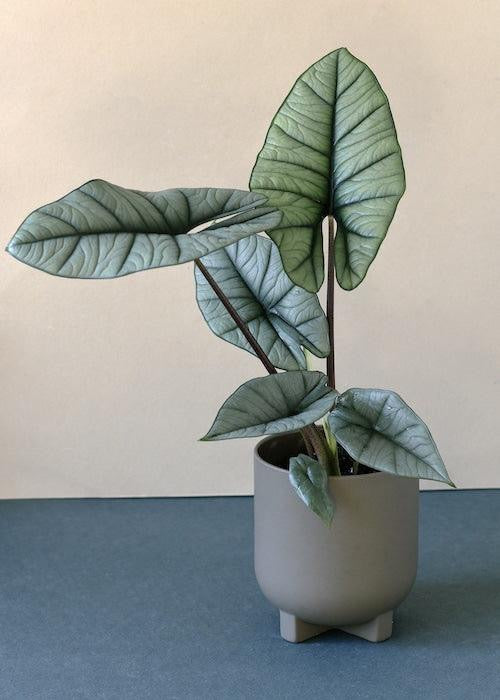
Silver Plants
View collection
Small Plants
View collection

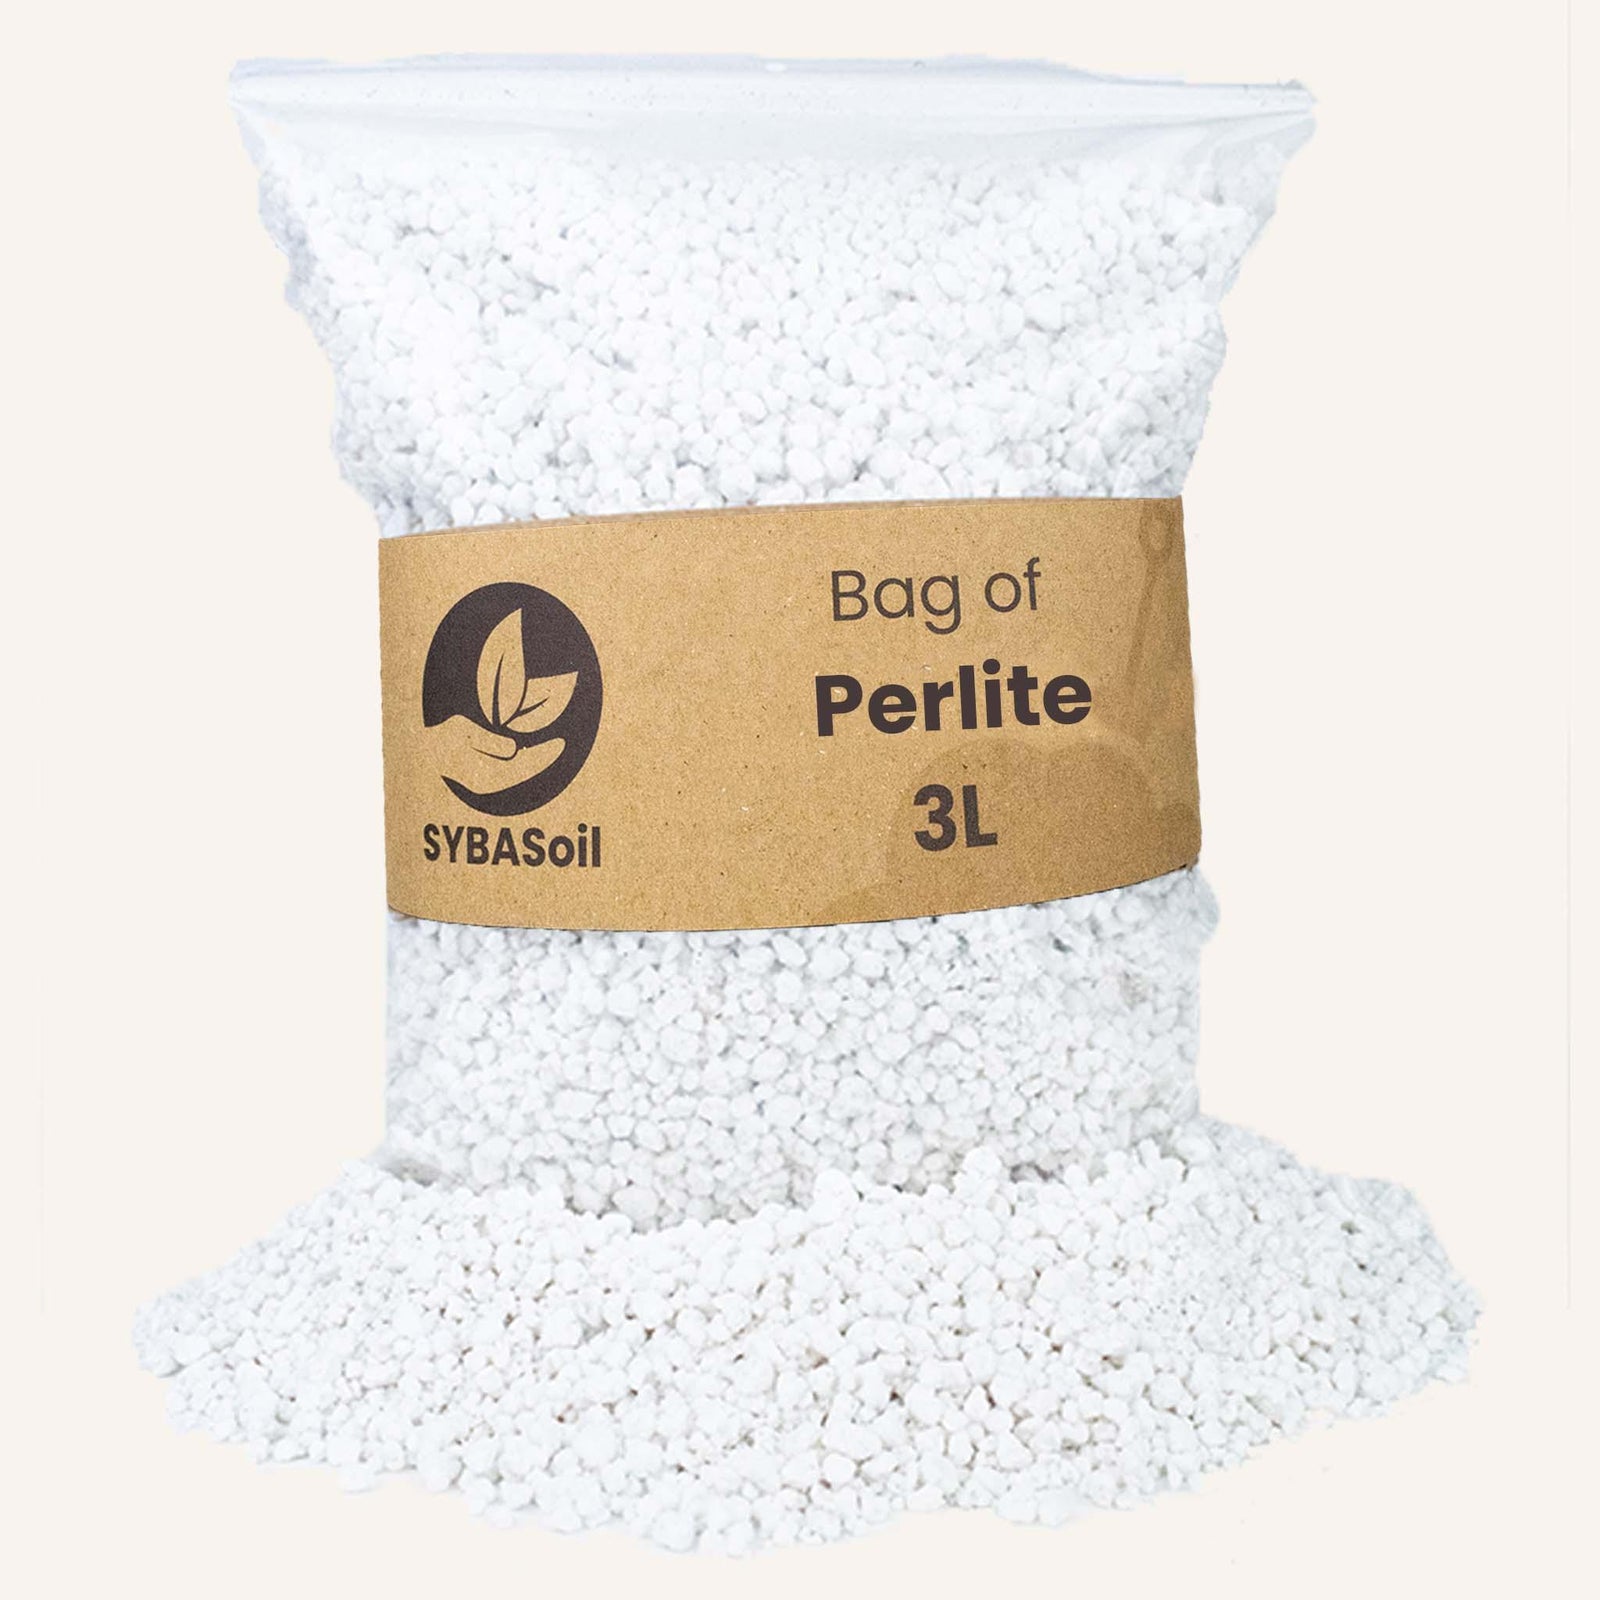
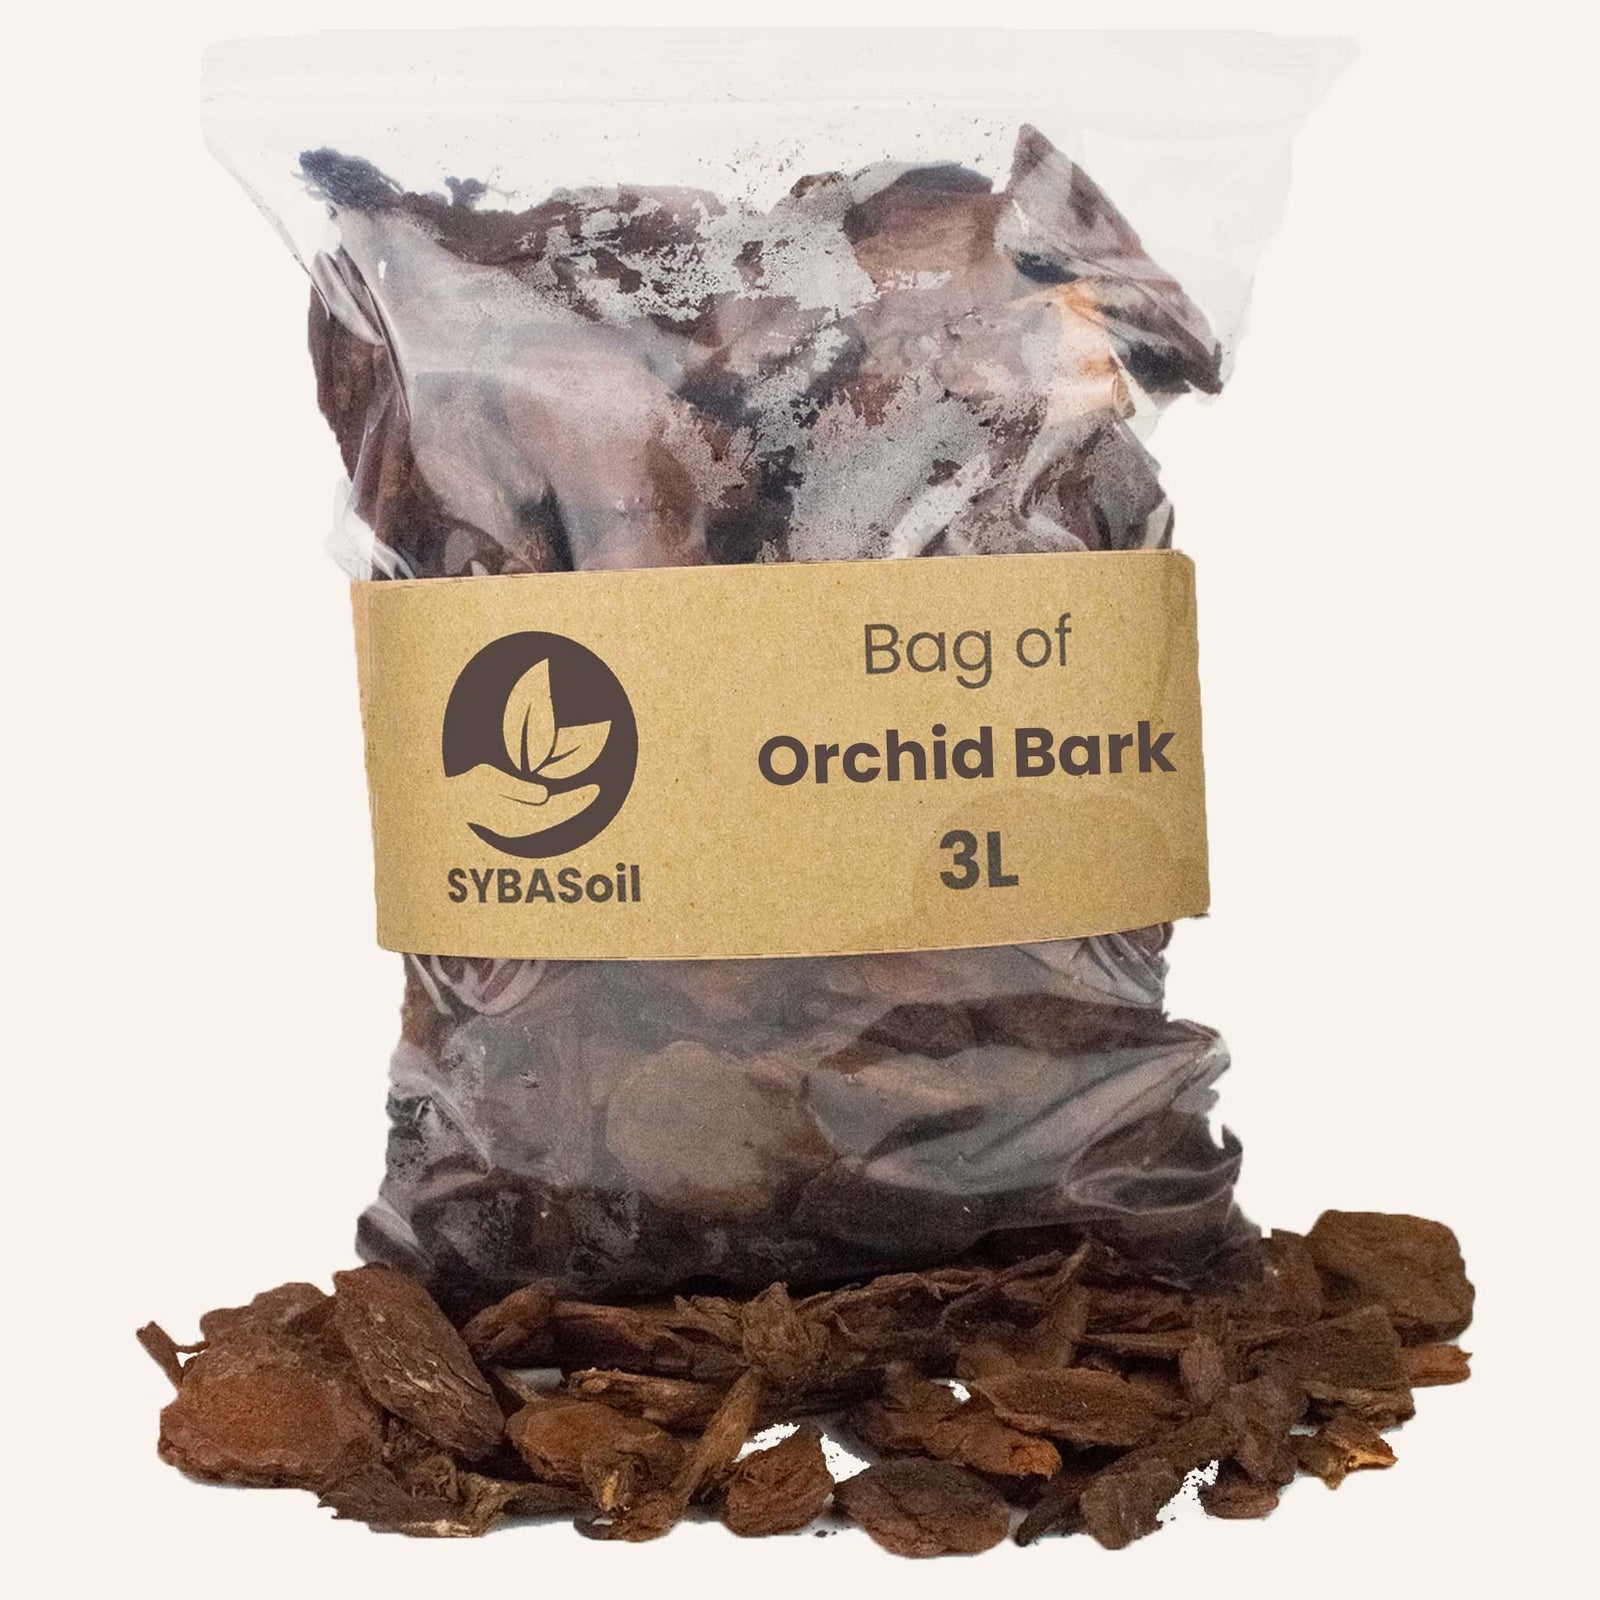
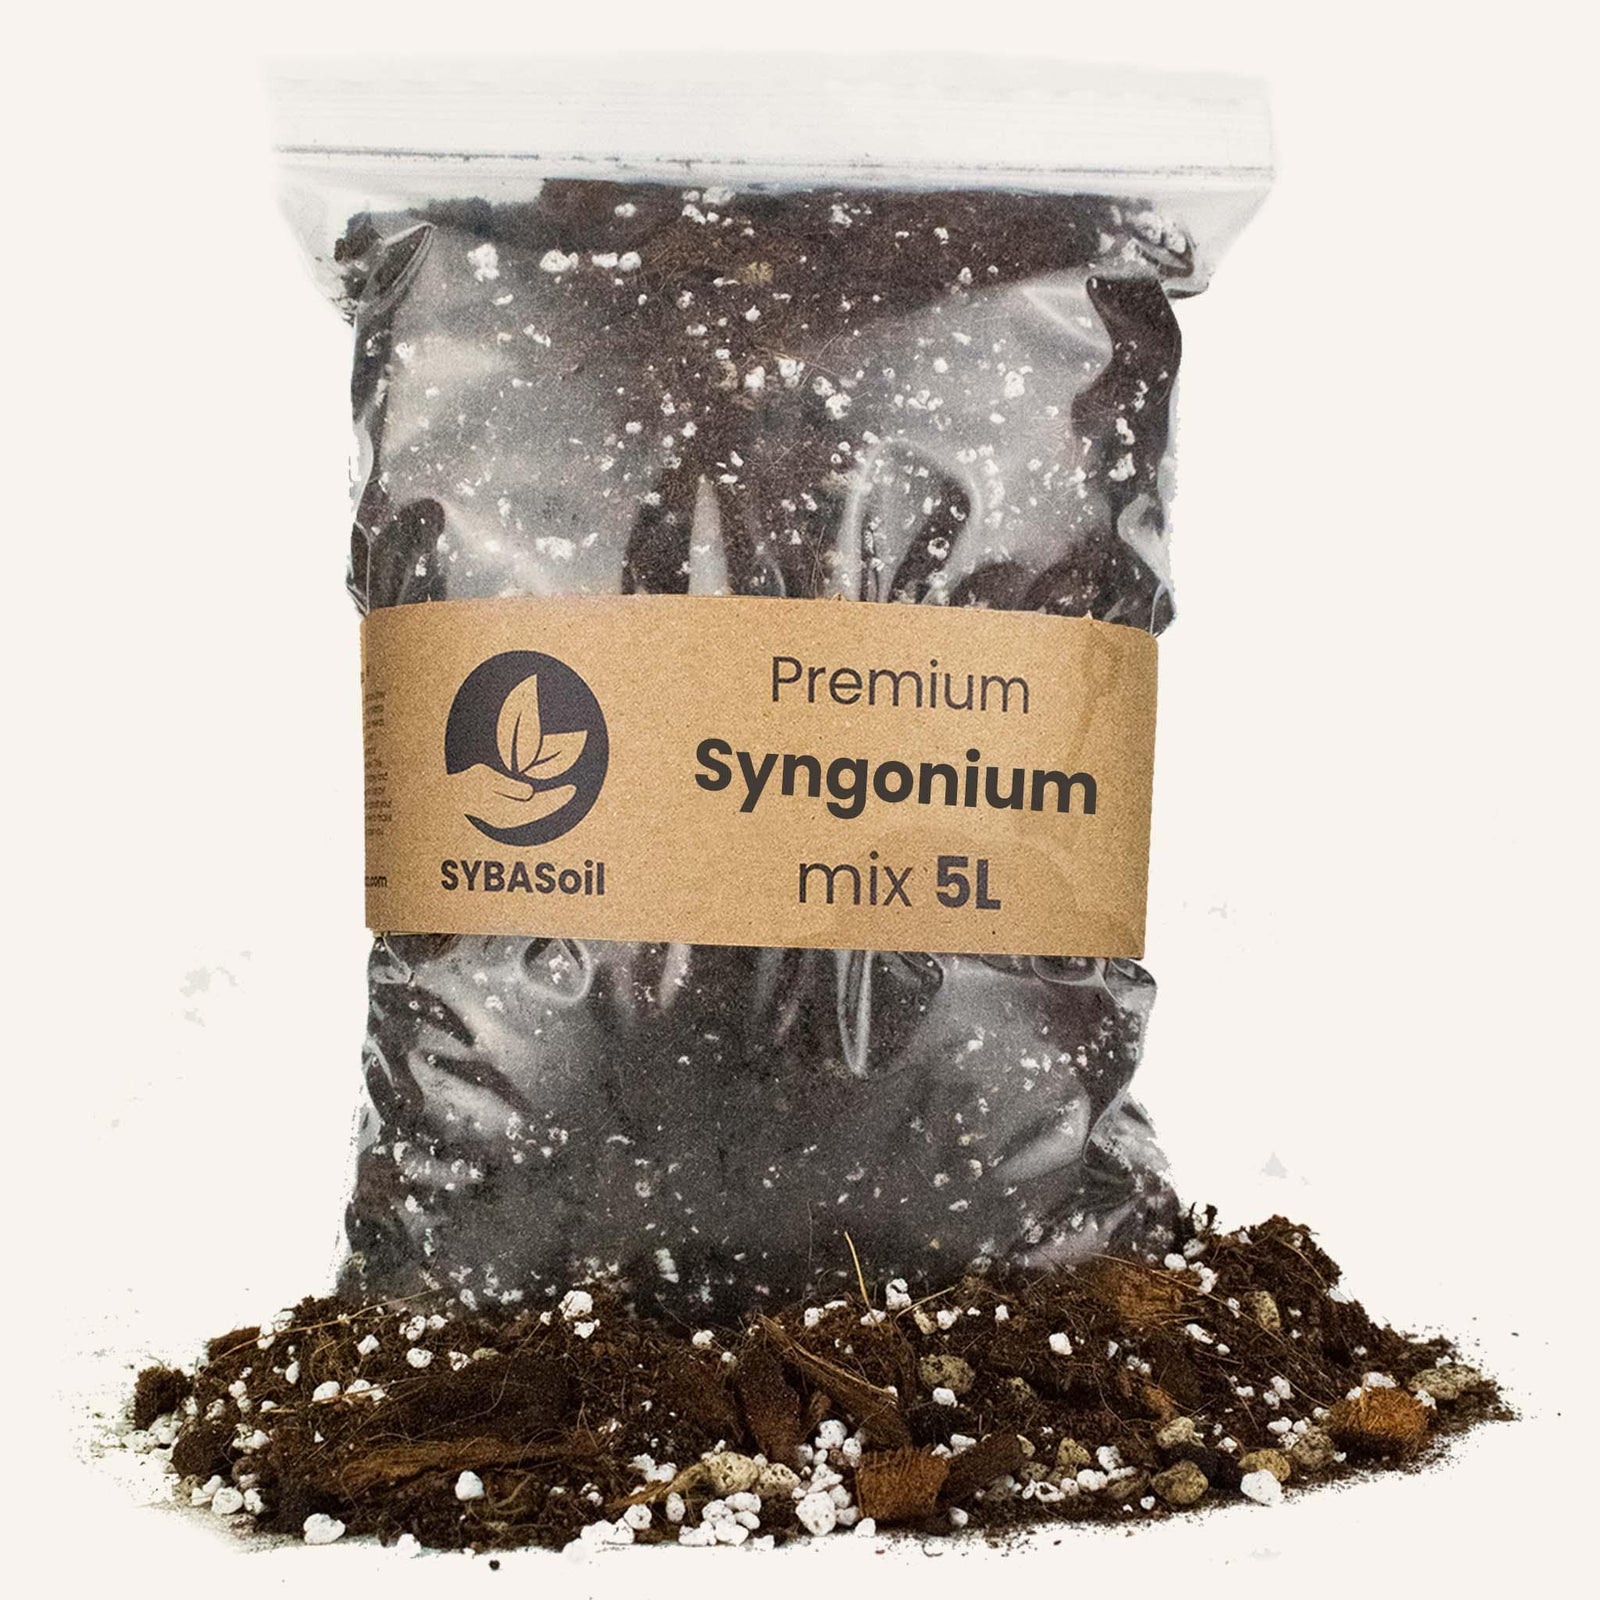
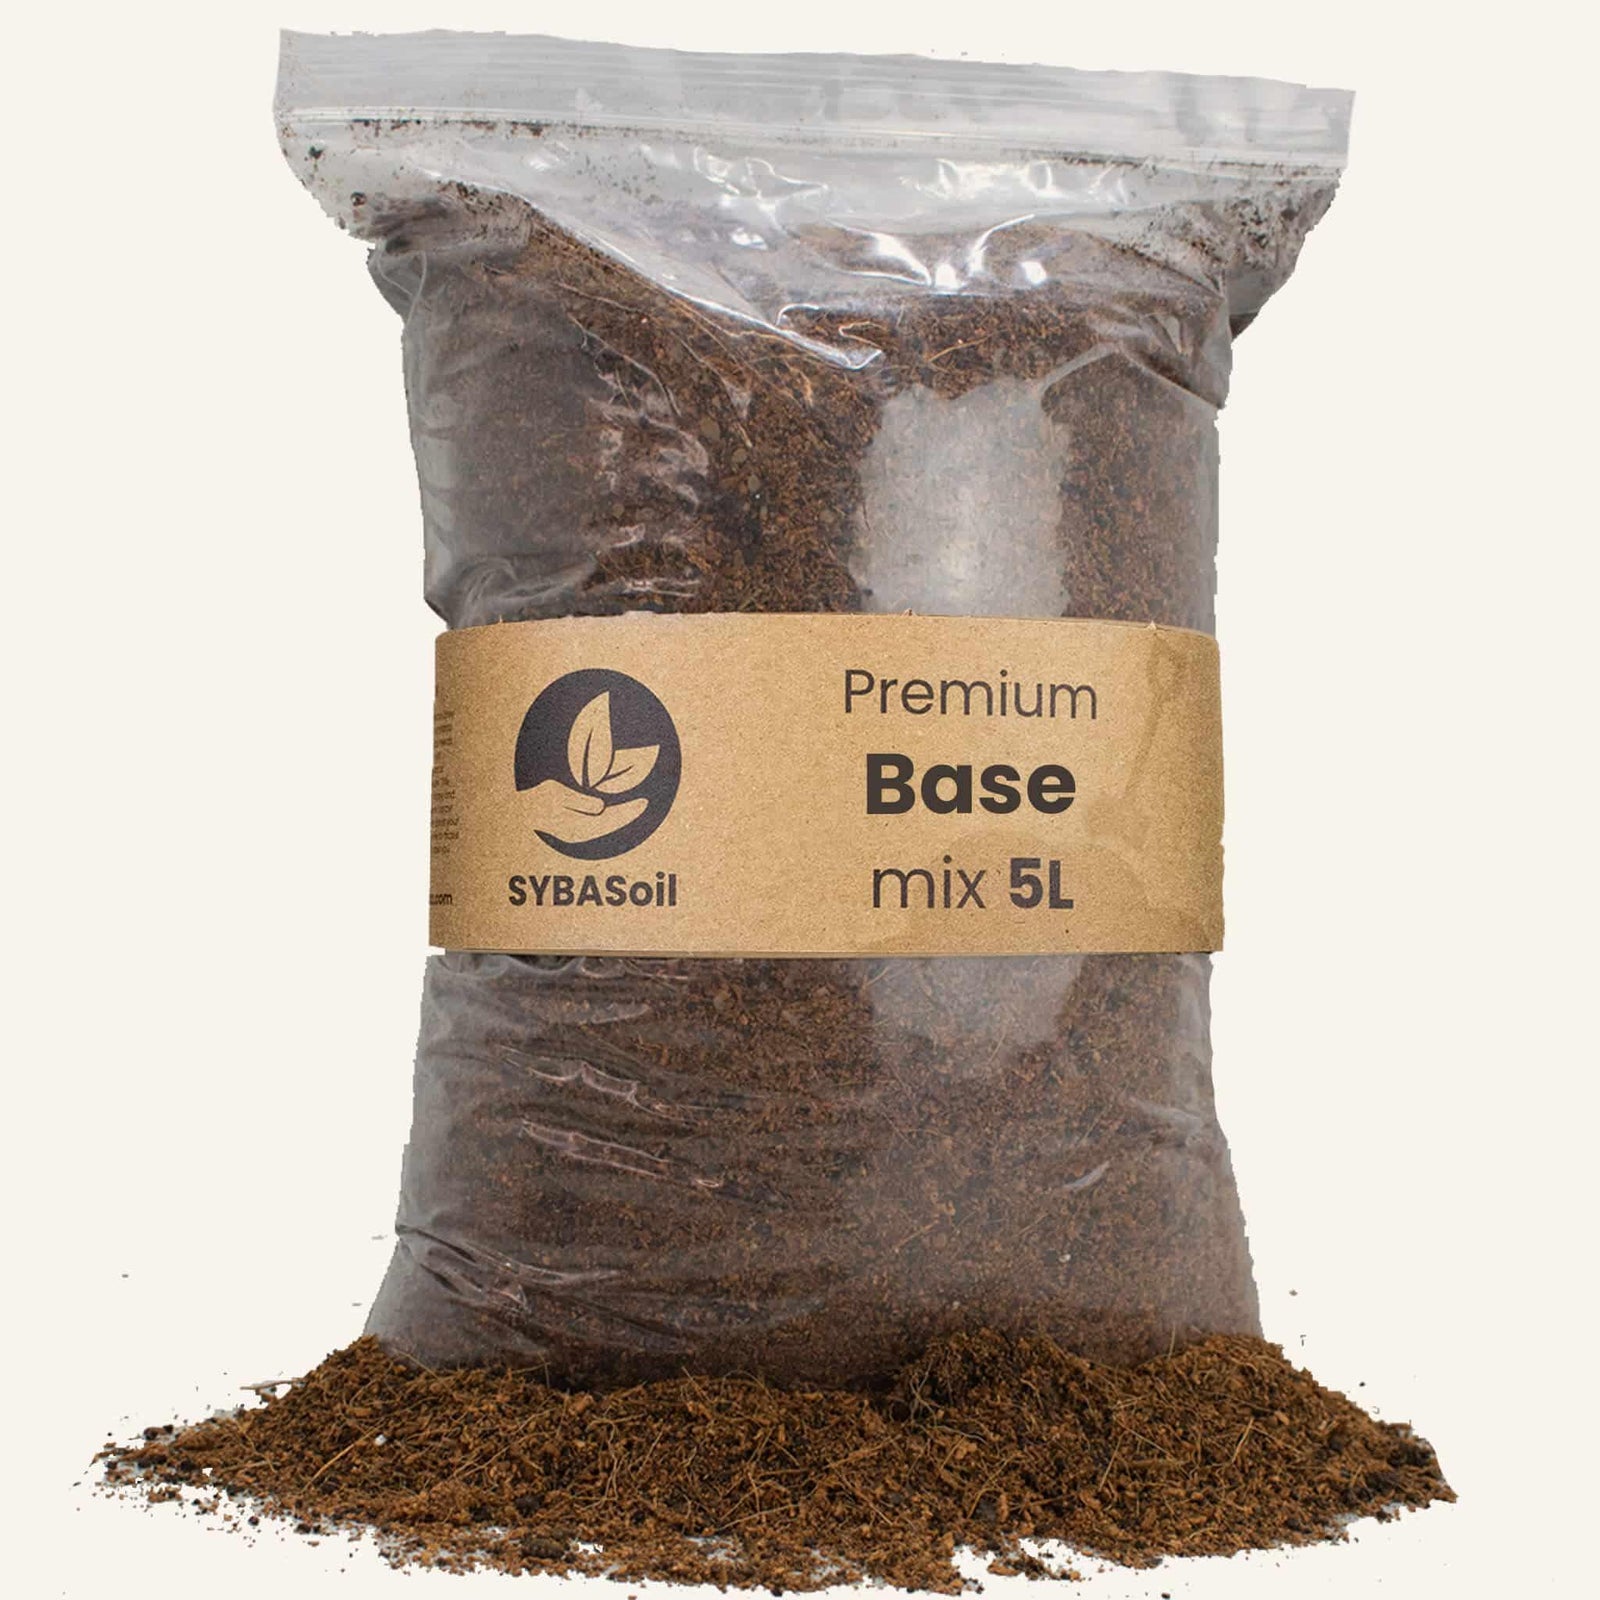
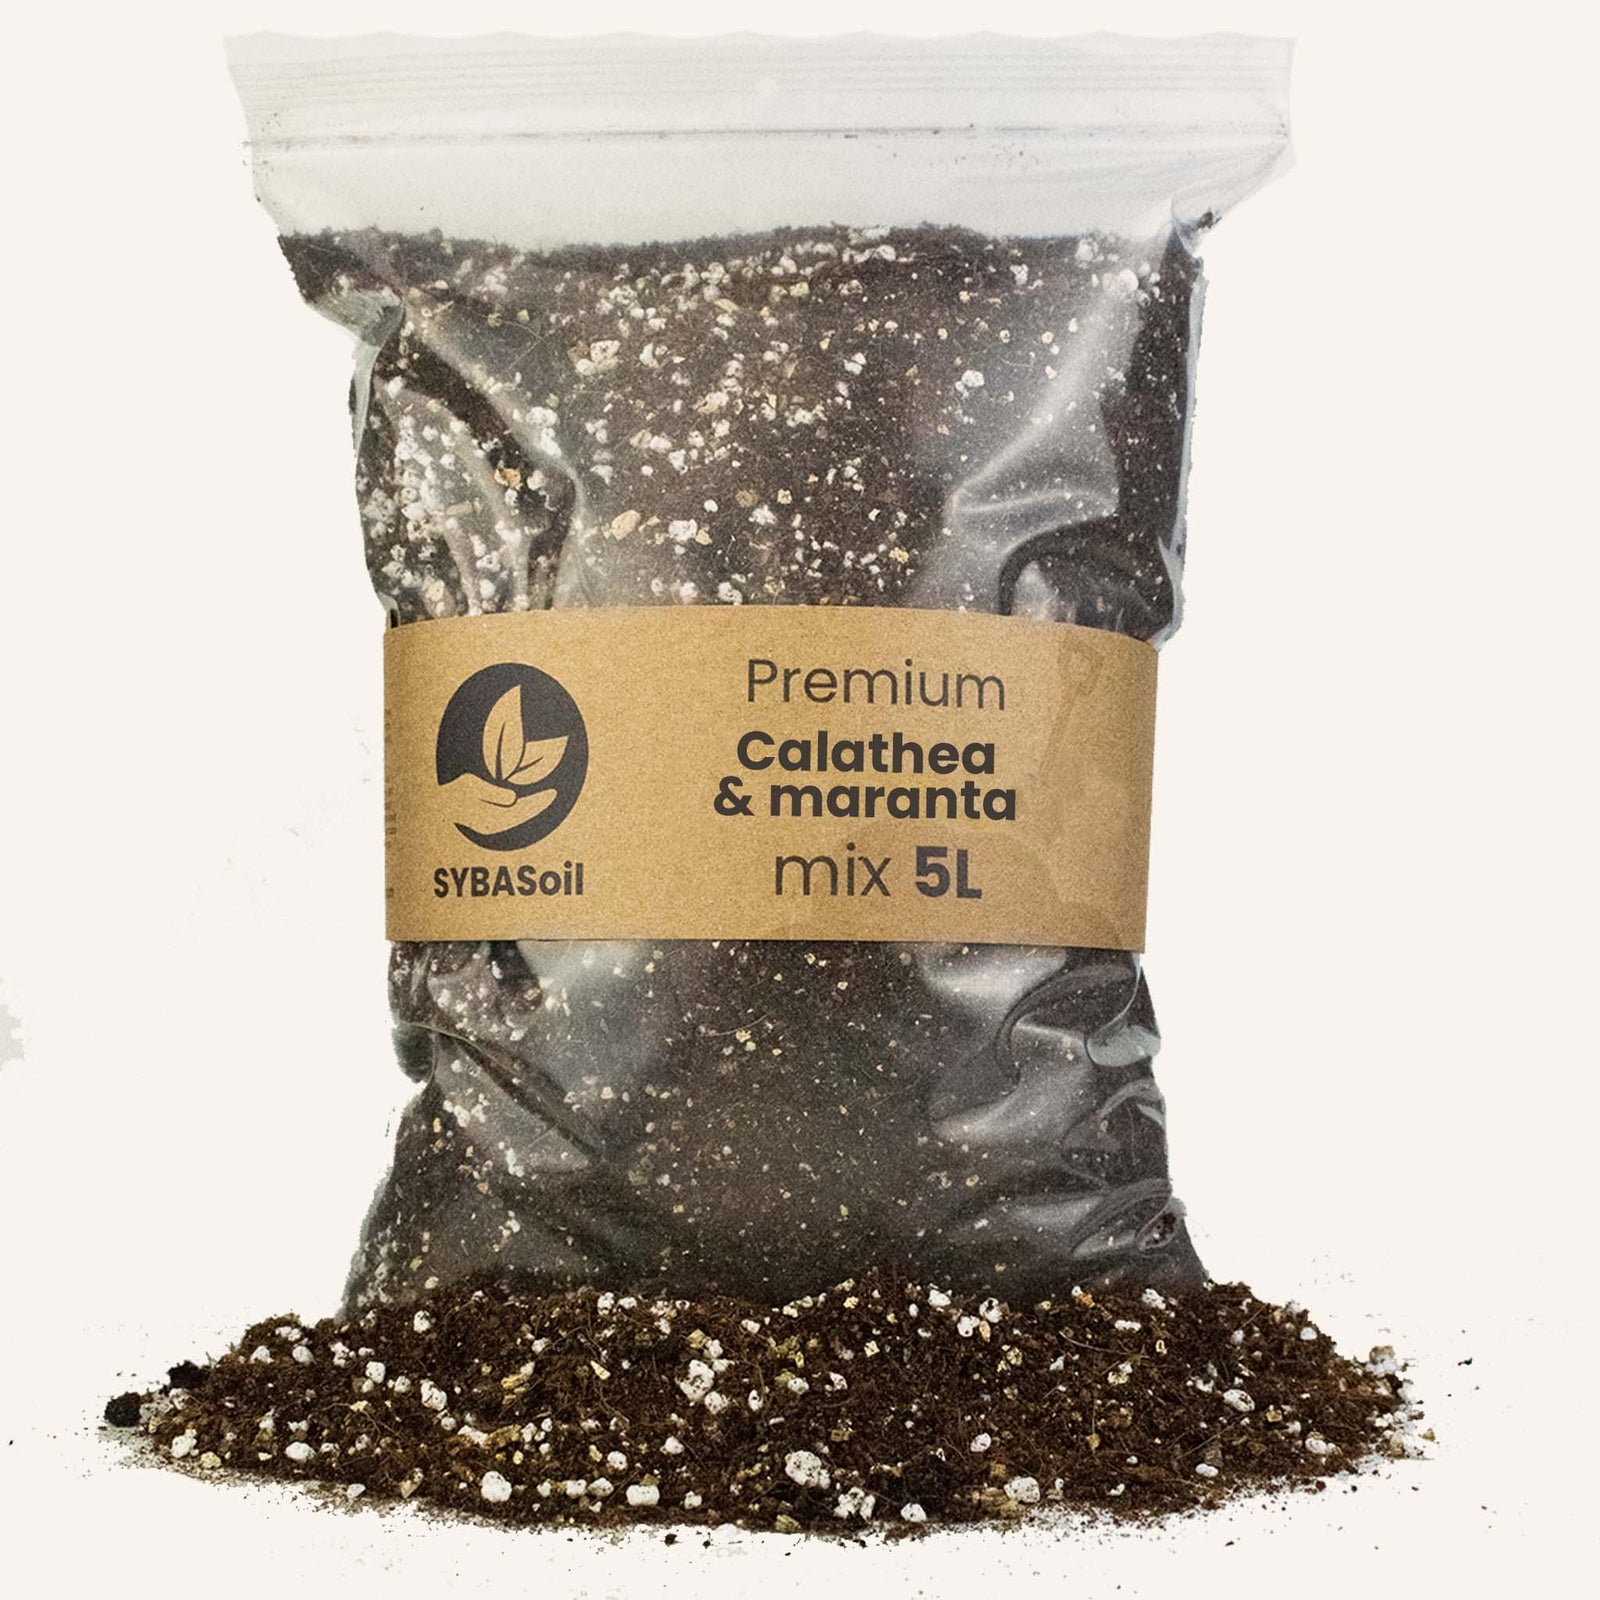
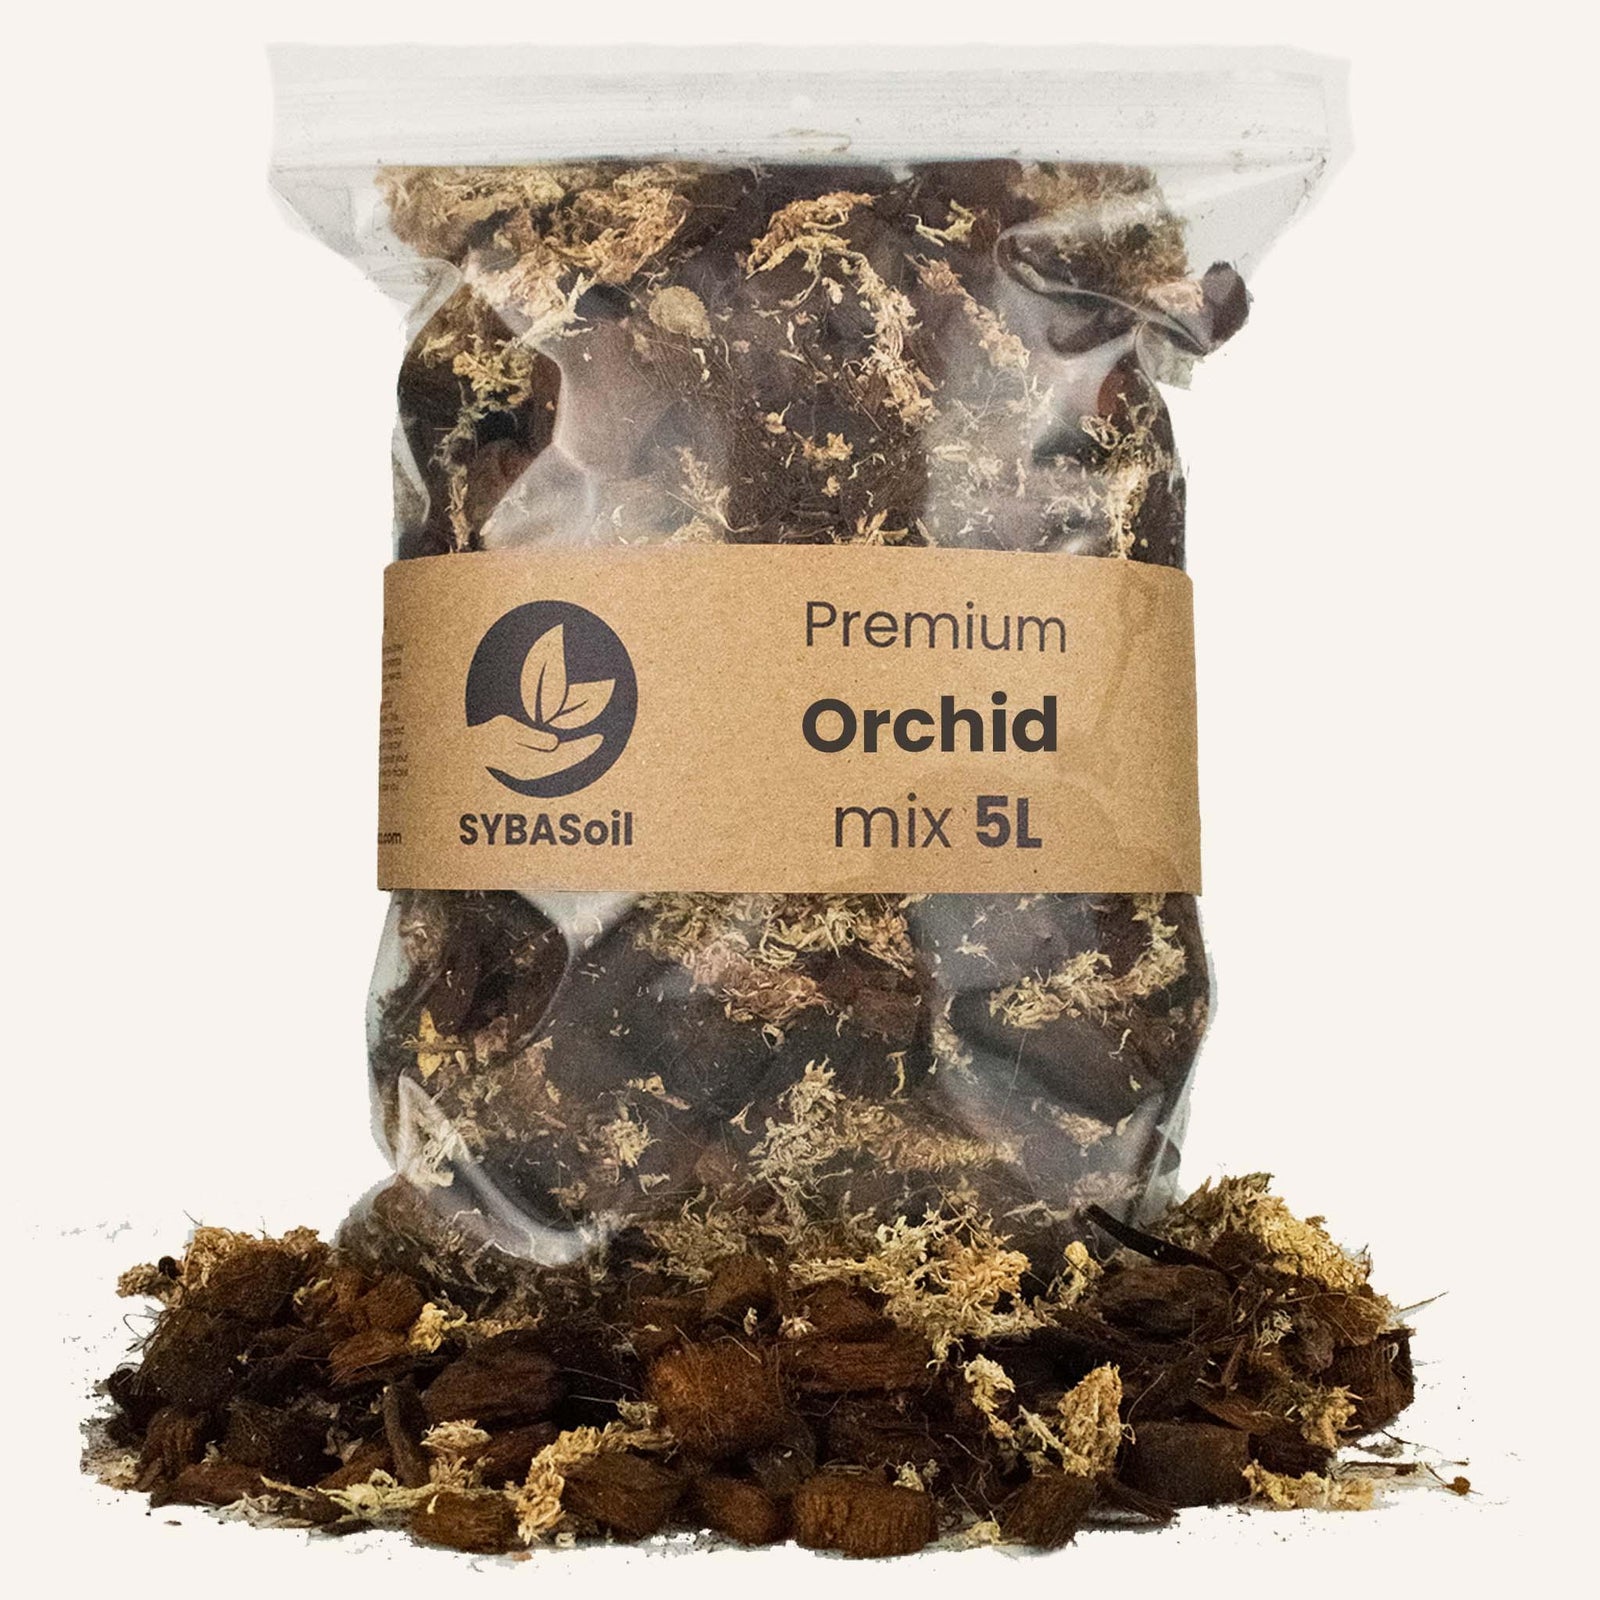
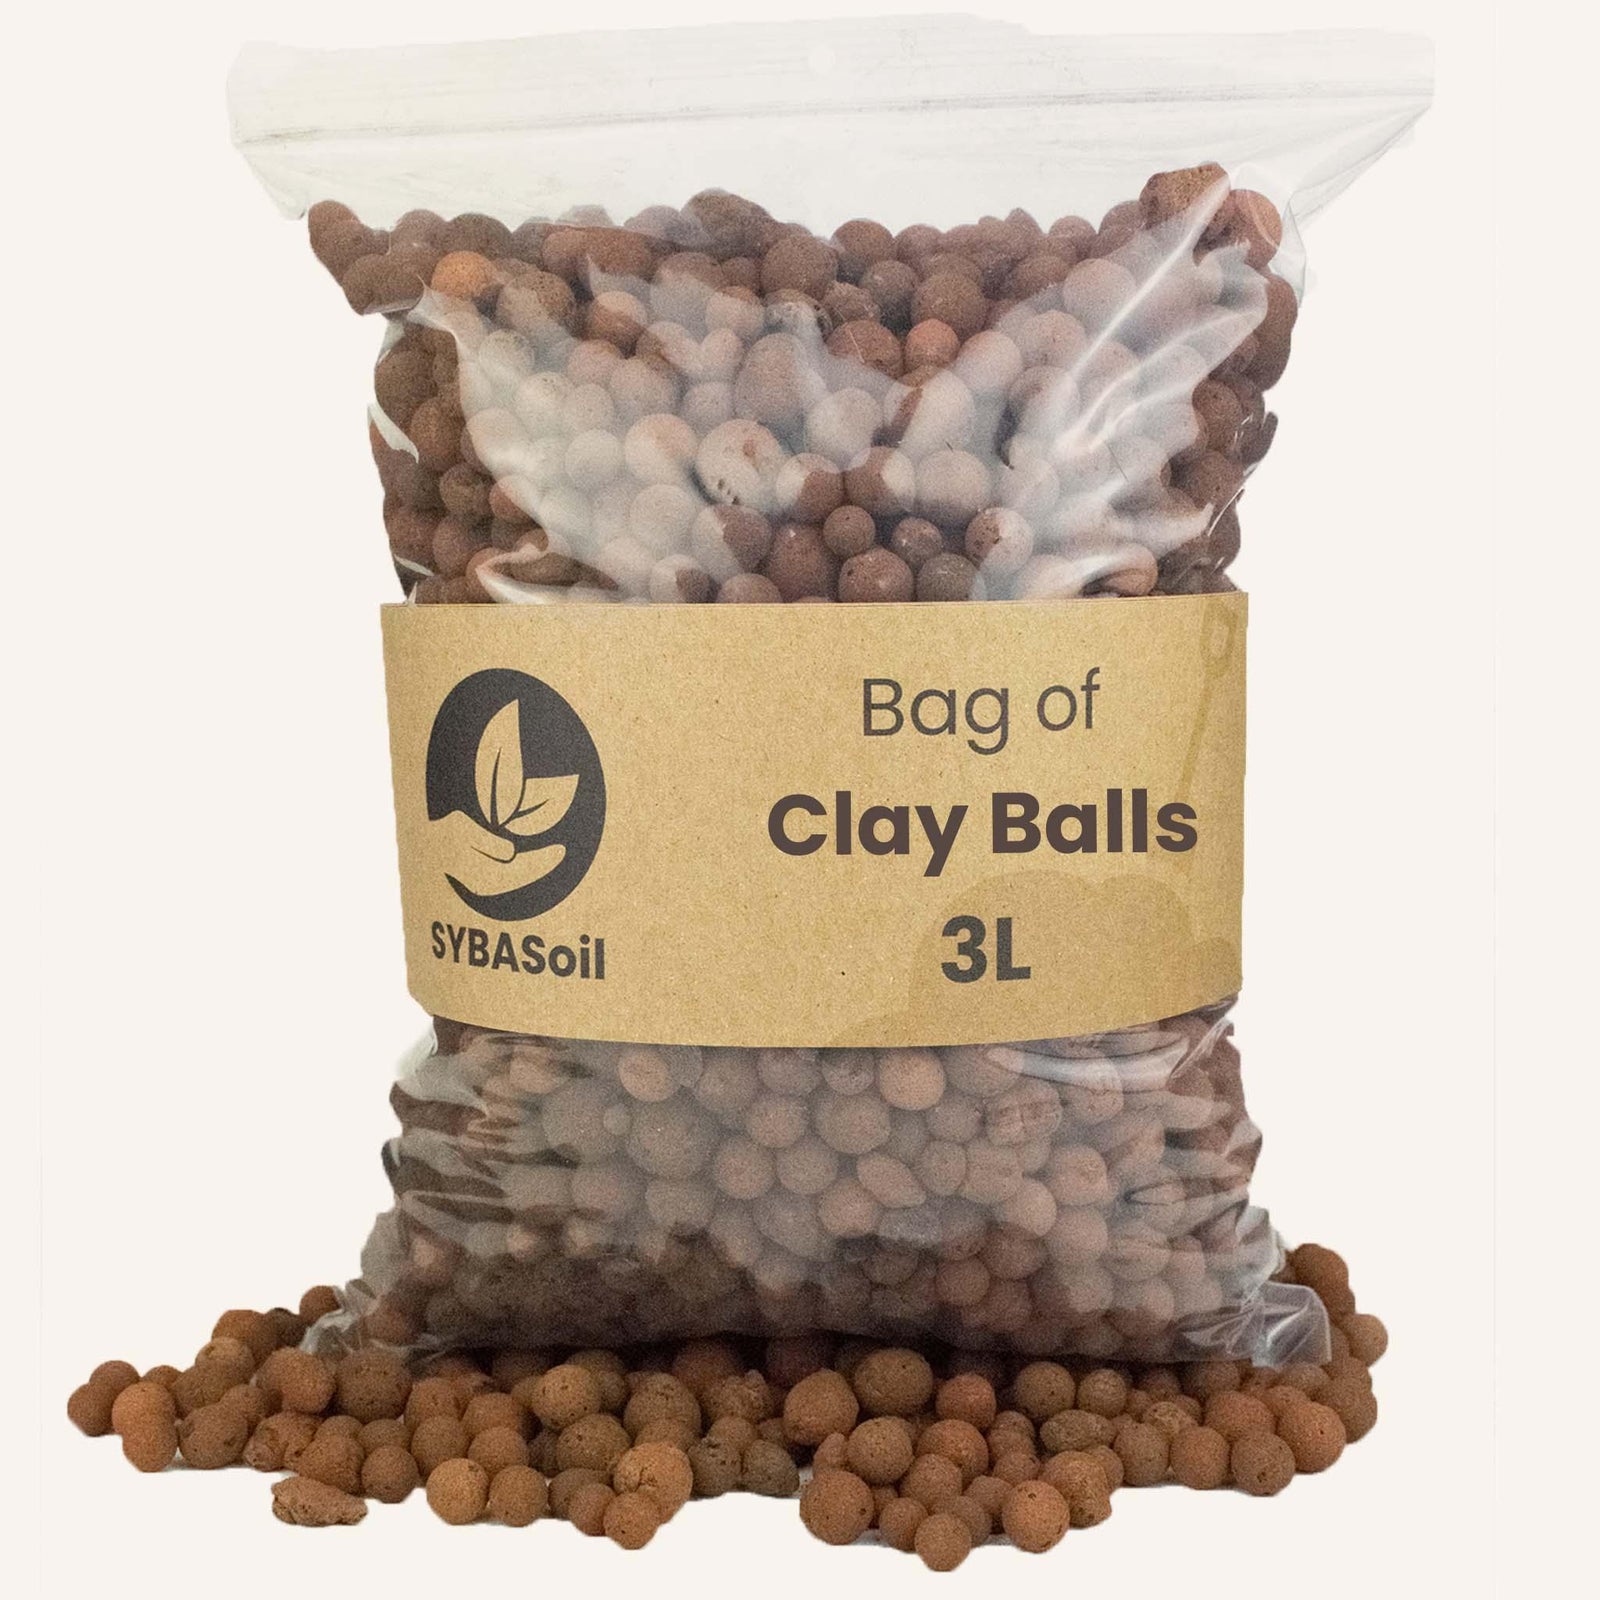
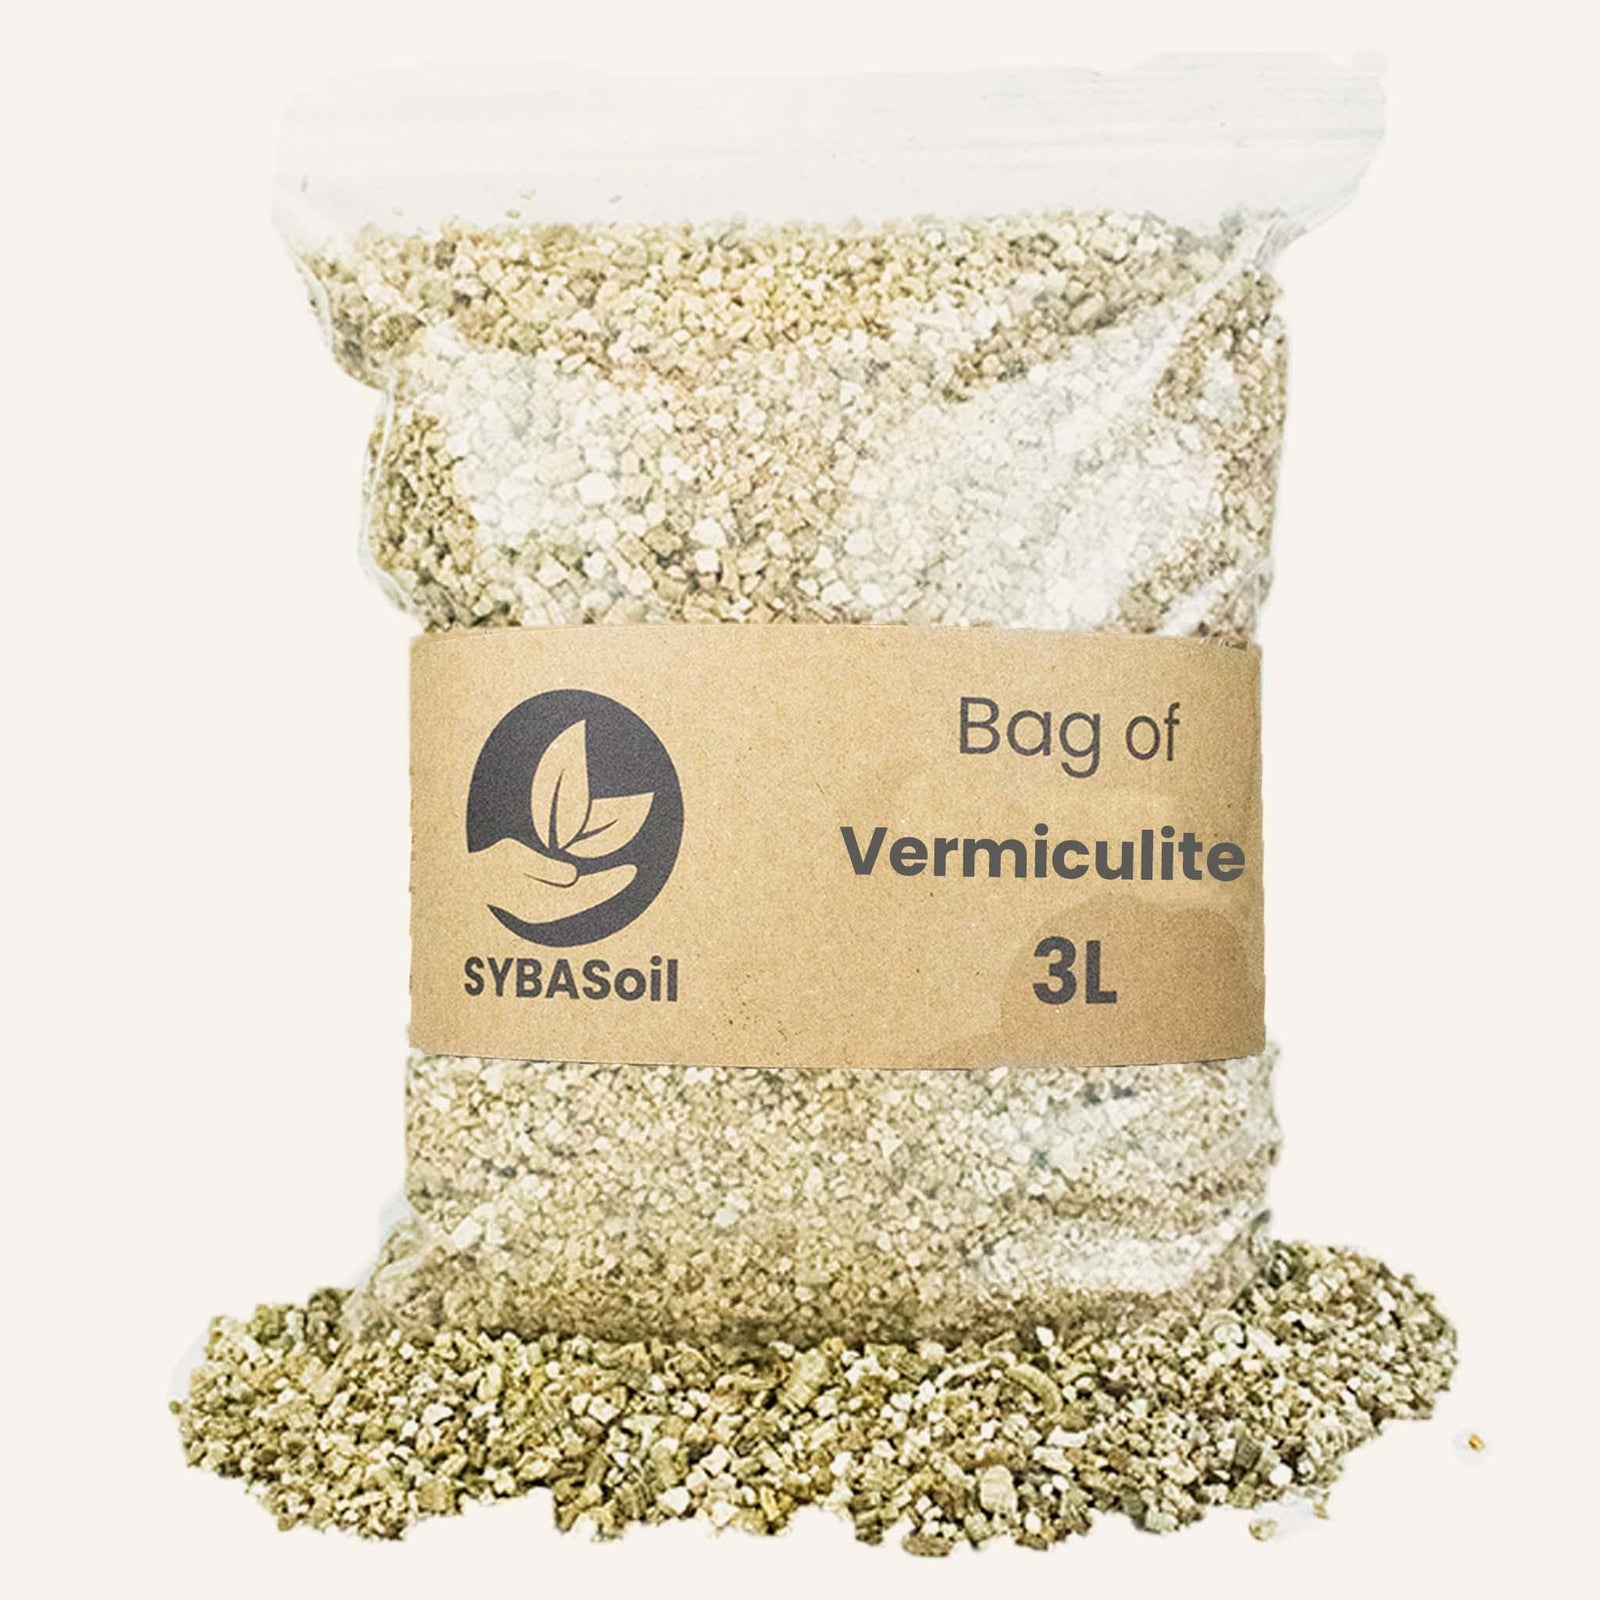
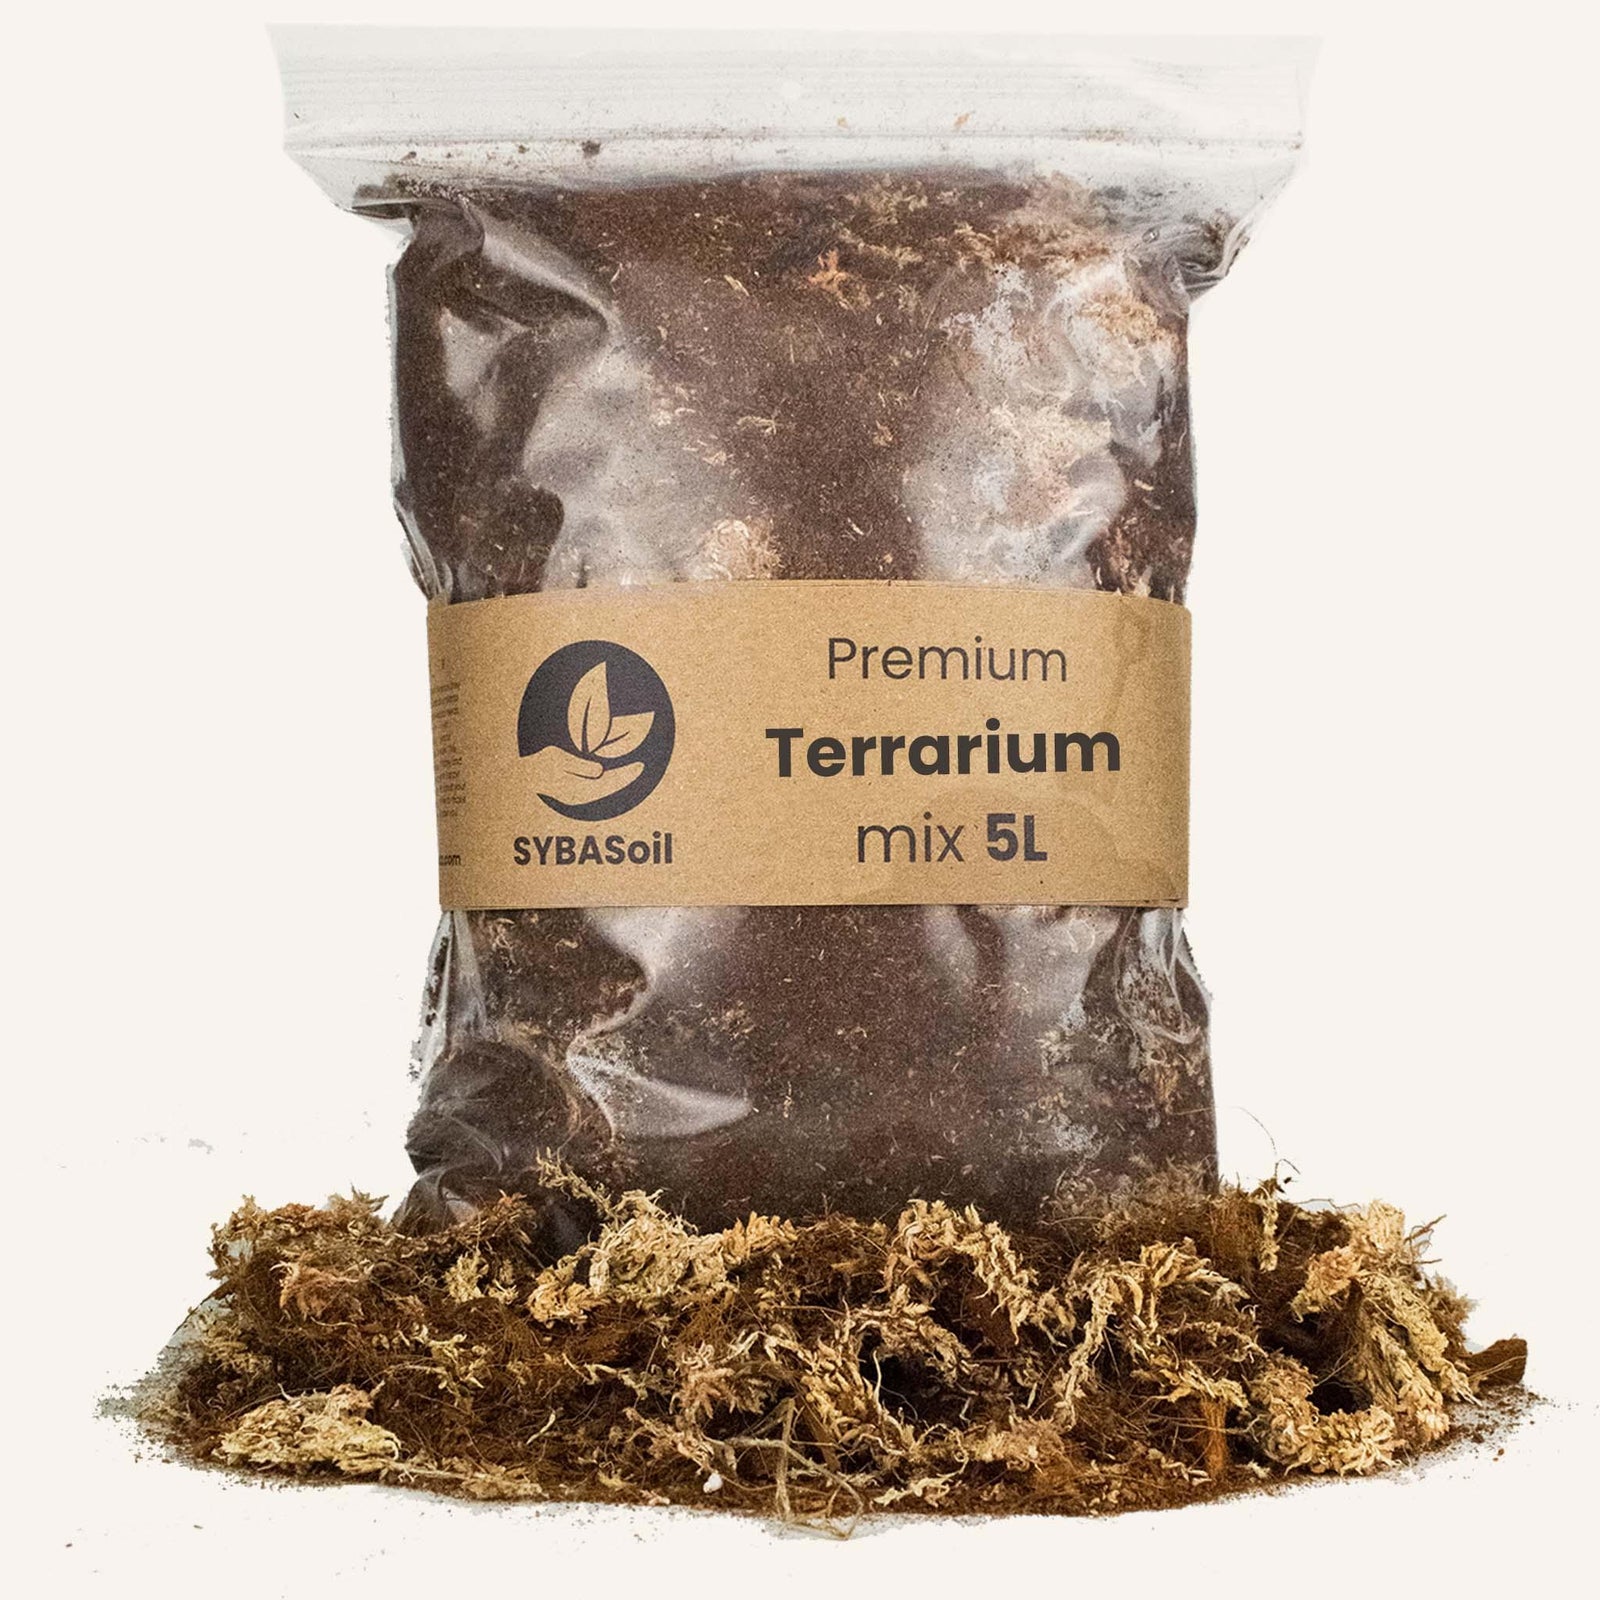
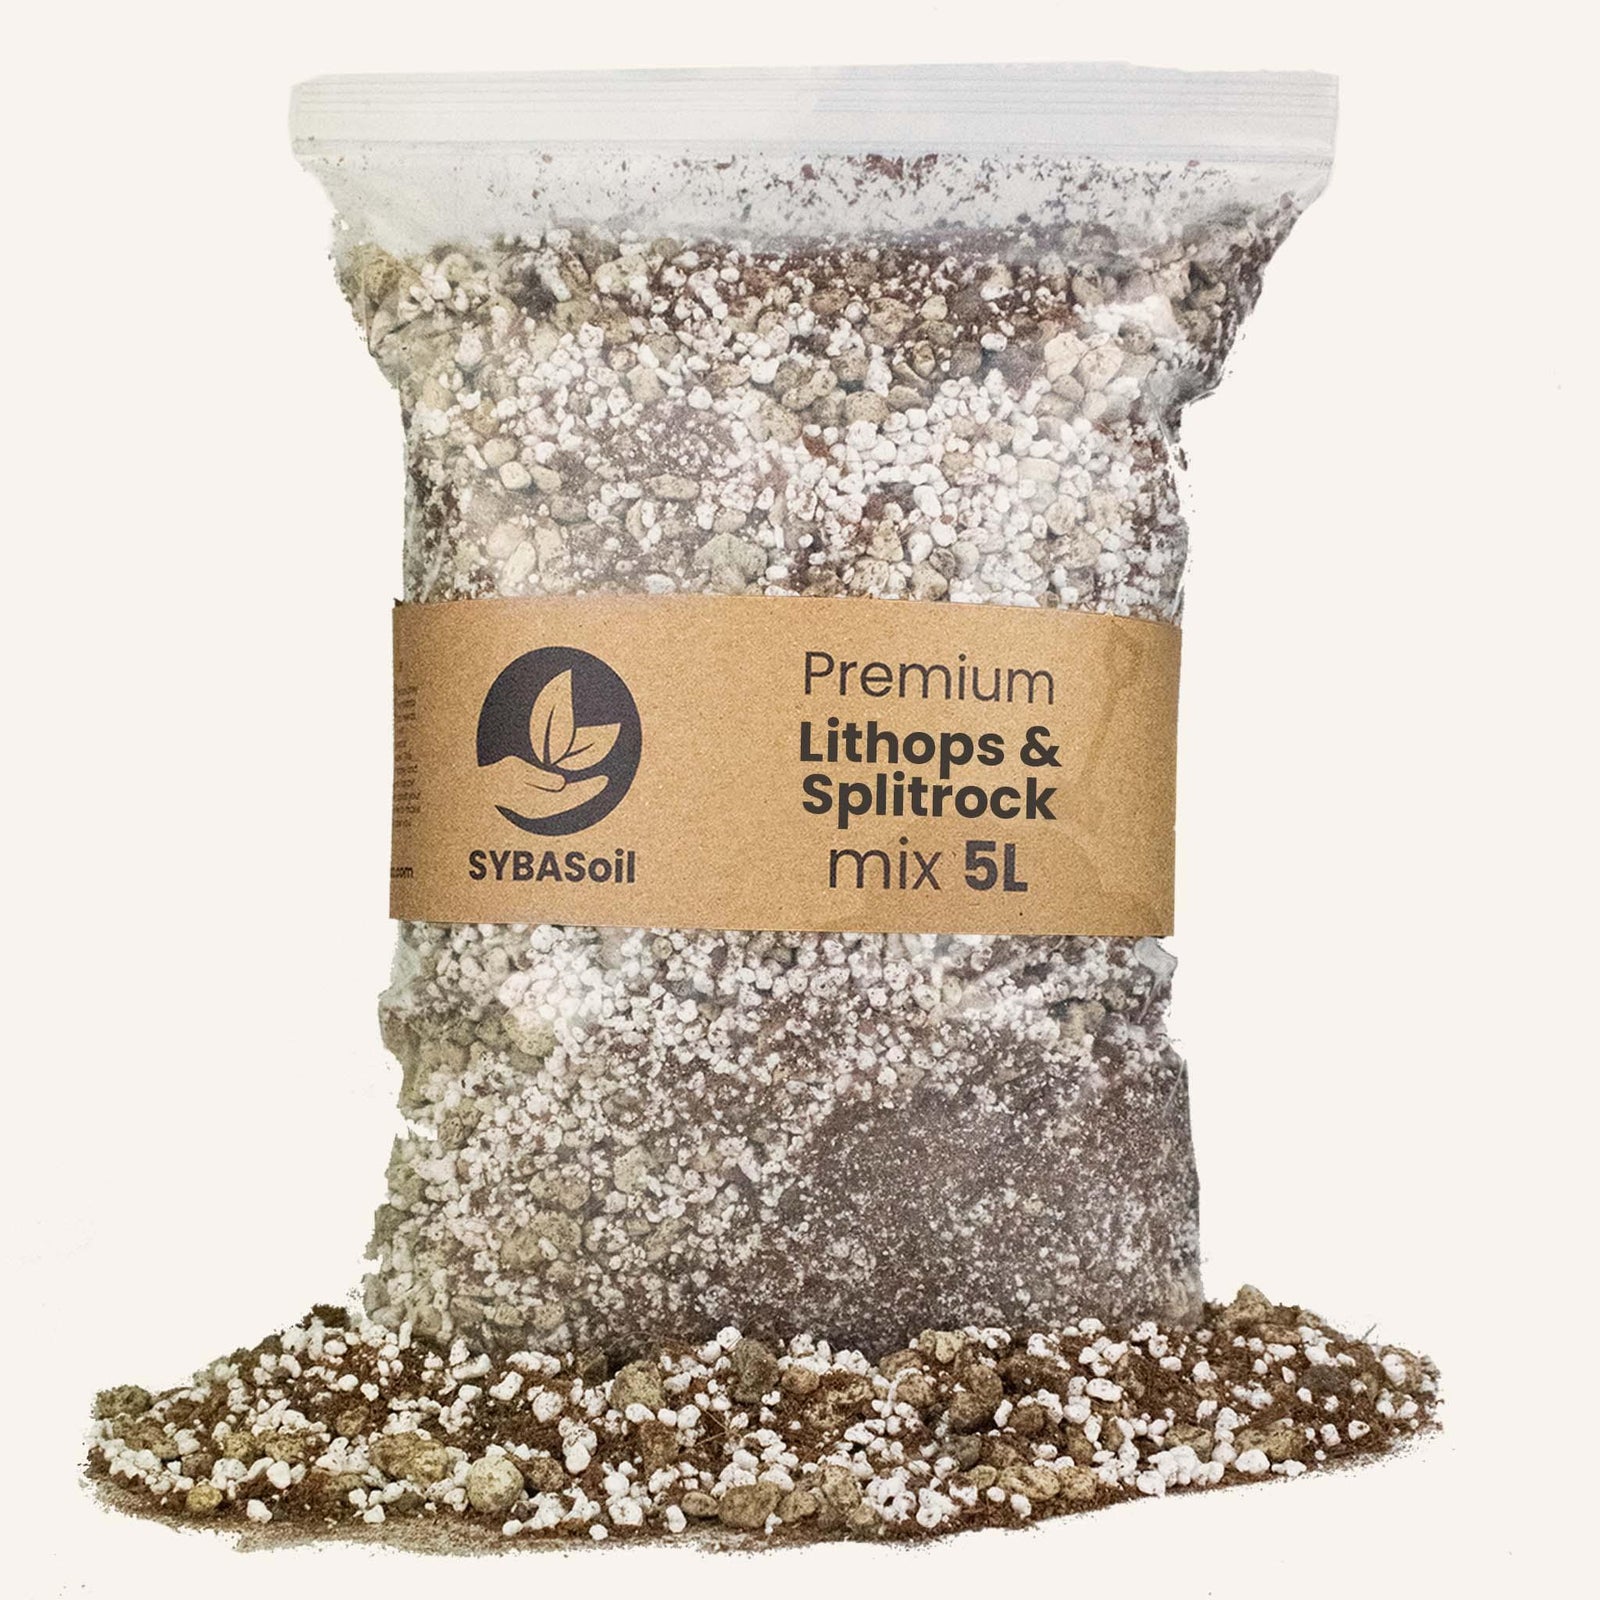
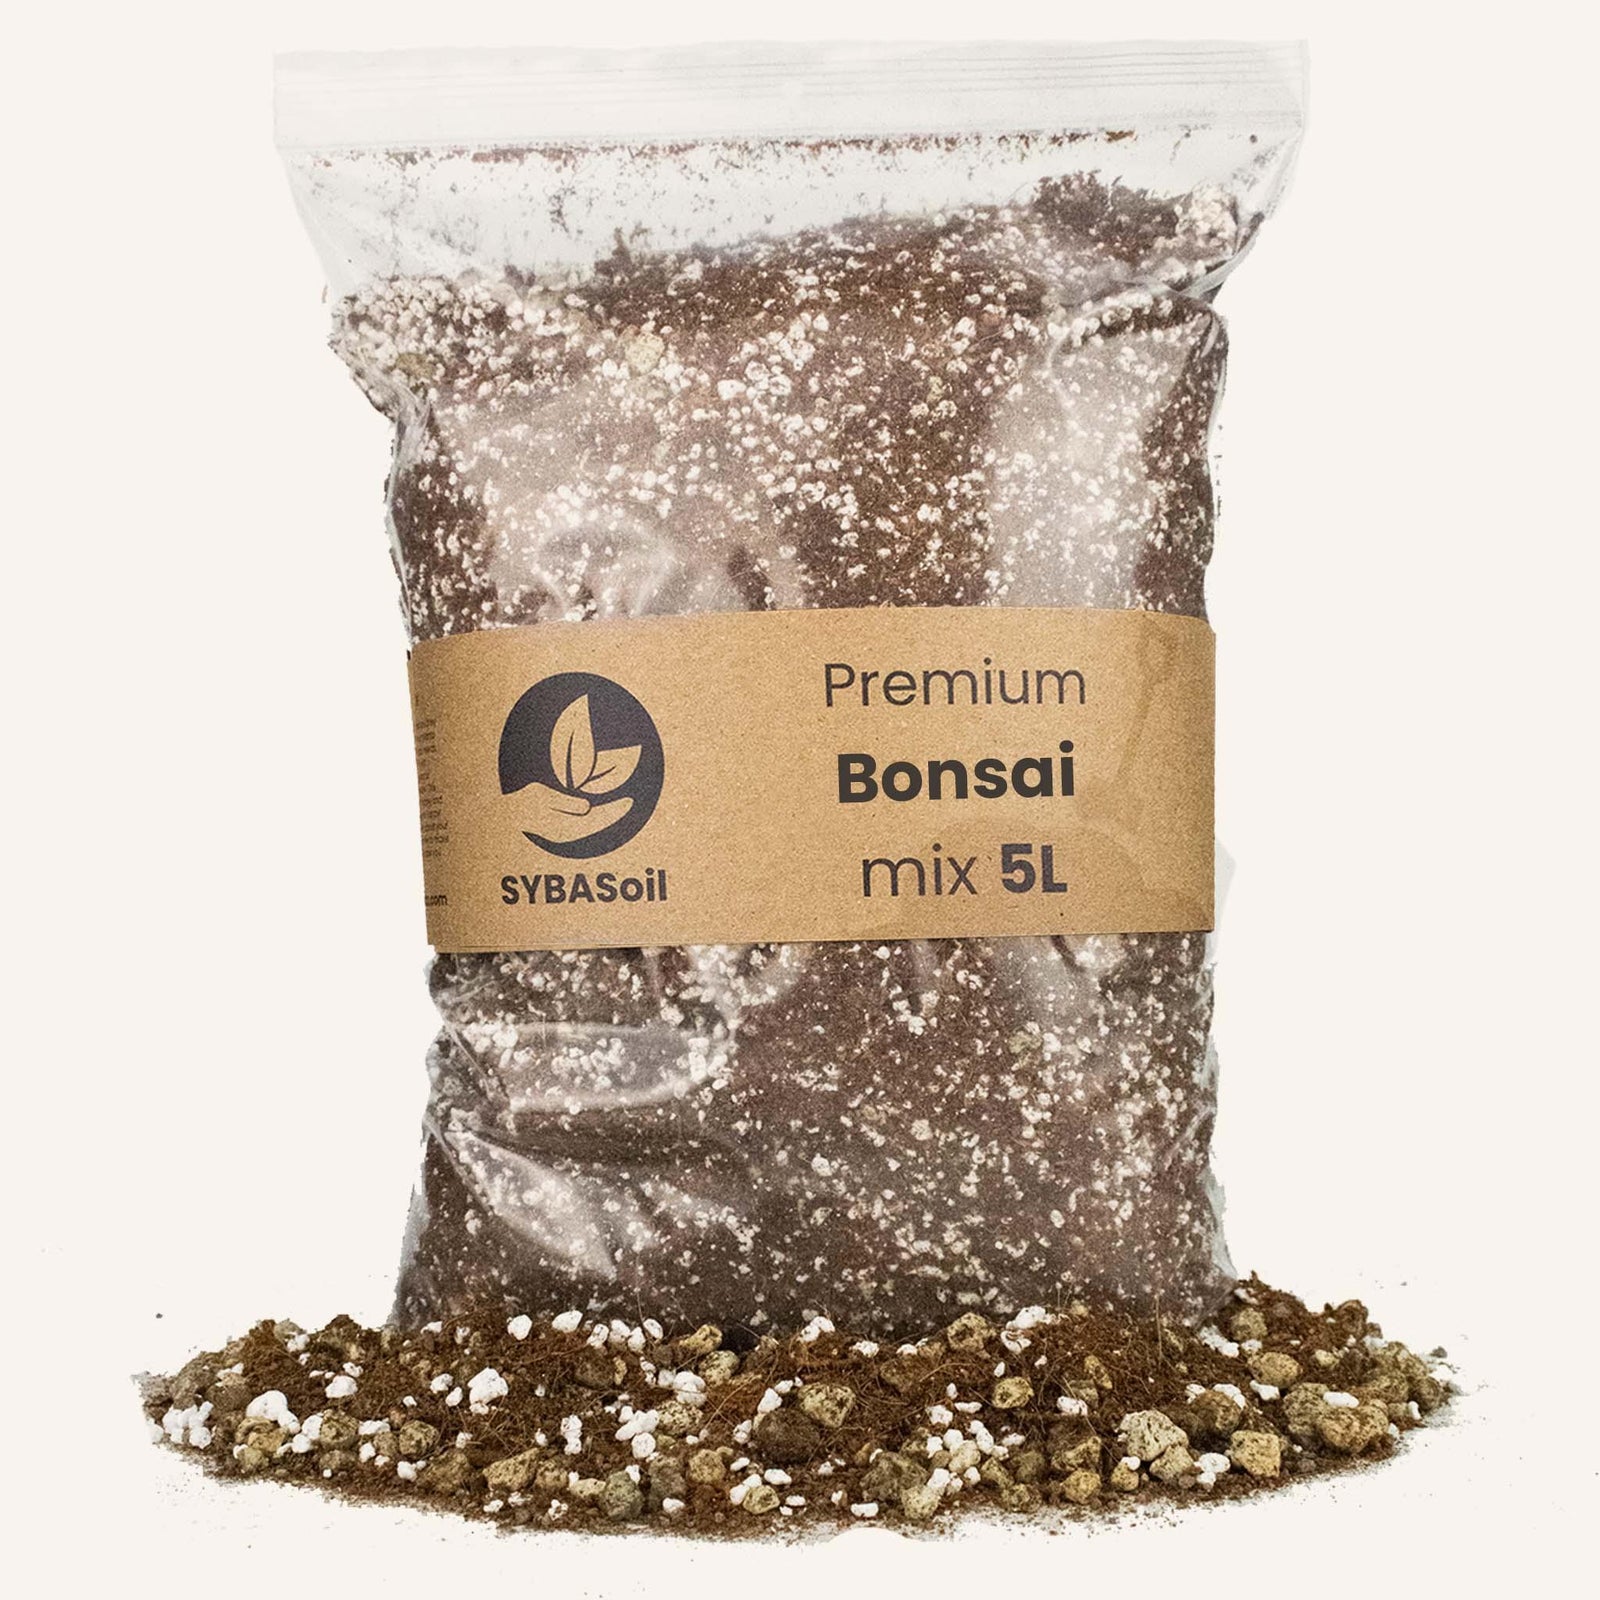
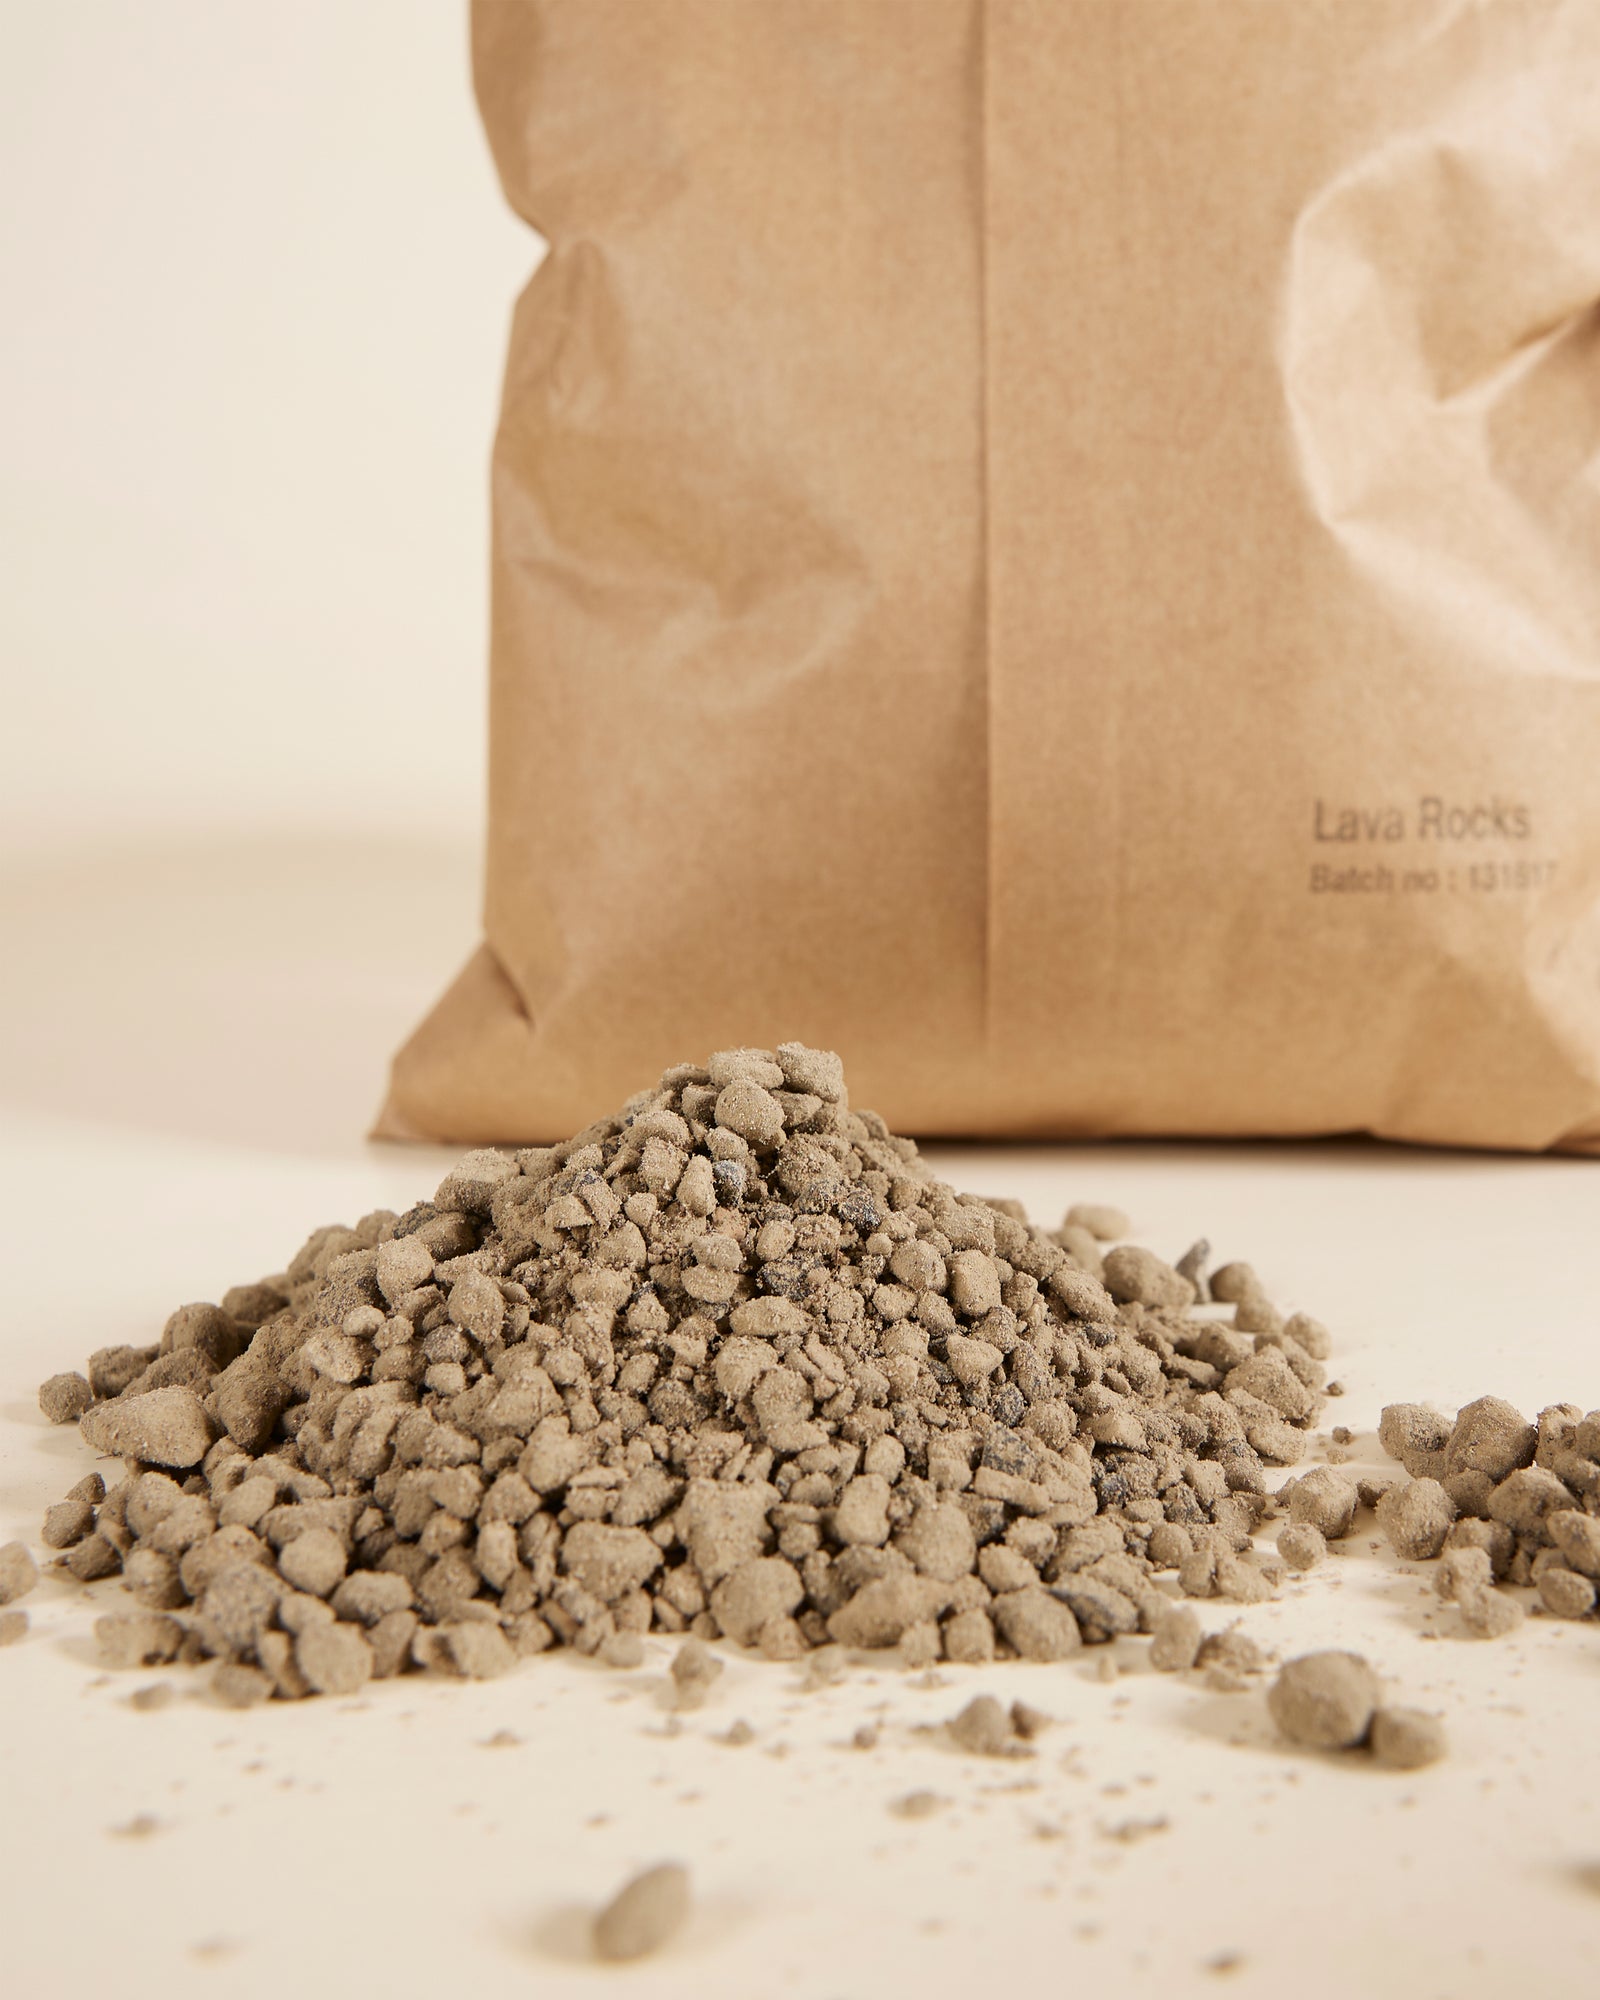
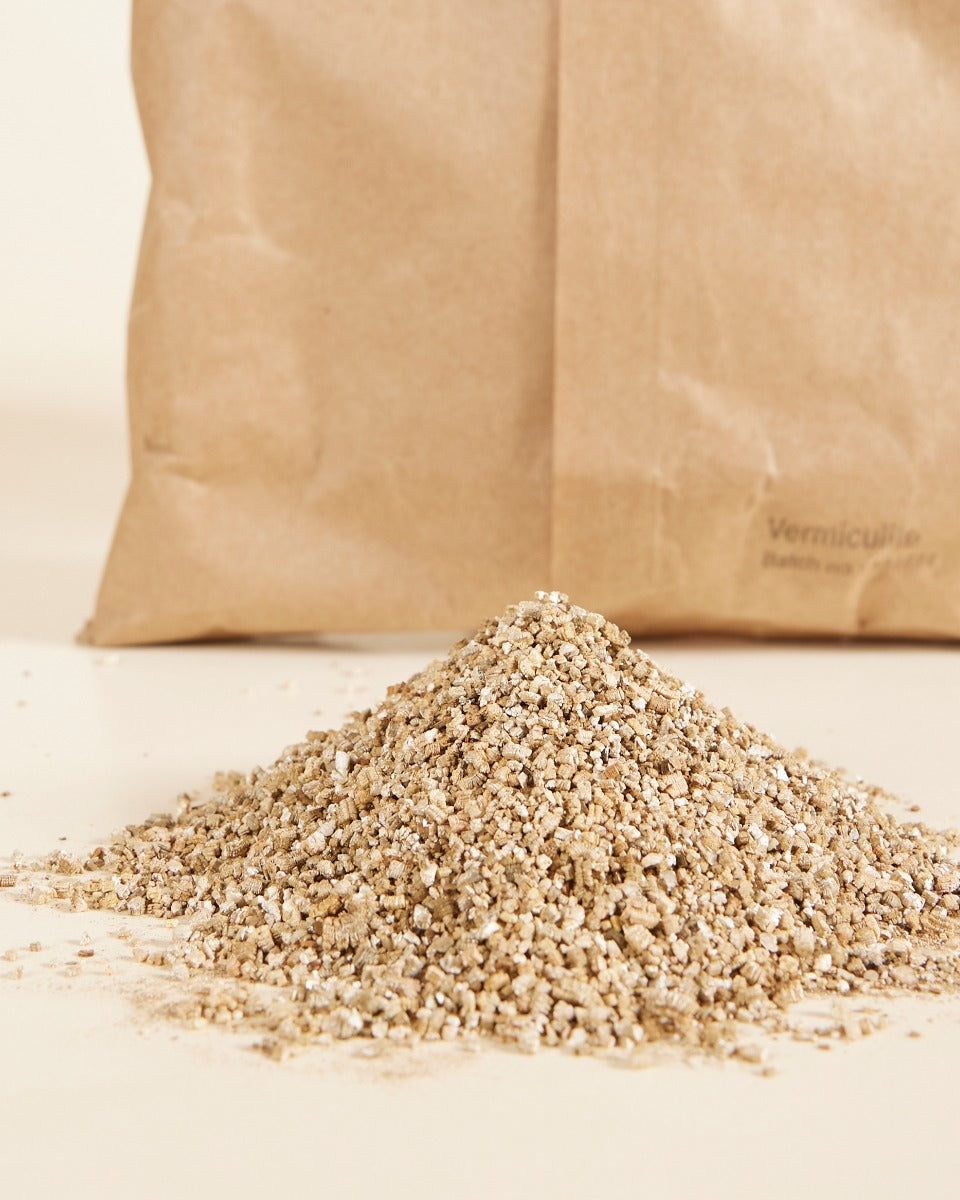
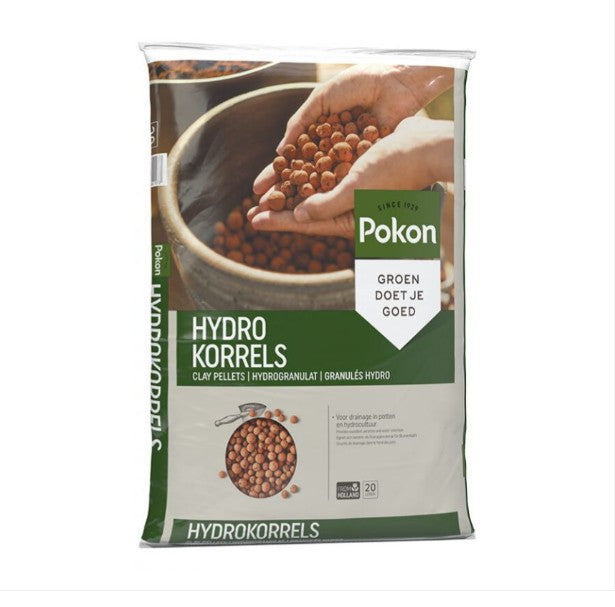
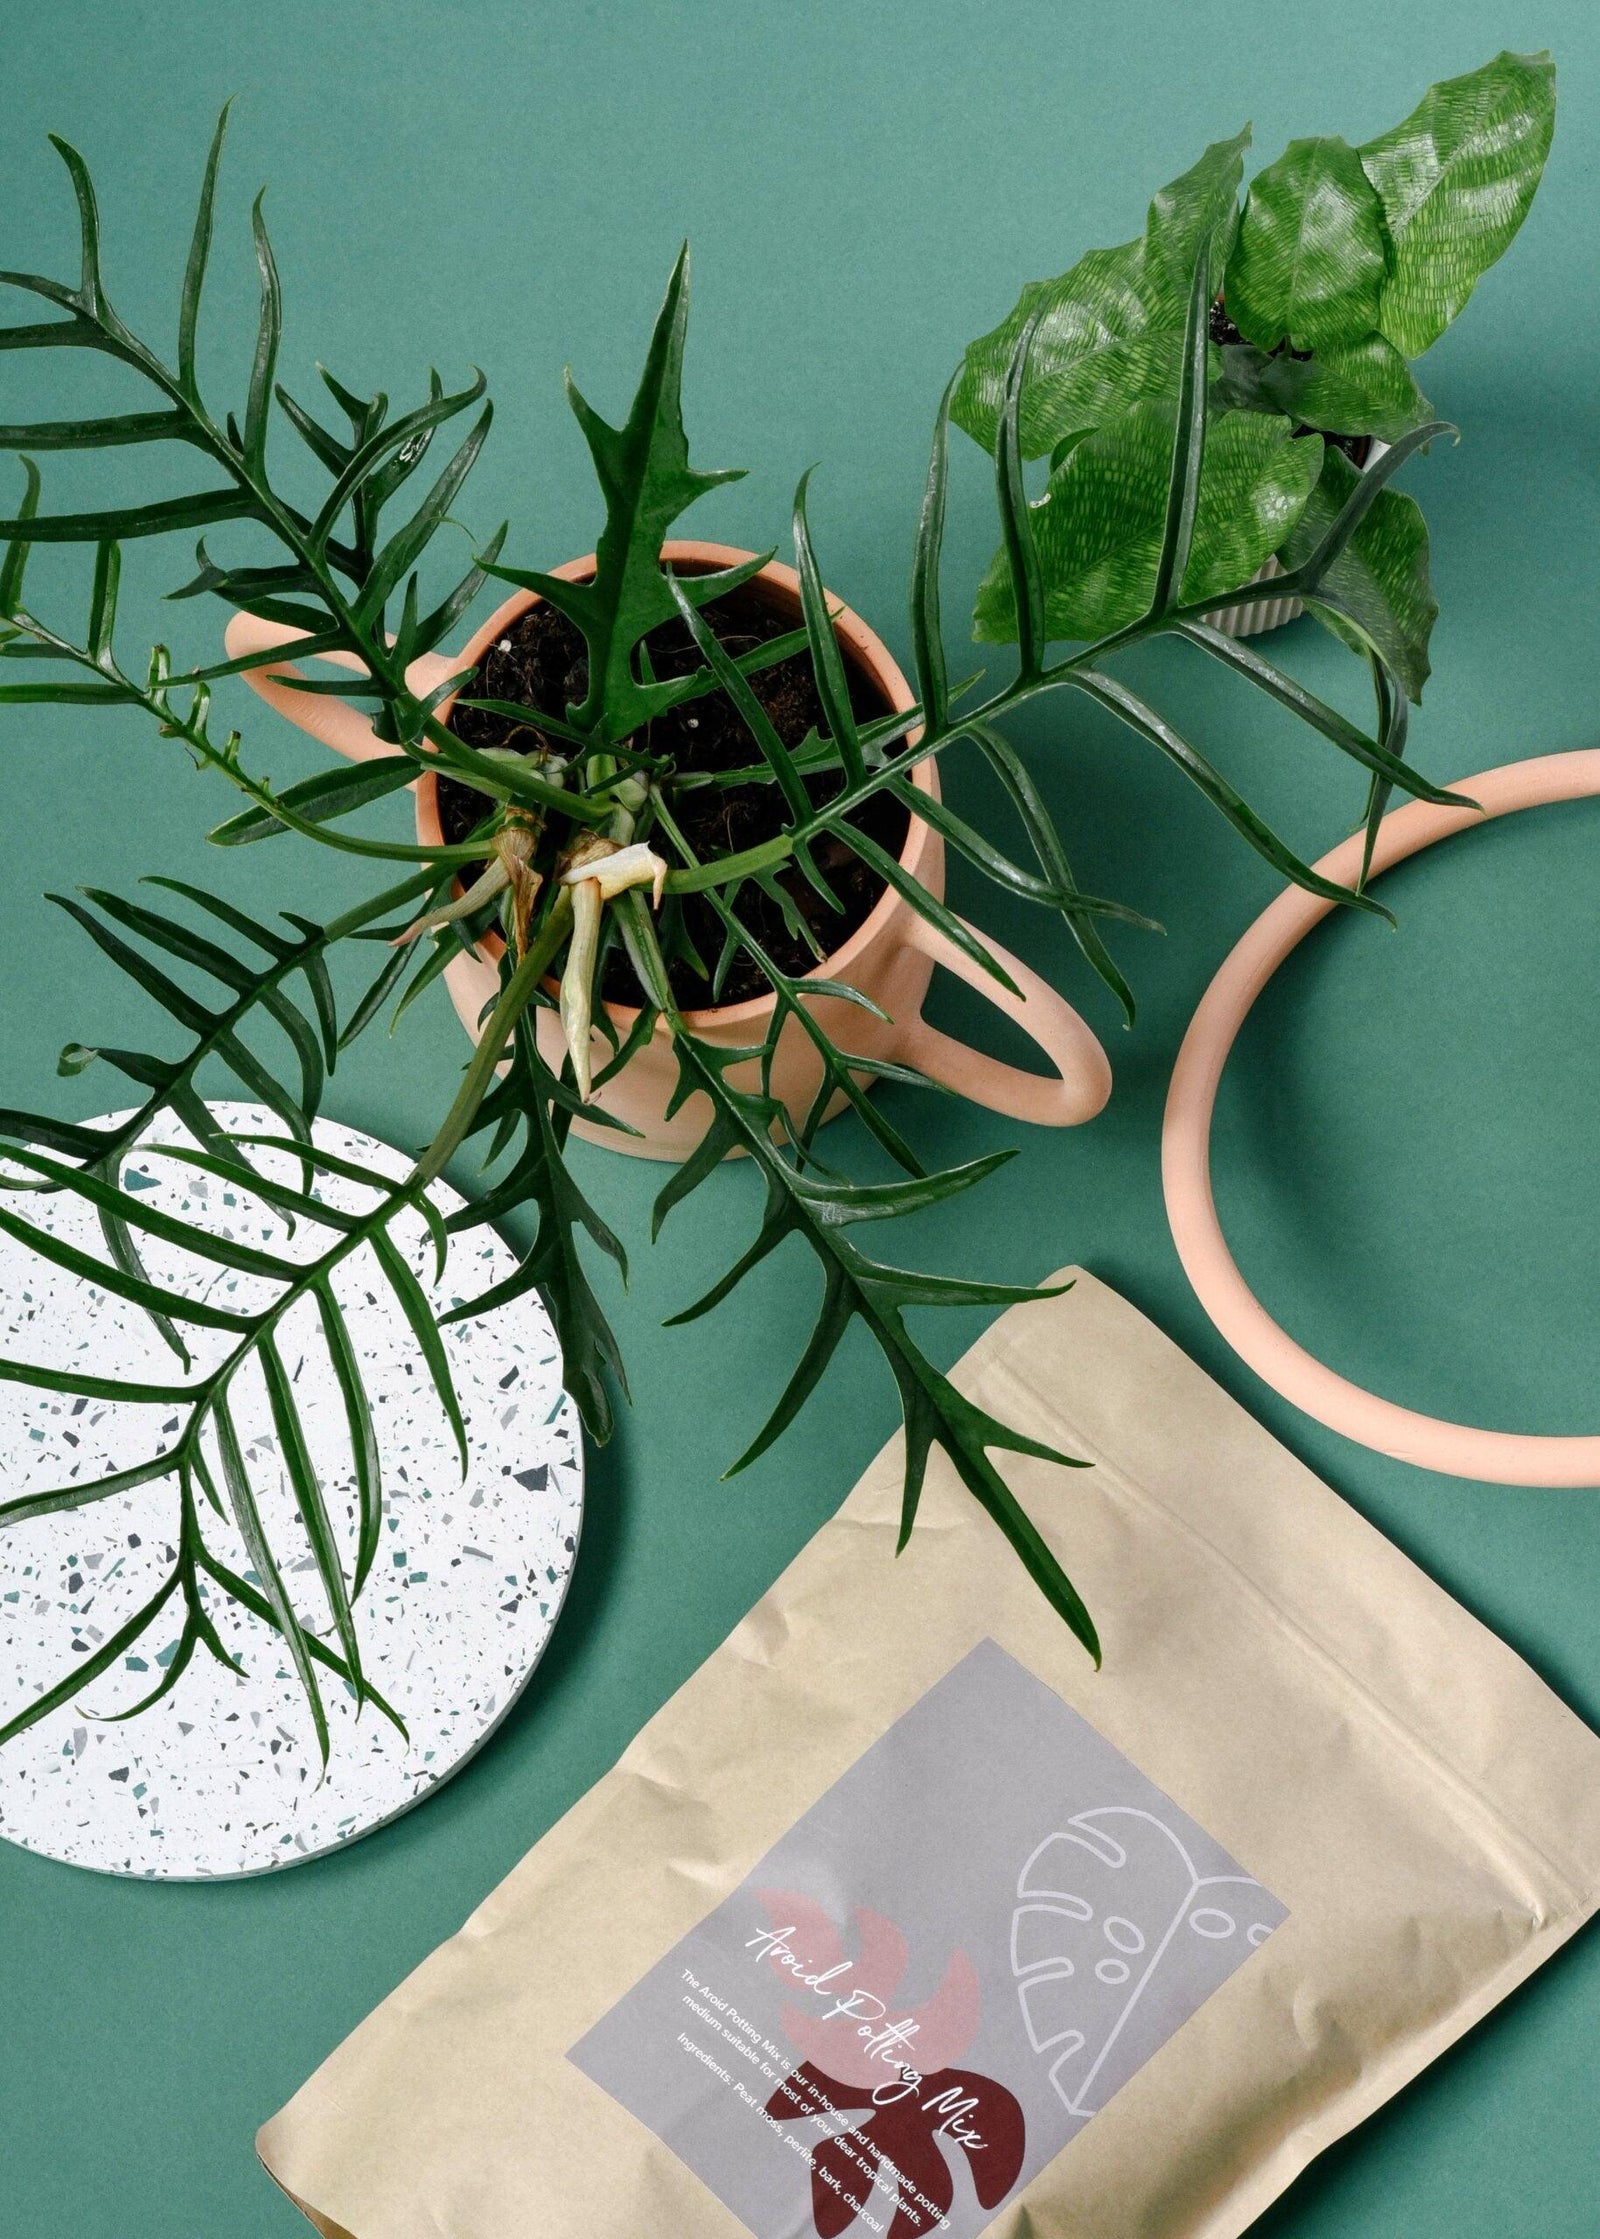
Substrates
View collection
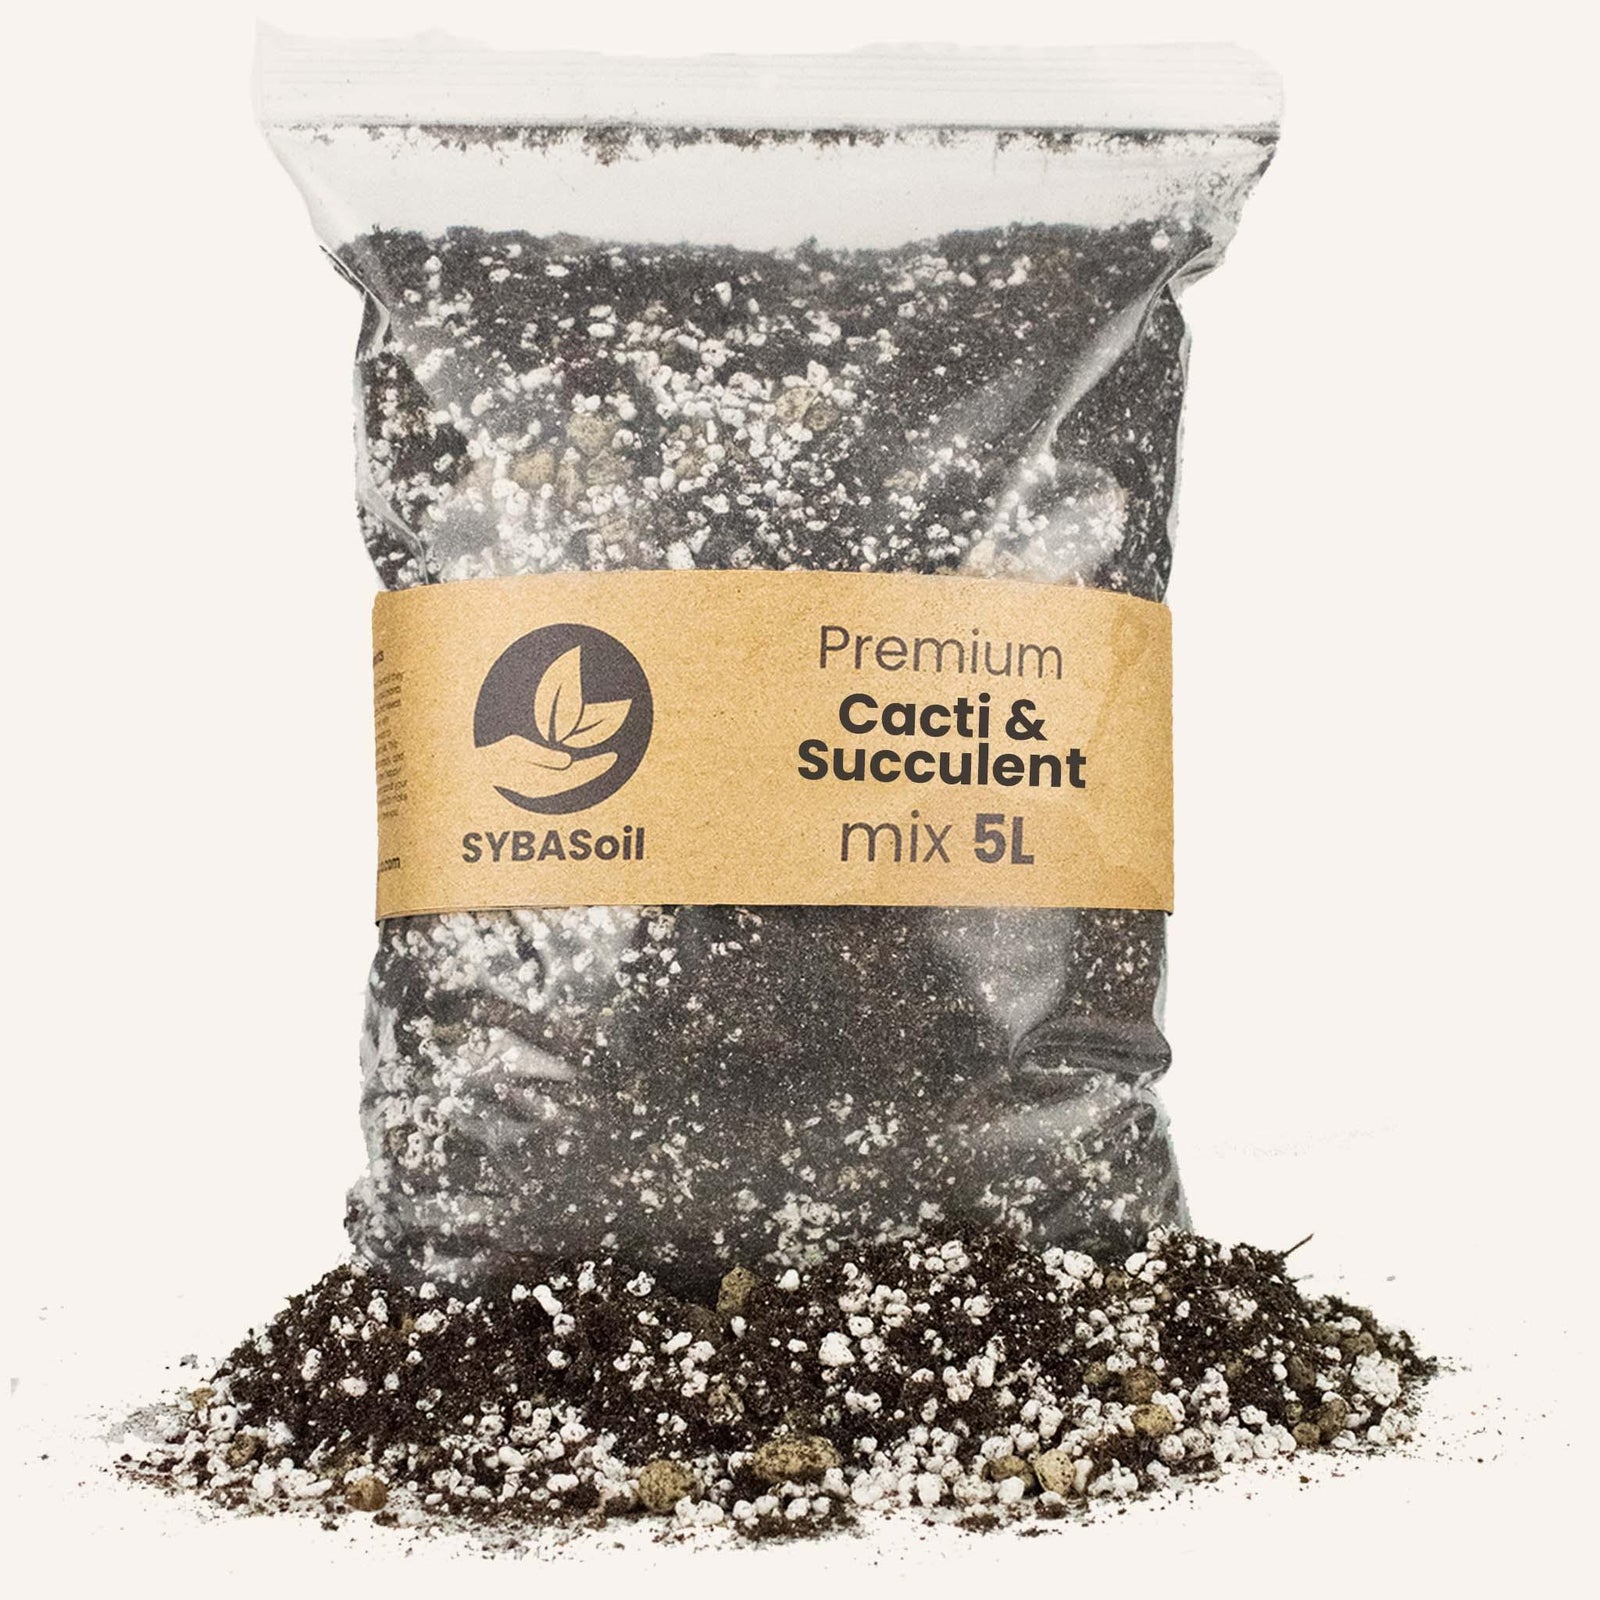
Succulents
View collection
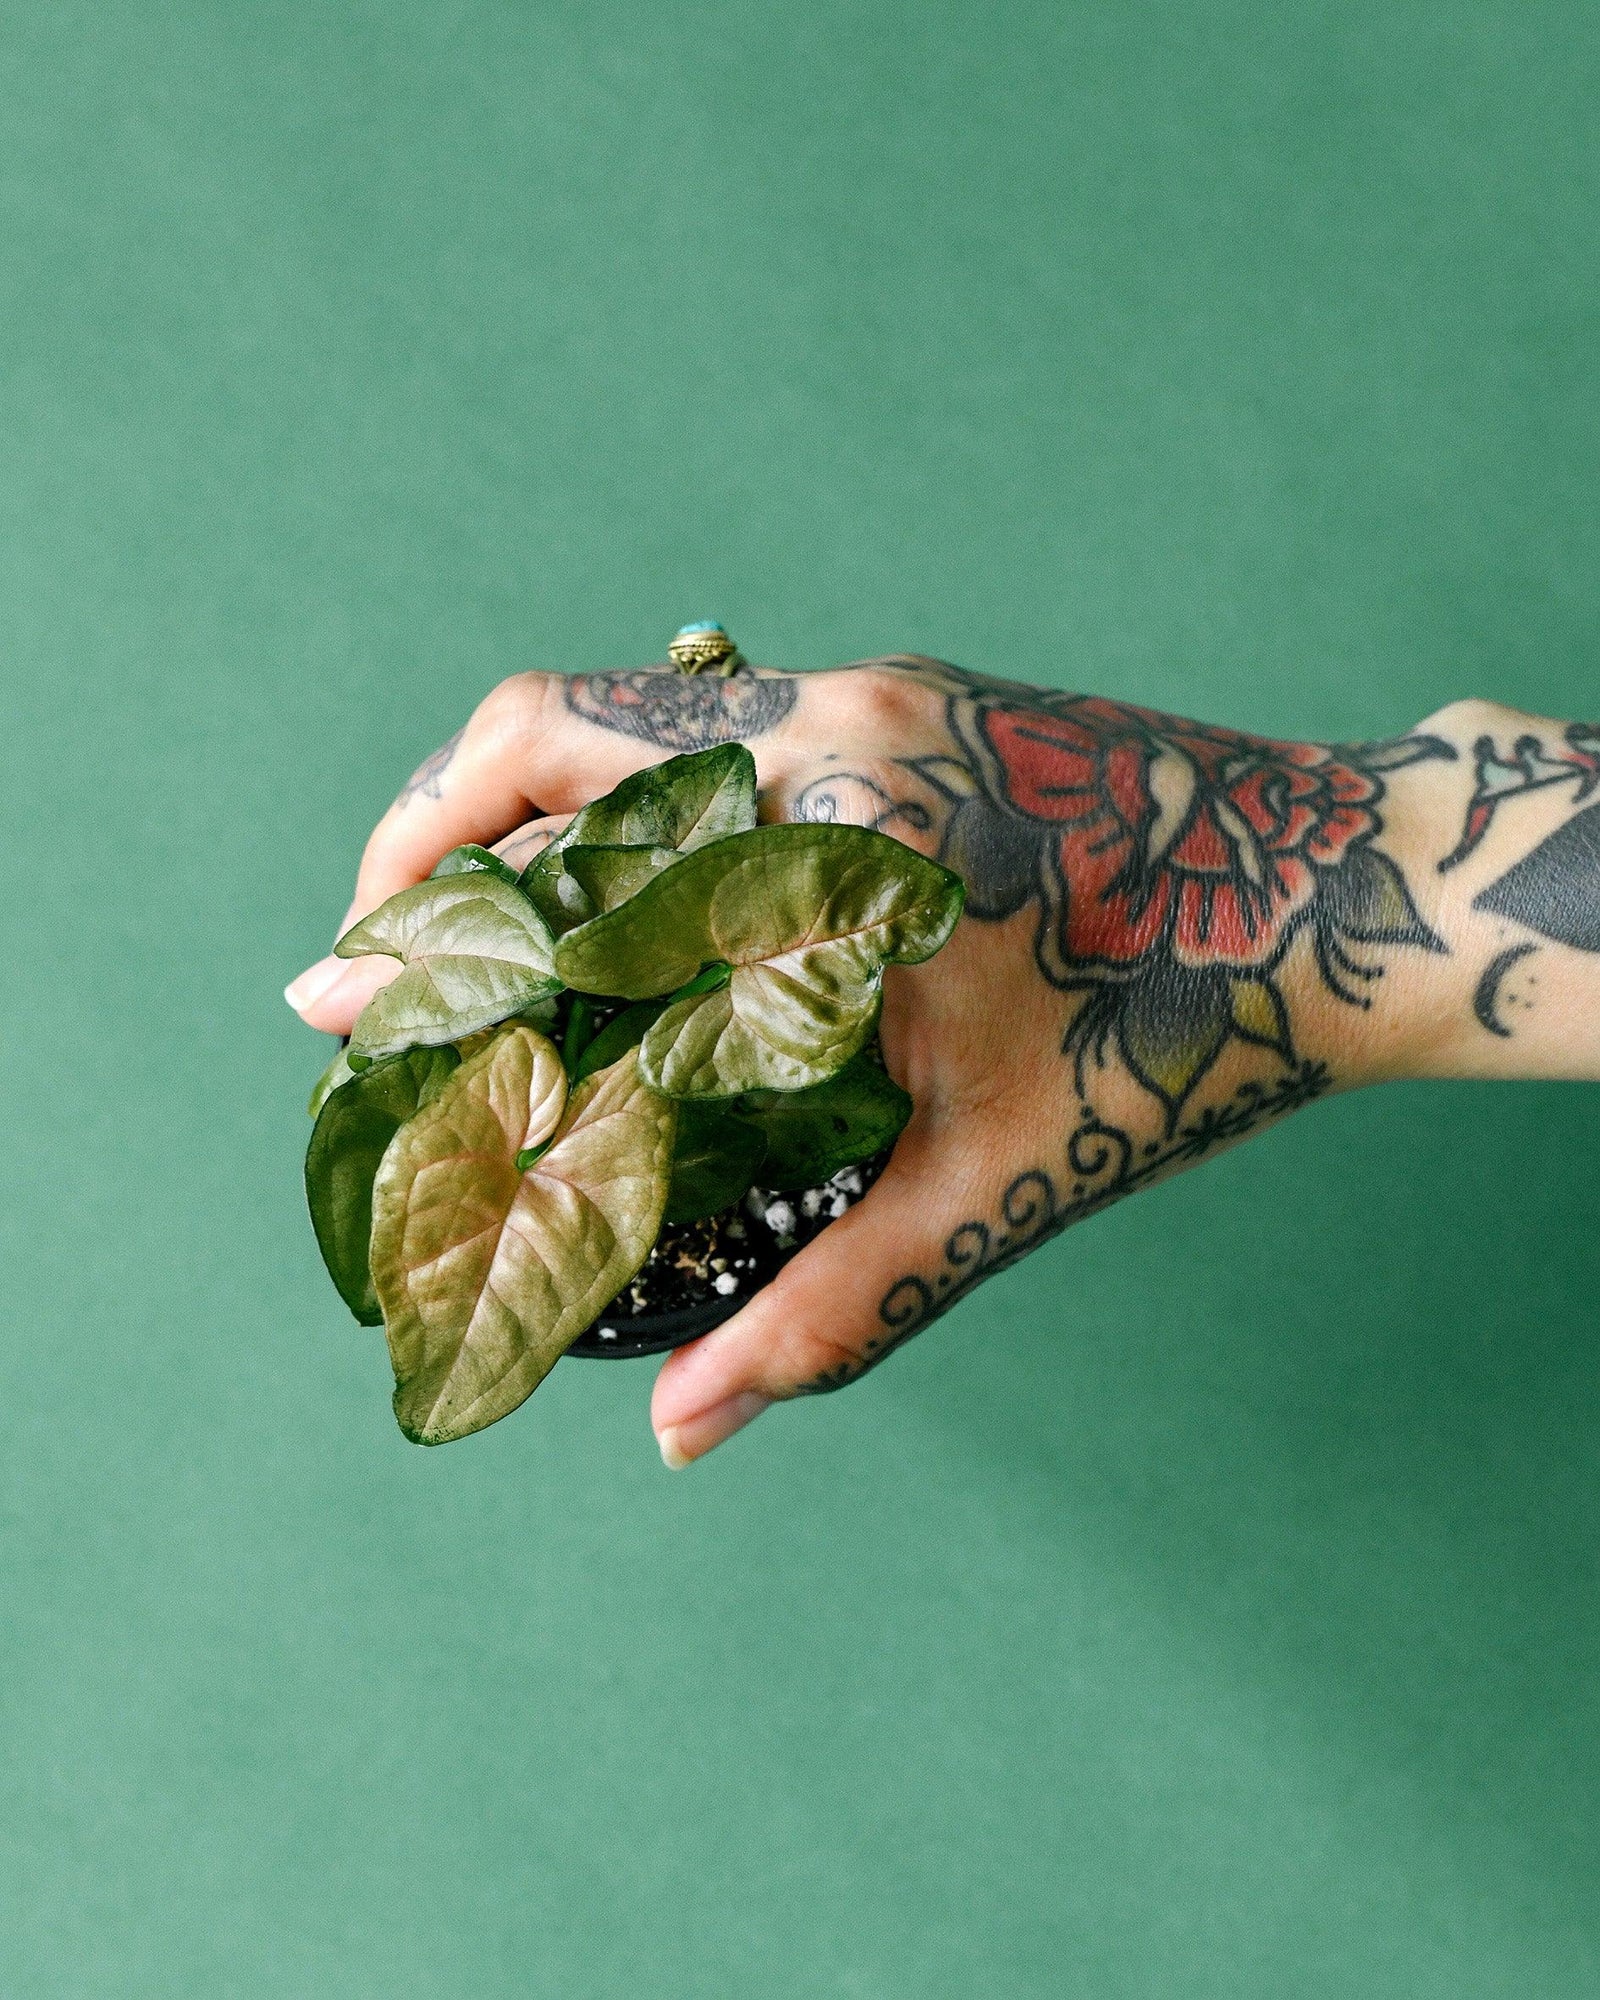
Syngonium
View collection
Valentine's Day Sale
The perfect gifts for special friends, family members, and loved ones during the season of love! See the blog article on our top 10 picks for 2025! Use promo code 'VDAY25' for 15% off all pink, purple and red plants until 14.2!
View collection
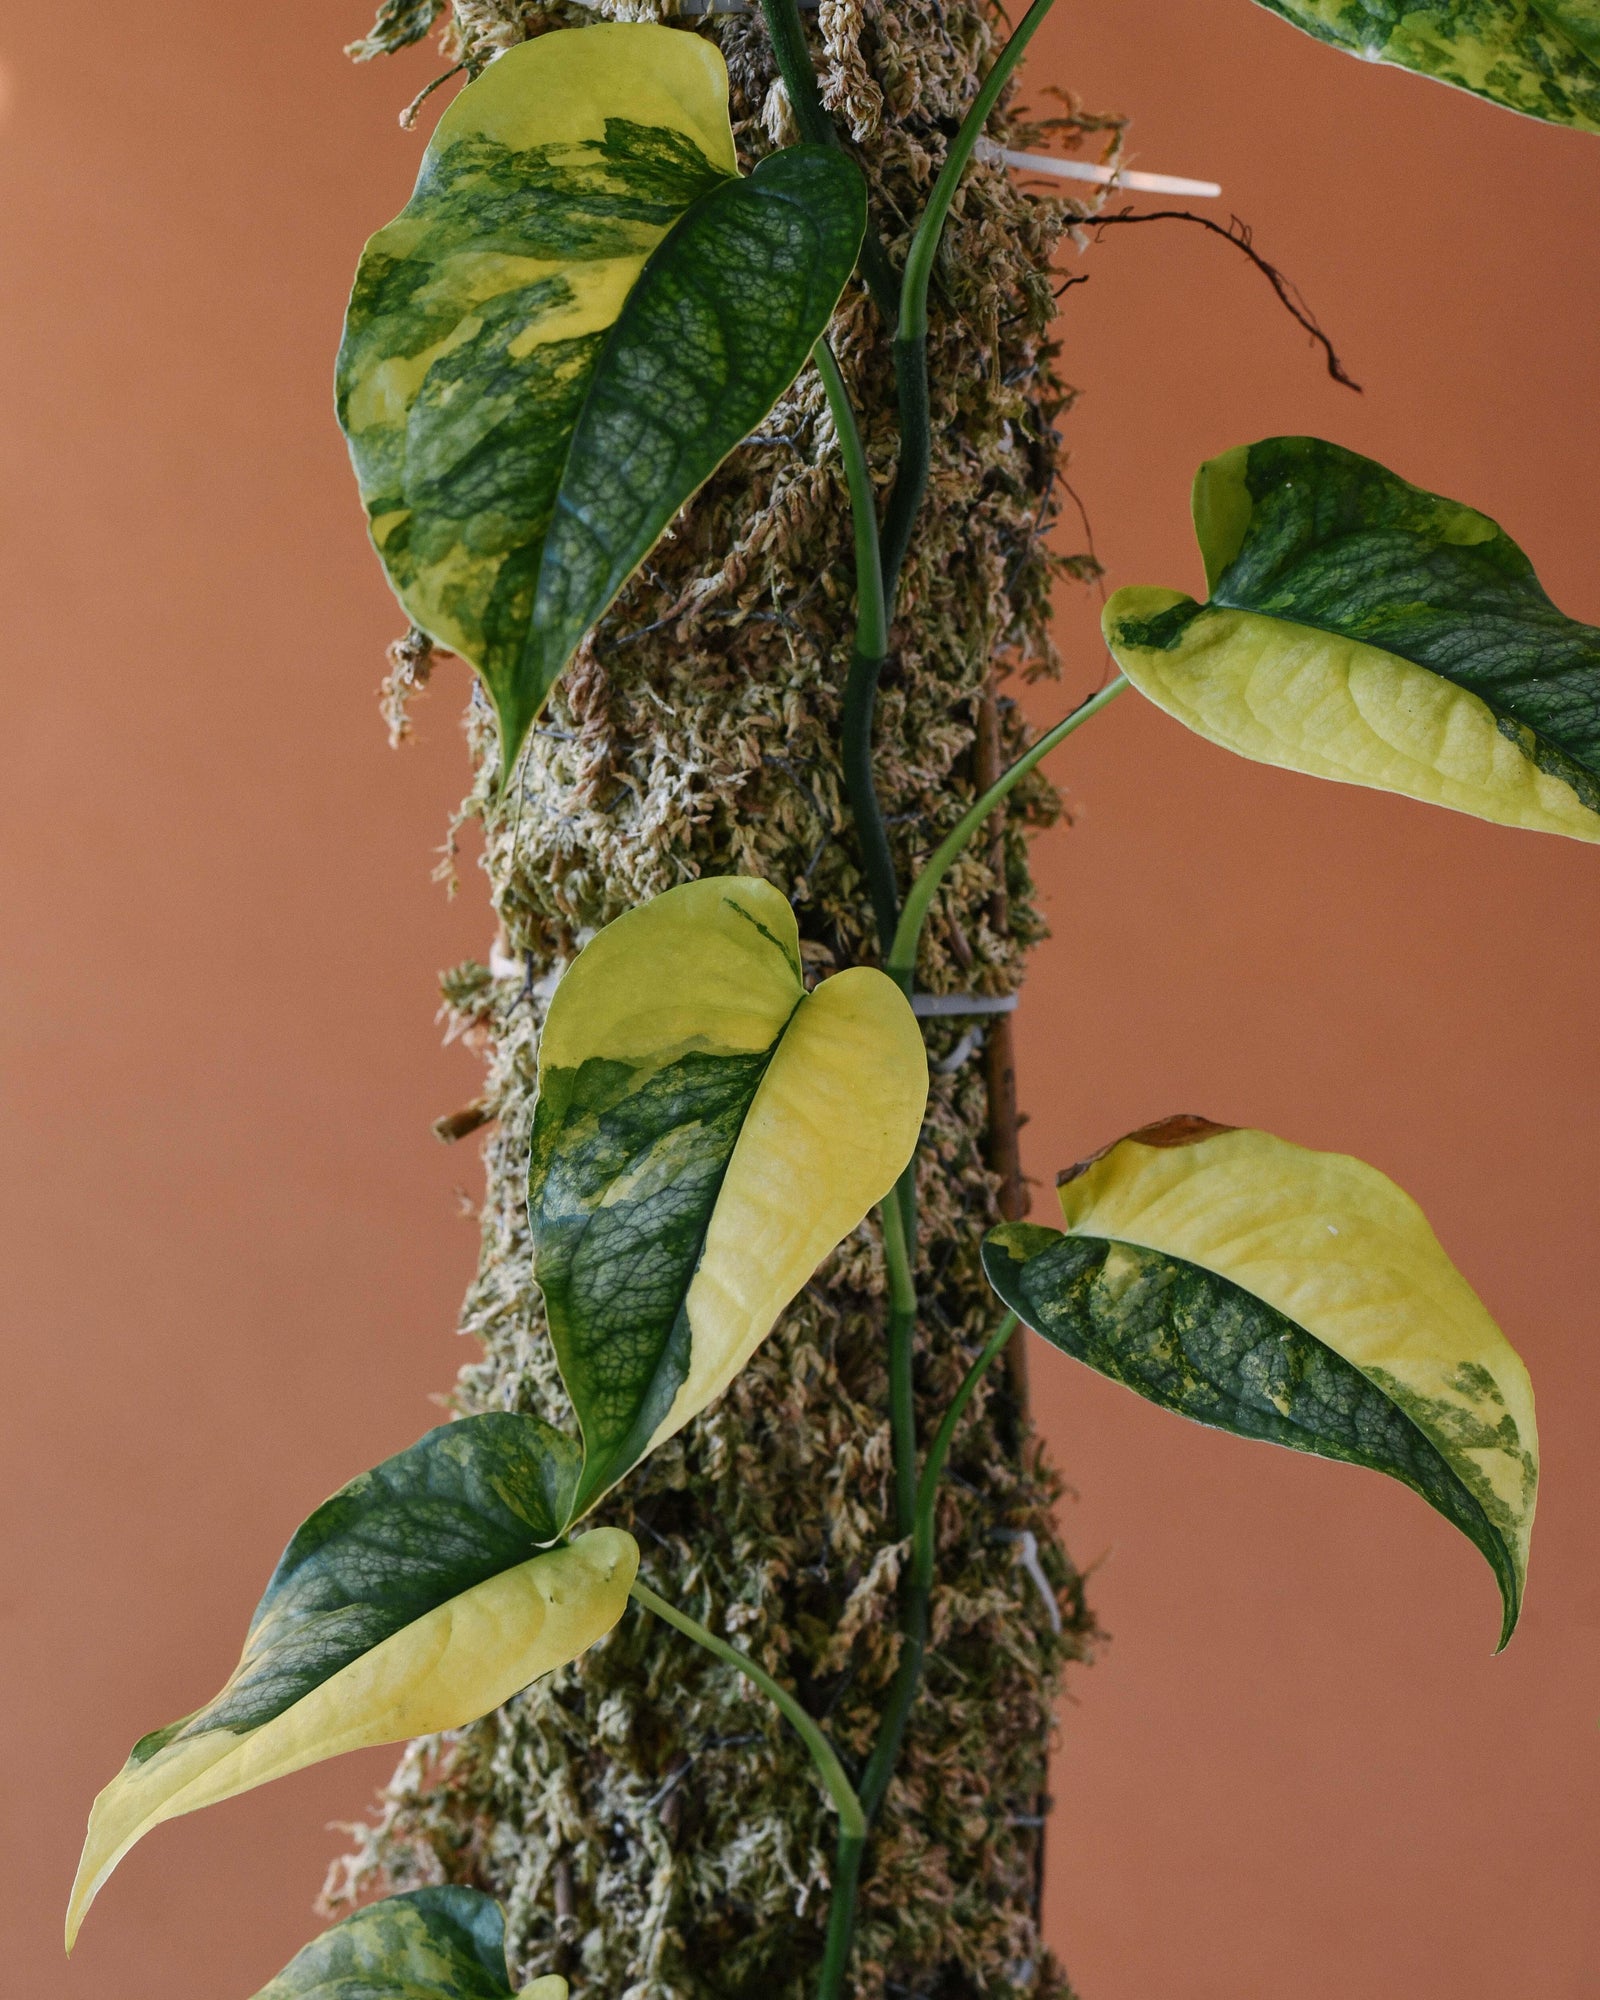
Variegated Plants
View collection
XL Plants
View collection
Our Story
We’re three passionate plant enthusiasts—Bode, Cal, and Monika—based in Berlin, united by our love for greenery and a desire to share it with others. Since 2017, Plant Circle has brought joy to over 10,000 customers, and this is just the beginning of our journey.
Guaranteed Shipping
Cultivating, packaging, and delivering a diverse range of plants across Europe is no small feat. But rest assured, we guarantee your plants will arrive healthy and thriving—or we’ll replace them at no cost to you!
Conservation
We’re committed to protecting the environment by using plastic-free packaging and striving for carbon-neutral deliveries whenever possible.


Meet Our Team

We’re three passionate plant enthusiasts—Bode, Cal, and Monika—based in Berlin, united by our love for greenery and a desire to share it with others. Since 2017, Plant Circle has brought joy to over 10,000 customers, and this is just the beginning of our journey.
See what true plant lovers are saying!
I‘ve ordered from plant circle 3 times now and I was always super satisfied. The plants were bigger than expected and very well packed. The shipping to Austria was very fast and they only use paper as packaging material so I really can’t complain at all!
— Klara from Austria
Plants arrived in good shape to Finland and they were huge, much bigger than I expected!
— Alvi from Finland
I live in Denmark, and just got my package. Just perfect! VERY well wrapped and in good condition. Would buy from here again 💯
— Nikie from Denmark
We are a small, independent team united by a core belief in doing everything the right way.
New & featured

3 simple tips for beginner plant parents
Have you been wanting to start a plant collection of your own this year? If so, we wanna get you off to a good start with some simple tips for beginner plant parents that will make you feel successful from the get go! Experienced plant owners can read along too! If you are new to growing plants indoors you might find yourself reading a lot of conflicting information online on how to care for your green buddies. After years of running workshops and answering your questions in person, as well as online, we have decided to put together our top 3 simple tips for beginner plant parents that can be universally applied to all plants in all sorts of conditions! 1. Give your plant sufficient light. Bright enough light for houseplants won’t be found in rooms or hallways that have no windows, or if plants sit in corners more than 1,5 m from windows. Please keep your plants close to windows or under (grow) lights. That being said, a lot of popular plants grown at home do not tolerate direct sunlight, it can literally burn their leaves! In practice, this means that if you have south or west facing windows, it could be dangerous to place your philodendron or monstera directly on the window sill during spring or summer. Most plants can withstand, and will even enjoy, a few hours of morning sun, but the afternoon sun can be a deadly. Please always google your specific plant’s light requirements before deciding on the perfect spot! 2. Learn how much water your plant needs. There is no universal watering advice for plants, and whatever you’ve been told about the plant you bought might not work for the conditions in your home. How often you need to water your plants depends on how much light they get, but also on the potting mix and planter it sits in. In order to determine how often to water your plant, please observe it as it will get droopy when it’s time for watering, and always check the soil with your finger, or a moisture meter, before watering. 3. Treat your plant to a quality potting mix. Plants tend to come in poor quality potting mixes, and we highly recommend always repotting them. But wait approximately 1-2 weeks after bringing them home before repotting them, so they have a chance to get acclimated! There is no universal potting mix recipe for all plants, but we find that just by adding a part orchid mix, part perlite and some charcoal you will improve the likelihood of your plant thriving in your home immensely!
Read more

7 things your ficus really hates
Ficus is a very common houseplant and for a good reason! It’s a very beautiful and diverse plant genus with lush foliage, that can grow into an impressive tree under the right care. Ficus, however, also tend to be a frustrating plant to grow, as it responds to stress rapidly by losing its leaves. So let’s take a look at where that stress can come from nd how to avoid it! The few ficus plants that are on the houseplant market all belong to the fig genus, which boasts hundreds of species native to the tropics. This tells you a lot about the environment they like: hot and humid. To know how to best grow your ficus, you first need to know a few things about what this plant don’t like, and what can cause it stress. 1. Ficus hates low temperatures. And they also hate drafts, so be sure not to place your ficus next to a window that you open in autumn and winter. 2. Your ficus also doesn’t like to be moved. We suggest picking a spot… and sticking to it! Since any change in environment can cause leaf drop, it’s just safer to not relocate them at all. 3. It doesn’t like insufficient watering either. Which means you have to stick to a schedule, and that schedule will depend on the light your ficus receives. Under ideal conditions, weekly watering in summer and bi-weekly in winter should be sufficient. 4. Your ficus also hates dry air. Yeah, your ficus is actually a bit of a diva, so we recommend treating it like the biggest diva of them all… your Calathea! Group your ficus with other plants, or place near a humidifier, or alternatively a bowl with water for added humidity. 5. It doesn’t like dust on the leaves. None of your plants do, but those big ficus leaves sure know how to collect excess dust! Make sure to keep your ficus’ leaves dust free by regularly wiping them with wet cloth. 6. It doesn’t like to be repotted often. Since it doesn’t like to be moved around a lot, it should come as no surprise that your ficus also doesn’t like to be repotted too often! Let your ficus go a little pot bound before you repot your it, and don’t go for a pot that’s several sizes bigger. Instead, just go a single size up! 7. Your ficus, like all plants, doesn’t like pests. And since it’s prone to dropping leaves, this is exactly the kind of thing that is likely to make it lose its foliage! Keep an extra eye out for pests when you wipe dust off the leaves and catch any infestations early. Now that we’ve covered how not to treat your ficus, let’s take a quick look at some best practices that will actually make it happy! Ficus needs bright light and when it’s acclimated it can also tolerate direct sunlight. The best spot for this plant would be in an east or south-east facing window where it receives a few hours of morning sun. Grow it in a well draining, rich potting mix and avoid acidic soils. If you’d like your ficus to grow a strong, thick stem you will need to shake it a few times a week. Yes, you read it right, grab that stem and shake it a bit… shake it, don’t break it! Normally this would be done by the wind outdoors, but since it’s a houseplant, this is your job now!Ficus’ tend to grow leggy, so it’s important to prune them. The best time to prune your ficus is in winter when they are not actively growing. Remember to wear gloves as the ficus’ sap is toxic. Use a sharp knife or garden shears and cut right above the node. Leave your cutting on a paper towel and let the cut area dry out. Once it’s cured, you can put it in water and let it grow roots!If you ever notice red spots on your ficus’ leaves, you should know it’s probably caused by leaf oedema. Its a non-deadly issue which we’ve described in more detail in this blog post. One way to avoid it is to adjust watering accordingly.And last but not least, don’t forget to fertilise your ficus regularly in spring and summer, and even every now and then in winter!
Read more

Common pests: Fungus gnats
Fungus gnats- identification, treatment and prevention! Often confused with fruit flies, fungus gnats are small, flying insects about the same size as their almost equally annoying cousins, that most people who live with houseplants have had to deal with at one time or another. Because adult fungus gnats are attracted to light, you might first notice these pests flying near your windows, making windows a great spot to place your yellow sticky traps. But we’ll get to traps later. First, let’s get into the gnats themselves! Fungus gnats develop through four stages; egg, larva, pupa, and adult. The lifespan of a fungus gnat is not very impressive, as the adults only live from about one to two weeks, and complete a full life cycle, including the egg and larvae stages, in about 18-30 days. However, their ability to reproduce at an astonishing speed, approximately 200 eggs a day, is where the real problems lies. While we can all agree that adult fungus gnats are an absolute nuisance, they are mostly harmless, and the larvae are the ones you actually need to worry about. Why? Well, fungus gnat larvae live in the topsoil of the plants, and primarily feed on fungi, hence the name, and organic matter in the soil. But since they also like to chew on the roots of the plants, they can stunt the growth of your plants, especially young and vulnerable ones.So if you were wondering why your plant suddenly stopped growing, slowed down, or started producing smaller or not fully formed leaves, it might actually be related to those annoying little flies buzzing around your plants and light sources! As with all plant pests and plant problems, there are a lot of tips and tricks out there on how to deal with fungus gnats. Some suggest preventing the flies from laying eggs by sprinkling cinnamon or sand on top of the soil, which in theory could prevent them from reproducing.Temperature also plays a big part when it comes to the ideal living conditions of fungus gnats, as they seem to really thrive at about 21-24c, which is unfortunately a very common temperature in most homes!Various tips and tricks aside, once you recognize that there is a problem with gnats in your home, we believe the most effective way to get rid of them, is by fighting them with either beneficial bugs, or a bacteria in the form of pill. Don’t be discouraged by the the words ‘bugs’ or ‘bacteria’, both options are 100% natural, and actually quite simple. Allow us to explain! Nematodes are predatory bugs, basically microscopic worm like creatures that will attack and feed off the larvae of other insects. Nematodes that are specifically sold to to fight fungus gnats and other pests, can be purchased online in pouches that you keep in the fridge until you’re ready to use them. You simply add them to water before watering your plants. The amount of water you need is determined by the amount of nematodes, and the amount of nematodes is determined by the number of plants you own, and you’ll need approximately 1 million nematodes for every 10 plants… don’t worry, like we said, they’re microscopic, so you won’t have a million visible worms in your home, more like a harmless looking powder that you add to your watering can! The bacterial solution is often referred to as Mosquito Bits in the US and the UK, and it is also known as ‘BTI’, which is short for Bacillus Thuringiensis Israelensis. It is a naturally occurring bacteria found in soils, which contains spores that produce toxins that specifically target and only affect the larvae of the mosquito, the blackfly and, of course, our nemesis the fungus gnat!In Germany, you can find Bacillus thuringiensis sraelensis in pill form, making it by far one of the easiest solutions out there, as you just dissolve the pill in water according to the instructions, and then use that water to water your plants, and you don’t have to keep this solution refrigerated, or worry about an expiration date, as you do with nematodes. And while nematodes might have a slight advantage in some areas, the bacterial solution should kill all of the larvae just as well! While these two solutions are our main picks for fighting fungus gnats in your home, there are of course other methods of prevention to consider, including but not limited to: Letting your plants dry out between waterings. Fungus gnat larvae prefer wet, peaty substrates, as that type of soil is ideal for growing the fungus and cyanobacteria, that the gnats feed on. Investing in a carnivorous plant, such as a Pinguicula, commonly known as Butterworts, or a Drosera Capensis. The sticky, hairy leaves on carnivorous plants trap the gnats, and the plant then feeds on them. Using yellow sticky papers to capture the adult fungus gnats. This is important, because even though they don’t harm the plants directly, their offspring will, so we recommend using yellow sticky papers in combination with either nematodes or bacteria for optimal results! We hope you found some helpful tips for getting rid of those pesky gnats, and keeping your beloved plants happy and healthy!
Read more

Common pests: Mealybugs
Mealybugs- identification, treatment and prevention! Mealybugs are soft-bodied, wingless insects measuring about 2 mm long, that often appear as white, cottony masses on the leaves and stems of plants. Although occasionally mistaken for white plant fungus, mealybugs can be easier to spot and remove from your plants than other common pests, but do not underestimate them! While slowly moving across your plant, these guys will suck the juices out of your beloved plant, and while doing so, excrete a sticky, honeydew-like substance on the foliage, which sets the stage for the growth of sooty mold fungus, and can even attract other plant pests. Mealybugs like to stick together and hide in the most inaccessible parts of plants, such as leaf axils, leaf sheaths, between twining stems, and under loose bark. And if that wasn't bad enough, there are also some mealybug species that feed on plant roots, something that often happens to Hoyas. The regular kind, though, will lay up to 600 small, yellow eggs in a protective, cottony mass, and aside from the bugs themselves, that is what you'll most likely notice first on your the plant. Where do they come from? The most common way for mealybugs to make their way onto your plants is via something we all love... new plants! Especially tropical plants with softer stems and leaves are very likely to attract mealybugs, but more on that further down!Prevention is easier than treatment, so before we get into how to get rid of mealybugs, the first thing you should always remember, is to check your new plants for bugs when you bring them home!If you want to play it safe and really be one step ahead of pests, try quarantining your new plant right away, and giving it a preventative Neem oil treatment, before introducing it to the general population. This way, if your new plant was carrying some unwanted stowaways, they won't have a chance to spread to the rest of your home. Which plants are prone to mealybug infestations? With so many different mealybug species out there, no genus is safe! But plants like Orchids, African Violets, Begonia, Coleus, succulents, and amaryllis, are among the plants known to be especially susceptible to citrus mealybugs, while the long-tailed mealybug seem to have a preference for plants in the Dracaena genus.As we mentioned earlier, there are some species of mealybugs that live in plant soil, and attack the roots. Hoyas are particularly susceptible to those, and unfortunately, the only way to identify this type of mealybug, is by the damage they cause the plant. Look for yellowing leaves and a lack of new growth, and if you suspect there are mealybugs in the soil, the only way to get rid of them is to repot the plant and completely replace the soil. /wp:columns wp:block {"ref":71578} / wp:paragraph If you see any of the following symptoms: stunting, chlorosis, defoliation, or wilting, or if you've been able to spot actual mealybugs on your plants, it's time to start treatment immediately!Here are our best tips for quickly and efficiently getting rid of these highly unwanted house guests. If you see adult bugs or eggs, remove them immediately by wiping your plant off with a damp towel soaked in rubbing alcohol. Alternatively you can make a spray by mixing one part rubbing alcohol to seven parts water, and spraying it directly on plants affected by mealybugs. This also works on aphids, thrips, whiteflies, etc. The alcohol will melt the protective wax that covers certain insects, and dry out the soft body parts of others. Remember to check all of those inaccessible spots such as partially unfurled, new leaves! Should you find any bugs there, either spray them or use a q-tip with rubbing alcohol to remove them. Use predator bugs like the Cryptolaemus Montrouzieri. Also known as mealybug ladybird, or mealybug destroyer, this insect can be released onto your plants in order to control the mealybug population in a completely natural way. Be aware that the ladybirds larvae look a lot like large mealybugs! It's also good to remember that predator bugs are usually most successful when pest populations are fairly low. Our trusty, old friend Neem! Neem oil is an effective treatment for nearly every kind of pest that can infect your plants, so if using predator bugs is not your thing, and you don't have any alcohol at home, you can always start with a Neem treatment. Last but not least, it's important to remember that no matter which method you choose, the key to success is repetition, and reducing the risk of the infestation spreading. You accomplish that by quarantining the affected plant for at least four weeks, and checking the plant for the bugs regularly. Also, don't forget to fertilise your plant when it's suffering from pests, as they will stunt the plants growth, so your plant will need all the extra help it can get to recover and regrow!
Read more

Common pests: Spider mites
Spider mites are one of the most common pests and at a size that’s smaller than 1 mm, they sure make it difficult for us to spot and identify them! And while they may be tiny, the damage they do to your plants can be extensive. Let’s take a look at what warning signs to watch out for, and how to best get rid of them! There are many different kinds of spider mites in the greater family, however one of the most common ones, and the ones you’re most likely to find your houseplants, are the red spider mites, or Tetranychus urticae. But that doesn’t mean you won’t ever have misfortune of meeting the white or black spider mites, so beware of them too! Spider mites damage your plants by piercing the leaf surface and extracting cell contents. This leaves holes in the protective layer of the leaf, which then leads to moisture loss, and eventually drying out. It’s important to act fast as these pests can multiple at an impressive rate! A spider mite egg will hatch in as little as three days, and mites becomes sexually active at only five days old. One female can lay up to 20 eggs a day and with a lifespan of 2-4 weeks, she’ll be laying hundreds of eggs in her lifetime. This accelerated reproduction rate can allow spider mites to adapt quickly and become resistant to pesticides, so with prolonged use of the same pesticide, it may become ineffective. Keeping that in mind, your best weapon will be the speed and diversity of the treatment! There are a few signs that your plant will display that you should watch out for, so let’s go over those first! 1. Stunted growthHave you noticed that your plant is not growing new leaves in what feels like ages, or that they have this one leaf that just refuses to unfurl for weeks? That’s a good indication that your plant is currently struggling with something, and that something could very well be a pest infestation. 2. Tiny dots on the leavesSpider mites suck the juices out of a plant leaving behind bite marks in form of tiny dots, so that’s one of the first warning signs to look out for! 3. Tiny webs Finding small webs, and what looks like dust gathered in folds of leaves and stems, is another warning sign. If those webs are accompanied by red, black or white moving bugs, then you know for sure you have a spider mite problem!4. Yellowing of the leavesWhen the infestation is heavy, you’ll notice yellowing of the leaves, in both young and older leaves, plenty of tiny webs, and white-powdery stuff covering the leaves. If you see some, or all, of the above signs on your plants, you have a problem… but don’t panic! There are effective ways to combat spider mites, and ideally you’ll want to implement them all at the same time to have best chance of success! First things first. When you spot spider mite related damage to your plants, you’ll want to give them a thorough, high pressure shower, focusing on rinsing the leaves from different directions to try remove as many bugs as possible.Using a lint roller can also be a very effective way of removing the adult specimens from the leaves! When the plant has been washed (and/or rolled!) it’s time to apply insecticide. You can choose to fight spider mites the natural way with Neem oil (read more about how to use that in this blog post) or with a commercially available spray. The key here is to be consistent and apply it weekly for the next 4-6 weeks to target the mites in all their various stages of growth. The first time you only get the adults, and after a few days their eggs will hatch, and so on, so that’s why it’s crucial that you keep the treatment going. When you got the infestation somewhat under control, usually around 2-3 weeks into the treatments, it’s a good time to introduce predatory bugs. This will help you fight the remaining colony of spider mites with very little effort on your part! Spider mites prefer hot and dry living conditions, so if you notice any mites on your plants, regular misting during the treatment could discourage them from staying on your plants, but keep in mind that this alone will not eliminate them. Last but not least, it’s important to apply fertiliser to plants that are struggling with pest infestations to help them regain their strength to fight, and continue to grow!
Read more

Common pests: Thrips
Thrips. The word alone sends chills down the spine of any plant parent, an with good reason, because thrips are probably one of the worst pests you can find on your plants! They are hard to get rid of, and they can transmit viruses. And to make things worse, they can be difficult to identify! But fear not, we’ll teach you all about identification, treatment, and prevention! The symptoms of thrips are often confused with either over watering, due to yellow and brown spots on the leaves, or extrafloral nectaries, due to the tiny dots on the leaves. So how can you tell that you’re dealing with thrips and none of the above? The first signs of a pest infection presents itself when a new leaf on the plant doesn’t want to unfurl, the growth of the plant is stunted, tiny dots appear on the leaves, or yellow and brown spots start appearing, looking similar to those of an overwatered plant.As soon as you see any of the aforementioned symptoms, it’s time to inspect the undersides of the leaves closely and carefully for any signs of bugs. Thrips are tiny, slender bugs that are only few mm long, so they can be quite hard to detect! The thrips larvae is white, while adults are black in colour. They suck on plants, which causes plenty of damage in itself, however the worst part may be that they can transfer viruses from plant to plant. How do they do that?Not only do adult thrips have wings and are able to fly, but the fact that most people keep their plants standing close together, and often touching, makes it almost too easy for thrips to cross over to their next victim. So once you spot tiny, slender bugs, no wider than sewing needle, on the underside of the leaf, and those bugs move once you carefully poke them with a fingernail, you know you are dealing with thrips and it’s time to get to work, ASAP! First you’ll want to get rid of as many of them as possible. You can do that by either using a lint roller, as suggested by House Plant Journal, or by placing your plant in the shower and using the water pressure of the shower head to thoroughly clean the leaves. Thrips will not only always lay eggs, which you can’t really remove, but the adults will often hide in the unfurled leaves, or in the cataphyll, which in plant morphology means a reduced, small leaf. As you can imagine, those places are far more difficult to get to, and thats why your fight against trips unfortunately doesn’t end with a shower and a lint roller. To really get rid of thrips, we recommend that you follow the steps outlined below, and repeat them over the next four to six weeks. Now, to be quite frank, it is both easier and faster to get rid of the unwanted pests by using store bought pesticides. However, there are ways to do it at home in a much less invasive way, and we tend to prefers those, so if you do as well, read on! After you have carefully showered, or lint rolled, your plant, spray it with a mixture of Neem oil and castile soap, measuring about 1 tbsp of neem oil and 1 tbsp of castile soap to 1 liter of warm water. Read more about this mixture, and the benefits of using neem oil in this blog post! Apply your mixture to all parts of plants with a spray bottle, particularly focusing on the underside of the leaves. Neem oil has a rather distinct odour, so we suggest you open a window when you use it to immediately air the room! It could also be a good idea to apply the Neem spray while the plant is still in the bathroom, as the mixture will get the plant quite wet. Once the plant is sprayed, it’s time to put it in quarantine! The infected plant should be separated from other plants, ideally standing alone in a room with a window. At this time, you’ll need to check your other plants for pests too. Even if none of them have thrips at first glance, we strongly recommend spraying them too, or maybe even getting some beneficial bugs as a preventative measure against any pests still hanging around your home. Beneficial bugs for treatment of thrips include Amblyseius Californicus which also work well against spider mites, and Chrysoperla Carneo, also known as lacewings. Neem oil leaves a film on the leaves of the plant, so remember to rinse the leaves again a couple of weeks after the treatment, but avoid washing the leaves until you have already the introduced beneficial bugs. Neem oil can kill any insect by smothering or suffocating them, but pests will die from ingesting the treated leaves.The beneficial bugs, however, don’t eat leaves and are therefore not affected by Neem, but if you spray the plant after releasing the predators, you might smother them, so it’s important do do things in the right order! If you’d rather skip the predator bugs altogether, simply spray the plant with the Neem mixture on a weekly basis over the next four to six weeks. You can, of course, also buy a natural pesticide based on Neem oil instead of mixing one yourself, and additionally, you can buy Neem seeds and mix them into your plants potting mix, or add them to your water while watering. Your biggest takeaway from this should be the importance of repeating treatment for several weeks, while isolating the infected plant to make sure the bugs don’t spread to other plants. If you do this, you have a good chance of getting rid of the unwanted squatters on your plants! Bonus tip: if you’re lucky enough to have a balcony, we also recommend planting a variety of flowers on your balcony, in order to attract beneficial insects that are natural predators to thrips. Some good predators include pirate bugs, lacewings, and ladybugs. And last but not least, sticky traps can be helpful in capturing adult specimens. Good luck and may your plants be ever free of pests!
Read more

Ferns: Are They Really So Hard to Grow?
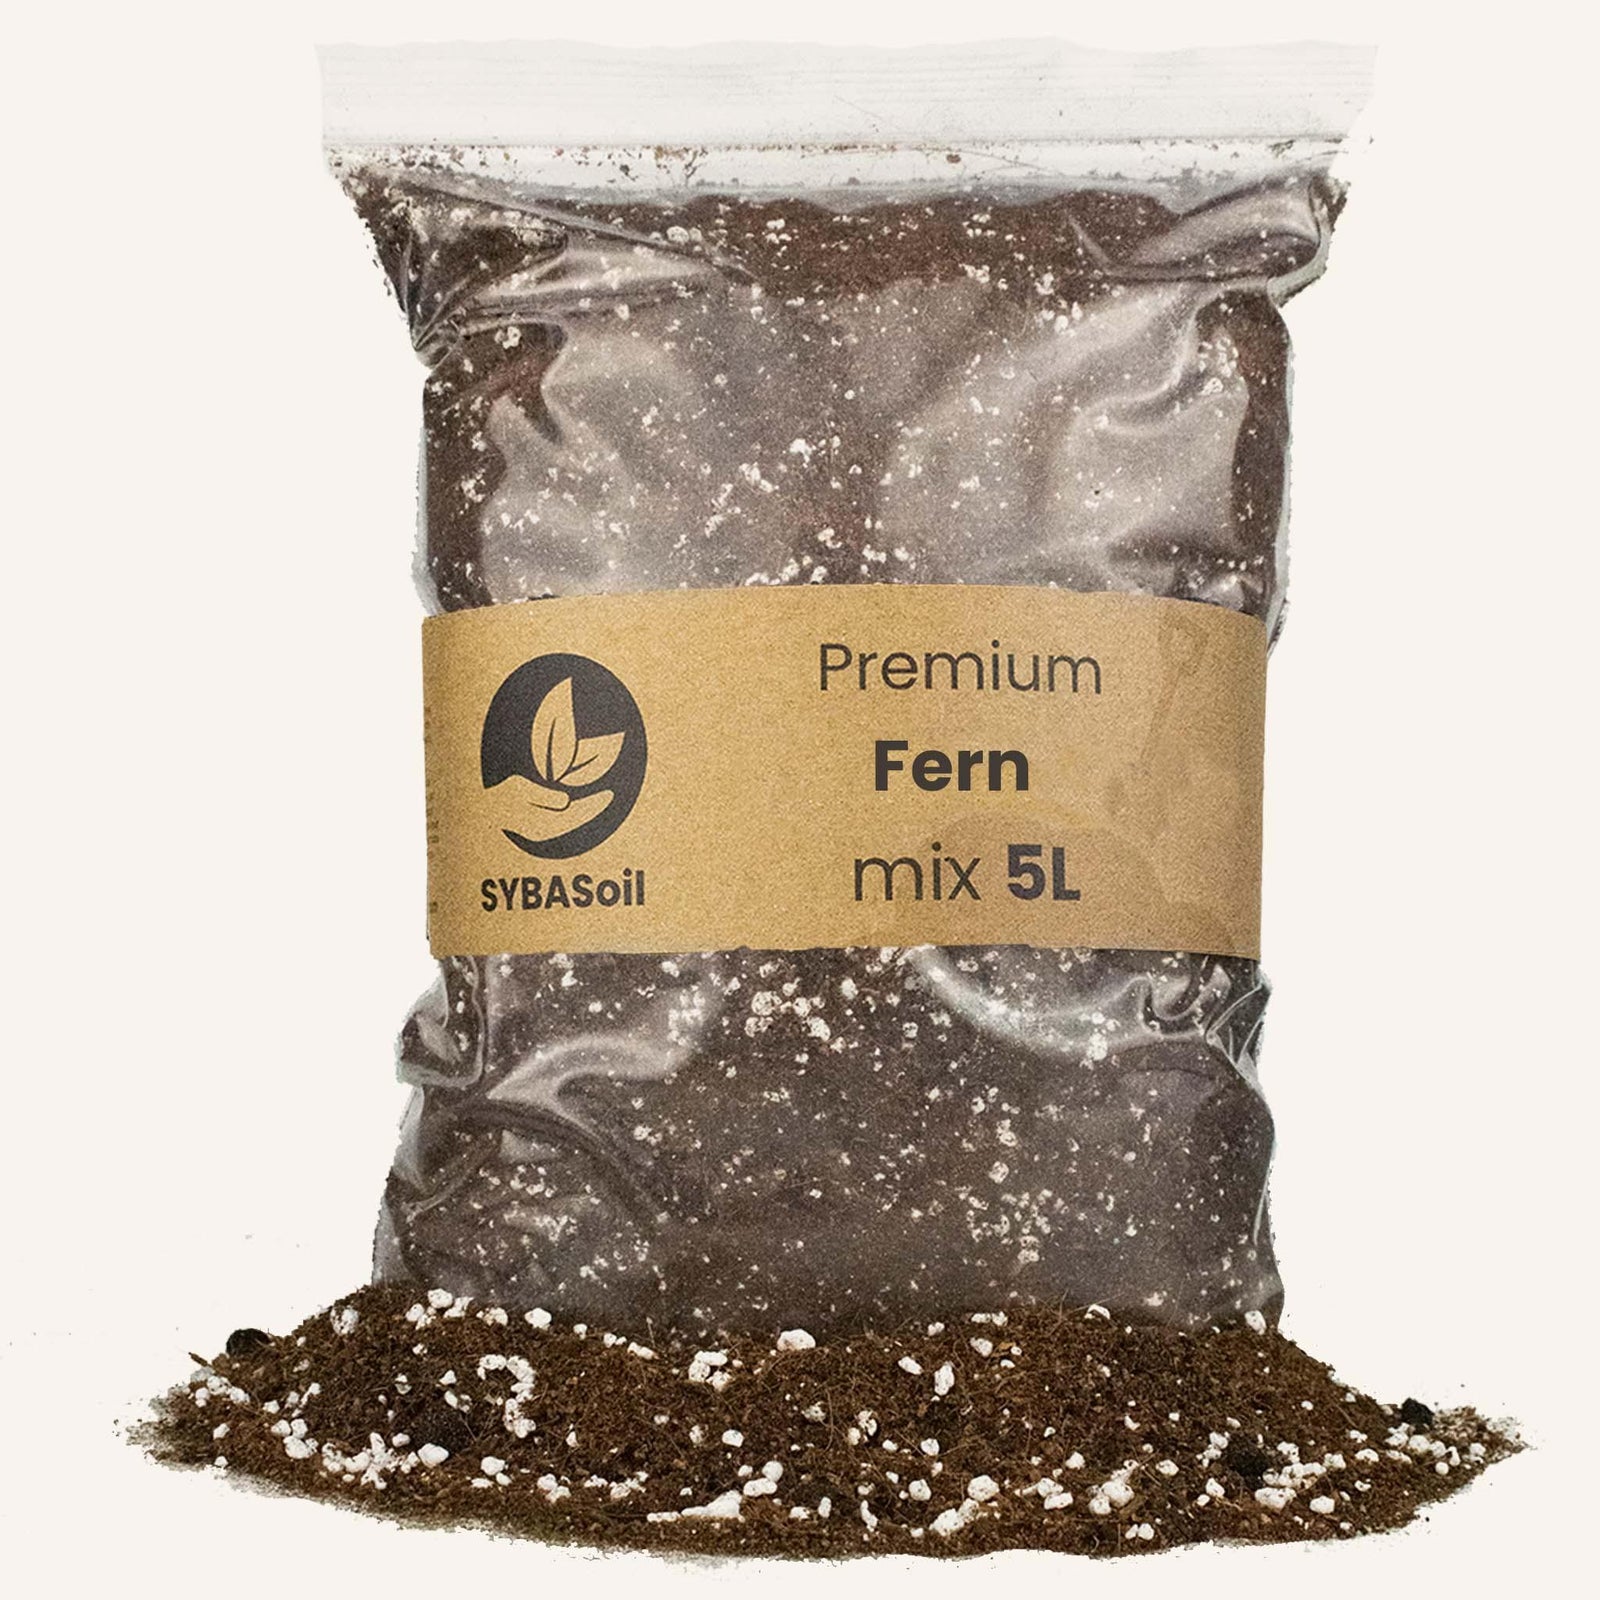
Have you ever found yourself grabbing a stunning silver blue fern or a bushy Boston fern at the store, only to put it back when you remember how many times you’ve accidentally killed your previous ferns? We’ve all been there. I can’t count on the fingers of both hands how many ferns I’ve brought home only to watch them wither away. However, after some trials and errors, I’ve figured out how to grow them successfully and even discovered which varieties are hardy and thrive on neglect. Here are my best tips and findings to help you care for your ferns. Watering You might have heard the famous advice: “Keep moist but not waterlogged.” But what does that really mean? Essentially, it means that when you touch the potting mix, it shouldn’t feel dry, but it also shouldn’t be muddy. Think of it as watering more often with small amounts of water rather than a lot of water once a week. Here are a few things to consider: Planter Type: Avoid terracotta pots as they absorb moisture and dry out the soil faster. Unless you enjoy daily plant care, opt for a plastic nursery pot placed inside a decorative planter. This setup helps maintain moisture levels. Drainage: Ensure your planter has proper drainage. If you overwater your fern, you’ll notice water sitting at the bottom of the planter. Ferns dislike “wet feet” (unlike some plants like Alocasia) and can develop root rot if left in standing water. Water Quality: Use distilled or filtered water, or even rainwater if possible. This helps avoid any issues with the chemicals present in tap water. Soil One crucial step for fern care is to repot your fern as soon as you bring it home. Most store-bought ferns are pot-bound, and upgrading their soil can make a big difference. Here’s how to handle it: Fern Potting Mix 5L Pre-Repotting Soak: Generously water the plant and let it soak to loosen the root ball, making repotting easier and ensuring that the roots are more pliable, reducing the risk of damage during the repotting process. Soil Choice: Since ferns like to stay moist, a good potting mix would be coco coir with perlite and some peat to lower pH. Coco coir is known to retain moisture for longer periods, making it an excellent choice for ferns. A quick Google search based on the specific fern you have will guide you to the best soil type. Light While ferns don’t like direct sunlight, they still need a good amount of light to thrive. Please don’t place your ferns in dark corners or windowless bathrooms. The more light they get (without direct sunlight), the better they’ll grow. Humidity If your bathroom happens to have a window, it will be a great spot for your fern as they love higher humidity. Otherwise, speaking from experience, I had no problems with ferns in my Berlin apartment with average humidity. Recommended Ferns for Beginners For those new to growing ferns, I recommend starting with these varieties: Bird’s Nest Fern: Hardy fern that doesn’t mind if you forget to water it occasionally. It’s broad, arching fronds can add a lush, tropical feel to any indoor space, making it an ideal houseplant for those looking to bring a touch of greenery into their home. This fern thrives in indirect light and can tolerate low-light conditions, making it perfect for rooms without much natural sunlight. Additionally, it can help purify the air, contributing to a healthier living environment. Just make sure to keep its soil slightly moist and avoid letting water sit in the crown, as this can cause rot. Crocodile Fern: Super easy to grow and possibly the hardest fern to kill—as long as you don’t overwater it! It tolerates drying out between waterings quite well. This unique fern, with its rugged, crocodile-like textured leaves, makes for an attractive indoor plant. Additionally, it thrives in indirect light and is exceptionally adaptable to various environments. Whether you’re a beginner or an experienced gardener, the Crocodile Fern is a delightful addition to your plant collection due to its resilience and low-maintenance nature. Boston Fern: This guy is definitely next level, but if you repot it and keep it far away from touch with enough space around it in a well-lit spot, it will grow like crazy! Additionally, it’s important to keep the soil consistently moist but not waterlogged, as Boston Ferns thrive in high humidity. Regular misting and placing a humidifier nearby can also aid its growth. Don’t forget to feed it with a balanced, water-soluble fertilizer every month during the growing season to ensure it receives all the necessary nutrients. With just a bit of care and attention, you’ll have a lush, thriving fern that adds a touch of natural beauty to any space. Asparagus Fern: Probably my favorite! This one definitely prefers regular watering and doesn’t like to be dry, but in my experience, it won’t die quickly if you ever water it a day late. Its delicate, feathery foliage adds a touch of elegance to any space, and it’s relatively forgiving when it comes to lighting conditions. Although it thrives in bright, indirect light, it can tolerate lower light levels, making it a versatile choice for various rooms in your home. Growing it near humidifier will help maintain its lush appearance and prevent the leaves from drying out, which is particularly helpful if you live in a dry climate or during colder months when indoor heating can reduce humidity levels. By following these tips, you can turn your home into a fern-friendly haven. Happy growing!Monika Like what you read? Why not sign up for our newsletter and never miss a blog post? Our Instagram is also a great place for plant care tips. Have a request about topics we should cover? Email monika@plantcircle.co with your suggestions! Disclaimer: This blog post is written from a well-lit Berlin apartment; please keep that in mind. If you live in a different part of the world, growing ferns at home might be easier or harder.
Read more

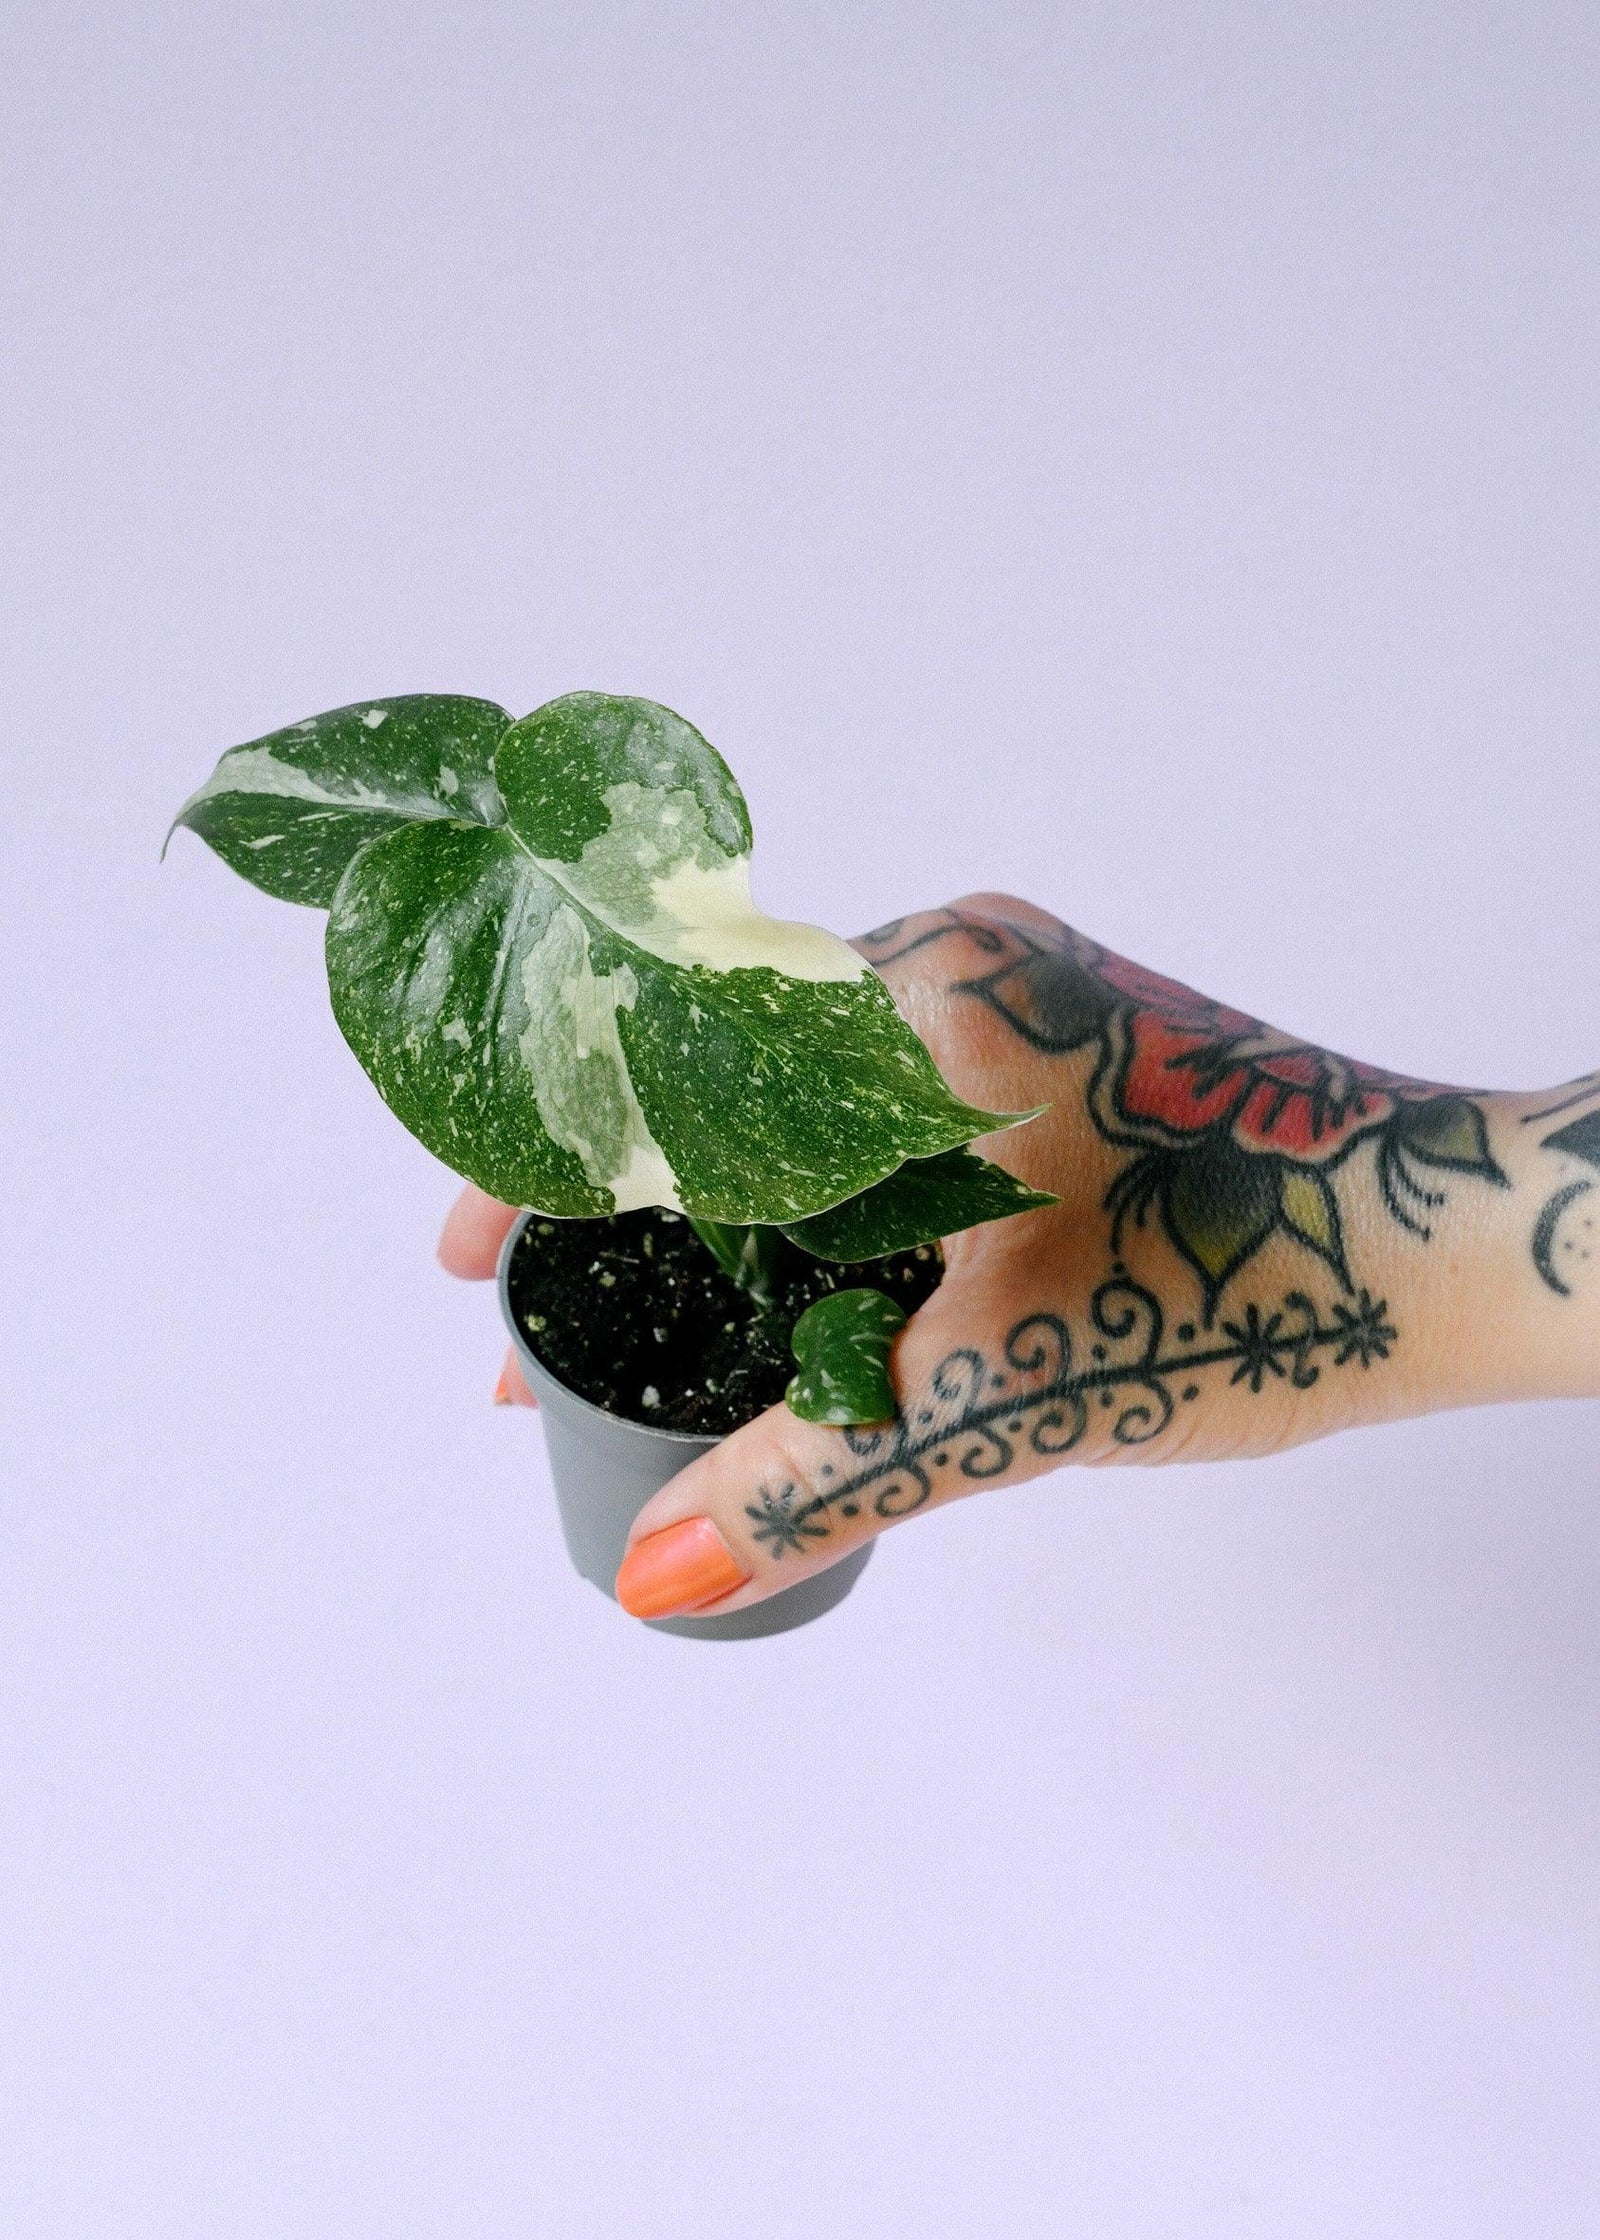
Growing Variegated Monstera: A Comprehensive Care Guide
Variegated Monstera plants, such as the Thai Constellation and Albo, are prized for their unique patterns and colors but require special care to thrive. This blog explores Monstera variegation types and offers essential care tips, from light requirements to humidity control, for healthy, vibrant foliage.
Read more
Growing Your Plants from Plugs
Are you looking to expand your houseplant collection without breaking the bank? Starting your plants from plugs might be the perfect solution. In this blog, we’ll explore what plant plugs are and why they are a cost-effective and sustainable way to grow your favorite plants. From understanding the innovative tissue culture propagation method to providing a step-by-step guide on how to pot and care for your plugs, we’ve got you covered. We have a large collection of plant plugs for you to check out! What Exactly is a Plug? A plant plug is a seedling that was started and grown in an individual cell filled with potting soil in a laboratory. This method, known as tissue culture propagation, involves growing plants from a small piece of plant tissue in a sterile environment. Tissue culture ensures that each plug is a genetic clone of the parent plant, free from diseases and pests. This method is highly efficient and sustainable because it produces a large number of uniform plants in a short period, using minimal resources. By optimizing growth conditions in the lab, tissue culture reduces the need for chemical treatments and water, making it a cost-effective and environmentally friendly way to propagate plants. Plugs provide a cost-effective way to jump-start your houseplant collection. These well-developed young plants with strong root systems are ready for potting up. Step-by-Step: What to Do with Your Plugs When They Arrive Prepare a Plastic Nursery Pot: Select a small pot, preferably around 8 cm in diameter. Using a bigger pot will require more soil, which can retain excess moisture and potentially cause root rot. It’s better to start with a smaller pot and gradually pot up as the plant grows. Typically, when the roots begin to grow out of the holes at the bottom, it’s time to pot up. Prepare an Appropriate Potting Mix: Choosing the right potting mix is crucial for the healthy growth of your plant plugs. You can either purchase a potting mix specifically tailored for the type of plants you are growing or create your own blend. A pre-made potting mix ensures that your plants receive the optimal balance of nutrients, drainage, and aeration needed for robust growth. These mixes are formulated to meet the specific needs of different plant varieties, making it easier for you to provide the best growing conditions. If you prefer a more customised approach, you can mix your own potting soil. Start with a good-quality base such as peat moss or coco coir for moisture retention, and add perlite or vermiculite to improve drainage and aeration. Incorporate organic matter like compost or worm castings to enhance nutrient content. Depending on your plant’s specific requirements, you might also add ingredients like sand, charcoal or bark. We offer a large selection of potting mixes and soil improvers to help you create the perfect blend. With the right potting mix, your plant plugs will have a better chances to thrive and grow into healthy, mature plants. Base Mix 5L 12 € Shop now Planting the Plug: Carefully take the plug out of its packaging. You’ll notice that the root ball is often surrounded by a mesh or net. Gently remove this covering, being cautious not to damage the delicate roots. This step is crucial as it allows the roots to expand freely into the new soil. Start by adding a layer of soil to the bottom of your plastic nursery pot. This initial layer will help elevate the plug to the correct level and ensure good contact between the roots and the new soil. Place the plug in the center of the pot. Hold it steady and begin filling the pot with soil. As you add soil, make sure to cover all the roots and fill in any gaps around the plug. This helps stabilize the plant and promotes healthy root growth. Once the pot is filled, gently pat down the soil around the plug. This ensures that the seedling is firmly in place and that there are no air pockets, which can hinder root development. The goal is to make the seedling stable and secure in its new environment. Water and Fertilize: Water your plant with a light fertilizer, ensuring that you follow the recommended dilution rates on the package for optimal growth and health of your plant, and always remember to avoid over-fertilizing to prevent any potential damage. Place the pot in a well-lit spot, avoiding direct sunlight, to ensure that the plant receives enough light for photosynthesis without the risk of leaf burn. Alocasia Frydek Plug Shop now Now, it’s time to watch your plant grow! With the right care, your plugs will thrive and soon become beautiful additions to your home. If you don’t want to wait to see your plants grow, we recommend exploring our large and extra-large plant categories. These mature plants provide instant greenery and beauty, allowing you to enjoy the full aesthetic of a well-developed plant right away.
Read more
How to NOT kill a Cactus
Cacti are probably the easiest plants to grow yet so many people kill them so fast. Why? Let’s look at closer at what makes these plants tick so we can avoid some of the most common mistakes! Most of the cacti on the planet live in places that are subject to at least some draught and many live in extremely dry environments like deserts. They have adapted very well to those conditions by conserving water. A healthy cactus is made of whopping 95% water! If you think about it, it’s really just skin and water. Cacti love sun and will enjoy a few hours of sun a day in the summer. Just be careful to not burn your plant by leaving it in scorching sun on the balcony after a winter and spring indoors (we’ve done that). You need to ease them into that summer sun. Good way to do this is to let them sit on the balcony starting in the spring. Cacti can withstand cold during the night, as that is similar to desert conditions- warm in the day and cold at night. As we’ve mentioned before, cacti are found in some of the hottest and driest places on earth. How do they survive that? They have developed some amazing coping systems to survive. One of them is the development of stomate. Stomate are tiny, microscopic pores that are critical for photosynthesis. Thousands of them dot the surface of cacti and they’re responsible for photosynthesis. Traditional garden plants have their leaves covered with stomate, that open during the day for carbon dioxide intake, which is essential for their one stop photosynthesis process. Open stomate make plants lose moisture, so if you don’t water your plants adequately, they will wilt. Many agaves and cacti evolved to adapt to extreme heat and drought by keeping their stomates closed during the day, so there’s no moisture loss. Cactus pores open at night for gas exchange and when they’re open, cacti are capable of taking in moisture directly through these openings. Now, this is crucial information for better understanding how to water these plants. If their stomate are closed during the day, and moisture intake is limited as a result, it makes no sense to water them during that time, as the water won’t be absorbed! Because gas exchange is active at night, the roots are better able to take in water applied to the soil. Additionally, you can pour water over the head of your cactus to let it experience rain-like conditions. This will also clean the cactus’ skin by allowing water to penetrate the stomate! Fun fact: a prickly pear cactus paddle can survive to up to 2 years after being cut off the mother plant. This shows you how effective cacti are at preserving the moisture through closing their stomate. Now, knowing all of the above, you must remember that rain in the desert is not a frequent occurrence, so don’t water your cactus too often. We recommend every 1-2 weeks in summer, if the plant gets southern exposure, and every 4-6 weeks in winter. Ideally you’d want to force your cactus into hibernation, which we discuss in this article.
Read more

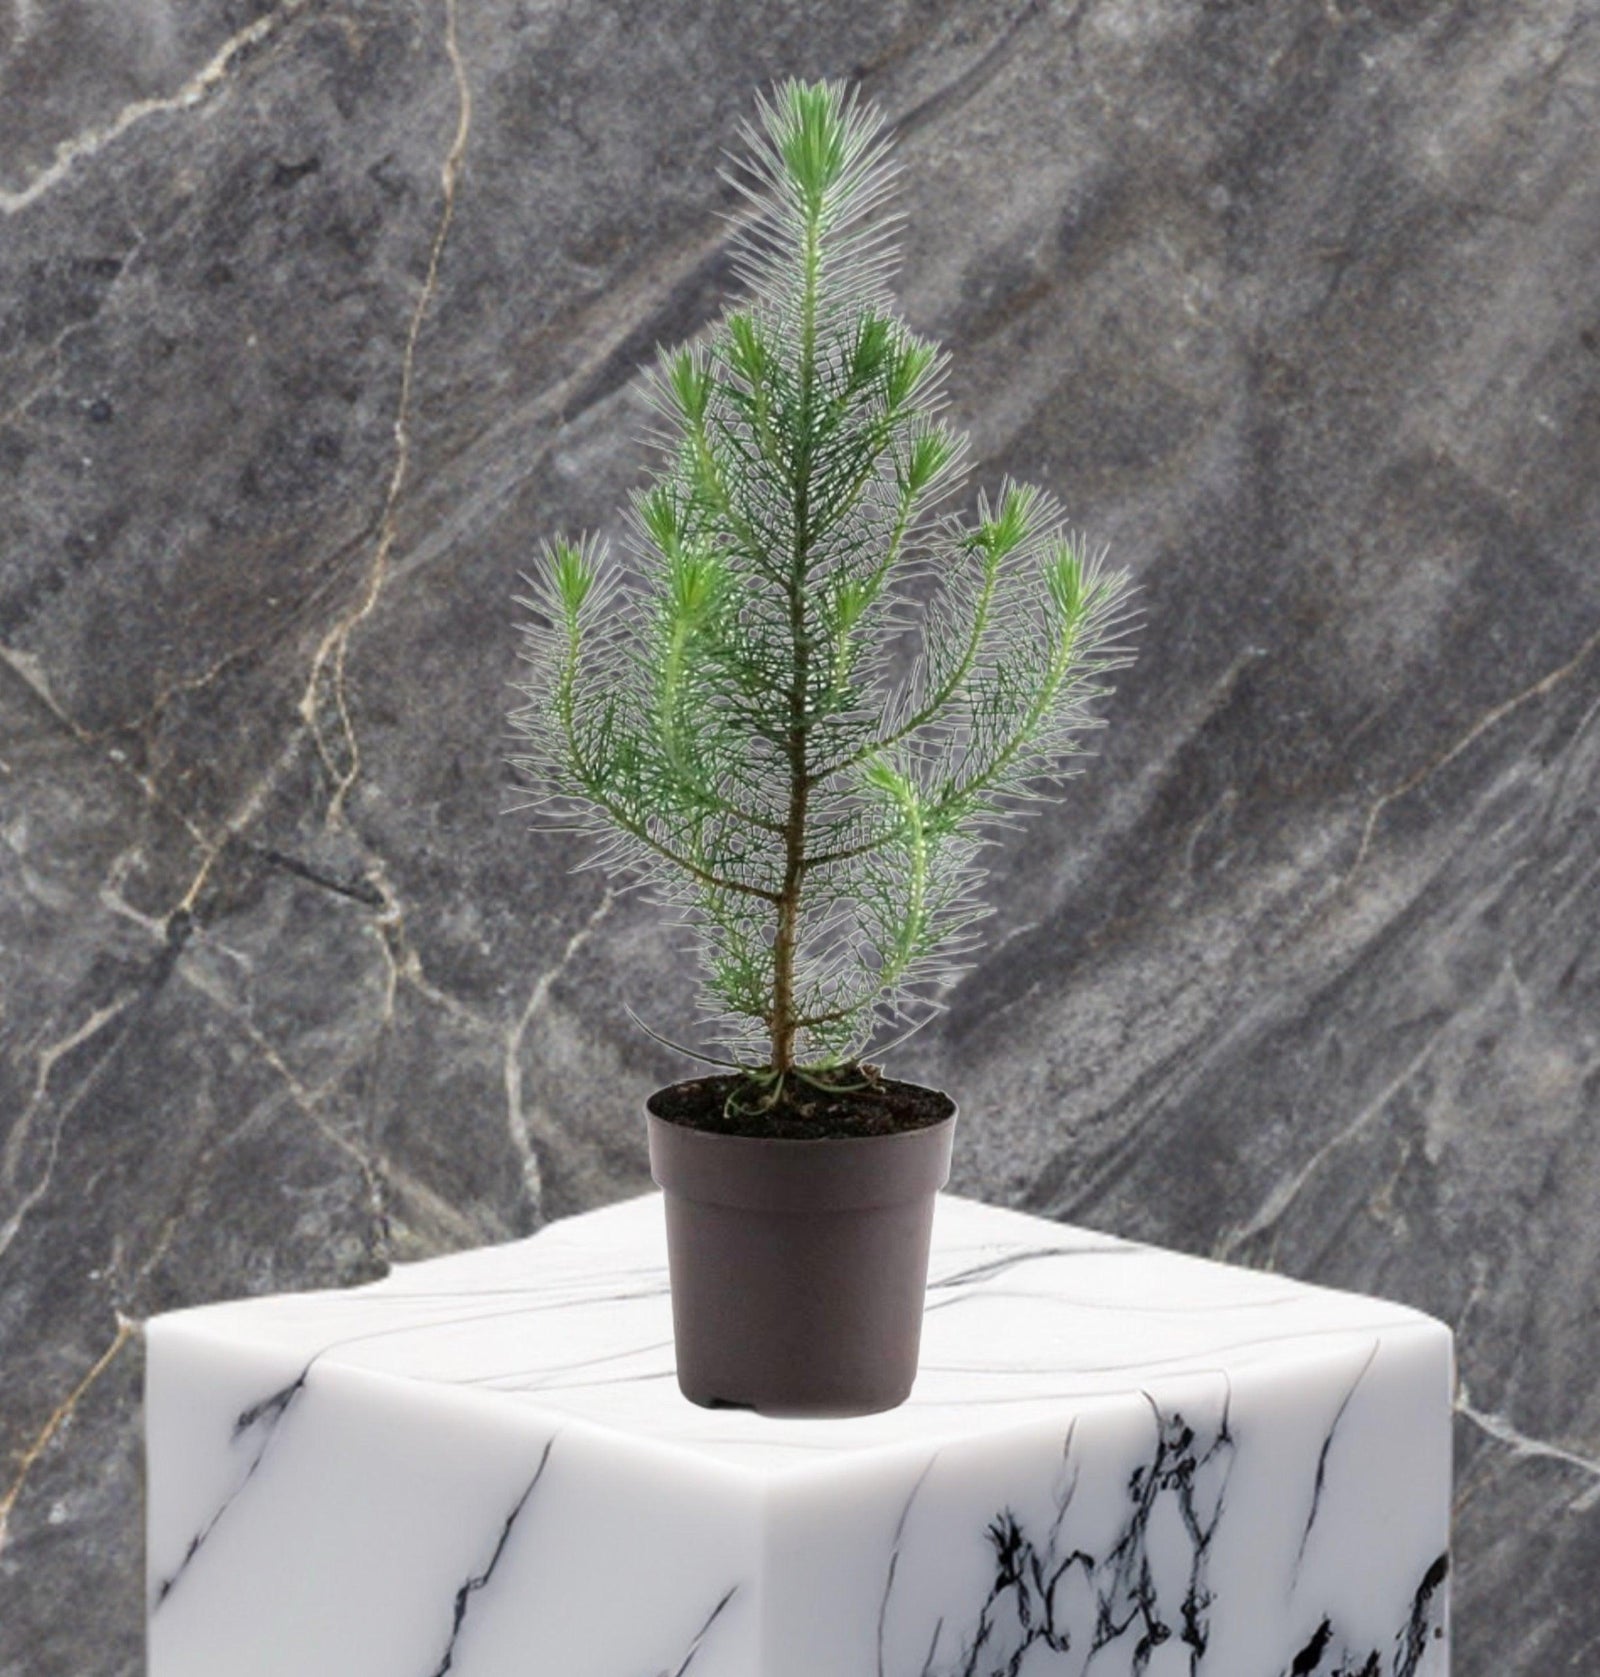
How to grow your Christmas tree past Christmas
For many people the only acceptable tree for Christmas is a live one and we get that! Nothing smells more like Christmas than a live spruce at home. The argument continues about which kind of Christmas tree is the most sustainable: fake or real. While both come with a footprint, and their own list of pros and cons, we are here to talk about the latter ones. Namely potted, real trees, and how to make sure they survive Christmas and continue bringing us joy year by year. Roughly 27 million trees are cut down every year in Germany just for Christmas. Buying potted trees is a fantastic alternative to cutting them down. However, a few things have to be kept in mind to make sure the tree stays alive past Christmas. 1. Pick a tree that is suitable for growing in a container. Like for example Picea Pungens “Super Blue”, also known as Colorado Spruce. Why is this one suitable? Because spruce has very shallow roots, which makes it a perfect tree for a container! 2. Do not keep your live, potted tree indoors for longer period than 10-14 days. 3. Choose the right spot. Spruce will enjoy a cool spot, away from the heating, that is semi bright to shady. 4. Water your tree every few days with lukewarm water when the top soil feels dry to the touch, and in addition, use a water bottle to spray it and moisten the needles. which protects them from drying out from the warm, heated air. Be sure not to drench the soil. You do not want it to be soaking wet, nor should it be left to sit in water, as this could drown, and eventually rot, the tree. 5. Don’t put too many heavy decorations on your tree. Please! 6. Before you place your tree back outside, slowly introduce it to colder environment by for example keeping it in the coldest room in your house for a few days, or near a window that you open regularly. Once your tree is back, outside remember to fertilise it after the first frost. Spruce is an extremely slow grower and it will take it about 25 years to reach a height of 5 meters!
Read more
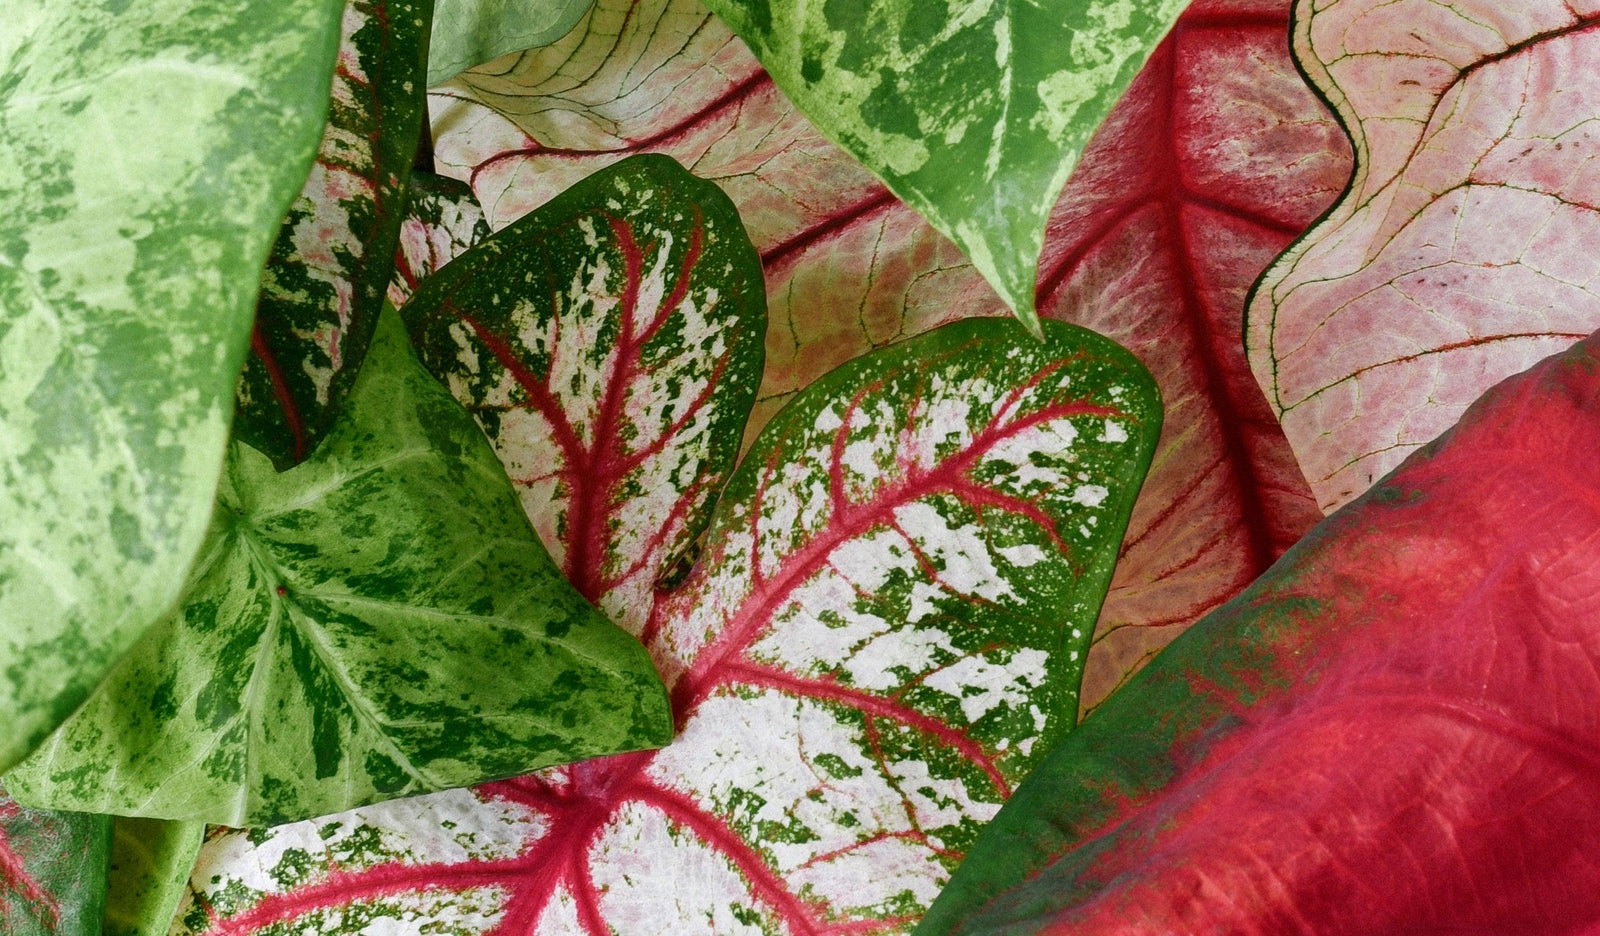
How to overwinter your tubers
In this article new would like to explain how to, and whether you should, overwinter your tuber plants! Did you know that Caladium, Amorphophallus and Xanthosoma all grow from a tuber? And that after the plant dies back, you can remove that tuber from the soil and plant it back later? Plants that grow from tubers usually die back in winter for a resting period of 3-7 months. Technically you can leave the plant in the pot and carry on as usual, as we assume the temperatures in your apartment won’t go below zero, meaning the plant can survive the cold season unaffected. However, if you would like your plant to come back in spring bigger and better than before, read on! 1. Remove the tuber from the soil and clean it well, getting as much excess soil off as possible. 2. Let the tuber dry out for a few days. 3. Once it’s dry to touch, place it in a box with a lid, and fill the box with either wood shavings or shredded paper. 4. Place it in a cool and dark storage with the lid not fully closed so a bit of air comes in. If you’ve followed the above steps to overwinter your tubers, all you have to do now is check back on your tubers once in a while. Once you notice a growth tip, it’s time to plant it back! You can plant Caladiums indoors in March and outdoors when the temperature is above 20 degrees celsius. When planting your Amorphohallus again, make sure that you place the tuber deep under the soil as the roots grow from the above the tube. This is so the tuber can support that beautiful, long stalk! When planting your Caladiums, make sure that the tuber is facing rings up, as this is where the plant will grow from. The tuber should be about 3-4 cm deep and you’ll need to keep it above approximately 24 degrees celsius for it to sprout. Tubers should be kept in moist, but not soggy, soil to sprout. Once new growth appears they should be watered often enough to keep the soil evenly moist, but again, never soggy! More detailed information on Amorphophallus, and how to grow them, can be found here.Happy planting!
Read more
How to water your plants
It’s no secret that the number one cause of death among houseplants is overwatering. This bad watering habit usually develops when well meaning plant parents give their plants just a little too much love and attention. Let’s explore how to water your plants… properly! Don’t feel bad, we’ve all been there. And most of us learned the hard way how to not water our plants! But whether you’re new to plant parenthood, or a seasoned plant parent, there’s no reason for you to make the same mistakes we did. And although all plants are different and have various watering needs, there are some good practices that you can apply all across the board. To help you out, we’ve compiled our top ten tips on how to water your plants here! 1. Sufficient lightYes, this post is about watering, but we can’t talk about watering without mentioning light! If your plants are not getting the sufficient, optimal light they need, they’ll also require less water than the internet, the sales assistant, or your friend says. Adjust your watering routine to the conditions you have! 2. Observe your plants They’ll tell you when they’re thirsty. All plants wilt when they’re dehydrated, and you’ll either notice rolled up leaves or some droopiness. Notice how many days it’s been since the last time you watered your plants, and now you know when your plant is overdue for a drink! Please note: some plants can take under watering quite badly, and will get burnt edges on the leaves, or even drop a few… looking at you, Ficus! If you want to avoid that, simply water them a day or two sooner the next time. Based on your previous observations you should now have a good idea of when the wilting is expected to occur! 3. The finger methodSimply stick your finger into the soil and check whether it’s wet or dry. If the top 3-4 cm of the potting mix are dry, you are safe to water your plants. 4. Bottom wateringSome plants, like Saintpaulia or Begonia, prefer bottom watering, as they don’t like getting water on their leaves. Do a little research about your new plant to find out if it has any special preferences! 5. Filtered water In a lot of places, like for example Berlin, tap water is really hard. Hard water has a negative impact on plants, therefore we recommend to always use either filtered, distilled, or rain water if possible. If those options aren’t available to you, then just let your water sit in the watering can for couple of days before using it. Read more about hard water here! 6. Showering your plantsOnce in a while it’s beneficial to give your plants a good shower! Not only will you clean dust off of the leaves, which is important for optimal light absorption, you’ll also take care of potential bugs and pests that could be hiding under the leaves. Furthermore, a thorough showering can wash out any mineral residue from the potting mix! We recommend this technique for the summer months. 7. Potting mixWhat potting mix your plants are in is crucial for keeping the roots healthy. The vast majority of plants will appreciate a well draining potting mix that will dry out between watering. Never use garden soil for your house plants, as it will turn into mud when watered and suffocate the roots. Read more about potting mixes here. 8. SeasonsAs the lighting situation changes with the seasons, it’s also important to change your watering routine. A good rule of thumb is to cut your watering in half in winter, meaning if you watered your plants weekly in summer, you can switch to watering every two weeks in winter. This, of course, doesn’t apply to for example cacti, if you’re hibernating them, or ferns that would rather stay kind of moist all the time. 9. Know the difference between moist and wetSome plants love for the potting mix to stay moist, but this doesn’t mean wet! Learn the difference, and never let your plants sit in water as it promotes root rot. 10. Drainage holesWe will forever recommend that you keep your plants in pots with drainage holes. No matter what! Drainage holes are actual lifesavers, as they make sure excess water doesn’t stay in the soil and damage the plant’s roots. When watering, make sure that you lift your pot up afterwards and let the excess water run through. Also, keeping your plants in plastic pots with drainage inside ceramics, promotes airflow around the roots. To make the conditions even better, you can put a few rocks under the plastic pot to lift it up a bit, and don’t forget to make sure that the ceramic planter is a few centimeters bigger than the plastic pot itself.
Read more

Introducing Our Exciting New Collaboration with PlantThatPlant!
Today, we’re thrilled to announce an exciting new partnership with PlantThatPlant in Sweden! Known for their passion for cultivating some of the most stunning and exclusive plants, PlantThatPlant shares our vision of creating a vibrant plant-loving community.
Read more
Introducing: Huperzia
An intro to the mysterious and controversial Huperzias, and Oliver’s top tips on how to care for them! If you’re trying to claim the title of the most plant obsessed person you know, nothing beats getting involved with the hot topic that is the Lycopodiaceae family! Even that simple sentence could stir up some serious drama in the taxonomy world, as this family has been highly contentious when it comes to classifications. Most commonly known as Clubmoss, these plants are ironically not moss at all, and in fact have a striking resemblance to fir trees, so some people also call them Ground Pines. We could go on and on covering the intrigue and drama surrounding the more than 400 species in this family, but since this is merely an introduction, we have decided to let you geek out and do some digging yourself… you have to earn the label ‘plant obsessed’ after all! But what we will do is give you the inside scoop on one genus of this family: the Huperzia. Huperzia has many of the same characteristics of other species of Lycopodiaceae: a fir tree-like leaf shape, dichotomous stem branching, and flowers/spores, which are called strobili. Most specimens are found in alpine regions with temperate environments, meaning they thrive in quite a unique ecosystem, that is rarely found in your average apartment! These environments often experience heavy fog, rain, and mist, and this fact is important to consider when trying to grow your Huperzia indoors. High humidity is important, as well as constant moisture in the substrate, which should be representative of those same alpine regions. These environmental needs obviously makes caring for a Huperzia a more difficult task than with other houseplants, so how exactly are you supposed to replicate the natural environment of sub-tropical alpine Asia in your own bedroom? Well, the answer is quite simple, but it does involve a certain level of dedication to the cause! Firstly, research! Understanding this plant is an important part of being able to care for it. Your research will probably lead you down a trail of confusing information, but understanding the mystery of these plants will help you understand the importance of their care. However, if you can’t be bothered spending your free time dredging through the difficult to find, and often conflicting, information about a plant family that has dozens of different names, then just skip it, and listen here: Water your Huperzia regularly. And by regularly we’re actually talking multiple times per week, and in the peak of summer it could even be daily. Ideally you want to make sure there is always moisture in the substrate. The Huperzia should be planted in a coco-chunk-like substrate which doesn’t hold water as well as a soil mix. Learning to feel the subtle weight difference between a watered and unwatered plant is of the utmost importance. Medium to high humidity will protect delicate Huperzia leaves from browning, and seeing as you are going to be watering the plant so regularly, watering the entire plant in the shower would be a great way to keep the leaves from drying out. Additionally, a humidifier, or grouping your Huperzia with other plants, can be helpful. Keep your Huperzia in a bright, well lit area with exposure to a few hours of morning sun, if possible. Midday and afternoon sun will burn your Huperzia dreams to dust, but a little morning sun will give you and your beloved Huperzia some time to relax and daydream about being 1/10th of the way up a beautiful Himalayan Mountain from the comfort of your inner-city dwelling! So, now that you’ve followed these care tips, your Huperzia is lush, and has branched several times, an indicator of age, and has begun to develop spores. At this point you’re probably thinking ‘’wow, lucky me, new plant babies!’… well, think again, budding Huperzia heads! Germination of spores takes between three and eight years, and if you are thinking about propagation, well, that’s just as difficult. In conclusion, the Huperzia is a true plant baby in an almost literal sense, meaning it’s all yours, and you will have trouble sharing it with other plant parents. So instead we recommend that you just cherish it, get to know it, love it, and it will love you back!
Read more

Philodendron Melanochrysum, Philodendron Gloriosum, or Philodendron Glorious?
Philodendron Melanochrysum, Gloriosum, or Glorious?! So many Philodendrons, so many opportunities to get them mixed up! In this post we’re taking a look at three of the most popular, and often mixed up, Philodendrons! Philodendron Melanochrysum, Gloriosum, and Glorious? are some of the most popular Philodendrons out there are the moment, and we want you to feel like an expert on these three, so let’s start with Philodendron Melanochrysum! This beloved plant is a climber, which sets it apart from its crawling sibling P. Gloriosum. It’s native to Colombia and Costa Rica, where it can be seen climbing up tree trunks, especially at higher elevations . Like many other Philodendron, the leaves on the Melanochrysum change shape and elongate as the plant climbs. In nature, or in particularly good care, the leaves can reach to one metre in length, making it a spectacular sight in any houseplant jungle!The species’ beauty is further enhanced by the velvet look and feel of its leaves, which start out in a bronze colour and slowly mature into a deep dark green. The petioles of P. Melanochrysum are round, unlike most P. Gloriosum varieties. Collectors also sometimes confuse this species with Philodendron Gigas, which has similar leaves at maturity, but petioles that are D-shaped, i.e. flat on top.P. Melanochrysum was first discovered in the wet, Andean foothills of Colombia in the 19th century by European collector and horticulturist, Édouard André, who named it after himself. So P. Melanochrysum’s first scientific name was actually ‘philodendron andreanum’, before it was officially changed to the name it goes by now. It has been in cultivation in Europe at least since 1886, when the infamous Veitch nurseries first introduced it to horticulturalists!The word ‘Melanochrysum’ is derived from the Greek ‘melanós’ meaning ‘black’ and chrysós, meaning ‘gold’. As you may have guessed if you own one of these beauties, this name refers to the tiny golden sparkles sometimes seen when the velvety blackish-green leaves of the adult plant are viewed in the sunlight. Philodendron Gloriosum is an Aroid native to the rainforest of Colombia and has spread throughout other Central and South American countries. It is a crawling, terrestrial plant, which means it grows on the forest floor and spreads there. When growing this plant at home, this means you will need a wide pot rather than a support pole, because it will grow sideways and crawl out of the pot eventually. This growth habit sets it apart from a many other Philodendrons, including the Melanochrysum and Glorious, who are climbers by nature. The leaves of Philodendron Gloriosum are much rounder and a brighter green in colour than those of the Melanochrysum. It’s beautiful, heart-shaped leaves usually have prominent, white veins and can reach a size of up to 90 cm, so it gets just as giant! There are many varieties for sale these days, such as ‘white veins’, ‘green veins’, ’round form’, ‘dark form’, ‘pink back’ or ‘white stripes’. This is because Philodendron can vary a lot by nature, so the particular characteristics of a P. Gloriosum might differ. For instance, a Gloriosum generally has D-shaped petioles, but the ‘dark form’ features round ones. P. Gloriosum was first identified in the Colombian rainforest in 1876 during an expedition led by French Botanist and Scholar Charles Antoine Lemaire. Around this time, the first specimen was also collected and brought to Europe for documentation. While P. Gloriosum is widespread in cultivation nowadays, it is unfortunately also listed as a threatened species on the IUCN’s international red list, because it’s so rare in nature. As of 2021, there are only 7 locations in the world where this plant is found natively in the wild. It can predominantly be found in Colombia, but some specimens also live in the rainforests of Southern Mexico, Venezuela, Ecuador, Peru and western Brazil. Philodendron Glorious is a hybrid of Philodendron Gloriosum and Philodendron Melanochrysum. This means that one of the parent plants (e.g. Melanochrysum) was cross-pollinated with the pollen of the other (e.g. Gloriosum) in order to produce Glorious seeds. This plant is not found in nature, but was intentionally bred by humans!The gorgeous hybrid was first crossed by Keith Henderson in the 1970s, but no-one knows which plant was the seed parent and which the pollen parent. However, it is speculated that the seed parent was a Gloriosum based on the dominant traits visible in his Glorious. It is likely that the majority of the P. Glorious plants in circulation do not stem from this original hybrid plant, and naturally for hybrids, they vary in characteristics. They can develop different features ranging between the origin plants, so whereas one Glorious might show stronger Melanochrysum characteristics, a different plant might be more reminiscent of a Gloriosum. Generally, the Glorious is a climber, just like its parent P. Melanochrysum, but it often slides off the climbing support and scrambles over adjacent plants or other objects. It is also known to grow mature leaves even without climbing much or by just scrambling over substrate. There, the Gloriosum parentage clearly comes through. Glorious leaves are longer, narrower and darker green in colour than a Gloriosum due to the influence of the Melanochysum. Consequently, Glorious leaves are also rounder, less elongated and a brighter green in colour than a Melanochrysum thanks to the traits of the Gloriosum.Particularly, young P. Glorious can look similar to P. Gloriosum, but would soon start to climb. Another tell-tale sign to find out which plant you have is that the Glorious has an oval petiole whereas that of the Gloriosum is D-shaped.So, do you feel like an expert on these three Philodendrons now? We hope so, but if you have further questions, leave us a comment below!
Read more

Philodendron White Wizard, White Princess, or White Knight?
Maybe you just got into plants and you saw one of these white variegated Philodendrons assumed they’re all the same? And maybe you thought that they just go by different common names? Not the case! But hey, we can’t blame you! These three do look very similar at first glance and, additionally, growers and retailers don’t always do their due diligence when it comes to correctly naming plants, thus creating even more confusion. Since we have all three plants in stock, we thought it would be the perfect time to do a blog post about the differences between these three popular, variegated beauties! All three plants are hybrids with unknown parentage due to lack of documentation proving the lineage. We can only guess that some, like White Princess, might have P. Erubescens in their genes.But even though we don’t know the exact parentage, we can still take a closer look at the differences between these three plants! In our opinion, the easiest of them to identity is Philodendron White Knight. This is due to its burgundy stems with white variegation and round leaves. The color of the stems actually highly resemble Philodendron Pink Princess! The leaves are green, with patches of white variegation, of course. Philodendron White Princess is much lighter in colour than White Knight. Additionally, the stems of this plant are green and carry white and pink variegation, and they have visibly narrower leaves than the other two! Also worth mentioning is that this plant is not a climber like others, but self-heading. This is where it gets tricky, as the Philodendron White Wizard is very similar to Philodendron White Princess. The most noticeable difference is, that the stems don’t have pink variegation, just white. But another thing that can help you tell these two apart are the leaves, and the fact that the leaves of the White Wizard get rounder! Now that you know the differences between these three plants, we are sure you’ll be able to correctly identify each one, should you come across them. Now, we would love to know if you own one, and which one is your favourite! Post your favorite on instagram, and don’t forget to tag us in your post!
Read more
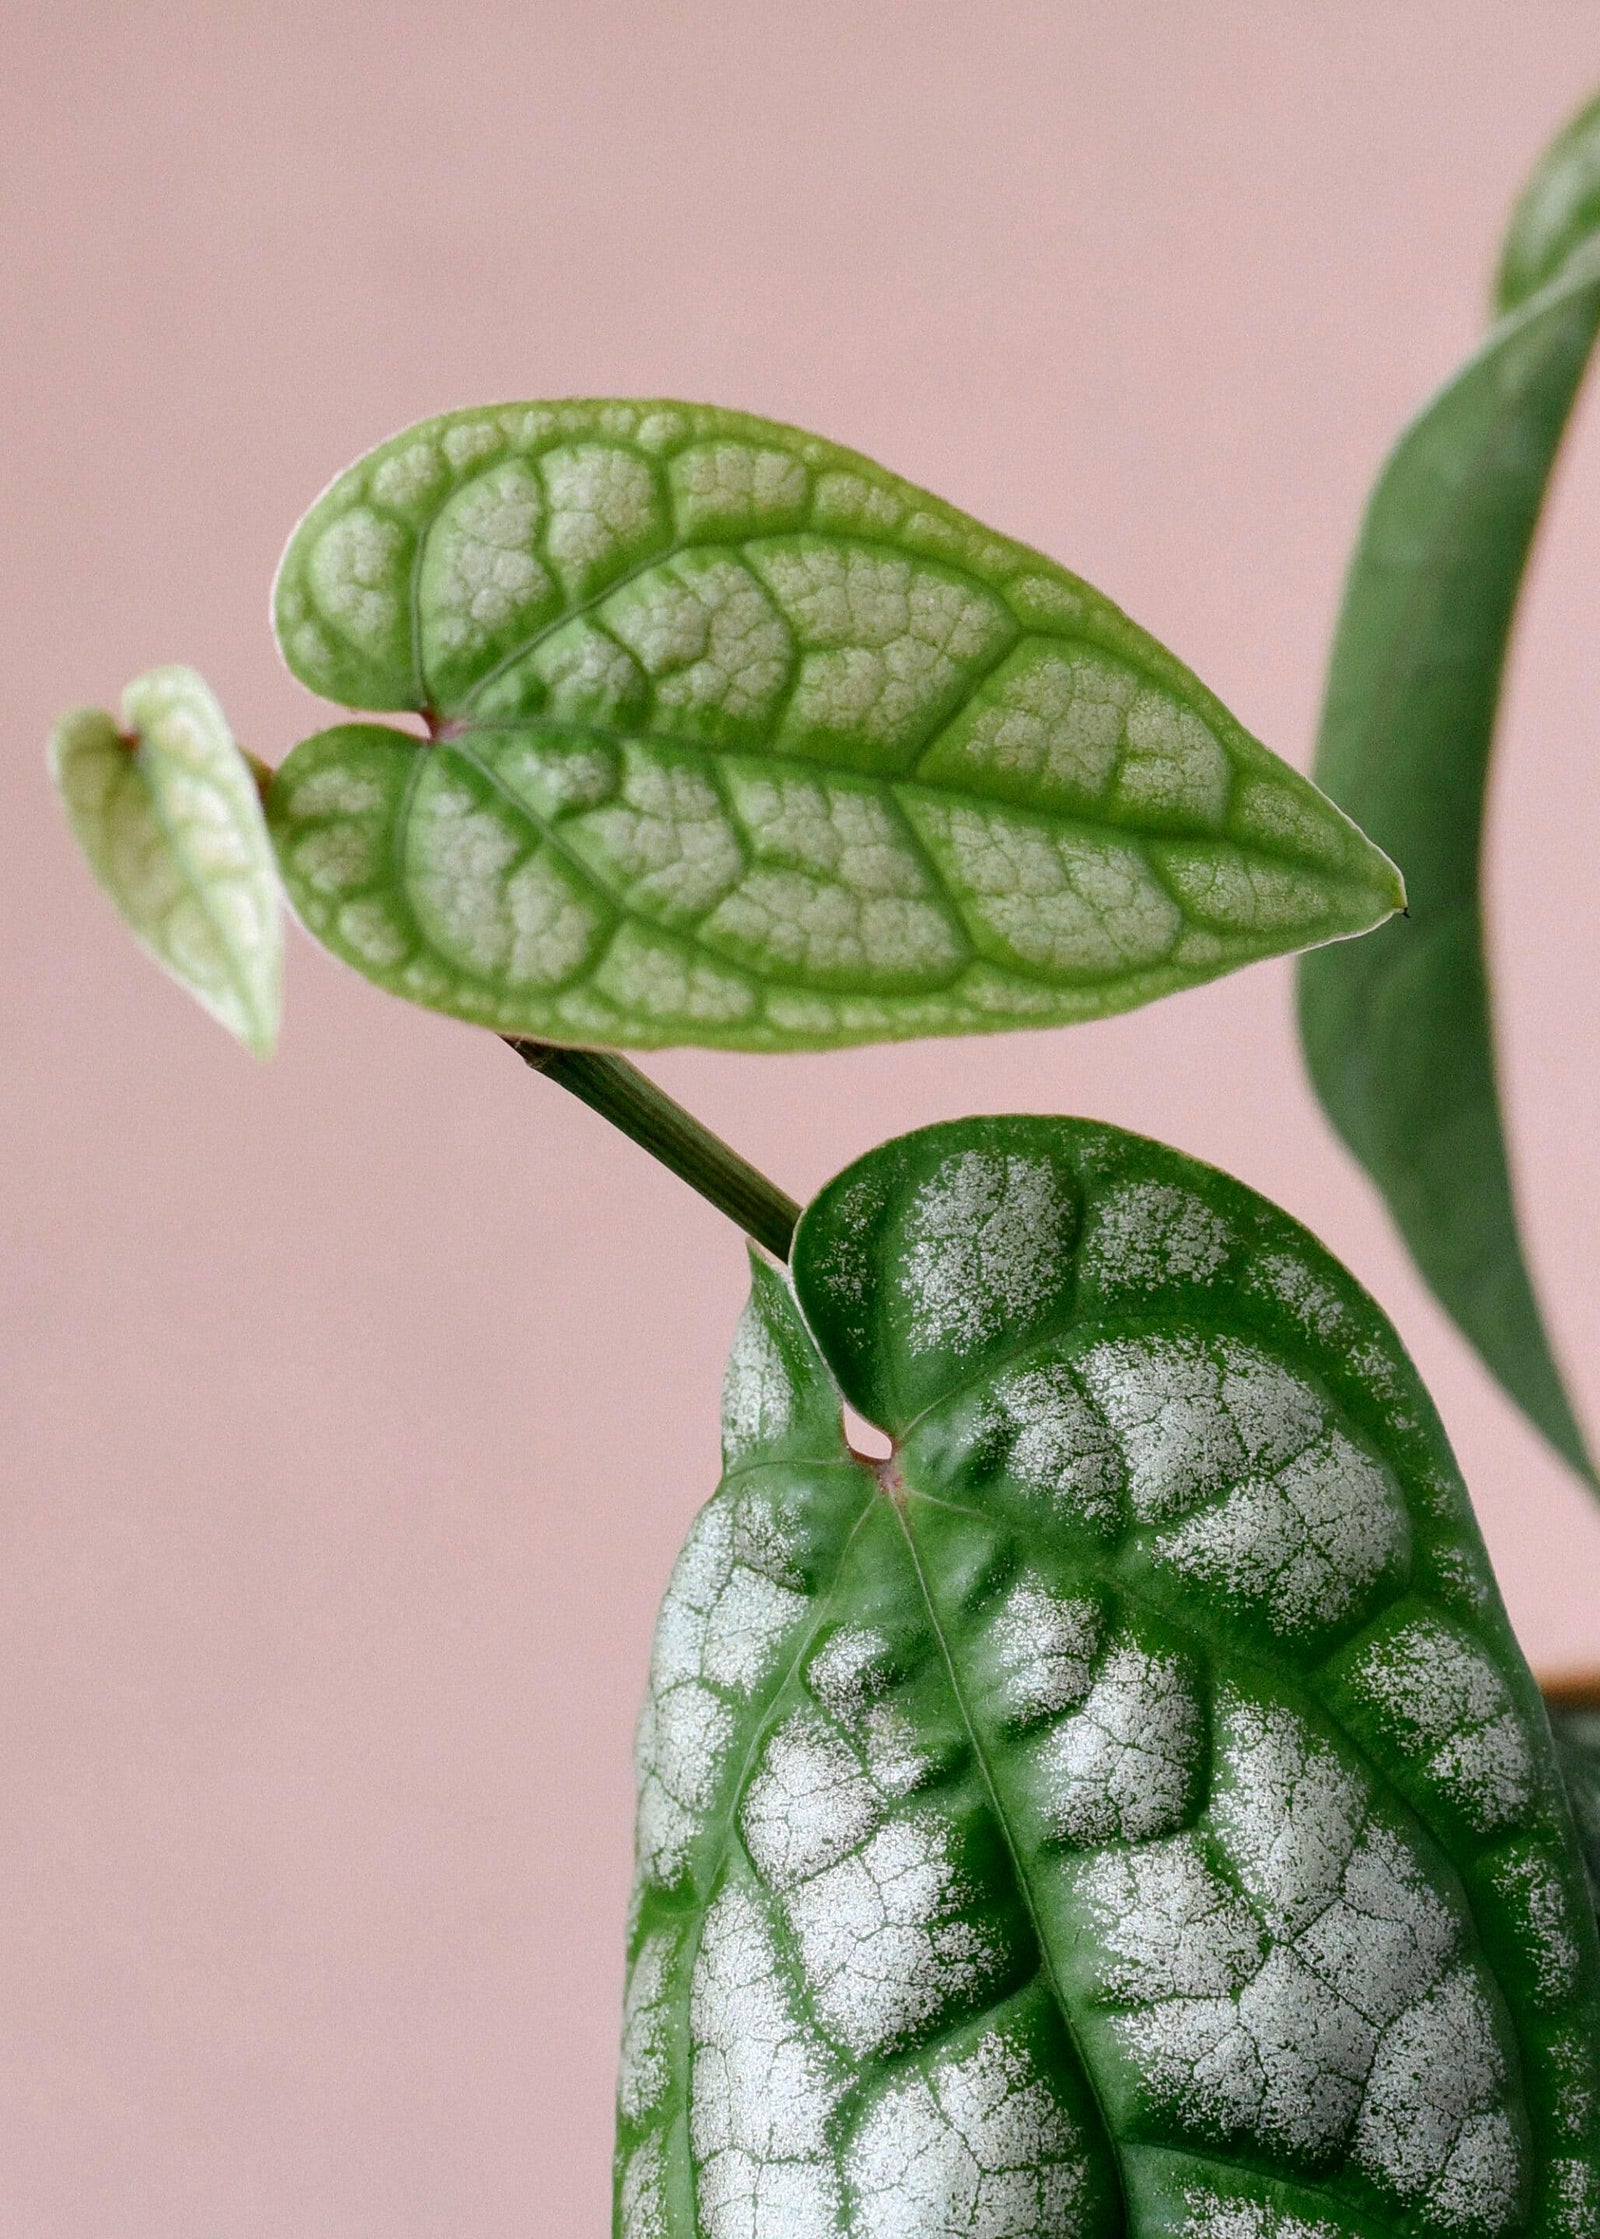
Piper Plants: Crystal Secrets
Piper plants, specifically Piper Crocatum and Piper Ornatum, are fascinating additions to any plant enthusiast’s collection. These South American natives are known for their unique characteristics and vibrant foliage. In this blog post, we’ll explore two key aspects of caring for Piper plants: understanding Piper Crocatum crystals and differentiating between Piper Crocatum and Piper Ornatum. Caring for Piper Plants: Piper Crocatum and Piper Ornatum To ensure the health and vitality of your Piper plants, it’s important to follow some key care tips. Firstly, provide them with the right amount of light. Piper plants generally thrive in bright, indirect light, so placing them near a window with filtered sunlight is ideal. Avoid exposing them to direct sunlight, as it can scorch their leaves. Secondly, maintain proper moisture levels. Piper plants prefer slightly moist soil, but be cautious not to overwater them. Allow the top inch of soil to dry out before watering again. Additionally, misting the leaves occasionally can help increase humidity, which mimics their natural tropical environment. Lastly, consider fertilizing your Piper plants every two to four weeks during the growing season using a balanced houseplant fertilizer. This will provide them with the necessary nutrients for healthy growth. With these care tips in mind, you’ll be well on your way to fostering thriving and beautiful Piper plants. Piper Crocatum Crystals: Nature’s Ant Protection If you observe the back of a Piper Crocatum leaf, you’ll notice small clear crystals known as exudate. These crystals are completely natural and serve as a means for the plant to release excess sugars through tiny openings in the leaf tissues. Over time, the clear crystals will dry out and oxidize, leaving behind tiny black dots that can be easily rubbed off with your fingers. But what purpose do these crystals serve? It turns out that Piper Crocatum plants have a clever defense mechanism against pests. They secrete sugar crystals on the backs of their leaves, which attract ants. This creates a mutually beneficial partnership between the plant and the ants. The Piper plant provides food for the ants, and in return, the ants protect the plant from potential threats. It’s a remarkable example of nature’s ingenuity! If you notice an abundance of these crystals, it could indicate that your Piper Crocatum is receiving too much light. Excess light leads to increased sugar production through photosynthesis. By reducing the amount of light your plant receives to partial shade (about 8 hours of filtered light per day) and ensuring that the soil remains moist but not overly wet, you can help maintain a healthy balance for your Piper Crocatum. Piper Crocatum vs. Piper Ornatum: Unveiling Contrasting Beauties When it comes to distinguishing between Piper Crocatum and Piper Ornatum, the differences lie not only in their appearance but also beneath their leaves. While both species share South American origins and similar growth habits, there’s a captivating distinction to behold. Piper Crocatum boasts deep purple backsides, providing a stunning contrast to its vibrant yellow and green striped leaves. On the other hand, Piper Ornatum reveals pale green undersides that beautifully complement its lush, glossy green foliage. Moreover, Piper Ornatum delights with its enchanting pink-veined leaves that gracefully vine or climb up trellises or supports. These visual variations make both Piper Crocatum and Piper Ornatum unique and irresistible additions to any plant collection.
Read more
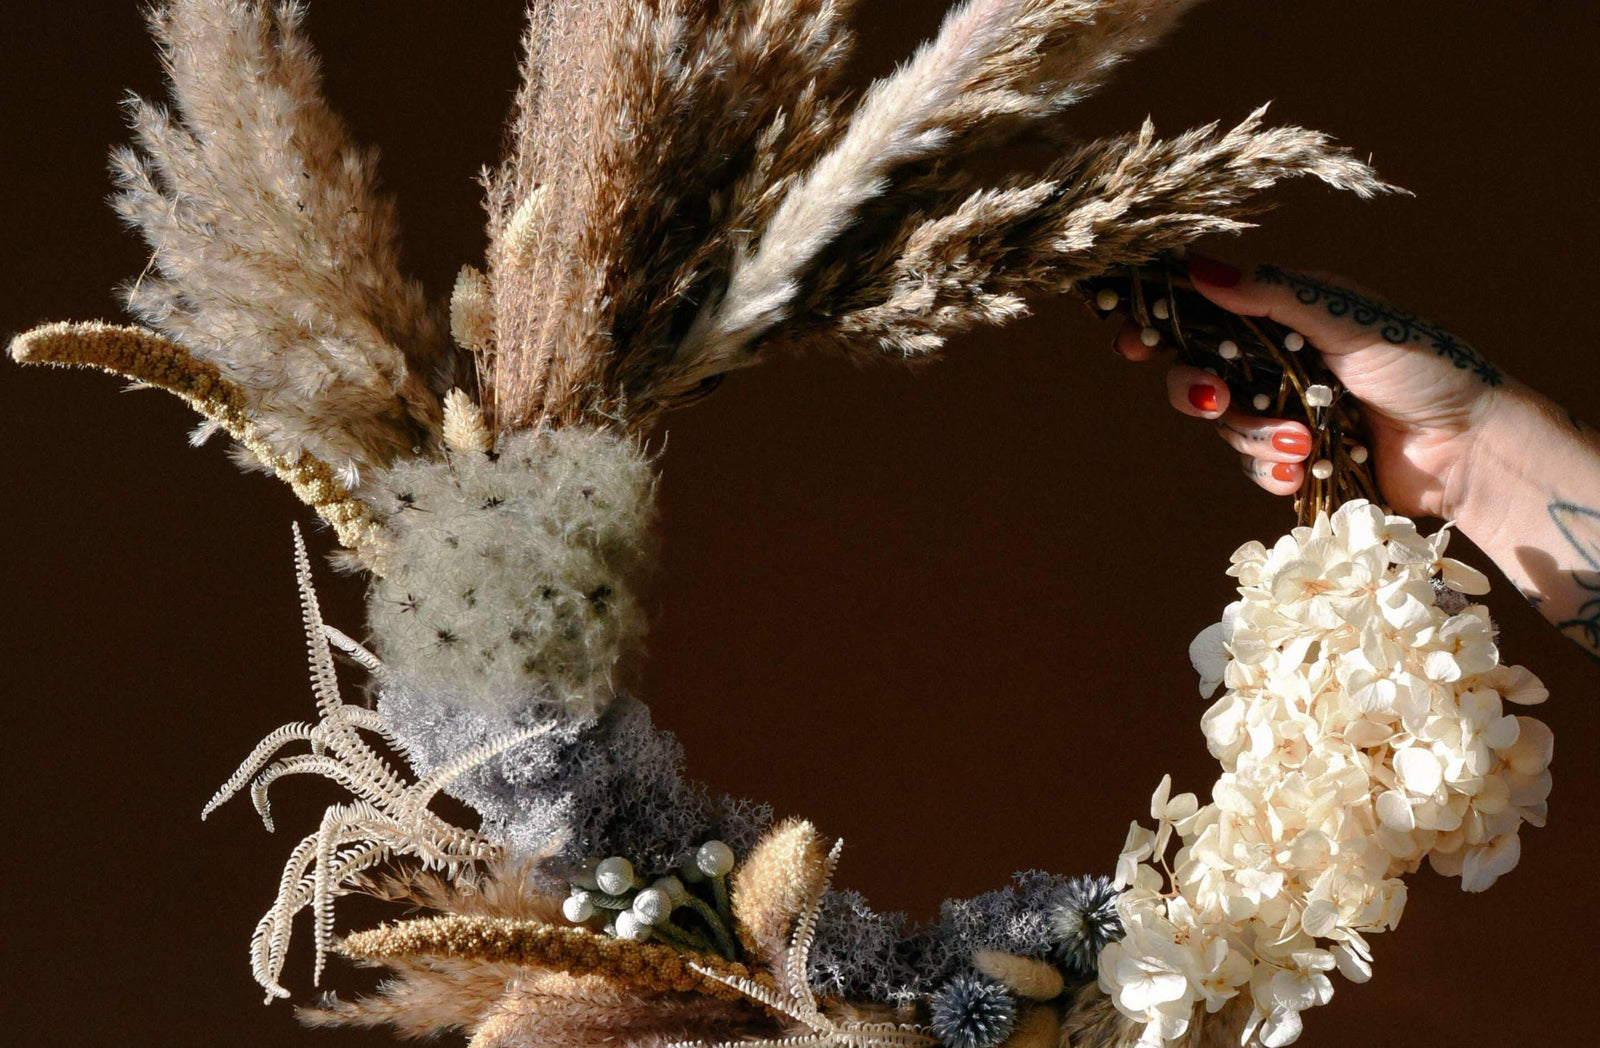
Plant Circle Gift Guide
Do you also swear to yourself every year, that this is the year you’ll get your Christmas shopping out of the way nice and early? Yet, the months roll by and before you know it, Santa is almost coming to town? If you answered yes, we feel you! So to help you tick a few things off your holiday shopping list, at least when it comes to finding gifts for the plant loving people in your life, we’ve put together this Gift Guide that is guaranteed to spark holiday joy! Please enjoy this selection of high quality gift ideas… and stay tuned for part two! 1. PlantSpectrum by mother.life Plant lights don’t have to be ugly and mother.life is here to prove that! The sleek design of their light passes as decor, while at the same time being extremely practical and durable. Not only are these lights waterproof, but they also come with a 4 year warranty. The color tone is white, not too cold or too warm, which makes it a perfect addition to your living room, and most importantly: it will help your plants thrive during the colder and darker months! We’ve partnered up with mother.life to offer you a 10€ discount, simply go to this link, add the coupon code PLANTCIRCLE and start shopping!The €10 coupon is valid from the order amount of €139. 2. Plant Stakes by Botanopia Everybody needs a little support sometimes, especially our trailing plants! Botanopia plant stakes, whether tall or mini, will be a perfect gift for someone with an extensive plant collection, as these will always come in handy while at the same time being a beautiful accessory! Find the full range in the accessories section of our shop! 3. Terrarium kit and workshop by Plant Circle Who doesn’t love a good DIY project? Well, if they exist, we don’t know them! Our Virtual Terrarium Workshop and Terrarium Building Kit are the gifts that keep on giving. Easy to assemble and fun to watch with family and friends, and the result, a thriving mini biosphere, will bring its owner joy for years to come. Also perfect for the younger ones in your life!To make this gift extra special, add a Terrarium Plant Set, with a group of carefully selected plants that thrive in a humid, enclosed environment. 4. Vegan nail polish by Gitti Conscious Beauty As plant lovers we love all things plant based, and especially when they don’t come at a cost to the planet like the beauty products from Gitti Conscious Beauty. Our teams favourite is of course the vegan nail polish, but our founder also swears by their hand cream and mascara. We think these would make for a fantastic gift for anyone, vegan or not! 5. Smudge sticks and incense by Purnama Rituals Here at Plant Circle we are all about self care and rituals. Whether they come in the form of a face mask, a relaxing bath, or some grounding meditation, we all need to switch off and make time to do something nice for ourselves. Purnama Rituals offers a beautiful selection of smudge sticks and incense that will help you relax and celebrate those small rituals in your life. We think these make for a beautiful and mindful gift. 6. Candles by Munio Candles What is winter without candle light and subtle scents filling the house? We don’t know a single person who doesn’t love candles, and Munio Candles are not only sustainably crafted, but also absolutely beautiful, and they smell fantastic too. If you ask us, you can’t have too many candles, after all you need one for every mood, right? Munio also offers beautiful pre packed gift sets that come with candles and wax melts, as well as organic skincare if you want someone to fill extra spoiled! 7. Dog accessories by Cloud7 Is your giftee also a dog owner? We got you covered! We, and our dogs, absolutely love the stunning clothes and accessories from Berlin based brand Cloud7. Not only are they stylish, but more importantly, they’re high quality and durable. We particularly love the jackets and sweaters that are guaranteed to keep the doggies warm during these cold months.
Read more

Plant Circle Gift Guide pt. 2
Did part one of our gift guide leave you wanting more? Not to worry, we have plenty of other gift ideas and suggestions for those of you who, like us, tend to wait until the last minute to get your Christmas gifts sorted! Whether you’re buying gifts for a plant lover, a dog lover, a book enthusiast, or a modern mystic, the second part of our gift guide has something for you! But be warned, you might wanna bookmark a few of these businesses and get something for yourself too! 8. Subscription box by Plant Circle Our Subscription Box is the gift that keeps giving! Get your loved one a 3 month subscription, and keep surprising them even after the holiday season is over! This subscription not only gifts them with a surprise baby plant each month, but also with an access to a virtual workshop, and other exciting and educational resources. And since the plant comes in a baby size, you don’t have to worry about space limitations! Perfect for beginner and intermediate plant parents alike. 9. Organic Skincare by MÁDARA Here at Plant Circle we love MÁDARA cosmetics, especially their CC cream and SOS hydration mask. Founded in 2006 by four Latvian women, MÁDARA pioneered scientific research of natural Northern ingredients 15 years ago while the industry was still obsessed with synthetic raw materials, and organic skincare was barely a thing. Sustainability and ethical production is a the heart of MÁDARA which makes us love the brand even more! 10. Toys and pet food by Pets Deli If your gift receiver is a pet owner be sure to check out Pets Deli. From delicious snacks to durable toys, Pets Deli has everything you could need, and as an added bonus, they’re based in Berlin and actively support animal causes. Our founders cat Zoe’s favourite cat toy is from Pets Deli, and she is obsessed with it! And Plant Circle’s employee of the month, Pina, loves the dental snacks and leber pate from Pets Deli. 11. Supplements and vitamins by Sunday Natural Sunday Natural is another Berlin based company that specialises in supplements, and here at Plant Circle we’ve been using their probiotics and enjoying the Milky Oolong tea. We think their teas, supplements, and superfoods make excellent gifts for literally anyone in your life, but especially those are health conscious, or want to improve their health in the new year! 12. Handmade artisan jewelry by Gudbling Gudbling is a small Berlin based and female owned handmade jewelry business that we have loved and adored for years! Christine, who is the owner and designer, very often repurposes vintage jewelry and found objects into beautiful, one-of-a-kind pieces. Gudbling pieces are perfect for those with boho hearts, but minimalists will also be able to find there something to their liking! 13. Home accessories by Bujnie Bujnie is polish design brand specialising in creating high quality plant accessories, and you may have seen their plant hangers in our shop, or on our instagram! Their products are made by hand in Poland with attention to detail and always in the trendiest colors. We love how their objects will fit any interior and elevate the look of our plants without stealing the spotlight from them! We especially love their plant wall hangers which are perfect if you have run out of floor or window space for more plants. As we always say: “if you don’t have space just go vertical… theres always room for one more!” 14. Spiritual self care by Kismet Kismet is a Berlin based esoteric store for curious souls. Stocked with beautiful, ethically sourced crystals, tarot cards and incense, this shop will provide you with plenty of inspiration and tools for your next self care rituals. We specifically love their tarot card decks, which are incredibly beautiful to look at, and would make an amazing gift for someone who is curious and open to something new. 15. Plant Tribe book by Judith de Graaf and Igor Josifovic From the Urban Jungle Blogger creators Judith de Graaf and Igor Josifovic, following the global success of Urban Jungle, comes Plant Tribe. This book is the perfect gift not only for plant lovers, but also design fans, as it provides a sneak peek into the homes of people around the world! These homes are of course filled with plants and beautiful objects, and we really get to know the people behind them. It’s a stunning coffee table book that anyone would be happy to find under the tree!
Read more
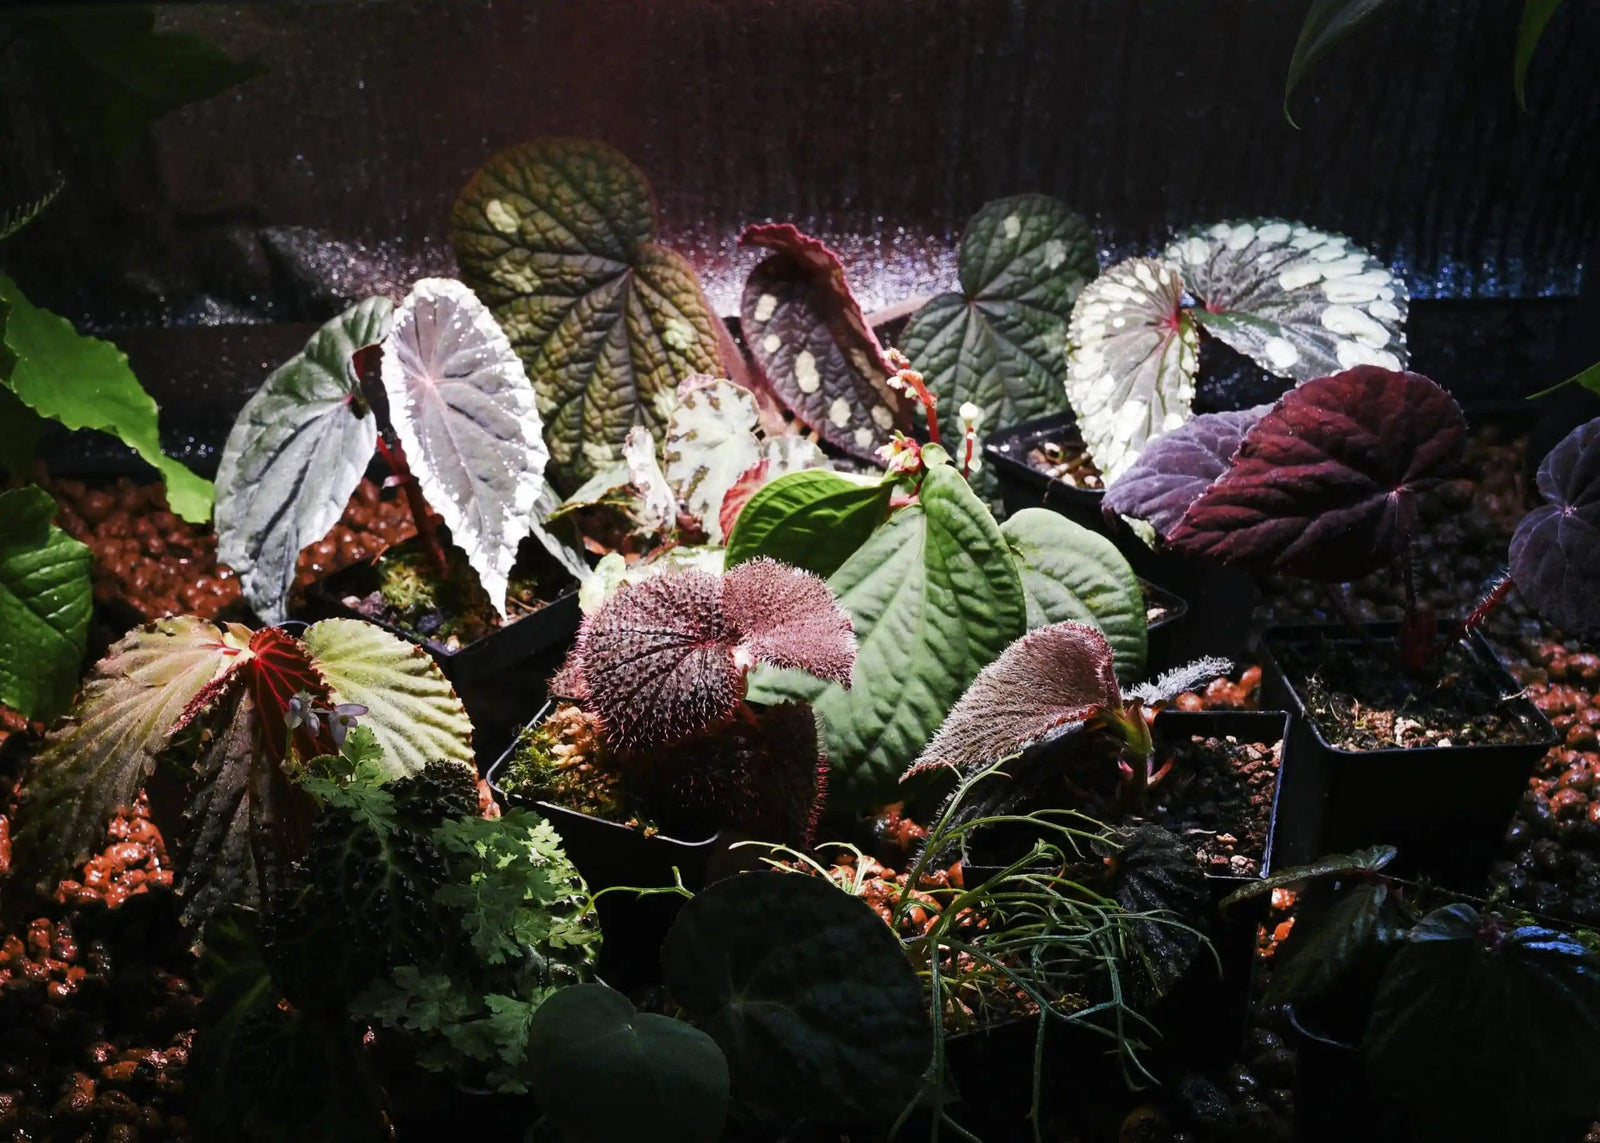
Plant Circle at Home: Pietro
For our second installment of the Plant Circle at Home series, we’re visiting Pietro Zambello, friend of Plant Circle and collector of rare plants, Begonias in particular.Ready to feel like maybe you don’t have that many plants after all? Then read on! Hi Pietro and welcome to Plant Circle at Home! Tell us when you started collecting plants and why? I started collecting Begonia maybe two years ago, after a long time keeping and breeding frogs. I enjoy a good hunt, and I’m a collector at heart in the most victorian way imaginable, and somehow jungle plants and Begonia in particular caught my attention. I can’t quite explain why it had to be Begonias, I have struggled the same way to explain how I ever ended up with frogs! I did have phases in between, though, with corals, English roses, and South American miniature orchids, but Begonias just tick all the right boxes in my head! There’s something about the leaf colors and shape, and logic about these plants that’s just perfect.I guess a massive plus was iridescence, which I have always been attracted to, so I decided to focus on South East Asian non-tuberous species. How many plants approximately are there in your collection?Gosh, if you count all the propagation trays and mother plants, possibly a couple thousands? What’s your favorite species and why?I think Begonia Rockii. As I mentioned, iridescence is something I have been attracted to ever since stumbling across a 19th century text on bioluminescence in European forests. After many ridiculous thoughts regarding glowing plants and luciferase, I settled for the next best thing; iridescence!Begonia Rockii came into my collection only recently, and it’s a large species with fleshy hand-sized leaves that are as close as it gets to a mirror. “I don’t believe in difficult plants, only in wrong environments”-Pietro Zambello What’s the easiest plant in your collection?My garden Begonia! I’m actually obsessed with Begonia Grandis and hybrids, with my all time favorite being Begonia Torsa.Massive leaves, slightly iridescent and indestructible. Spends winter as a tuber in my fridge. You can’t ask for more! What’s your most difficult plant?I don’t believe in difficult plants, only in wrong environments. If a plant is being is difficult, it’s because it’s a non established plant, like a recent import. My imported plants usually needs weeks to pick up as Begonias ship awfully, and you need to bring back the homeostatic level over a long period of time, crowned by leaf losses and stem rot, repotting and moving through boxes with decrescent humidity levels. In most cases you end up with only a 2 square cm leaf wedge rooting! What’s the best piece of advice you ever got in regards to growing plants that you wish you had known sooner? Don’t bother them! Don’t overthink, over measure, try to figure out soils, and come up with new remedies. My grandma was growing incredible plants basically in the dark with zero knowledge, and they’d make some instagram scientist from today cringe. I’m learning this myself; that less is more. That maybe if instead of changing the growth medium every four days, I could just let the plant figure it out, and we’d both be happier. How long do you spend tending to your plants on a daily/weekly basis?I think about plants, like, all the time! It’s my safe space.I took my whole collection to work, so I can take a lot of little breaks during the day. Usually I’ll get to the plant room at the end of my day for a few hours, where I mostly repot or propagate. What’s the most valuable plant in your collection for you? (Not based on the market value)My blue Sonerilas. It was a gift I received from a friend after a night in Sumatra. I was there with my brother, and we had to take three flights from Borneo to reach central Sumatra, and ended up staying there only one night at my friends farm in the mountains, which we reached after dark, and after hours of travel by car. There I was shown these ridiculous plants, and many more, that are just blue and shine at the slightest shimmer. It was very overwhelming and surreal. None of these plants ever managed to leave Sumatra, as they ship terribly. I took home a 2 cm sprout and it’s a crazy feeling to have a plant that, besides not being described, you can’t even find and online record of! It was a process to figure it out, and I’m so happy I have many of them. I think I’m low key trying to recreate that night over and over. I was very happy. What do you see in plants that you think other people don’t and wish they did?Poetry What do plants bring to your life?Mostly a sense of control. I think about my plants every night before I go to sleep, and rearrange them in my head. I guess that’s what they bring to anybody? You feel in charge, without the pressure of feelings, as a plant is not in pain, and even if it’s is undernourished, it won’t feel hunger like for example a dog would. And then of course the positive feedback you get from seeing them grow, and the tiny moment where you think you cracked the code of life because you see a new leaf! And the panic three days later when it starts melting!
Read more
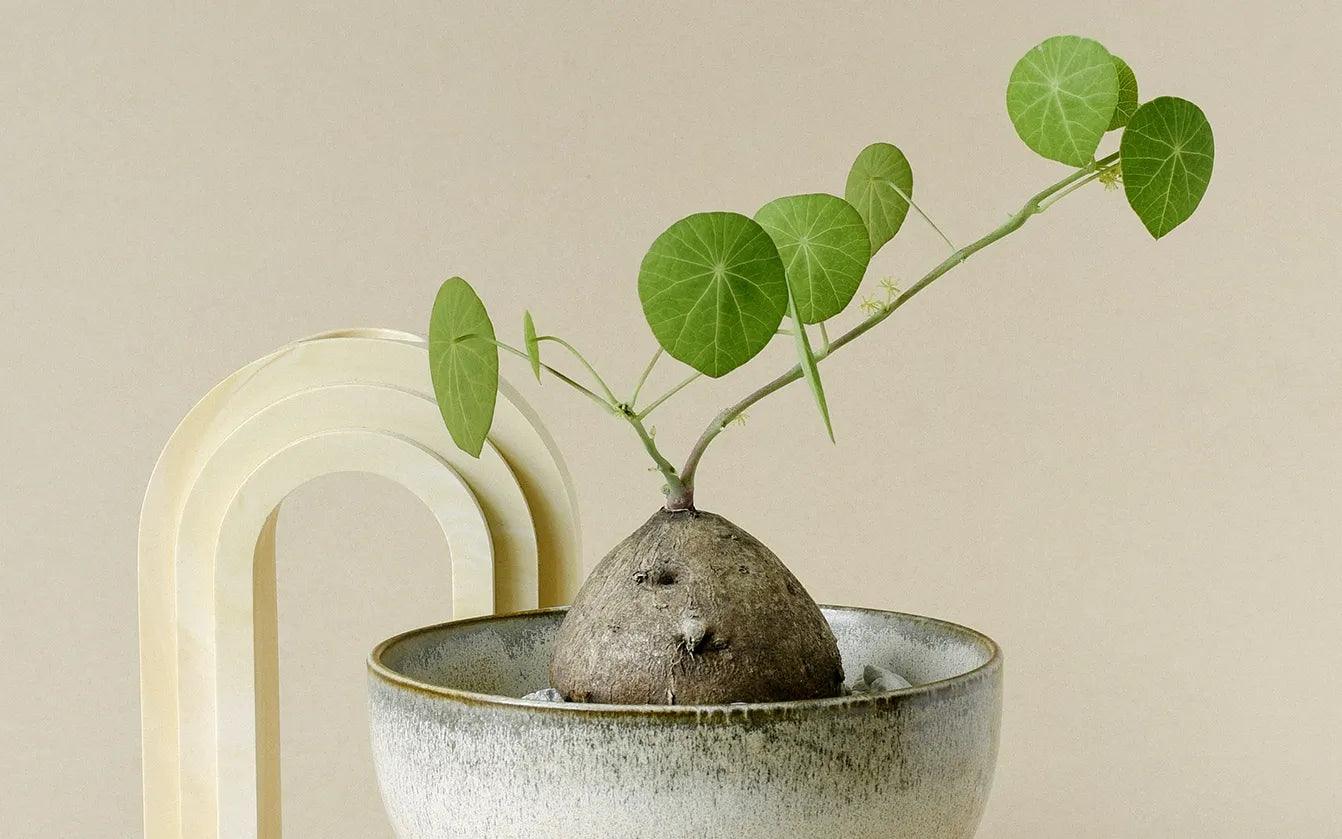
Plant Circle investigates: Stephania erecta
Exposed: Every single Stephania erecta on the European market is a poached plant! Stephania erecta has been trending in the houseplant community for the past one and a half years. These potato-like, tuberous plants with delicate round leaves have a special aesthetic that appeals to many plant enthusiasts, not only because they make for great pictures on social media, but also because their distinctive look sets them apart from a lot of other houseplants on the market. The hype around Stephania led wholesalers to source this peculiar plant for the European market and culminated in the sale of probably thousands of them in the last year. However, both experts and sellers now agree that it is most likely all of them were collected from the wild. “They are probably all poached,” says Rogier van Vugt, Head of Greenhouse at the Botanical Gardens in Leiden, Netherlands According to him, the wholesalers were “seemingly misled by the Thai sellers who told them all these plants were cultivated. However, one quick glance at the plants makes it clear they are not.” Plant poaching is the removal of plants from their natural habitat. In the case of Stephania, it is not illegal for the local sellers in Thailand to collect the caudex plants by detaching them from the limestones or digging them out of the forest floor, since they are not endangered. However, the plant community generally deems it unethical to buy or sell plants that have been ripped out of nature, as opposed to having been cultivated professionally at a nursery, mainly due to the detrimental long-term effects poaching can have on the population of certain species. A lot of the Stephania on the European market come from Dutch wholesaler Ansu. “Last year, we and our Thai partner Suphachadiwong saw that there was demand for rare plants on the market,” says Steef van Adrichem, Commercial Director at Ansu. “We found the caudex family interesting enough to give it a try.” With this move, the company decided not only to bring Stephania erecta to market, but also rarer caudex plants such as Stephania kaweesakii or Impatiens phengklaii, which were sold on to plant shops and consequently to house plant enthusiasts around Europe. “Stephania erecta is kind of a weed in some places,” van Adrichem says, “and it does not harm the environment when you take some out”.Still, van Adrichem acknowledges that the poaching of other caudex plants, which his company imported to Europe, might have had more detrimental effects. “We do not buy Impatiens phengklaii anymore,” he continues. “We also stopped importing Stephania kaweesakii after finding out how they take them from nature.”Ansu now strives to grow their own seedlings instead, in order to ethically cultivate these two rarer species. For this reason, Ansu is collaborating with Rogier van Vugt, who has been conducting research on the cultivation of Stephania and Impatiens.“I’m working on investigating how some of these caudex plants can be propagated by seed,” van Vugt says. “I urged Steef [van Adrichem of Ansu] to ask people in Thailand to do the same.” His experiments have yielded the first results in the form of Stephania erecta and kaweesakii seedlings. “Stephania seeds germinate very easily. It will be interesting to see how fast these will develop a desired caudex size. But I’m sure this will take years.”And therein lies the problem, as Stephania grow very slowly in their natural habitat, which is one of the challenges growers face when trying to cultivate them for profit. “Many Stephania like the popular S. erecta are lithophytes meaning they grow on rocks or, more specifically, limestone in this case,” says Stefan Burger, an Australian naturalist, habitat guide, and expert on cacti and succulents. “It takes them decades to mature and reach just a few inches in diameter. Under more favourable circumstances, like subtropical climates and nutritious substrates, they can grow quite fast and the caudex may reach a few inches in diameter in only a couple of years,” Burger explains. But the ever-changing houseplant market and drive for new plants often does not allow for such a large timeframe. New, trendy plants need to be saleable as quickly as possible – ideally in a good size and at an accessible price. “Even though they may grow fast under good circumstances, habitat poaching is the quicker and cheaper alternative for those living near to the native habitats,” says Burger. While there are no studies on the consequences of Stephania’s rise to popularity and mass poaching so far, it is clear that the harvest of thousands of bulbs in recent years has diminished their population quite a bit. According to Burger, there is no information on “these specific habitats, but we know that it is obviously having a negative effect“. While all Stephania were traditionally harvested from habitat, according to Burger, some growers have now begun cultivating them professionally. However, this remains a rare practice. In their home country of Thailand, Stephania suberosa in particular are commonly sold in Asian markets for home decoration and medicinal purposes. A few species of Stephania are toxic, while others are part of the Asian cuisine. The leaves of Stephania japonica, for instance, are commonly used to produce edible green grass jelly in Indonesia. “It all comes down to whether the Stephania are ethically grown or not,” Burger says. “Plants should only be bought from a CITES-approved nursery for 100% peace of mind.” The Convention on International Trade in Endangered Species of Wild Fauna and Flora (CITES) regulates the global trade in plants. It categorises endangered plants into three categories, depending on the level of threat they are under. It lists more than 30,000 taxa of plants compared to about 5,000 taxa of animals. Stephanias are not on the CITES list as of now.“Any plants sold via social media direct messages should be treated with suspicion,” Burger says. He strives to educate plant enthusiasts about illegal plant poaching and importing via his Instagram @cactusexplorer_.He also runs cactus exploration tours in South America, where cactus and succulent poaching is of particular concern. Rogier van Vugt suggests sellers should be more mindful when selling slow-growing caudex plants, such as Stephania. “The plant market should at least stop advertising these plants as a funny, disposable, cheap plant,“ he says.“This way people will have to think a bit more before they buy one. This will limit the demand in numbers, yet can still supply the people in Thailand with an income. Logically, this can only be done with common species.” Thanks to everyone who generously gave us their time and expertise, so we could put together this article, and to Plant Circle’s Sarah for doing the investigating.If you are one of the people who have been wondering why we haven’t restocked Stephania erecta in ages, now you know that as soon as the reality of where these plants come from came to our attention we stopped selling them in our shop immediately. It is our hope that other plant sellers who haven’t already will consider following suit.If an ethically grown Stephania erecta enters the market we look forward to offering it in our shop again. But until then, let’s be mindful of where our house plants come from and remember that no plant collection or home aesthetic is worth damaging a plant’s natural habitat.
Read more
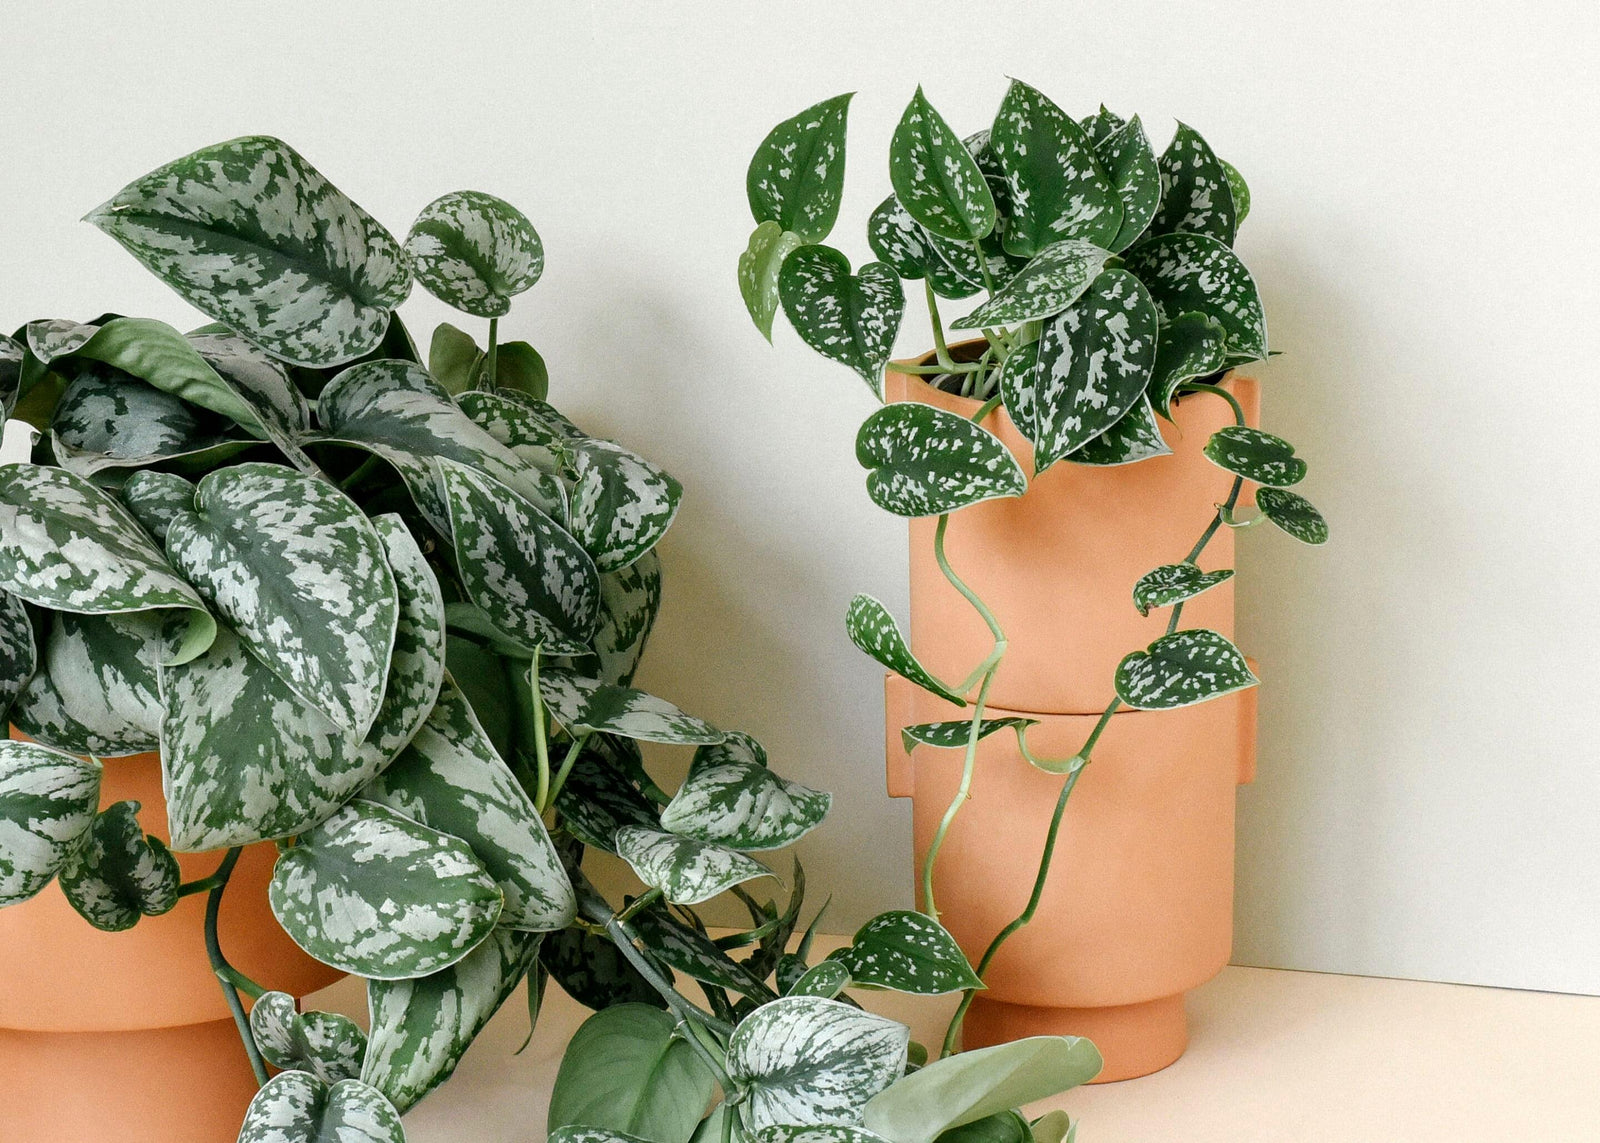
Plant Circle’s Top 5 houseplants for low light
These green friends will grow even in the darker corners of your home! The spaces in a home with ample light for plants are always too few and far between for an avid indoor gardener. And to make matters worse, it’s a problem that only grows along with your collection, with every new, needy houseplant fighting over that coveted space in front of the window. But luckily, there are some plants that don’t aspire to take up space in those prime locations of your home and that will, in fact, appreciate being placed in lower light spots! These low light tolerating plants are the troopers every houseplant lover needs in their indoor jungle, because they green up the darker corners of your home with ease, and demand very little care and attention in return.Here are our top 5 low light houseplants for your home! 1. Scindapsus Scindapsus are the unsung heroes in the world of low light tolerant houseplants! They have only recently come into focus, and are now available in wide varieties on the plant market. The most popular Scindapsus feature lush, matte green foliage with beautiful, silvery markings. But these pretty, trailing plants from South-East Asia are not only trendy, but also highly versatile when it comes to light and positioning. Scindapsus are a sure bet if you are looking for a plant to brighten up a darker spot. Explores our range of Scindapsus here! 2. Sansevieria There’s a reason why you often find Sansevieria inside shops, malls or offices; these indoor plants are incredibly undemanding and can cope with just about any low light situation you throw at them! Also commonly known as snake plants or mother in law’s tongue, these plants, that were recently (and controversially) reclassified as part of the Dracaenaceae family, hail from Africa and southern Asia, and grow in the brightest light nature has to offer, but amazingly they can easily be kept in the polar opposite situation in your home. As long as you make sure not to overwater them, since they will need less water in the dark, Sansevieria will keep your darker corners green all year long! They also come in a wide variety of shapes and colors, so you’re sure to find one that is aesthetically pleasing to you. Check out our wide range of Sansevieria, Dracaena, snake plants, or whatever you wanna call them, here! 3. Zamioculcas zamiifolia Zamioculcas zamiifolia, or ZZ plants as they’re commonly known as, are probably the kings of low light houseplants! A very undemanding staple plant that will tolerate even the darkest corner of your home, it’s also commonly referred to as ‘lucky feather’ for its highly decorative, feather like leaves. It’s a slow grower, so it will not outgrow its location quickly, however, if you have some space to fill, we can recommend our Zamioculcas Zamiifolia XL! Zamioculcas zamiifolia has been around for centuries, originating in drought-prone parts of eastern Africa, but in the 90s, Dutch nurseries saw the plants potential and started distributing it around the world. Since then, ZZ plants have entered hearts, homes, and of course offices worldwide. 4. Epipremnum Aureum / Pothos Epipremnum Aureum, also commonly known as Pothos, can be found in the homes of even the most black-thumbed people you have ever met, and for good reason! These houseplants, which can be grown both climbing or trailing depending on your aesthetics, are incredibly versatile and will survive even in the most unfriendly growing conditions… and that of course includes low light! That, and the fact that they’re easily propagated, has made them some of the most popular houseplants out there, and with their lush foliage and prolific growth, they’ll easily turn the darker corners of your home into a lush jungle. Is the ‘Golden Pothos’ too common for you? Don’t worry, these easy care plants are on the market in a variety of colors these days! We recommend checking out our green-on-green speckled Epipremnum Aureum ‘Global Green’, the white variegated string of pearls, or the striking ‘Neon Pothos’ for lovers of bold colours! 5. Aglaonema We think it’s fair to say that, if the late Queen Elizabeth had been a houseplant, she would’ve been an Aglaonema. Why? These houseplants are incredibly reliable and dutiful, will make it through the most dire situations and show subtle, yet strong character! Also known as Chinese Evergreens, the whiter Aglaonema varieties are a surefire bet for the darker corners of your home. They also stay relatively compact and are slow growers, making them a great choice if you have limited space. Even in low light, these houseplants will reward you with a lush and bushy appearance. Have a look at our range of Aglaonemas here!
Read more
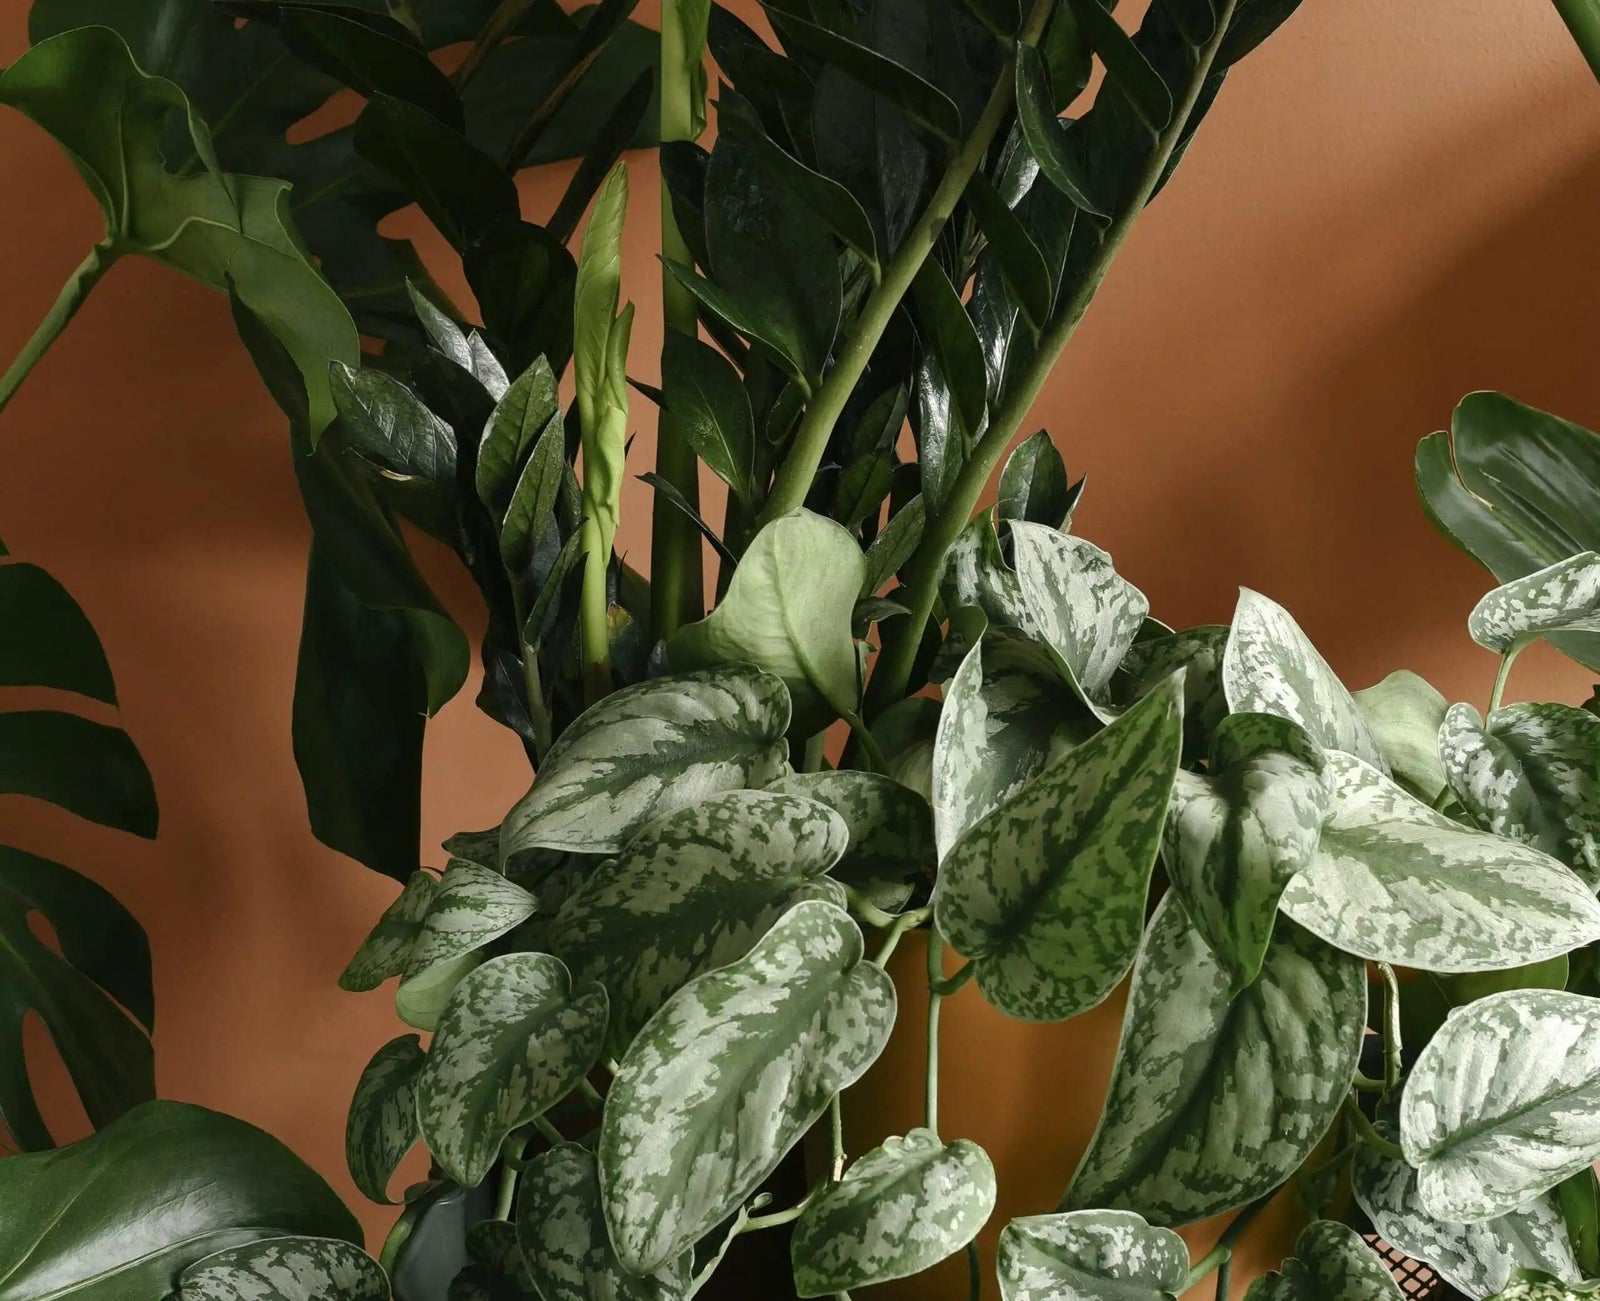
Plant Circle’s top 5 plants for your workspace
In our humble opinion, any plant is better than no plants in your workspace! But even we must admit that there are some that are just more suitable for workspaces than others. In this post we explore which plant varieties would make the perfect additions to your (home) office, and why! ‘Why do I even need plants in the office?’, you may ask. Well, according to scientists, not only do they purify the air you breathe and improve the indoor air quality, but they also help you focus and increase your productivity.Additionally, looking at the color green makes you feel calmer and uplifts your mood!All pretty good reasons to have plants around while you’re working, if you ask us, and if you’re feeling convinced too, let’s take a look at the conditions that a plant needs to meet to be considered a great choice for the workspace. We think that the ideal candidate should be:• super easy to take care of• known for its air purifying qualities• visually pleasing, as a bonus! And it should however NOT:• require too frequent watering• require higher than average humidity Lucky for all of us, there are plenty of plants that meet all of those requirements, and we’ve gone ahead and made it super easy for you by compiling our choice for the top five plants for your workspace, that tick all the before mentioned boxes! 1. Zamioculcas Zamifoliia ‘Raven’A very interesting cousin of the more well known green variety, popularly known as the ZZ plant, will lure you in with its stunning, almost black foliage. Besides looking super interesting, this plant is known for being easy care… and we’re talking super easy!The only way to kill a ZZ plant is by watering it frequently, so just don’t do that and you should be fine! We suggest to water it only every 4-6 weeks and apart from maybe a windowless bathroom, you can pretty much place this plant anywhere you want, as it doesn’t have high expectations when it comes to light either.Just an easy care champion all around, but one that’s still sure to attract plenty of compliments from friends and coworkers! 2. Monstera DeliciosaUnbeatable when it comes to creating that #urbanjungle vibe we all love, the iconic foliage and avid growth of the Monstera are just some of the reasons why people continue to be obsessed with this classic.A Monstera Deliciosa will liven up any corner of your office, just don’t let it sit in complete darkness, or the sharp afternoon sun, as that can scorch the leaves.Just like the ZZ, it’s easy to take care for, but this one will appreciate weekly or bi-weekly watering depending on where it’s placed.In some countries Monsteras grow like weeds, which seems strange considering its status as a houseplant, but you literally can’t get rid of them if you plant them in your garden in warmer climates, so that should tell you something about how easy this plant actually is!Read more about Monstera care in this blog post. 3. Scindapsus PictusAlso known as silver pothos, Scindapsus Pictus is a perfect addition to your workspace and creates and instant lush and jungley vibe. This plant will do great on a shelf or in a plant hanger as it loves to trail. Not only is it super easy to care for, but it’s also known for its ability to remove toxins from indoor climates.We love the silver varieties, as they’re so unpretentiously beautiful and also grow like crazy! These plants are not fussy when it comes to light and will do well in medium to bright indirect light. Direct sun is the natural enemy of your Scindapsus, and will burn its leaves. Also don’t overdo it with the water, depending on the position simply water it every 1-2 weeks.Read more about Scindapsus care in this blog post. 4. Hoya Carnosa Krimson QueenHave a sunny office and don’t know what to grow there? Hoyas are your new best friends! We particularly love the Hoya Compacta Baby variety, as it gives you so much variation in color on the leaves! The colors can range from white to cream to hot pink, and an added bonus? Hoyas are succulents, and don’t like to drink often outside growing season AND they produce flowers that smell insanely good!Place your Hoya on a shelf, or in a hanging basket, and water it weekly in summer, and every 2-3 weeks in winter, provided its growing in a sunny window.Please keep in mind that Hoyas shouldn’t be repotted during flowering season, and that they like to grow pot bound in general. So basically just leave it alone. Easy!Read more about Hoya care in this blog post. 5. Sansevieria MetallicaOk, we know that snake plants may not be known for their stunning good looks, but the gorgeous Metallica variety definitely proves this assumption wrong!Not only is it proven by NASA that all Sansevierias can help if you suffer from migraines, but also they’re also famous for being super easy to care for. Just like Hoya, Sansevierias are succulents, which means they are not particularly big on drinking. We’re talking not even weekly in summer, once a month will do the trick. Besides that, they like to grow pot bound so you won’t need to repot it that often either.The perfect plant if you’re forgetful, or don’t stop by the office as often as you used to!
Read more
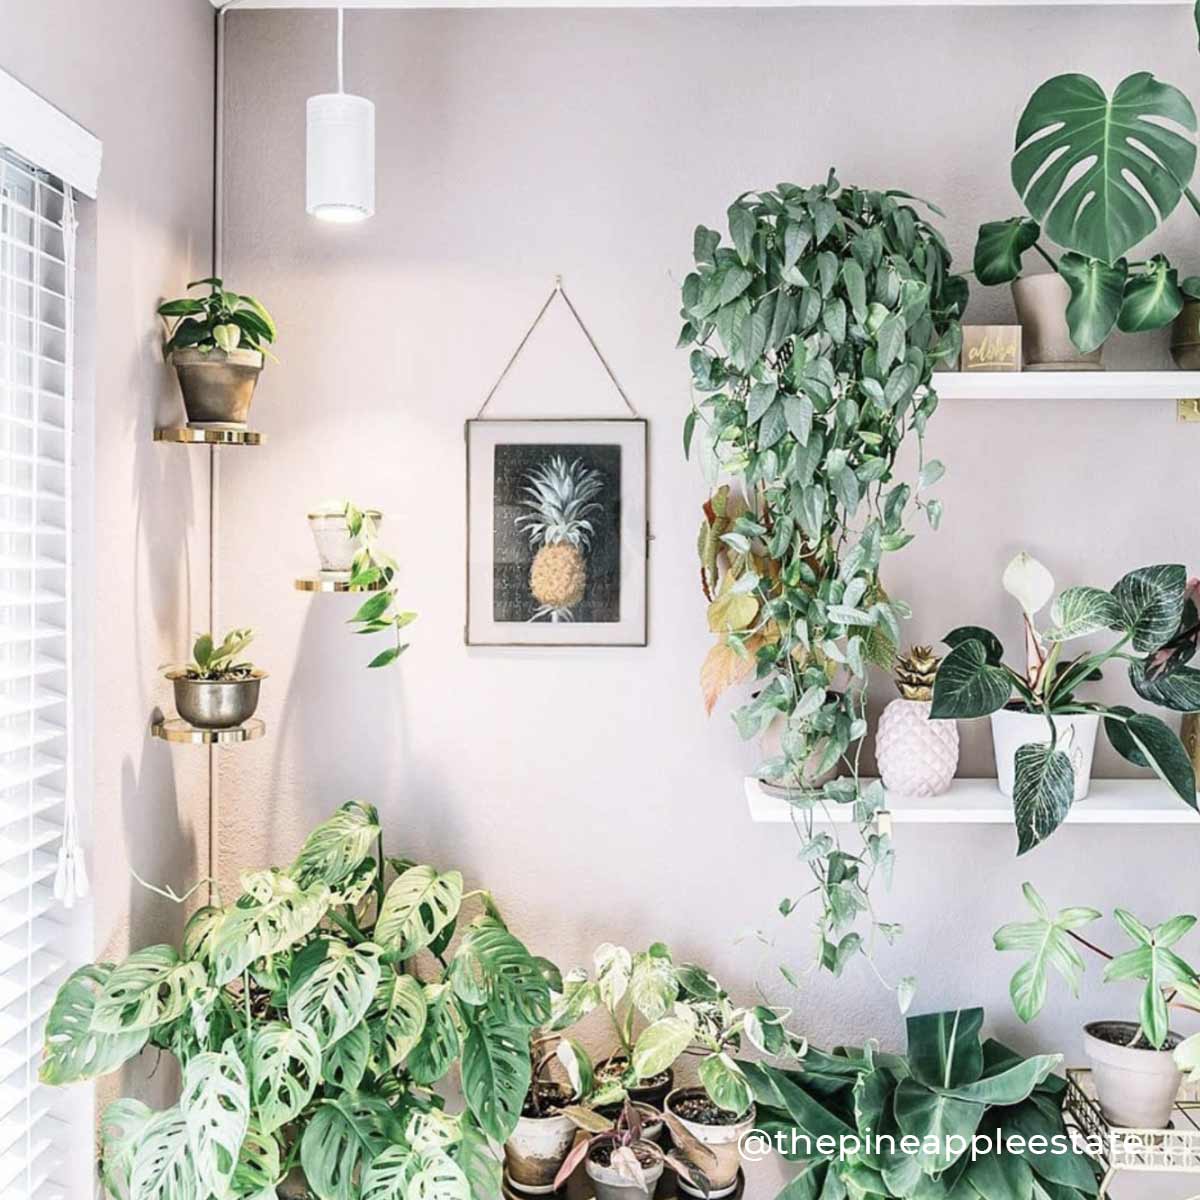
Plant Lights: The Glorious, The Necessary, and the Downright Ugly
Upgrade your plant care with a stylish plant light that blends seamlessly into your home! Ditch the harsh, industrial grow lights and opt for elegant, effective solutions like the Aspect™ LED Growlight or Grove™ LED Bar Light—perfect for any space. 🌿✨
Read more

Plant Profile: Begonia
With a dazzling number of over 1800 species, and at least as many hybrids, Begonias are such a diverse plant family that it’s nearly impossible to not have at least one species you like! In this post we get really into all things Begonia, particularly how to care for them! Everyone probably knows the tuberous garden Begonias that bloom with huge flowers in summer, and the rich blooming Begonia Semperflorens types that adds pops of color to gardens and balconies long into autumn.But most Begonia species and hybrids aren’t grown or known for their impressive flowers, but rather the their leaves, which are the main points of interest when it comes to this plant! The wide variety of different, leaf colors, forms, patterns, and sizes, from tiny plants growing just 5 to 10 cm tall, to giants that can reach a few meters in height, prove that there really is a Begonia for everyone’s taste. The Begonia family is so widely spread all over the world that they have adapted to all kinds of different climates. But before you buy a rare Begonia, it is still important to do a bit of research about the conditions of their natural habitat. Do you have to give the plant wet soil, high humidity conditions and shade, for example in a terrarium, or is it better to keep your particular plant on the dry side with a lot of light? Although they have different needs, all Begonias are often quite good at adapting to new living conditions. The existing leaves can get damaged by a change in environment, but new developing leaves often won’t be affected at all. So don’t worry too much and feel free to experiment!In general most Begonias like their soil on the dry side between two waterings and don’t require a lot of fertilizer. Most of them dislike strong sunlight in the afternoon, and prefer well draining soil on the slightly acidic side.If you see your Begonia declining during winter, it’s usually due to a lack of light, and/or too much water. If you aren’t able to give your plant the extra light it requires in winter, try to find a spot where the average temperature is lower, for example in the bedroom, and dial back on watering significantly. Some Begonias can even overwinter at temperatures just above freezing point, for example Begonia Luxurians (Palm leaf begonia), as long as they are kept quite dry. Main pests and diseases are that can affect your Begonias are aphids and powdery mildew. The mildew often can be avoided by relatively harmless preventive treatments with products containing sulphur, and an aphid infestation can be taken care of with regular neem oil treatments. 7 quick Begonia tips from collector of rare Begonias Pietro Zambello: 1. Perlite is your best friend when working with South East Asian species, and try adding a bit of Akadama and soft limestone to your mix. Cane Begonias can take a heavier humus soil, mixed with Perlite, and you want it quite rich to sustain the growth. The Rhizomatous Begonias, on the other hand, like a more drained and mineral rich environment.2. Let them dry between watering, and don’t water too much in general, with the possible exception of certain Chinese species, such as Emeiensis, that actually like to sit in a bit of water.3. Work clean, using clean blades, osmotic water, and disinfecting your pots and boxes. 4. Let them be, and don’t throw them away until they’re completely gone. You’d be surprised at how little a Begonia needs to pop back! Use sphagnum as a last resort.5. Leaf color will tell you when it’s time to feed, and leaf melting is your Begonia practically screaming that it’s overdue for a feeding!6. Offer them a lot of light, but no direct sun.7. Tuberous Begonias are great for low light, North facing balconies. Begonia Grandis are absolutely incredible, and besides having the advantage of being very hardy, they often develop strong iridescence as well. With Begonias becoming more and more popular these days, we expect even more new species being introduced in the coming years, so don’t forget to check our webshop on a regular basis! A special thanks to Begonia expert and rare plant grower Wilko Hofstede for sharing his Begonia knowledge for this post!
Read more

Plant care: Hard water
What hard water really is, how you identify it, and how it affects your plants! Depending on where in the world you are, you’ll have a different quality of tap water, but for the purpose of this blog post, we will be talking about the quality of tap water here in Berlin! And as you may know, the tap water in Berlin has quite a reputation, and unfortunately it’s well deserved! For those of you who don’t know, Berlin’s tap water is notoriously hard… but what does that even mean? Let’s take a closer looks at what the term ‘hard water’ really means in practice for both you and your plants! What is hard water? By definition, this type of water contains an appreciable quantity of dissolved minerals like calcium and magnesium, and the easiest way to find out whether your tap water is too hard for your plants, is by observing your plants, specifically the top layer of the soil. Calcium residue is often clearly visible on the top of the potting mix in your potted plants in form of white residue. Another easy, yet slightly more scientific, way of determining the hardness of your water is to measure the pH value of the water using measuring strips. Anything above 8.5 pH value is considered hard. So let’s say that you’ve measured the pH of your water, and you’ve found out that it is indeed above 8.5… how does that actually affect you and your plants? Well, first of all, hard water does not possess any health risks to humans. At worst, you might notice a slightly bitter taste, and it can definitely dry out your skin and hair, as Berliners know well! The bitter taste can impact the flavour of your tea or coffee, and we’re sure we don’t have to mention what the effects of dry skin are! Luckily, both can be remedied quite easily by installing a water filter on your shower and/or on your sink.Here you can easily see the difference between distilled water and hard, Berlin water on a pH strip. Number one is distilled water from a dehumidifier, number two is from a Brita filter, and the third is your standard Berlin tap water! Now, it’s not that we don’t care about the taste of your tea of the lustrousness of your locks, but let’s get back to what having this type of water means to your plants! In general, there isn’t a single plant that actually likes hard water, however some tolerate it better than others. But for the sake of your plants, let’s choose to focus on the plants that don’t tolerate it well, and how you can actually tell just by looking at them! As mentioned earlier in the post, the first thing you’ll see is a calcium carbonate and salt build up on the top layer of your potting mix, which suggests that your tap water is too hard. This alone is problematic, as all of that salt and calcium will start building up around the roots too, and will eventually start to repel water. Doesn’t sound good, does it? So how do you fix that? You start by removing the top layer of the soil, or completely changing the potting mix, and switching to filtered, distilled, osmosis, or rainwater. You can also try to flush it out by giving your plant a shower. This of course works best if your shower has a filter installed on it already! Another common sign that your water is too hard on your plants are brown, crispy, burnt edges of their leaves. This happens very often to plants from the family Marantaceae, like Maranta and Calathea, with the latter being the more sensitive to hard water. Unfortunately a popular portable water filter, like Brita, won’t be enough in this case… these absolute divas will only truly thrive if you water them with distilled or osmosis water! Another group of plants that will suffer terribly when being watered with water that’s too are carnivorous plants. These guys are simply unable to produce the juice they use to trap insects when the water is too hard, which results in them being unable to get their nutrients to survive. Under no circumstances do you want to water them with anything other than distilled water! Besides the aforementioned species, the health of any plant can suffer the consequences of being watered with hard water. If you spot burnt edges or calcium buildup, you’ll know it’s either the result of the water in your home being too hard, or a lack of sufficient humidity in the room, and you can take immediate steps to remedy the situation. With this knowledge, growing happy Calatheas or carnivorous plants shouldn’t be an issue anymore!
Read more

Plant care: Non deadly issues
Have you ever questioned your inner morals as a human after realising that you would rather spend hours sitting with your houseplants, than visiting the newborn child that your cousin has just brought into the world? Oliver has, but thankfully his questionable morals are your gain, as they led to this post about non deadly issues, aka things that actually won’t kill your plants! Sometimes, to us house plant addicts, the connection with our plants can be similar to the connection with a child. You love them with all your heart, to a point of absurdity, and to a point of over-protectivity. We all need to learn how to sometimes take a step back and, ultimately, realise that what might be a problem for us as humans, is perhaps not actually a problem for our plant friends. In this blog post we will cover some common non deadly issues that most plant parents will encounter during their parenthood, and hopefully reading this will help you to calm down a little in the future, if and when these discoveries take place. The most important thing to remember when coming across new, unexpected life forms in your indoor jungle is this: you have brought nature into an unnatural environment, and that nature will actually benefit from an ecosystem of some sort. Here are some common insects that you might find repulsive, but your plants will welcome with open stems! Soil mites. These tiny white mites can be seen crawling through soil just living their best life. They love your plants just as much as you do, but love composting material even more!These little critters spend their days munching on this decaying plant material, while leaving your plant, and its root system, happy and healthy. Sometimes these mites are confused with spider mites, which are dangerous to the plants health, or fungus gnats, but take some time to observe them, and you will quickly be able to see that these soil mites are exclusively sub-terrestrial. Springtails. Another bug commonly confused with the infamous fungus gnat, is the Springtail. These little white bugs live in the soil, feasting on decaying plant matter, and while they may look threatening, these guys are not there to eat your plant, and while they can occasionally inhibit the hardiness of your plant, they are very rarely the actual cause of your plants problems. Most notably, Springtails can jump several inches into the air when disturbed, causing disgust and disarray from the plant parent, but be grateful for this ability, as it can help you distinguish them from the real pest! Silverfish. Possibly the most difficult insect to decide if you want to allow to continue to co-inhabit your indoor jungle is the Silverfish. While they may look like something from a poorly animated 80s horror film, we should not judge a bug by its apparent creepiness. These truly buggy looking creatures like to feed on dead insects, such as springtails, soil mites, and even fungus gnats and other detrimental pests, as well as fungi, which is almost always found within soil, even if you cannot see it. While silverfish can absolutely cause damage to your books and other material possessions, but as they will not harm you or your plant babies, they still fall under the Non deadly issues category. So what do you say? In my opinion, out of sight, out of mind! Earwig. Another common house guest, that looks like it could kill you with a bite of its scorpion like pincers, is the deceptively harmless Earwig. Even more beneficial than Silverfish, Earwigs will feed on live, plant-feeding insects, acting as a biological control supporting your plant. While they can become pests if their population are allowed to get out of control, this rarely occurs and their population can be kept at a reasonable and manageable level by following a few simple and overall beneficial rules. Managing population levels of houseplant bugs. The thing that all of these animals have in common is their ideal environment. Dark, cool, humid. The exact environment that you will find in the bottom part of the soil of a plant, or under a ceramic pot, especially the highly popular terracotta pots. Using specific potting mixes for different types of plants will manage the humid environment that these bugs love, ensuring that your plant love its soil, and that the bugs don’t get too comfortable in your jungle. Additionally, watering correctly (not over watering, and ensuring that excess water is always removed after watering) will again help your plant and its living pot-mates. Whilst potting substrate and watering are essential for managing the living populations in your plants, it is also highly beneficial for managing some other non deadly, purely cosmetic issues that are found in plants. Oedema. Caused by excess uptake of water by the plants roots, oedema is characterised by a corky, blustery like appearance on the leaf of plants. This can be the result of poor potting mix, excessive watering or prolonged exposure to water, as well as watering with warm water, or during periods of the day where it is too hot. All of these issues are easily solved through your actions! While you might have a few deformed leaves, the plant is still happy and just being a nice friend with a good level of resilience. Stunted growth. Don’t take it personally, but this is a problem with you! Not the plant. Stunted growth and deformed leaves are again an issue with the sub-terrain. Maybe you haven’t ever changed the potting mix, which has now turned rock solid after months of watering and dying out? Or perhaps the plants have grown so well that it’s now time for a bigger pot with more space for the roots? Whatever you might have done, or neglected to do, it’s time to do something about it! Increase the pot size, provide a more penetrable potting medium, and give your baby an upgrade. The roots will always dictate your plants overall health!
Read more

Plant care: Potting mix
Many longtime plant parents started out thinking that dirt is dirt, and plants will grow in anything. No? Was that just us? Well, luckily thanks to information being more widely available, we now know that plants in fact need high quality potting mixes to really thrive, and to make understanding the ingredients and compositions easier for you, we've gathered them here! Having a good quality potting mix tailored to the needs of the plant is every bit as important as providing your plant with water or sufficient light. In fact, most common plant related issues, like overwatering and root rot, come from using an average quality potting mix... or worse.Let's start by getting into the two most frequently used terms when it comes to this topic: 'potting soil' and 'potting mix'. Though these terms are used interchangeably, there is a difference. Potting soil may contain soil, while potting mix is strictly a soilless medium. Technically, potting soil is nothing but dirt that no longer has the adequate elements necessary to support the growth of potted plants, or indoor plants. Potting mix, however, is sterile, which makes it safer for plants because it's guaranteed to not contain pathogens such as fungus or other diseases. Why is having a good quality potting mix so important? The main reason is that potting mixes are designed to not get too compacted, something that can suffocate the roots of a plant, or impede the flow of water and nutrients, and in the worst cases, cause root rot. A high quality potting mix will be lightweight and fluffy, with the ability to hold moisture. For the roots to grow deeply, good aeration is necessary and recommended. Aeration requires puncturing the soil with tiny holes in order for the water, air, and nutrients to penetrate the roots. To achieve that effect without the physical labour, you simply add bark to the potting mix, which creates little air pockets! Now that we've established the importance of a good potting mix, and what it does for the health of your plant, let's get into the the most common components that can be added to your potting mix! Perlite. Perlite is the name of a naturally occurring mineral. In nature, it exists as a type of volcanic glass, created when the volcanic obsidian glass gets saturated with water over a long period of time. And since fertile, volcanic areas have been settled due to fertile soils since biblical times, humans have been aware of perlite at least since Third Century BC. Other uses of perlite include masonry construction, cement, gypsum plasters, and loose-fill insulation. Horticultural perlite is made by exposing perlite to heat, which causes the trace water contained in the perlite to expand, 'popping' the perlite like popcorn and expanding it to 13 times its former size, resulting in an incredibly lightweight material! Since it is a naturally occurring, mined mineral, perlite is a nonrenewable resource. Perlite is an excellent potting mix additive, and is also an effective rooting medium. Please note: Perlite dust can aggravate existing respiratory conditions and cause eye irritation. Eye and mouth protection are recommended to prevent the dust from being ingested. Want to go deeper? Read an exhaustive article on perlite here! Vermiculite. Vermiculite is the name of a group of hydrated laminar minerals (aluminum-iron magnesium silicates) which look like mica. Horticultural vermiculite is processed with massive heat that expands it into accordion shaped pellets composed of multiple layers of thin plates. It will not rot, deteriorate, or mold, and is enduring, odorless, non-toxic, and sterile. It is however not a renewable source. Just as perlite, vermiculite is an excellent potting mix additive, and can also be used as rooting medium! This article further explores the topic of vermiculite! Activated charcoal. Activated charcoal prolongs the life of soil media by balancing pH levels and sweetening the soil of potted plants and terrariums. It also eliminates odour, absorbs salt residue, and breaks down the build-up of bacteria. We love to add activated charcoal to any potting mix, and we also add it to the water when rooting a plant! Coconut Coir. Firstly, what exactly is coconut coir? Actually everything in between the shell and the outer coating of the coconut seed is considered coco coir! While most people mainly think of the edible parts when they think of this fruit, coconuts actually have many applications in horticulture! Coco coir is known to be one of the most moisture retaining growing medias, and can absorb up to 10 times its weight in water. On the market coco coir is available in three forms: coco peat, coco fibres, and coco chips. It's very common to grow tropical plants in coco coir in Asia; in fact, that's how most of our imported plants arrive from there. We are however not big fans of coco coir as the only potting medium, and therefore suggest using it in potting mixes in combination with other ingredients. For example, you can use coco chips instead of bark, or coco peat instead of peat moss! Bark. We love bark! Namely pine bark shreds. You can easily improve drainage and aeration of your potting mix by adding some bark to it. We recommend it for pretty much all mixes, besides succulent ones. Sand. Sand is super helpful when creating a potting mix for succulents and cacti, as it it increases drainage ability. Please note: we advice not using sand taken directly from the beach, as this type of sand has a high salt content, and could severely damage your plants roots! Ideally you should only use horticultural sand. Worm humus. Worm humus, also known as vermicast, is the final product of decomposed material excreted by the king of the soil: the mighty earthworm! Packed with water soluble nutrients and bacteria, worm humus is a very nutritious organic fertilizer, and excellent all-round soil improver. Worm humus is perfect for refreshing a potting mix, or adding to substrate mixtures already in use. The ideal proportions to aim for are a blend of 10 – 15% worm humus to 85 – 90% substrate. Spaghnum moss. Spaghnum moss is generally used more for cuttings and propagations, however, some Anthuriums can be grown in it, but this is generally only recommended for people who check on their plants daily, as spaghnum moss can dry out quickly, and might require you to check on your plants every day. Read more about this, and other types of moss, in our post dedicated to Anthuriums! Last but not least, and maybe this goes without saying, but don't plant your plant into a pot without drainage holes! Leave it in the plastic nursery pot, and always check for excess water to get rid of after watering. You'll also want your ceramic planter to be a tad bigger than your plastic nursery pot, as the little gap between the two will allow a better airflow around the roots. We hope this gave you an idea of how to provide your plant with the best potting mix, and if you're still in doubt, we recommend starting out with our handmade Aroid Potting Mix! It's suitable for most tropical house plants, and contains a high quality ingredients such as bark, perlite and activated charcoal.Happy potting, plant lovers!
Read more

Plant care: Predator bugs
Perhaps you’ve been hearing people, your friends here at Plant Circle included, rave about predator bugs, but if you’re still unsure of exactly what they are and how to use them, we’re here to help clear things up Predator bugs, also referred to as predator insects, or beneficial insects, are the natural enemies of common pests, such as thrips, spider mites, etc. They’re important agents in biological control of pests, and the perfect solution for those who don’t like to use chemicals at home, and would rather see nature take its own course, with just a tiny bit of human interference! With predator bugs you get good results with little effort, as long as you make sure to act quick! Predators are most effective as prevention, or at the earliest stages of an infestation. Once your plants are covered in pests, these won’t be of much help, so try to keep that in mind, and check our previous blog posts on treatments, such as our post about Neem oil!However, if you are in the early stages of a pest infestation, and you want to make sure it doesn’t escalate, read on! Many types of beneficial insects can be purchased and released in your home, balcony, or garden to control specific pests. Here are some of the most common commercially available beneficial bugs, and the pests they work to prevent. Please remember not every predator is good for every pest, you have to choose the right one. Most beneficial bugs come in containers in some sort of medium, which you can easily sprinkle that on top of your plants foliage. Nematodes. These microscopic worms live deep down in the soil and feed on variety of underground pests like fungus gnat larvae, slugs, or snails. Each type targets different pests. You release them by mixing them with water, and using that mixture to water your plant. We highly recommend these guys if you have been struggling with fungus gnats! Read more and buy them here! Lacewing. These gorgeous flying insect is usually shipped in form of eggs or larvae. Once hatched, they feed on aphids, thrips, mealybugs, and spider mites, among others. The lacewing larvae have pincer-like jaws with which they grasp their prey and inject them with a poison, after which the pest is sucked out. We can highly recommend them, especially in the sometimes seemingly never ending fight against thrips! Buy them here! Ladybugs. Yes, the cute little innocent looking ladybug is actually a voracious eater of all kind of soft bodied bugs and larvae. These predator bugs are particularly effective against aphids and mealybugs! Parasitic wasps. These tiny wasps lay eggs inside the bodies of pests. We highly recommend them if you have problems with Aphids! Predatory mites. These tiny mites are excellent weapon against thrips and spider mites. We highly recommend Amblyseiulus Californicus. We use them regularly and find them effective, and they’re available to buy online! If you decide to try and fight or prevent pests with beneficial bugs, there are a few important things to consider: Do not use neem oil sprays after releasing predators, as it can effectively kill them by smothering them, much as it would the pests Do not use pesticides that require contact to be deadly at the same time as using the beneficial bugs, as these could kill them too Once the pests are gone, predators will die soon after, as they feed on the pests and cant survive without their food source. Some predators, however, feed on pollen, that can usually be purchased together with the bugs Predators are most effective when being used as a preventative measure, and when infestation is on a smaller scale, so always keep a close eye on your plants for early warning signs of an infestation!
Read more

Plant care: Succulents
Succulents are some of the easiest plants to care for, so why do they have a reputation that says the opposite? We’ll get into that, and the most important tips on how to care for a succulent, in this post! First off, what are succulents? By definition, succulents are drought resistant plants that store water in their stems, leaves, or roots, and because of that have a more “fleshy” appearance. They can be found all over the world… except Antarctica! There are about 60 different plant families that contain succulents. Fun fact: cacti are also categorised as a succulents and some plants loosely referred to as cacti, like many varieties of Euphorbia, are actually succulents, not cacti! Now that we know what a succulent is, let’s move onto how to care for these plants, and why so many people end up killing them. As previously mentioned, succulents store water in their roots, stems, and leaves. This means that they really don’t need a lot of watering provided by you. And by not a lot, we actually mean about once a month tops! The number one cause of death for succulents is, as you may have already guessed, overwatering. Yes, that extra love we so want to show our plants, really can kill them! So please, and we can’t stress it enough, if you feel like showing them some extra affection by watering them: don’t! One of the great things about succulents is that they’ll show you when they’re dehydrated and in need of watering by basically shrinking. If you pay attention to the leaves, you’ll notice they appear wrinkly, so just watch them closely, and you’ll know when it’s watering time! Ok, so you’ve been watching the leaves, they’re looking nice and wrinkly, it’s been weeks since the last watering, and your succulent is looking thirsty… How do you water a succulent correctly? In our opinion, the best technique is to soak them. Yup, you read that right! Simply take a bowl filled with water, and put your succulent in there for couple of hours. This may sound excessive after we just told you they don’t need much water, but allow us to explain why we stand by this.Succulent soil is the most draining potting medium out there. It’s usually 50/50 potting soil and sand, which means that it does not hold any water, the water just runs right through it. In practise, this means that the roots don’t have a chance to soak it up, so when watered using the usual method, they just get teased by the water, but won’t actually get to have a good drink. So if you’ve been watering your favorite succulent with little sips of water, now you know why it always looks a bit sad! We suggest you switch to soaking your succulent every 2-3 weeks in summer, and every 4-6 weeks in winter instead of regular watering. This is of course providing that your succulents receive the best light possible… Succulents love light, the more the better, and some even love direct sunlight if they’re used to it! For most, a few hours of sun a day would be ideal. As a lot of succulents actually live under a transparent shade cloth, even in the nurseries where they’re grown, they could burn if you put them in an afternoon sun right away. But you can easily train your plant to endure direct sun, if you just remember to expose it to the new conditions little by little, every day. An apartment with southern exposure is ideal for most succulents, and if that’s the case with your home, you can pretty much take your pick! However, if your apartment only has northern exposure, we suggest sticking to more patient and low light tolerant species such as Sansevieria or Zamioculcas! Potting mix. As we mentioned earlier, succulents love extremely well draining potting mixes that are 50/50 potting soil and sand. And here’s a little bonus trick: place a piece of mesh at the bottom of your nursery pot so your potting mix doesn’t spill. You can check out all of our high-quality substrates in the collection. Important: unless you’re a certified plant pro, we suggest to never plant your succulents directly into planters without drainage holes. These plants are, as we may have already implied once or twice, extremely prone to overwatering, and the lack of proper drainage can be fatal! Propagation. Most succulents propagate easily by leaf or stem cuttings. Simply pluck the leaf or stem off, and leave them atop of the soil for a few weeks until roots start to appear. Once your cutting is rooting, you can start misting it with water. When the roots are more developed, plant it into soil and water sparingly. This is a very generic guide on how to care for succulents, and there are so many different kinds of succulents out there, that all have slightly different requirements. So if you’re looking for more specific tips on particular varieties, we recommend checking out our beginner guide for plant care!
Read more

Plant profile: Anthurium
In this introduction to this incredibly popular houseplant, we asked Plant Circle team member, and avid plant collector, Sarah, to give us her best Anthurium care tips, so get yourself a coffee, get comfy in your favorite chair, and prepare to have some knowledge dropped in your lap! Anthuriums are among the most stunningly beautiful foliage plants the world has to offer, if you ask us! Who can resist their unreal veins, or their giant velvet, glossy, or corrugated leaves? We definitely can’t! While many people collect and grow them perfectly fine as houseplants, it needs to be noted that these are first and foremost jungle plants, that need some level of special care in order to thrive. But don’t worry, we got your back! You will find all the information you need to grow your own happy and healthy Anthuriums in this post. But first, a little background information about this fascinating plant! Anthuriums are actually the biggest genus in the Aroid family, encompassing about a thousand species of plants. They are found throughout southern Mexico, Central America, and much of South America, with a few species found in the Caribbean. Aroid experts expect that there are hundreds more Anthurium species out there, that have not yet been located and described in the rain forests of many South American countries, Ecuador and Colombia in particular. The vast majority of the rarest and most beautiful forms of Anthuriums are located on the western slopes of the Andes Mountains. Each year, Aroid specialists like Dr. Tom Croat of the Missouri Botanical Garden, who’s considered one of the world’s leading experts on this Aroid genus, trek deep into the rainforest, with the assistance of students and researchers, in order to locate, photograph, collect, and describe new species. He is also the person responsible for finding many of the species that the plant community are obsessing over these days, so if you have a popular Anthurium in your collection, you probably have Dr. Croat to thank for it! The genus Anthurium is now found in South Asian countries as well, but only because humans cultivated them in the region. Ok, so now that we know a bit more about where Anthuriums come from, let’s get into how to best care for them! Substrates. There are epiphytic, hemiepiphytic, and terrestrial Anthuriums, which tend to favour the kind of growing media that best reflect their habitat in nature. Some Anthuriums are flexible in terms of environments and can be found in both terrestrial and epiphytic conditions. One notable example for this is the popular Anthurium Crystallinum.Most anthuriums are epiphytes, native to the canopies of tropical rainforests. They use their roots to anchor themselves on trees, then gather water and nutrients from the surrounding environment, and not by parasitizing the tree. Epiphytic Anthuriums grow on trees and attach their roots to the bark, meaning they grow without the involvement of any soil. This is why, when kept in a pot, they will love a very airy mix, containing around 50% bark, 30% perlite and 20% substrate. And go ahead and add some charcoal for its antibacterial and antifungal properties! The only reason why it’s beneficial to add some substrate to the mix, is because it is moisture-retentive, and therefore saves you the hassle of having to water your plant everyday! Examples of Epiphytic Anthuriums include Anthurium Clarinervium, Anthurium Veitchii (King Anthurium), Anthurium Plowmanii, and Anthurium Villenaorum. Hemiepiphytic Anthuriums root in the ground, and then attach themselves to another plant, often a tree, to climb upwards. Since they start out in the ground, they fare better in mixes containing more soil compared to epiphytes. We recommend a mix of 40% bark, 30% perlite and 30% substrate with added charcoal. These plants might require a deeper pot, or a pole to hold on to as they start climbing. Examples of Hemiepiphytic Anthuriums include Anthurium Warocqueanum, Anthurium Marmoratum, and Anthurium Metallicum. Terrestrial Anthuriums grow on the ground of the rainforest, and because of that they can tolerate a mix that’s a little less airy. We recommend 1/3 bark, 1/3 perlite, and 1/3 substrate. They will also love a top layer of live moss that covers their roots and stem! Examples of Terrestrial Anthuriums include Anthurium Magnificum, Anthurium Dressleri, Anthurium Besseae, Anthurium Papilillaminum, and Anthurium Queremalense, as well as almost all pebbled-leaf Anthuriums, such as Anthurium Luxurians, Anthurium Radicans, Anthurium Corrugatum, and Anthurium Clidemioides. Most Anthuriums also do exceptionally well in semi-hydroponics, such as PON or Leca. Their thick roots love the airy mix, and they’re also not as threatened by the constant moisture as some plants with thinner roots might be. In cases of root rot, we recommend putting the remaining stump into spaghnum moss that you will need to keep moist, but not wet, at all times. Anthuriums love growing new roots into spag! You can also keep your Anthuriums in this moss in general, this is however only recommended for people who check on their plants daily, as it can dry out quite rapidly, and needs constant observation. Pro tip: Use living moss! Anthuriums really appreciate a layer of moss on top of the potting mix, and the layer should cover the top part of the stem, allowing the plant to grow its new roots into it. While spaghnum moss works fine, living moss, such as cushion moss, is more ideal since it forms a natural symbiosis with your Anthurium, giving it not only extra support, but also humidity from growing close to the leaves, as well as helping the plant retain some extra water in the soil. It also happens to be way prettier than spaghnum moss, making it look as if your Anthurium is growing on the forest floor. Adding layer of moss will also facilitate both root and leaf growth! Light. Anthuriums live in the undergrowth of the Southern American rainforests, so they are used to rather low light situations. Especially the ones with a purplish to red underside have adapted to their deeply shaded environments. Research has shown that the coloration on the leafs undersides is used to reflect a significant amounts of light that has already travelled through the upper leaf surface, back into the leaf where it is absorbed. This means that such plants have found a genius way to absorb light more effectively by reabsorption! However, it must be said that low light situations in a rainforest can still be brighter than the dark corners of our homes and, while some Anthuriums can definitely be kept there, they will by no means grow a lot or thrive. Giving them at least medium bright light will allow them to lead a happier life in your home! Precious, velvety Anthurium leaves get sunburned fast, so make sure to keep a good distance from grow lights, and acclimate them to the light if you had them in a low light setting before. Many collectors keep their Anthuriums in the now famous IKEA greenhouse cabinet with grow lights. In our experience, a 30 watt LED strip at the top, and another one in the middle of the cabinet, will be more than enough to make your Anthuriums grow in this particular setting in no time! Humidity. Humidity is where the debate forums really start to heat up when it comes to Anthuriums! Many people say that you can only grow Anthuriums in high humidity, so if you cannot provide them with 70%+ humidity, you shouldn’t even start collecting them. However, we are happy to inform you, that this is not entirely correct! While it is true that, technically, Anthuriums are not houseplants and cannot be grown as such, there are some varieties that will be okay growing in 40% humidity or lower!Anthuriums with glossy leaves are generally known to be more easy going when it comes to humidity. Anthurium Browniii, Plowmanii etc. will grow and thrive in your home without any fuss! Velvety Anthuriums are usually a little more demanding, but some species more so than others. Our beloved Anthurium Clarinervium, for instance, has become so commonly obtainable exactly because it makes a great houseplant. It will be fine with a humidity of 50%, which happens to be the humidity you should strive for in your home anyway, because it’s ideal for humans too!Other velvet-leaved Anthuriums will thrive in a humidity of ideally 65-80 %. Providing them with the humidity they need will ensure that you don’t get crisped up leaves or stunted growth. Still, a lot of our beautiful velvety favourites can be acclimated to live in lower humidity conditions. It is a time and care-intensive process, since you should only lower the humidity for them bit by bit in order to make them get used to the change, but they will eventually be able to live in 50% humidity environments. We have done this successfully with Anthurium Besseae and Anthurium Papilillaminum x hybrid! Some Anthuriums, however, will wilt within hours when they are not given the right humidity. These are, unfortunately, out of the question as regular houseplants and require a terrarium our greenhouse environment. Especially the pebbled-leaf, corrugated Anthuriums belong in this category. A prime example is the Anthurium Splendidum, one of the most beautiful species out there, which will only thrive in humidity over 85% and doesn’t tolerate anything less. One notable exception to this rule perhaps is the Anthurium Luxurians x Dressleri hybrid, which does very well in normal room conditions, when properly acclimated to them. A lot of people grow Anthuriums in greenhouses, grow tents or greenhouse cabinets to ensure high humidity. Yet, these plants are quite prone to fungus, so it is very important to give them proper air flow and clean their environment regularly. But we’ll get to that in the pest and diseases section! Fertilizing. Many Anthuriums will grow like crazy once they are fertilised regularly. Slow-release fertiliser that is mixed in with the soil can work wonders for them. However, your personal go-to fertiliser, which can also be liquid, will do the trick as well! In a greenhouse environment you can fertilise them all year round, because, just like in the rainforests they originate from, no seasonal differences exist in there! Repotting. Anthuriums love having space for their roots, so they will appreciate pots that are bigger than their root ball, and generally go up a size or two more than you would for your other houseplants. They will reward you for giving them more space by growing bigger leaves! Pests and diseases. Anthuriums are not as prone to pests as a lot of our other houseplants. However, if stressed, they can get attacked by spider mites, thrips, and other common houseplant pests. This is why it is important to leave your Anthuriums alone as much as possible, instead of constantly repotting and pruning them, or changing their environment. This will only make your plant weaker and more attractive to pests! The most common problems with Anthuriums are bacterial and fungal diseases, including bacterial blight, root rot, stem rot, and fungal or bacterial leaf spots. Bacteria and fungus thrive in the same high humidity conditions that your Anthuriums love as well, and this is why it is necessary to ensure good air circulation in your home or greenhouse environment, as moving air makes it way harder for fungus or bacteria to settle on leaves! If you see yellow spots on your Anthurium leaves, often with a small brown spot in the middle, or large parts of your leaf turn brown and crispy with a yellow halo around them, you likely have a bacterial or fungal problem. The first emergency step is to separate the affected plant from the rest of your plants, since bacteria and fungus can spread rapidly. We highly recommend cutting off all leaves that show signs of bacteria or fungus and disposing of them right away. We know this is a very daunting process and you might be left with nothing more than a stump if all leaves are affected. So, if you would like to try alternative methods first, we recommend a fungicide containing copper, or a systemic fungicide, which can stop the breakout on your plant. It will not remove the spots, but it will prevent the fungus from spreading.In case of a bacterial infection, what works for humans also works for your plants… believe it or not, we’re talking about mouthwash here! Spray some antiseptic mouthwash directly onto the affected area of the Anthurium, and let sit for five minutes. Then gently remove the remaining liquid from the leaf using a cloth. You can also spray your Anthuriums once a week to prevent any insect infestations, but be sure to only use the unflavored, or gold, version of the mouthwash, as the flavored versions have extra additives that could be harmful to your plants health. Propagation. Anthuriums can be propagated by stem cuttings and pollination, but it will take a whole other blog post to describe these processes, so stay tuned for a future post about that! We hope this post has inspired you to take on the exciting task of Anthurium plant parenthood, and whether you go full on with a greenhouse or a grow tent, or you just want to try putting one in your windowsill next to your more common house plants, you now have all the knowledge required to make your Anthurium of choice thrive!
Read more

Plant profile: Calathea
Calatheas are popular houseplants mainly because of their beautiful patterns, but the truth is, these are not simple houseplants, but real divas that need a lot of informed care! Want to become an expert? Read on! Calatheas are also called prayer plants, because they point their leaves upward at night like hands held together in prayer. Once the day begins, the leaves lower again, and some say they can hear a crackling noise during this process. These living sundials are exciting plants precisely because they are so alive and ever-changing! Calatheas belong to the Marantaceae family and are native to tropical areas of South America. In tropical regions they were used as roofing and for weaving baskets, which gave them their name. ‘Calathea’ comes from the Greek and literally means ‘basket’! Now, in order for you to have the best chance of success with this rather demanding species, we’ve gathered our best care tips and best practices below, and even included a list of Calatheas ranging from ‘beginner’ to ‘advanced’, so you can start off successfully and build your collection from there! Humidity. This type of plant, as we already mentioned, does need quite a lot of care, and especially a relatively high humidity to stay beautiful in our home, which is why some indoor gardeners do not dare caring for them.At least 60 percent in winter and 70 to 80 percent during the growing season from March to September are ideal conditions for Calathea. If the humidity in your home is too low, some Calatheas will quickly get brown and dry leaf margins. Also, the risk of them getting spider mites increases with lower humidity and, believe us, Calathea are unfortunately proper spider mite magnets!Note: Some Calatheas, especially those in the ‘beginner’ category of the list below, retain their beautiful leaves despite drier conditions. Watering. Calatheas like to be kept moist, but not wet – they don’t like to dry out too much. When they are thirsty, Calatheas show it with curled-up and droopy leaves. That’s when you should give them a good soak at the latest, and they will be back to their former stunning selves within a day.Important: Calatheas will not tolerate your regular old tap water! Highly sensitive to hard water, these babies require water that is room temperature and soft, so think distilled water, or at the very least well filtered! Soil. Despite their well earned diva reputation, prayer plants are actually not too picky when it comes to soil. They prefer a relatively well-draining, lightweight potting mix, but not as loose as you would use for your aroids, for example. A mixture of 50% coco coir, 30% perlite and 20% bark would work, or you can add about a quarter of sphagnum moss to three quarters of your go-to aroid mix to make it a bit more moisture retentive. Light. In their native countries, Calatheas grow as hanging and climbing plants, or ground covers in the rather shady undergrowth of the rainforest. That’s why Calatheas don’t like too much light at home either; their ideal conditions would be a warm, draught-free, semi-shaded location without direct sunlight.Depending on their pattern, however, certain Calatheas, such as the White Fusion, need more light.If left too bright, Calatheas like to lower their leaves steeply, and that’s the great thing about this plant species; they may be divas, but they clearly communicate their needs! Pests. As mentioned above, spider mites are a Calathea lover’s worst nightmare! These annoying bugs love prayer plants, so it is important to check the underside of their leaves very frequently for white spots that could prove to bespidermite eggs. There are a lot of ways to get rid of them. Our favourite is a solution of Neem oil, water and organic soap (with a teaspoon of pure alcohol if you want to go the extra mile) with which you can gently clean all your Calatheas leaves from both sides and its stems. Dormancy. Although Calatheas are not known to go dormant, but they do go through phases of growth and demise, which means that they will sometimes start to drop a majority of their leaves. It is a shocking process, but you must not give up on your Calathea then! In a lot of cases, it will come back with a lot of new leaves once it goes into its growth phase again. As long as the rhizomes in the soil are healthy, all you need is patience. Propagation. Calatheas cannot be propagated through cuttings, unfortunately. The only way to multiply a Calathea is by division, meaning you can simply divide the leaves of one plant including its rhizomes and roots into two and plant them up again. Easy as that! If you want to test your feel for prayer plants, start with the simpler varieties we’ve listed below, and if you follow these tips, you’ll be mastering the ‘advanced’ category in no time!Bonus info: Calatheas are not poisonous, which means they are pet friendly and not toxic to either cats or dogs, so this is the perfect genus for the patient plant and animal lover! Beginner: Musaica ‘Network’ Medaillon Vittata Concinna ‘Freddie’ Lancifolia Easygoing siblings from the Marantaceae family: Ctenanthe burle-marxii Maranta Leuconeura Stromanthe Triostar Ctenanthe Setosa Stromanthe Magic Star Maranta Leuconeura ‘Lemon Lime’ Maranta Leuconeura var. kerchoveana ‘Variegata’ Advanced: Orbifolia Fasciata Beauty Star Flame Star Makoyana Rufibarba Roseopicta Helen Kennedy Expert: Zebrina White Fusion Warscewiczii Ornata Sanderiana Crocata Special thanks to Plant Circle’s Sarah Remsky for her expertise! Follow her on instagram and, if you speak German, check out her book too.
Read more
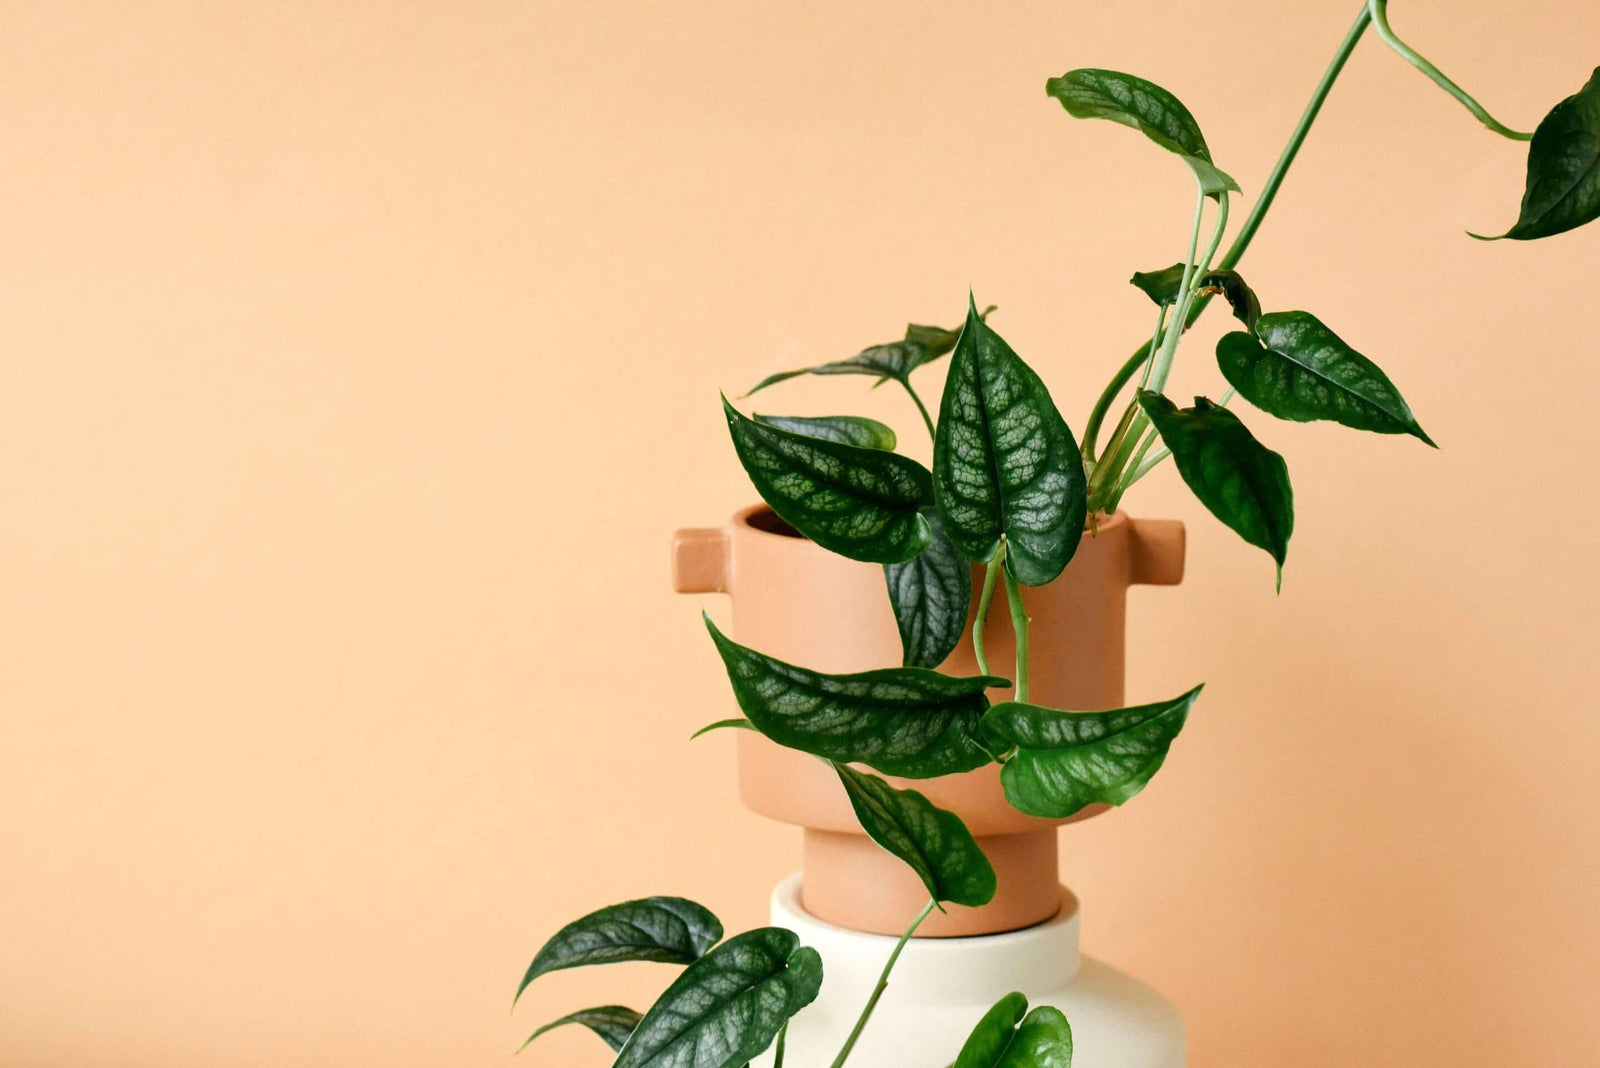
Plant profile: Monstera Siltepecana
Let’s take a look at how to care for Monstera Siltepecana; the first Monstera we ever produced ourselves for Plant Circle! We think it’s the perfect plant for the beginners and collectors alike, and here is what we’ve learned about keeping it happy during the last couple of years. Monstera Siltepecana is a popular houseplant thanks to it being easy care and having attractive foliage. Endemic to Mexico and Central America, it’s renowned for the silver markings on its immature foliage.Like other Monstera species, Siltepecana is rather easy going and doesn’t demand too much attention from us. This plant however undergoes a considerably big transformation from the juvenile to the mature form, and like most Monstera species, it can develop fenestration on its leaves as it reaches maturity. In order to experience the transformation first hand, you must first ensure that the plant enjoys the most ideal conditions growing up! Soil. Plant your Monstera Siltepecana in an airy potting mix, either premade or one that you make yourself using bark, perlite and peat moss. Remember that a good potting mix will ensure healthy roots! Siltepecana cannot stand direct sunlight and should receive bright indirect light instead. It would enjoy a spot 1-1,5 meters away from a south facing window, or sitting directly on an east, north-east, north west ,or south east facing window. The afternoon sun of the west facing window could potentially scorch your Siltepecana, so be careful! Watering. We suggest keeping your Monstera on the dry side, meaning water only when the top 3 cm of soil have dried out and is dry to the touch. If you’d like to see your Monstera develop holes in the leaves, you’ll wanna provide above average humidity, and most importantly something to climb. It is crucial for the maturity of the plant to have something to climb on. Once you attach it to the moss pole, make sure to keep it moist. If you do not care about the leaves maturing and getting fenestrated you can also grow it in a hanging basket. A juvenile Monstera Siltepecana is also a great addition to a terrarium! Growth rate. Siltepecana is an extremely fast grower. From leaf spike to fully unfurled leaf it only needs a few days under ideal growing conditions, and under less ideal conditions it might take a few days longer… still pretty fast, if you ask us! We had observed some crazy fast growth on our plant that we keep in the greenhouse. In just 6 months it went from a baby sized plant to a one meter tall lady, and it just gave us first fenestrated leaves. Propagation. This plant is super easy to propagate in water from cuttings. Simply cut between two nodes. They’ll often produce small aerial roots, which means you can also use the air-layering technique. Take some moist moss and wrap around an aerial root, secure with foil, et voila! Give it a couple of weeks and you should see the aerial roots pushing some fresh white roots. Once the roots are long enough, we suggest over 5cm, cut it off and plant it in moss to develop further. You can also easily transfer it into water if you’re more comfortable with that method. Pests. Monstera Siltepecana is prone to getting thrips, however, we have noticed that with the use of a store bought pesticide, it’s not too hard to get rid of the pests.If the infestation is very bad, we suggest using propagation to save the plant.
Read more

Plant profile: Philodendron Gloriosum
Philodendron Gloriosum is quickly becoming one of the most sought after Philodendrons out there and for a good reason! The velvety heart shaped leaves, easy care temperament, and the ability to reach an impressive size make for a very exciting houseplant. How to grow the rare Philodendron Gloriosum? We’ll tell you all about it! Gloriosum is endemic to Colombia and belongs to the family Araceae, commonly known as Aroids, and the genus Philodendron. It’s a crawling, terrestrial plant that you’ll find growing across the forest floor, as opposed to attaching themselves to trees like other popular varieties from this genus. Gloriosum has a very attractive, cordate (heart shaped) leaf with a gelatinous surface, pink margins and white or even pinkish veins. The leaves on a Philodendron Gloriosum can reach an impressive size of 30-40 cm in diameter and a maximum height of about 1 meter! The Gloriosum is a rather slow grower compared to, let’s say, Florida Green, and a leaf spike on a Gloriosum can take up to 1-2 months to fully open. Growing habits. As we mentioned earlier on, the Gloriosum is a terrestrial Philodendron, meaning that it doesn’t climb trees like most of its cousins. This means that this type of Philodendron needs to be planted in a long planter, that will give it enough room to crawl sideways! Light. Since we already know that Philodendron Gloriosum grow on the floor of the jungle, this gives us an indication of the the kind of light they receive in nature. Indirect, of course! A perfect spot for your Gloriosum would be either one meter away from a south facing window, where direct sunlight can’t reach it, or on a west facing window with a few hours of morning sun. Other possibilities would be south east, north east, north west. A north facing window might not offer sufficient lighting, especially in winter, so if those are your conditions and you still dream of owning one of these beauties, we suggest adding a grow light! Soil. Make sure you plant your Gloriosum in an airy aroid potting mix, like our aroid mix or make a similar one yourself. It should consist of bark, perlite, and peat moss. Fertilizer. You can feed your Gloriosum with a high quality, liquid foliage houseplant fertiliser during spring and summer months, according to the bottle instructions. We can highly recommend using Blattwerk for that purpose. Watering. Before you water your Philodendron Gloriosum, always check if the top 3 centimeters of the soil are dry. These plants do not like to be watered a lot, or too often. When they get too much moisture you will sometimes notice a wet pattern appear on the undersides of their leaves. Should this happen to your plant, it’s time to reduce watering! Humidity. When it comes to the humidity, Philodendron Gloriosum thrive in 60-80% humidity, but they’re are not particularly fussy, and tend to do pretty well in the regular European indoor conditions. Propagation. If you’d like to propagate your Philodendron Gloriosum, simply cut in between two nodes. For best results, root your cutting in a warm spot in moss under a grow light, and we suggest waiting until the cut stem cures before putting it into moist moss or perlite. Pests. The Gloriosum is prone to spider mites and thrips infestations. If you ever find any of the aforementioned pests on their leaves, make sure to wipe them off every few days, and treat with a Neem oil mixture, or store bought pesticide. Pest infestations are natural occurrences when growing houseplants, and no reason to panic. When treated fast enough, the pests can be fully eradicated, and the key to success is repetition! Always repeat your treatments on a weekly basis for at least a couple of weeks. Click here to read more about how to use Neem oil to treat your plants! Other facts worth noting: Philodendron Gloriosum has a conservation status of Vulnerable (IUCN 3.1), which you can read more about here. Also important? This plant is toxic to humans and animals if ingested!
Read more
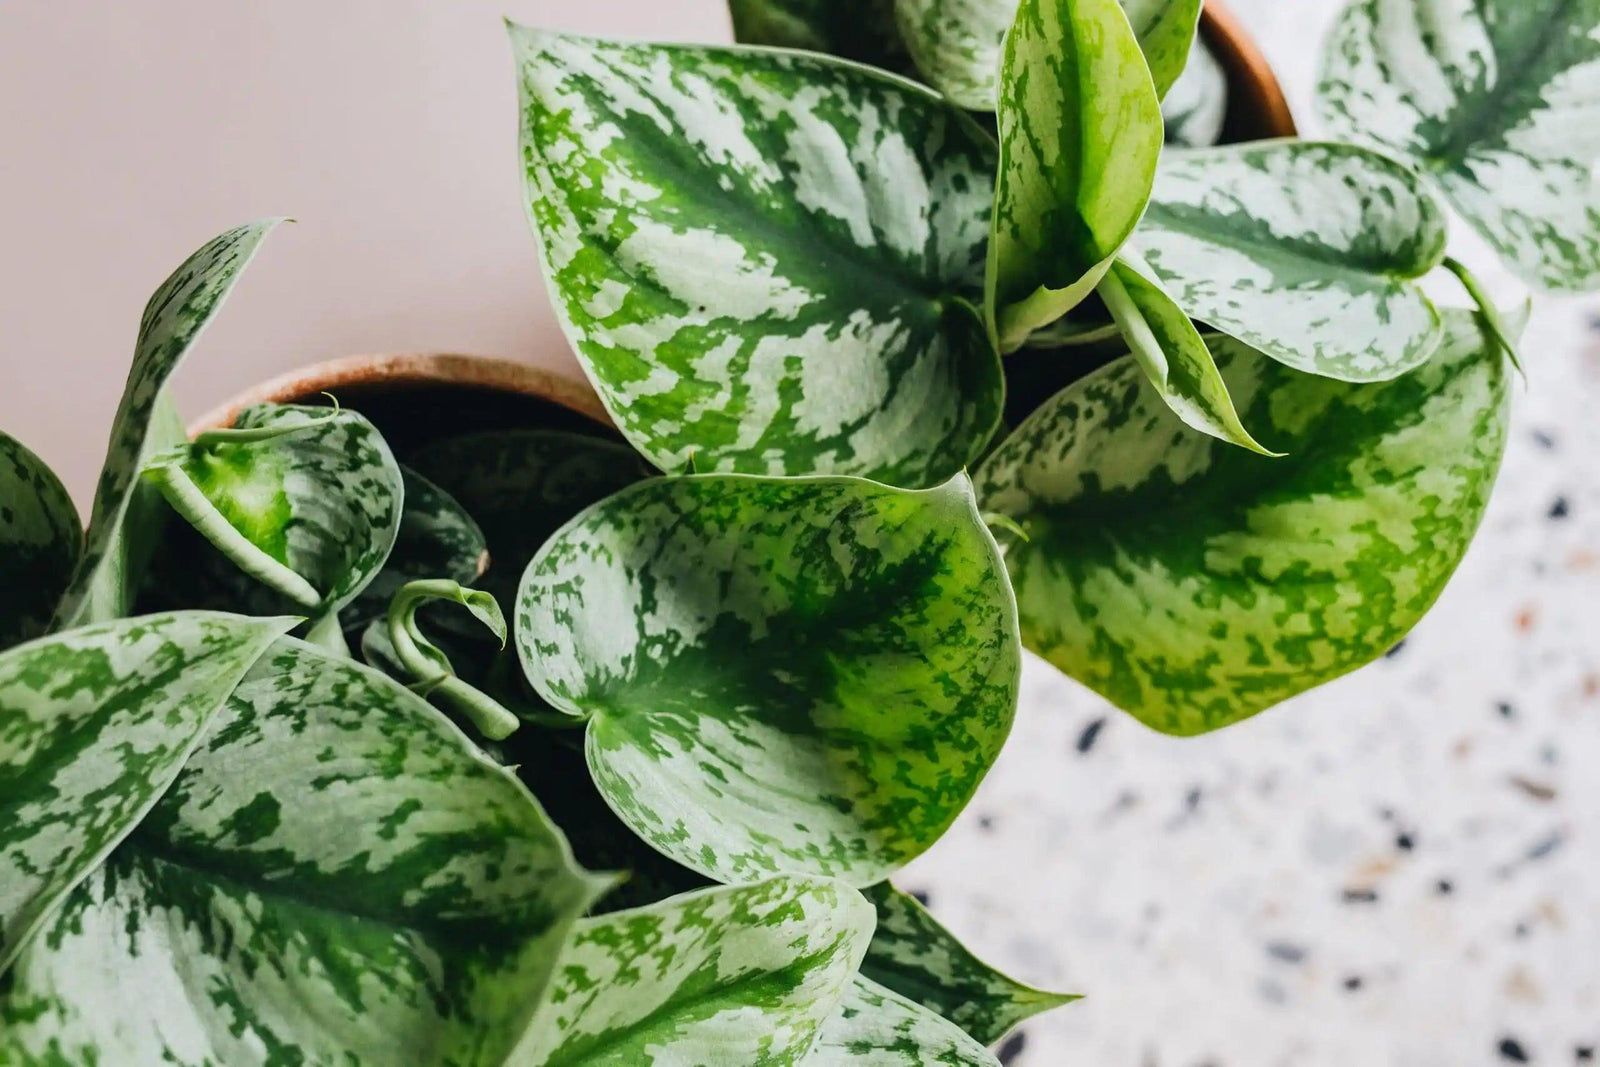
Plant profile: Scindapsus
In this plant profile we get into Scindapsus! Learn about where they’re from, how to care for them, and how to tell them apart! The Scindapsus is a popular genus, commonly known as ‘Satin Pothos’ or ‘Silver Pothos’, despite not actually being a Pothos at all! Not an Epipremnum, and not a Philodendron either, although sometimes mistaken for that too, Scindapsus belongs to the Araceae family, which is native to Southeast Asia, New Guinea, Queensland, and a few western Pacific islands.The most common Scindapsus species in cultivation today is the Scindapsus Pictus, followed by Scindapsus Treubii, which has only recently become more commonly available due to an increase in popularity. Scindapsus plants are highly decorative, climbing vines with thin stems and rooting at the nodes. These plants are some of the best selling plants that we carry here at Plant Circle, and with good reason; not only are they easy to care for, but they’re also absolutely beautiful, and most importantly, affordable… even the rare ones! Scindapsus Pictus was described in 1842 by German botanist Justus Carl Hasskarl. The name ‘Pictus’ comes from Greek and means ‘Painted’, and it’s not hard to understand why they decided to name it that! When young, this species is characterised by thick, velvety leaves, that are narrowly ovate with a heart-shaped, slightly asymmetric base. The leaves have a dark green color with silver-grey edges, and irregular spots of the same colour. In their mature form, the leaves become fully heart-shaped. Left image, clockwise from the top: Silver Princess, sp Sumatra, Silver Splash, Silver Splash, Silver PrincessRight image: Exotica, Silver Hero, Silver Hero, Silvery Ann, Argyraeus Some Scindapsus varieties have been on the market for a while, and are already in mass production, while others are more uncommon, or even rare. Scindapsus Treubii, for example, which is native to Jawa, Malaysia and Borneo, is a less common species of Scindapsus that has only entered the European market in very recent years. Scindapsus Treubii ‘Moonlight’ is the only species currently in commercial production in Europe, while ‘Dark Form’ is slowly making its way into European greenhouses.At the end of this post we have compiled a list, to the best of our abilities, of the different varieties of Scindapsus Pictus and Scindapsus Treubii, that we are familiar with, sorted by how common or rare they are. The list will be updated on regular basis as we become familiar with new varieties. But first, let’s get into some basic plant care for this surprisingly low maintenance genus! Growing tips. Although Scindapsus is a great plant to grow in hanging basket, and it’s tempting to just do that, if you want your plant to really achieve its full potential, and grow large sized leaves, try letting it climb something like a coco pole instead. The key here is providing the plant with a climbing surface made from organic matter. This allows the plant can grow its roots into the pole, and only then can the leaves can reach a truly impressive size! Humidity. Scindapsus prefer temperatures around 18-20 degrees, but when it comes to humidity, which is so often a problem for plant lovers in drier climates, this plant doesn’t require a lot of humidity, and can even thrive under more dry conditions, so you won’t need to invest in a humidifier because of this plant! Watering. Very basic; simply check with a finger and water the plant when top 3 cm of soil is dry, and let it dry out between waterings. This plant is very adept at communicating its needs, and its leaves will start to curl when it’s really thirsty! Soil. Scindapsus likes a porous, well draining substrate that is rich in organic substance, like our aroid potting mix! The faster growing species will need to be repotted frequently, but you can tell that it’s time when you see the roots growing out of the bottom of the pot. Light. The darker the Scindapsus, the less light it will need to survive, and while it prefers bright indirect sunlight, it can tolerate low light conditions. However, as with all plants, the less light it gets, the slower the growth will be! Note: Scindapsus Treubii tends to grow at a much slower rate than Scindapsus Pictus, who is considered an avid grower. Pests and problems. If you notice your Scindapsus growing very small leaves it usually means that it’s in need of something to climb, or that the light it’s receiving is insufficient. When you notice the edges of the leaves rolling inwards, it means the plant is dehydrated and needs water right away, or that it’s suffering from root rot, which also prevents it from drinking. Common pests include the usual suspects; thrips, fungus gnats, and spider mites.If you live with kids or pets, it’s important to remember that this plant is toxic if ingested! Propagation. These plants are easily propagated by stem cutting or air layering. Fun fact. Each variety of Scindapsus Pictus has the ability to suddenly produce a leaf that will look like another cultivar. We have come across ‘Silvery Ann’ producing ‘Argyraeus’ leaves, and ‘Silver Splash’ suddenly growing an ‘Exotica’ patterned leaf, so don’t say this genus isn’t full of surprises! Common types of Scindapsus Pictus (commercially produced): Scindapsus Pictus ‘Exotica’ Scindapsus Pictus ‘Argyraeus’ Scindapsus Pictus ‘Silvery Ann’ Uncommon types of Scindapsus Pictus: Scindapsus Pictus ‘Silver Hero/Platinum’ Scindapsus Pictus ‘Silver Splash/Silver Cloud’ Scindapsus Pictus ‘Silver Lady’ Scindapsus Pictus ‘Silver Princess’ Scindapsus Pictus ‘Jade Satin’ Rare types of Scindapsus Pictus: Scindapsus Pictus var ‘Argyraeus Dark Form’ Scindapsus Pictus ‘Jade Satin Variegated’ Common types of Scindapsus Treubii: Scindapsus Treubii ‘Moonlight’ Uncommon types of Scindapsus Treubii: Scindapsus Treubii ‘Dark Form’ Scindapsus Treubii Sp ‘Sumatra’ Rare types of Scindapsus Treubii: Scindapsus Treubii ‘Variegated’ Scindapsus Treubii ‘Mint’
Read more
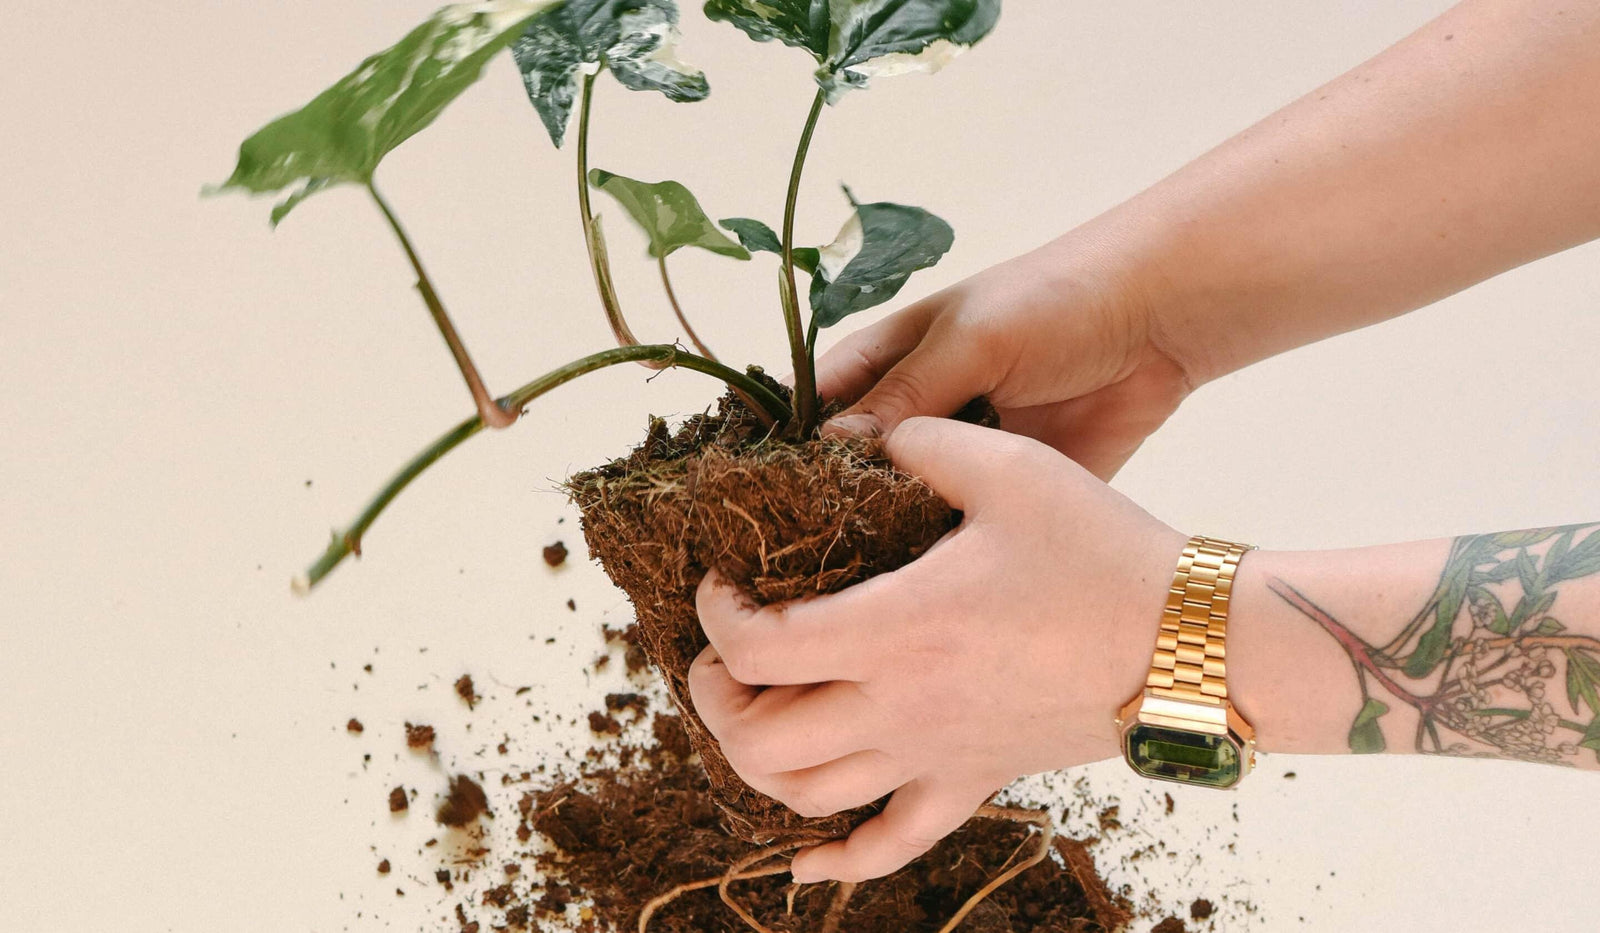
Repotting your plants (winter edition)
You’ve probably wondered when it’s a good time to repot your plants, and how to go about it. You’re not the only one! Thankfully there’s one universal sign that your plant needs a new pot, and that’s roots growing out of the bottom of the pot. But what do you do if it’s in the middle of winter? What kind of pot do you move it into? Is repotting in winter even allowed?! We’ve prepared a few tips for you, and a handy diagram below! So you took the test and landed on a “Go for it!” but there are still a few things to consider when repotting your plants. Like choosing the right pot! Don’t go too big. The pot you’re transferring your plant to should only be one size bigger than the old one, so approximately no more than an additional 2 cm in diameter.Perhaps it’s time to change the soil? If this is the first time you’re repotting this plant, it’s very likely that the plant has been sitting in some poor potting mix. Now is your chance to upgrade! Make your own universal quality mix by mixing one part each of potting mix, perlite, and bark. Read more about potting mix in this post.Does your planter have drainage hole? if not, leave your plant in the plastic nursery pot. Make sure that the planter is slightly bigger than the nursery pot to allow for proper air circulation. You can also easily drill holes in your ceramic planters with a diamond drill bit!Potting directly into a terracotta planter? Note that terracotta planters absorb moisture, which means you’ll probably need to water your plants a little more often than usual. Also make sure you have saucer! Now that you’ve picked the right pot, you’re ready for repotting! Let’s go over that in steps too: 1. Press on the plastic nursery pot so the soil can easily get unstuck and detach from the pot.2. Carefully remove the plant from the plastic pot.3. Loosen up the root ball and remove the soil, cleaning the roots as much as you can. 4. Prepare your potting mix and add it into the bottom of the pot, then put the plant into the pot, and cover the roots with more potting mix.5. Make sure no roots are exposed, and push down the soil so the plant is stable.6. Water your plant! If the potting mix sinks down and exposes the roots after watering, you can add a bit more potting mix in this step to make sure they remain covered.Need visuals? We’ve got you covered there too! Below you’ll find all six steps, and if you want detailed video of the process, go to our instagram and see how we repotted a huge Philodendron Billietiae, a super potbound Scindapsus, another potbound baby, this time a Hoya, and don’t miss out on this good example of how bigger isn’t always better when it comes to pots!Happy repotting!
Read more

Rooting for Growth: A Beginner’s Guide to Propagating Aroids from Cuttings
Welcome to the first volume of our propagation tips and techniques blog, where we will be discussing how to propagate aroid plants from cuttings that include nodes and aerial roots. Aroid plants, including Philodendron, Epipremnum, Syngonium, Scindapsus and Monstera, are popular houseplants that are easy to propagate from cuttings. When taking a cutting from an aroid plant, it’s important to include a node. A node is a small bump or ridge on the stem of the plant where the leaves, aerial roots, and new shoots grow from. Nodes are essential for propagation because they contain meristematic tissue, which is responsible for the growth and development of new roots and shoots. Cuttings without a node and just a leaf will not be able to develop roots and grow into a new plant. This is because the cutting lacks the meristematic tissue found in the node that is responsible for root and shoot development. Therefore, it’s important to make sure the cutting includes a node. To take a cutting from an aroid plant, follow these simple steps: Choose a healthy plant.Select a healthy aroid plant with strong stems and no signs of disease or damage. Find a node.Locate a node on the stem of the plant, where the aerial roots or leaves are growing from. Make the cut.Use a sharp, clean pair of scissors or a knife to make a clean cut below the node. The cutting should be at least 3-4 inches long and include one or two nodes. Place the cutting in water.Place the cutting in a jar or vase filled with clean, room-temperature water. Make sure the node is submerged in water, but the leaves are not. Change the water every few days to keep it clean and prevent bacteria from growing. Wait for the roots to growAfter a few weeks, you should start to see roots growing from the node. Once the roots are strong and at least few centimetres long, the cutting is ready to be planted in soil. Better have longer roots than shorter so if you can wait longer, do it. Plant the cutting in soil.Fill a small pot with potting mix and make a small hole in the center. Insert the cutting into the soil, making sure the node and roots are buried about few centimetres deep. The cutting needs to be stable and all roots need to be covered. Water the soil and place the pot in a bright, warm spot, but avoid direct sunlight. By following these simple steps, you can easily propagate aroid plants from cuttings with nodes and aerial roots. Propagating plants is a fun and easy way to expand your plant collection or share your love of plants with friends and family. Stay tuned for the next volume of our propagation tips and techniques blog, where we will discuss how to propagate another popular houseplant.
Read more
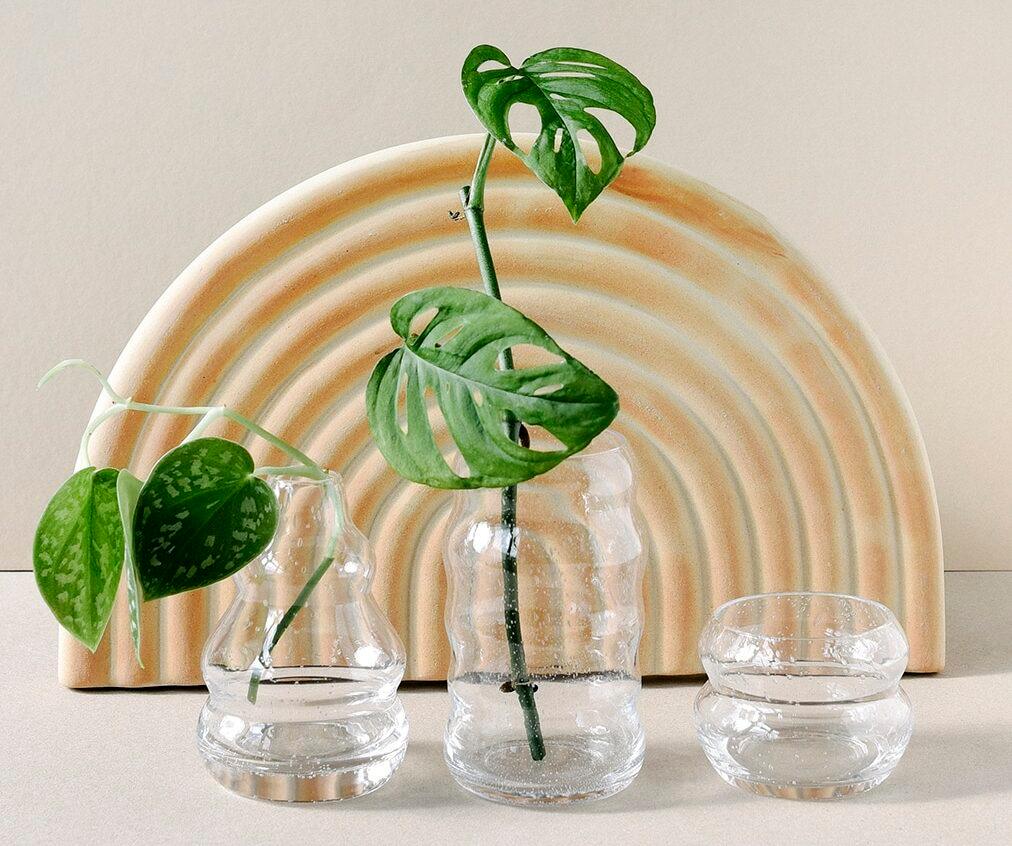
Roots of Success: Mastering the Art of Water Rooting Cuttings!
As spring ushers in new life and vibrant greenery, many plant parents look forward to propagating their beloved plants through cuttings. Sharing these cuttings with friends is not only a great way to spread the joy of gardening but also allows us to multiply our plant collections without spending a fortune. One popular and relatively easy method of propagation is water rooting. In this blog post, we will explore the best practices for propagating plants through cuttings and successfully rooting them in water. Start with Clean and Disinfected Tools.Before embarking on your propagation journey, it’s essential to ensure that your tools are clean and ideally disinfected. Use sharp scissors or a knife to make clean cuts, as jagged or torn edges may hinder successful rooting. Allow the Cut to Heal Once you’ve taken a cutting, it’s crucial to let the wound heal before placing it in water. Freshly cut stems are prone to becoming mushy and rotting in water. Most plants require a few hours on the counter to heal the cut, while succulents or cacti may need a few days for the cut to callous over. Change the Water Regularly or Use Activated CharcoalTo prevent bacterial growth and maintain a healthy environment for rooting, remember to change the water in the container every few days. Alternatively, you can add a small amount of activated carbon pellets to the water, which helps keep it bacteria-free. Provide Light for Root DevelopmentChoose a glass container for your cuttings, allowing the roots to receive some light. Light exposure promotes photosynthesis, helping the cuttings develop stronger root systems. However, be mindful of excessive direct sunlight, as it can overheat the water and damage the delicate roots. Consider Rooting Hormone Although not always necessary, using a rooting hormone formulated for foliage application can boost the success rate of your water-rooted cuttings. Apply it according to the product instructions, as improper use can be counterproductive. Wait for a Strong Root Network Patience is key when propagating plants through cuttings. Wait until your cutting has developed a healthy network of roots before proceeding. Rushing the process could lead to transplant shock or the failure of the cutting to establish itself. Choose the Right Pot and Potting Mix When your cutting has developed sufficient roots, it’s time to transition it to soil. Select a small pot that provides stability for the cutting. Ensure that all the roots are covered with potting mix, but be cautious not to choose a pot that is too large, as excess soil can lead to overwatering and root rot. We have substrates (potting soils) for all types of plants. Provide Bright Indirect Light Place your newly potted cutting in an area with bright indirect light. This will allow the plant to photosynthesize and promote healthy growth. Avoid placing it in direct sunlight initially, as it may be too intense for the tender roots. Water and Fertilize with Care In the first few weeks, be mindful of watering your newly potted cutting. Overwatering can drown the young roots, while underwatering can lead to dehydration. Find the right balance and adjust your watering schedule based on the needs of the specific plant. Additionally, provide a balanced fertilizer to nourish the growing cutting but avoid over-fertilization, as it can cause root burn. Propagation through cuttings and water rooting is an exciting and rewarding way to expand your plant collection and share the joy of gardening with friends. By following these best practices, you can increase your chances of success and ensure the healthy establishment of your propagated plants. So, grab your disinfected tools, prepare your glass containers, and embark on a propagating adventure this spring. Happy propagating!
Read more

Summer plant care
Summer is generally a great season for plants, as this is when all the growth happens. The days are longer, the sun is shining, humidity goes up… basically all the good things your plants have been lacking in the winter time! There are however a few things you should keep in mind, so let’s talk summer plant care! Holidays. So you have decided to leave the town for a number of days. Good for you! But what to do with your plants? Naturally you could ask your friends to take care of them, and that’s ideal as long as you make sure to brief them thoroughly on who to water, and how much as unfortunately, speaking from experience, most people like to water plants a little too much! You’ll probably get the best outcome if you group plants together based on their watering needs, and adding some sticky notes with instructions obviously won’t hurt either! We’ve also found it helpful to tell people for how many seconds they should pour the water, so that’s also worth a try. And remember that succulents like Hoya or cacti can be easily skipped if you are away for just a couple of weeks! If none of your friends are available to help you out, don’t panic! There’s a simple summer plant care watering system you can set up for your plants. First, we suggest moving your plants away from the windows, especially if you have southern exposure. The less light they get, the less water they’ll need. As mentioned before, succulents like Hoya, Cacti or Zamioculcas should survive your absence for 2-4 weeks just fine, so you don’t need to set up a watering system for them. But for your other plants, here’s what you’ll need: a few meters of cotton rope, and a couple of containers for water. Group your plants by watering needs, and depending on how much they drink, you’ll need place your water container above the plants on a shelf or stool for plants that drink a lot, and below the plants on the floor if they drink just a little. Cut the rope into pieces as long as the distance between the plant and the container, plus/minus 10cm. Water your plants first, as you normally would, and soak the strings of rope in the water. Then you wanna poke holes in your plant’s potting mix using a thick stick, think approximately 1 cm, push the rope down with your finger, and place the other end in the water container. Continue doing this for all plants, and you’ll be able to leave for you holiday with a clear conscience! Please note that we only recommend this summer plant care system if you’re going away for longer than one week. If your holiday is under 7 days you’ll only need to water your plants once before leaving, unless you have some super thirsty buddies, like maidenhair fern, in which case this system will also work!We do not advice you to leave your plants standing in a tub filled with water, or using glass balls, as we find them quite unhelpful. They tend to release all the water on the first day, which can result in over watering the plant, and you don’t want that! Pests. Another thing to watch out for in summer are pests. Thrips, spider mites, etc. can enter your apartment through the open windows and balconies, and attack your plants. No need to panic though, it’s just the circle of life, and having pests is an inevitable part of having plants! We have covered pests extensively here on the blog before, so if you’re wondering how to handle them, just scroll through the topics! Sun damage. Southern or Western sun exposure can be quite damaging for some plants, and leaving your shade loving plants in the afternoon sun can result in burnt foliage. It is however just an aesthetic problem, and it does not impact the health of the plant, but you might want to cut off the affected leaves. What does sun damage look like? You’ll usually see discoloured foliage in a very ‘compact’ way, like a big blotch or a stripe across the leaf. Another type of sun damage, or overexposure to sun, can express itself through discoloration of the entire plant. When the plant overall gets very light and faded in its color, it could very easily be due to too much light. After noticing it, you should move your plant to a spot without direct sun exposure immediately.A lot of our plants coloring depends on how low or high its light exposure is. Hoya’s, for example, will usually get pinker or redder due to sun stress, which a lot of people fight very aesthetically pleasing, and since it does not affect the plants health, there’s really no problem with giving them the extra exposure. Begonias or Syngoniums, on the other hand, will have darker and more intense coloring when grown in half shade and will lose that color when exposed to too much light. We will cover this topic more extensively in a future blog post, but this should give you an idea of what to look out for when it comes to the sun and how much is too much! Watering. Due to the hot summer temperatures you might notice that your plants are thirstier than usual.That’s absolutely normal, and you should adjust your watering routine according to plants needs in any season, so the best thing to do is observe your plants current needs, instead of rigidly sticking to a specific schedule all year round.We hope you read this before heading out on holiday, and that it gave you a chance to optimize your summer plant care routine!
Read more

The key to (successfully) growing Alocasias
It’s true that there’s no universal truth on how to grow specific kinds of plants, just experiences and opinions we can share. In this post, Plant Circle’s founder Monika shares what she’s learned, and have found to be the key to (successfully) growing alocasias. Curious yet? Read on! When you’re reading blog posts or articles about how to care for a certain kind of plant, you may notice that something important is often missing… people sometimes forget to share the exact location of, and conditions in, their home or garden! And that stuff is kind of important. Because if you live somewhere warm, and your garden is filled with thriving alocasias, a blog post like this one is not for you and you can easily skip it. I have no experience growing alocasias in the tropics, and I can only tell you what works in an apartment in Berlin. I can imagine that a lot of places in Europe will be similar, but I also know some will be wildly different, so use your best judgment when deciding whether or not to follow my advice! Apartments, just like geographical locations, can vary so much, especially by the season, and when it comes to how they are built and how much light they get. Apartments in the northern hemisphere are rather well insulated and can get very dry in winter due to heating. Mine, however, is actually different. Yes, it’s insulated and heated, but it gets rather humid in winter as I have quite a few plants in here, and that, combined with less airing out (it’s freaking cold outside!) creates a humid microclimate. My journey with alocasias began a long time ago, but after years of failing at growing them, I decided enough is enough, and I went down an internet rabbit hole (thank you, ADHD) and hyper fixated on an extensive research about what these plants actually like. I’ve also spoken to the people around me who’ve grown them successfully about what their secret is, and all roads eventually led to this conclusion: hydro. Alocasias love for their roots to be ‘exposed’. I even read somewhere, that they would grow on rocks in certain places, and basically only drink when it rained on them. The water would wash down the roots and then leave them to air dry themselves. I thought this was a fascinating, yet hard to replicate, at-home idea. I also read that they like to have ‘wet feet’ which means to sit in water. Now, if you try this with a regular potting mix, having it always be wet at the bottom, you will most likely start to get root rot. I don’t know about you, but I didn’t dare try! So instead I connected the dots and came up with a potting mix, that I thought would work: pumice, charcoal, bark, and hummus. I took some dying alocasias, removed the potting mix they came in (which happened to be this weird nursery mix that mainly consists of coco fibres) and placed them in my new creation. To my surprise, this worked like a dream! After just a few weeks, new shoots were coming out and the plants were revived. Now you can get the expertly mixed alocasia potting soil here. No mess required! Now, for the best results you can put it in a self watering pot and always keep it full. I grow my alocasias both in self watering pots (like this Elho pot with a self-watering insert) and in regular pots. It’s a little harder to control the water level in a regular pot, but if this is what you happen to have on hand, use it and just add a bit of water every week. Alocasias love for their roots to be ‘exposed’.I even read somewhere that they would grow on rocks in certain places and basically only drink when it rained on them. Monika Kalinowska, founder of Plant Circle So, if you’ve been struggling with alocasias, like I have, before you give up on this amazing genus, please give hydro a go! You can also try clay pebbles. Personally I would even add some bark to it at a 10% rate, just to make it even more airy. Good luck and let me know if you try this, and it works for you too!
Read more

Top 10 Pink, Purple and Red Plants That Make Perfect Valentine’s Day Gifts
Looking for a thoughtful and lasting Valentine’s Day gift? Skip the short-lived bouquet and give the gift of a stunning live plant! In this guide, we share Plant Circle’s top picks for pink, red, and purple-hued plants that radiate love and warmth. From the easy-care Syngonium ‘Neon Robusta’ to the elegant Philodendron Pink Princess, these plants are perfect for plant lovers of all skill levels. Discover why the Ceropegia Woodii Variegated (String of Hearts) is our #1 pick for the season! These sustainable, low-maintenance options are sure to bring joy long after Valentine’s Day has passed. Find your perfect plant gift today!
Read more

What to do when your pets like to eat your plants
Owning plants can be challenging if you’re also a pet owner. Most popular plants you see on the market are sadly toxic and not suitable for pets that have the tendency to munch on some leaves. While some pets like to eat your plants because they’re bored, and simply providing them with some kind of stimulation could solve the issue, some do it out of sheer passion and there’s nothing you can do about it. Or is there? As the information on plant toxicity is often missing at the less specialized commercial plant shops, here at Plant Circle we make sure to always include it in the product descriptions on our website, and we even have a dedicated category for just pet friendly plants! As most of us here at Plant Circle live with both pets and plants, we think we have a few things figured out, so now we wanna share what we’ve learned about what can be done when your pets like your plants a little too much! 1. The easiest solution to your problem? Simply putting your plants out of your pets reach! This can be easily done if you have a dog, but it can be more challenging if you have a cat. Having dedicated shelves away from cabinets and other jumping off points will provide a safe area for plants, just as placing them on really tall plant stands would.We also recommend making use of hanging pots that can be attached to a curtain rod, or on a hook in the ceiling. Good luck reaching those, kitty! 2. Get your cat some cat grass! What to do when your pets like to eat your plants? Give them better plants to eat! We’ve noticed that even the most eager feline plant eaters will leave your houseplants alone when provided with the tasty alternative that is cat grass. 3. Switch to pet friendly plants! At least the plants that are within the reach of your cat. Pet friendly plants don’t have to be a compromise, as there are a lot of beautiful and interesting plants that are non toxic to both humans and animals when ingested, and you can find them right here!
Read more

Why are my leaves not growing big in size?
Houseplants are a great addition to any home. They add color, life, and even help improve air quality! But what if you’ve noticed that your plant’s leaves aren’t growing in to their full potential? Here are some common reasons why this may be happening! Pests. Spider mites, scale insects, thrips and aphids. We’re sure you’re familiar with at least some of these, and they can all do great damage to your plant’s leaves! They can cause yellowing, curling, and even stunted growth, so if you suspect pests, it’s time to take a much closer look at your plant and its leaves for any signs of damage. If you do find pests, treat them promptly to prevent further damage. Not sure how? We have several posts about pest treatment under the category ‘common pests’! Over watering. Over watering your plants can cause roots to rot and limit the plant’s ability to absorb nutrients and water. This can cause yellowing, wilting, and stunted growth of leaves. Make sure to allow the soil to dry out between waterings and make sure your pot has adequate drainage to prevent over watering. Learn more about best watering practices in this post! Too much light. You can have too much of a good thing! Too much light can actually cause the leaves on your plant to yellow and become stunted. On the other hand, too little light can also be the cause of spindly growth and small leaves. Make sure your plant is getting the right amount of light for its species, and if necessary, adjust its placement to ensure it’s getting the right amount of light. Nutrition Deficiency. A lack of essential nutrients like nitrogen, phosphorus, and potassium can cause stunted growth and yellowing of leaves. If you suspect a nutrition deficiency, fertilize your plant with a balanced fertilizer and make sure it’s getting the nutrients it needs to grow. Root Bound. When a plant’s roots become too crowded in its pot, it can limit its ability to absorb nutrients and water, causing stunted growth. If you suspect your plant is root bound, it may be time to repot it into a larger pot with fresh soil. Read all about repotting (in winter) here! Needing something to climb. Some plant species, like climbing plants and vines, need support in order to grow to their full potential. If you have a climbing plant, make sure it has a sturdy support system to help it grow, like a moss pole or a hanging plant support! In conclusion, there are many reasons why your houseplant’s leaves may not be growing big in size. By understanding the common issues and taking steps to address them, you can help your plant reach its full potential and enjoy its beauty for years to come!
Read more

Why is my cactus not flowering?
You’ve probably seen loads of pictures on Pinterest and Instagram of beautiful cacti with stunning flowers on them, and you wouldn’t be the first person to wonder “how come I’ve never seen these on my own cactus?!” Let’s look at the main reasons your cactus isn’t blooming, and what to do about that! Now that the summer is almost over and we are approaching autumn and winter, aka hibernation season, it’s the perfect time to start planning ahead by looking into what will make your cactus bloom during the next growing season. First of all, it may surprise you to know, that a cactus has to be mature to produce a flower, and for some cacti species it may take up to as much as 50 years before they reach maturity and finally start to bloom! So in order to be sure your cactus will even be able to flower for you and not your grandchildren, a good tip is to buy a cactus that’s already in bloom. This way you at least know that the cactus is mature enough! But that being said, we also encourage you not to give up if you try all of our following suggestions, and your cactus still refuses to bloom for you. It may just have a bit more growing up to do! In order for a cactus to produce a flower it needs to first have a good rest period, also known as hibernation or dormancy. Please note that a dormancy period is not necessary for all cacti, though, in fact, Rhipsalis, Epiphyllum, and Schlumbergera genus don’t require one at all. But for those that do, how do you initiate hibernation in an indoor environment? 1. Reduce wateringIf you were watering your cactus every two weeks in summer, do every 3-4 weeks in autumn, and every 6-8 weeks in winter. 2. Keep your cactus coolThe ideal temperature for hibernation is 8-12 °c, or 12-15 °c for tropical cacti. A window sill far from a heater, and next to a window that you open often would be the ideal spot. You want to keep your cactus cool throughout winter, until March. 3. Shade it from the sun Make sure that your cactus is shaded from the sun wherever you placed him for the winter sleep, so if you picked a window, make sure that it’s not south facing, or hide your cactus behind a curtain, so it doesn’t receive direct sun. 4. Slowly reintroduce it to sun Some time in March you can start re-introducing your cactus to the sun by putting it back in its usual spot, while using a shade cloth to protect it from direct sun. Don’t forget that part, if you don’t shade your cactus from direct sun, it will most likely get burnt! Important: you still need to water your cactus during hibernation, but as mentioned earlier, very sparingly, and with lukewarm water. Cacti won’t absorb cold water, and additionally, cold water can lead to root rot. And don't forget the right soil! Don’t repot your cactus during hibernation and also don’t feed it! The best time to repot a cacti is at the end of its dormancy. During the growth season, make sure to provide your cacti with the correct care to give it the best shot at producing flowers.
Read more

Why is my plant turning brown?
Have you ever noticed your plant getting brown spots on its leaves? They can appear on the tips, edges, or randomly on the surface of a leaf. Although this is obviously not the worst thing that could happen to your plant, it’s not pleasant to look at either, and it could be an indicator that your plant is struggling with one of the issues listed below! Irregular watering. This is a very common issue that can cause brown tips on your plant’s leaves. Whenever your plant needs moisture, but water isn’t getting into the roots, it will pull moisture from the leaves, hence the dried tips. To fix this simply water your plant regularly, perhaps in shorter intervals. Wanna know learn more? Let us teach you how to water your plants once and for all! Variegated plants. Brown leaves on variegated plants is super common! Variegated plants are more sensitive to lack of water and light, and since the white parts of the leaves have no chlorophyll, they are highly sensitive to issues that will turn leaves brown. If your leaf is fully white, the chances of it surviving and not browning are close to zero, at least in your home environment. Variegated plants need a lot more light than their green counterparts, so if you love variegated plants, you might wanna invest in some grow lights. Variegated plants will also suffer greatly if you don’t provide them with regular watering or meet their required humidity levels. However, sometimes none of this will help, and the leaves will get brown spots anyway. It’s the cost of their beauty, and something we simply need to accept. Low humidity. Just like irregular watering, low humidity can cause the browning of the leaves, and on Calatheas in particular you’ll often see the edges of the leaves turning brown. An easy way to fix this is to group your Calatheas together, get a humidifier, or place them on a tray with water and pebbles on it. Tempting as it is, we do not recommend misting your plants, as it is a very short term solution that can even cause leaf fungus if the room does not have proper air circulation. Sun burn. If you ever notice brown patches on the leaves in more central spots, it’s likely because your plant sat in the afternoon sun and got burnt. Unfortunately there is no remedy for this, your only option is to cut off the leaf if it bothers you, and of course move your plant away from direct sun exposure. This issue is very common in spring and summer, after we’ve been desperately moving our plants closer to the windows all winter, and we forget to move them back to their usual spots in spring… based on a true story that may or may not have happened to us! Hard water. Another very common reason for the edges and tips of your plant’s leaf to go brown is hard water. If you live in the place where it’s common knowledge that the water is hard, then you’ll need to switch to filtered water or rain water to water your plants. This is a very common problem with Calatheas but we have also seen it happen to other plants like Ficus and Anthurium. Brita filters work pretty well, but for Calatheas we suggest using distilled water only. Read more about hard water here!
Read more

Why is my plant yellowing?
One of the most frustrating things for a plant parent is seeing yellowing leaves on one of our beloved plants. Sometimes we have to accept that this is what just happens to plants, but other times we’re able to make some small changes to ensure it doesn’t happen again. Read on to find out what the reasons for yellowing leaves are, and maybe how to prevent the next one! Nature. Older leaves turning yellow and eventually falling off the plant is part of the plant’s life cycle. If you see an old leaf beginning to turn yellow and die, simply pluck it off. Plants will always shed leaves as they grow, and not every yellowing leaf is cause for concern, especially if you know that you provide your plant with adequate light and water, and regularly check for pests.There can however be other reasons for yellowing leaves, so let’s go over those! Water issues. A common result of over watering, or even under watering, your plant is that the leaves start turning yellow. If you notice yellow leaves on your plant, first check whether the soil is crispy dry or still wet, and you’ll have an idea of which crime you’re guilty of… and you might wanna check out this blog post to make sure watering isn’t the cause of yellowing leaves in the future! Light. Seasonal changes in lighting, or moving your plant to a different position, might cause your plant’s leaves to turn yellow. As soon as there is inadequate light, meaning too little light for the plant to sustain its foliage, it will drop ‘excess’ leaves in order to survive. Once you notice your plant doing this, move it closer to light source or install a grow light. Usually only older leaves will be shed in this way, so if you see your plant shedding new leaves, it’s likely that something else bothering it, like for example over watering. Nutrient deficiency. If you have never fertilised your plant, or only do so sparingly, your plant might be lacking some important nutrients that could cause its leaves go yellow. After a while the plant’s soil becomes depleted of nutrition, and there’s no other way for the plant to get the crucial minerals than via fertilisers. Remember, fertilising is important throughout the year, not only in spring and summer. Please note that once a leaf goes yellow, there’s no going back to green! We know, it’s a sad truth to face, but the best way to treat yellow leaves is to just cut them off, as this will help your plant focus its energy on the new growth.
Read more
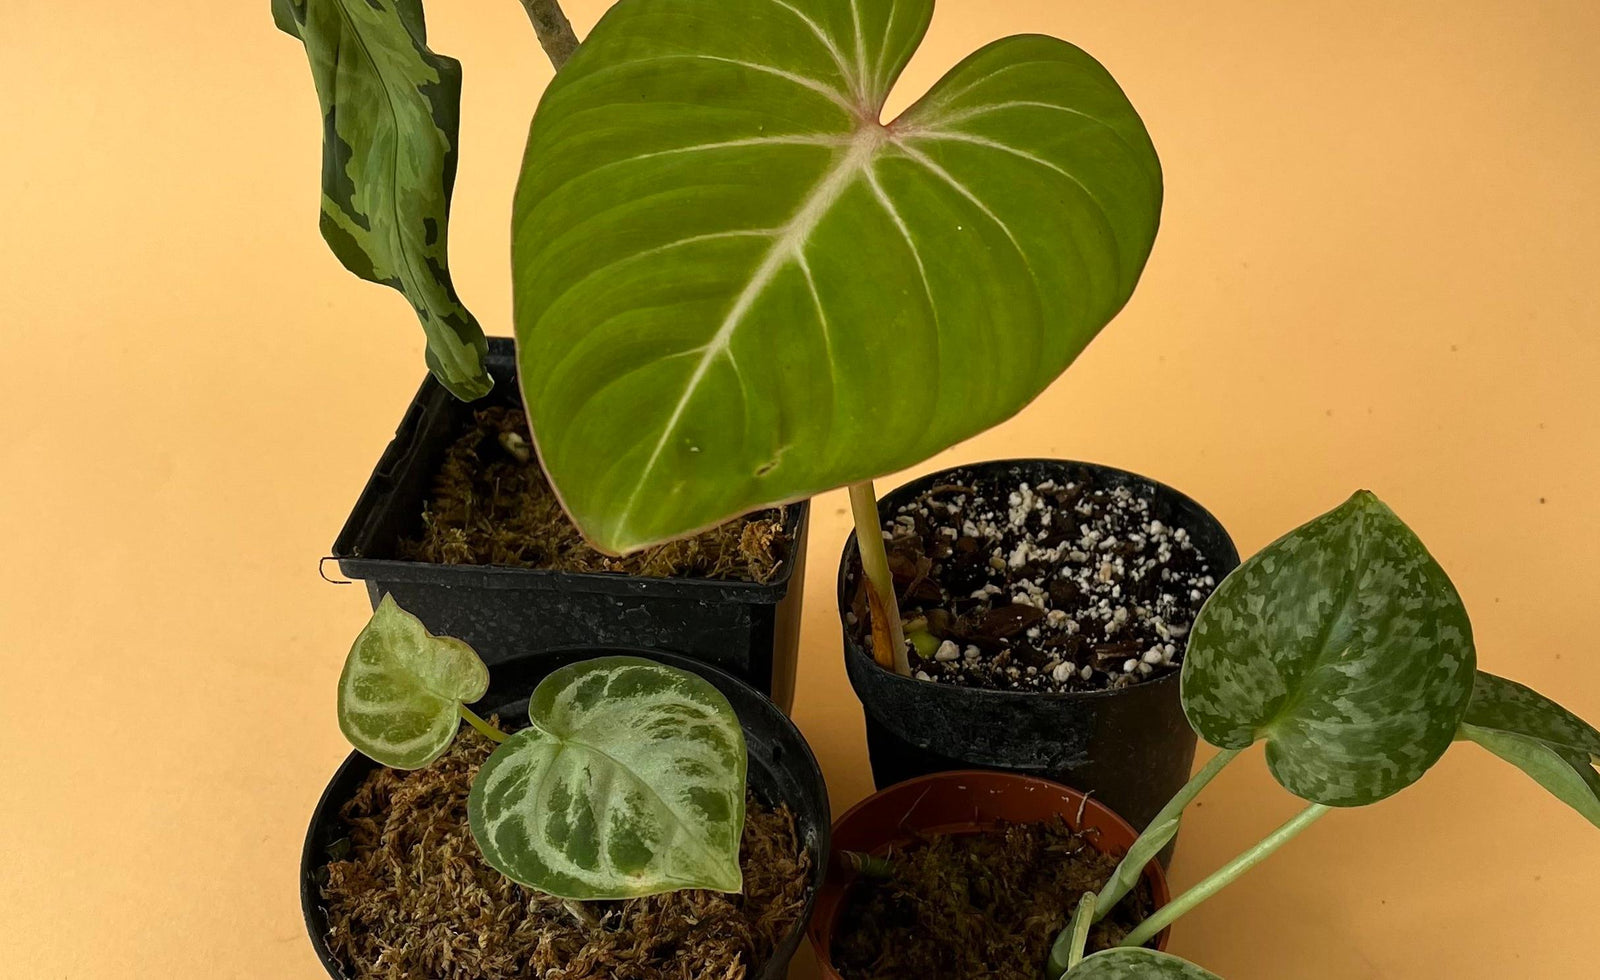
Why is my plant’s soil mouldy?
… and other common soil issues! Plant issues often start with the soil, so to ensure that your plants are as healthy and thriving as possible, we’re gonna take a look at the most common soil related issues, and how to fix them! Poor potting mix can lead to a plethora of problems with your plants, but they can easily be avoided by switching to a quality potting mix. We cannot stress enough how important it is to repot your plants into something light and airy after purchasing them, and it doesn’t have to cost a fortune. In fact, you can improve any potting mix by simply adding perlite and orchid bark to it!Now, some soil issues can be difficult to spot, but most of them are actually quite obvious… if you know what to look for!Let’s take a look at some of the most common ones, and the solutions. Mouldy soil. The root problem here, no pun intended, is a poor potting mix that doesn’t dry out fast enough. Additionally, your plant could also be dealing with over watering, and possibly even poor air circulation in the room. If you ever spot this issue, we suggest repotting your plant into a better aerated potting mix immediately . You can improve the quality of any soil by adding perlite and orchid bark to the mix, so invest in those, as they will always come in handy and last you a long time!In our experience, this hack will work well for pretty much any plant besides cacti. White stuff on top of your plant’s soil. The white stuff on your plants soil is a buildup of minerals and salts. This is a very common issue in countries where tap water is very hard. To keep this from happening, switch to softer water if you can, like distilled-, filtered-, or rain water. We also suggest removing the affected top layer of soil and replacing it with a fresh mix, as those salts are harmful to your plants. And lastly, give your plant a shower from time to time to wash it all down! Soil is too compact. This one of the most common soil issues, and a very serious problem that can cause a lot of damage to the roots of your plant. And to make matters worse, it’s not the easiest one to spot either!Compact soil doesn’t let water get through, so whenever you water your plant, the liquid flows around the dense substrate, but doesn’t penetrate it. This way, the roots of your plant actually don’t get any of the water you’re watering it with! So if you’ve been wondering why your plant is looking all droopy even right after you’ve just watered it, check the potting mix! The only way to fix this issue is to immediately change the potting mix to something more airy. Little flies around you plants. These little flies that resemble fruit flies are called fungus gnats. Although these guys are not harmful in their mature form, the larvae will feed on your plants roots, making this a potentially serious soil issue. But not to worry, we wrote a whole blog post on how to get rid of them, and you can read it here!
Read more
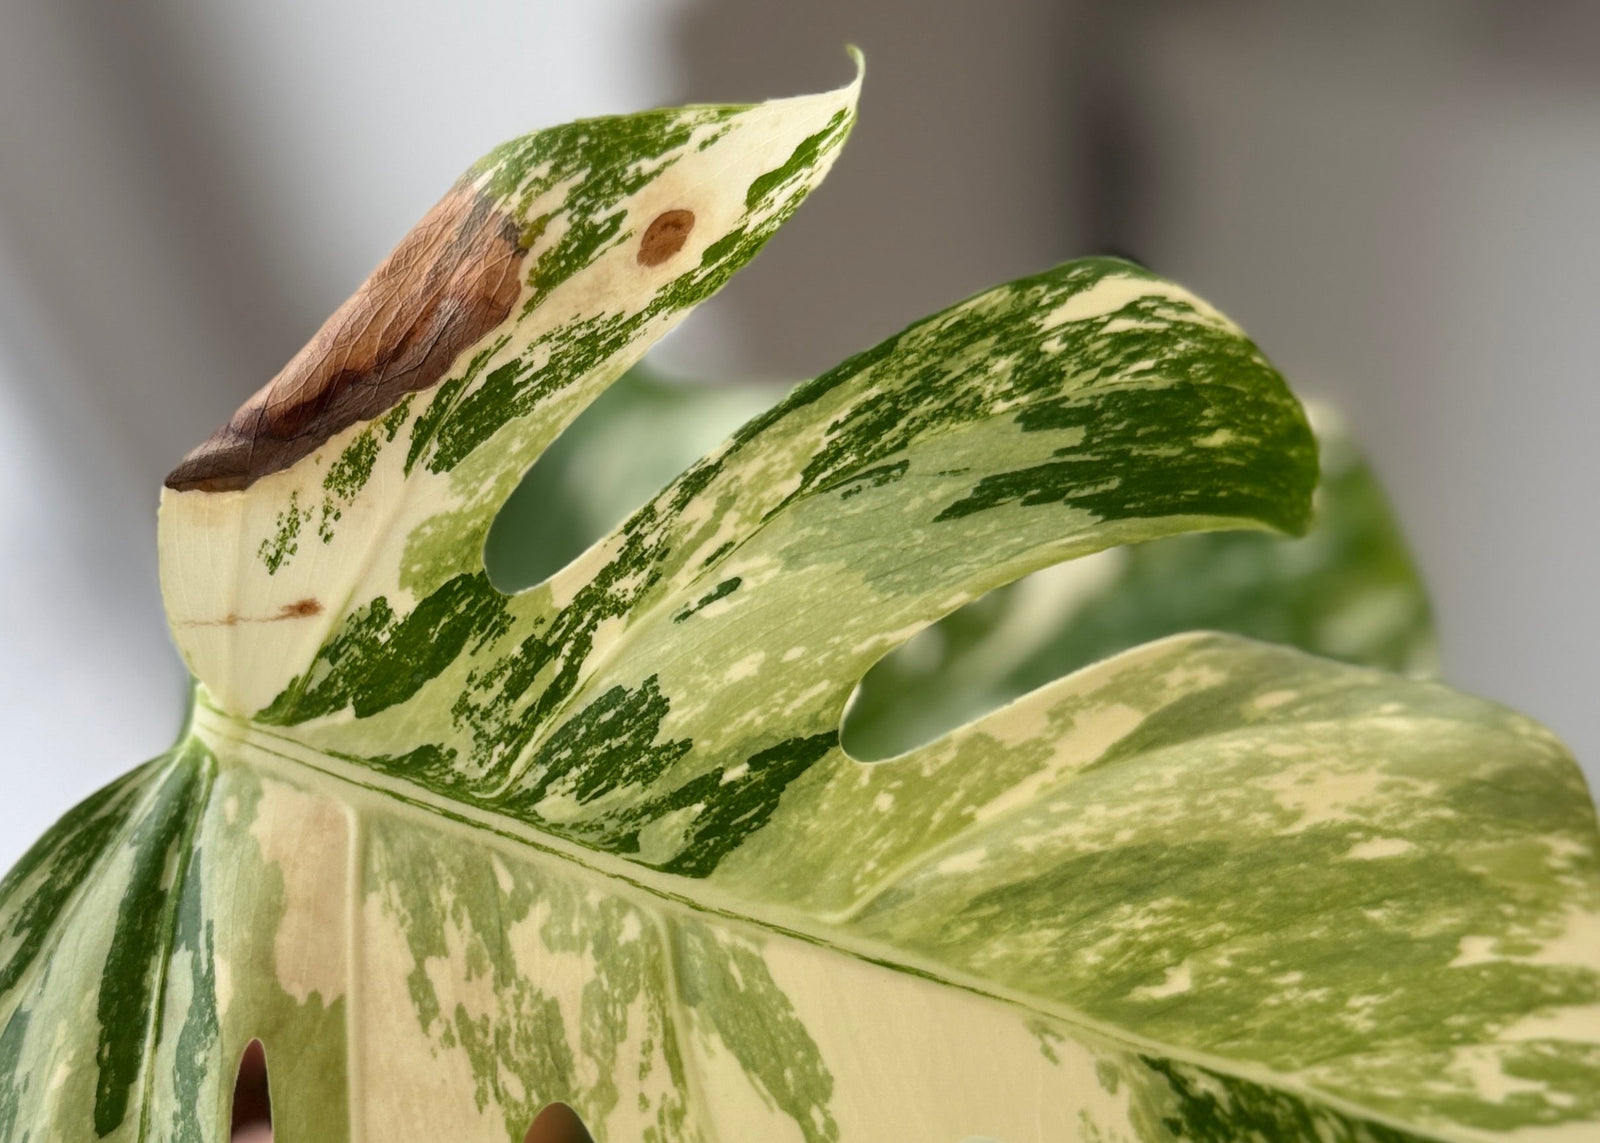
Why the White Parts of Variegated Leaves Turn Brown (and How to Prevent It)
The white parts of variegated leaves turn brown because they lack chlorophyll, making them more delicate and prone to damage from too much light, inconsistent watering, low humidity, and temperature changes. While some browning is normal and unavoidable, you can slow it down by providing bright, indirect light, consistent watering, high humidity, and stable temperatures. Don’t stress—trim brown spots as needed and focus on overall plant health. Imperfections are part of the beauty of variegated plants! 🌿
Read more

Winter survival guide for your plants
As seasons change, so does our houseplant care routine, and as the days get shorter, at least here in Berlin, sun becomes scarce. So with that in mind, we wanna introduce you to some essential tips for keeping your houseplants happy during the darker months! Clean your windows. Yes, you read that right, our winter survival guide includes cleaning your windows! Dust and dirt accumulate on our windows all the time, but sometimes we forget to consider that it’s blocking the already scarce sunlight from passing trough. Even though it’s not always visible to the naked eye, as much as 50% of that much needed natural sunlight can be blocked by dirty windows!So do your plants, and yourself, a favour and clean your windows, preferably twice a year, to the the sunshine in! Move your plants. However annoying it may be to rearrange the plants in your home, you’ll want to gather your plants closer to the windows during winter. In the summer it can be dangerous to keep your plants on windowsills, as they can easily get sunburnt in the the direct summer sun, but in winter the sun won’t be as strong, and pretty much any plant will be happy to sit on the windowsill. Yes, even if your windows are south facing! And if your windows are north facing, well then, keeping your plants on the windowsill throughout the entire year is an absolute must! Dust off your plants. Just like dirty windows, dust on the plants themselves will also prevent light from getting to where it’s most needed. And in addition to that, certain plants also really hate dust in general! Dust on your ficus, for example, can actually stunt their growth, so you’ll wanna dust off those babies all year round! Our preferred way of removing dust from plants is to shower them. However, to avoid overwatering your plants, we recommend that you shower them only on a regular watering day and not in between! If showering is not an option, a simple wipe down with a cloth will also do the trick, and as an added bonus, both of these methods will help keep your plants free of pests as well! Invest in plant lights. Of course our winter survival guide includes grow lights, and we all know those can cost a fortune. But you don’t have to break the bank when buying plant lights, in fact, literally any daylight bulb will be good for your plants, and by this we mean a light bulb with 4600-6500 kelvin. For reference, the suns color temperature is 5600K, so you may think: “is a ‘regular LED’ light bulb really enough?” This may be a controversial opinion, but our answer is yes! We have tested a huge range of both grow lights and ‘regular’ LED light bulbs with a cooler daylight temperature, and we can confirm that our plants grew very well while using them. So whatever your choice is, grow light or normal LED, your plants will thank you for the investment! Reduce watering. Assuming you don’t provide your plants with extra light, and only rely on the power of the sun during winter, you’ll have to adjust your watering schedule. Succulents may only need watering once a month, and other plants anywhere from every 10 to 14 days. You’ll need to keep a close eye your plants and figure this out for yourself, but luckily a lot of plants will let you know when they need water by getting droopy. And for the less communicative ones, sticking a finger in the soil to check if it’s truly dry will do the trick!
Read more


help Looking for something?
Be the first to know about newly stocked plants and accessories, sales and exclusive offers.
Cant belive they were do well packed..never seen packing like thst before.plant very nice
Beautiful. Much bigger than expected!
Die pflanze war bereit in zwei tage da. Gesund und ohne transport schaden obwohl so kalt war.
Arrived in perfekt condition plus heatpack, ordered in winter. Really beautiful plant. Thx
We really love the quality of the plants, and were amazed by the great packaging and customer support.


