Quality Guaranteed

Across the EU

Free Shipping

60€ in Germany | 100€ Europe*

Queer & Woman Owned

Founded 2017 in Berlin

chevron_left chevron_right

Filters

Clear all

Blog Themes

    3 simple tips for beginner plant parents

    by Plant Circle

    3 simple tips for beginner plant parents

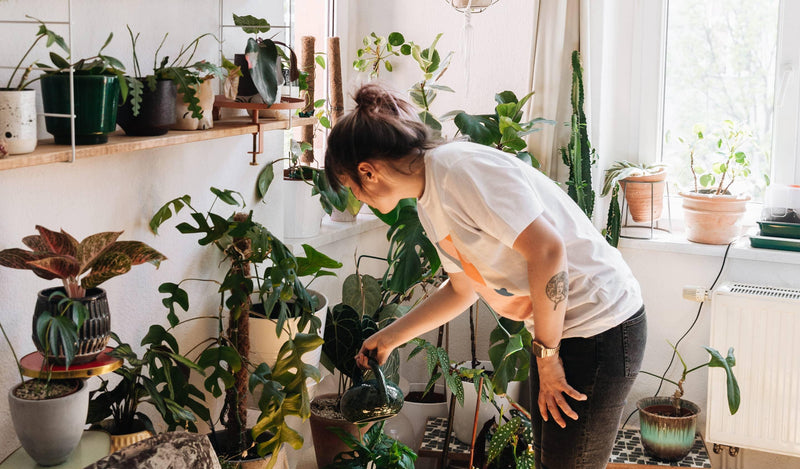
    Have you been wanting to start a plant collection of your own this year? If so, we wanna get you off to a good start with some simple tips for beginner plant parents that will make you feel successful from the get go! Experienced plant owners can read along too! If you are new to growing plants indoors you might find yourself reading a lot of conflicting information online on how to care for your green buddies. After years of running workshops and answering your questions in person, as well as online, we have decided to put together our top 3 simple tips for beginner plant parents that can be universally applied to all plants in all sorts of conditions! 1. Give your plant sufficient light. Bright enough light for houseplants won’t be found in rooms or hallways that have no windows, or if plants sit in corners more than 1,5 m from windows. Please keep your plants close to windows or under (grow) lights. That being said, a lot of popular plants grown at home do not tolerate direct sunlight, it can literally burn their leaves! In practice, this means that if you have south or west facing windows, it could be dangerous to place your philodendron or monstera directly on the window sill during spring or summer. Most plants can withstand, and will even enjoy, a few hours of morning sun, but the afternoon sun can be a deadly. Please always google your specific plant’s light requirements before deciding on the perfect spot! 2. Learn how much water your plant needs. There is no universal watering advice for plants, and whatever you’ve been told about the plant you bought might not work for the conditions in your home. How often you need to water your plants depends on how much light they get, but also on the potting mix and planter it sits in. In order to determine how often to water your plant, please observe it as it will get droopy when it’s time for watering, and always check the soil with your finger, or a moisture meter, before watering. 3. Treat your plant to a quality potting mix. Plants tend to come in poor quality potting mixes, and we highly recommend always repotting them. But wait approximately 1-2 weeks after bringing them home before repotting them, so they have a chance to get acclimated! There is no universal potting mix recipe for all plants, but we find that just by adding a part orchid mix, part perlite and some charcoal you will improve the likelihood of your plant thriving in your home immensely!

    Read more

    How to grow your Christmas tree past Christmas

    by Plant Circle

    How to grow your Christmas tree past Christmas

    For many people the only acceptable tree for Christmas is a live one and we get that! Nothing smells more like Christmas than a live spruce at home.  The argument continues about which kind of Christmas tree is the most sustainable: fake or real. While both come with a footprint, and their own list of pros and cons, we are here to talk about the latter ones. Namely potted, real trees, and how to make sure they survive Christmas and continue bringing us joy year by year. Roughly 27 million trees are cut down every year in Germany just for Christmas. Buying potted trees is a fantastic alternative to cutting them down. However, a few things have to be kept in mind to make sure the tree stays alive past Christmas. 1. Pick a tree that is suitable for growing in a container. Like for example Picea Pungens “Super Blue”, also known as Colorado Spruce. Why is this one suitable? Because spruce has very shallow roots, which makes it a perfect tree for a container! 2. Do not keep your live, potted tree indoors for longer period than 10-14 days. 3. Choose the right spot. Spruce will enjoy a cool spot, away from the heating, that is semi bright to shady. 4. Water your tree every few days with lukewarm water when the top soil feels dry to the touch, and in addition, use a water bottle to spray it and moisten the needles. which protects them from drying out from the warm, heated air. Be sure not to drench the soil. You do not want it to be soaking wet, nor should it be left to sit in water, as this could drown, and eventually rot, the tree. 5. Don’t put too many heavy decorations on your tree. Please! 6. Before you place your tree back outside, slowly introduce it to colder environment by for example keeping it in the coldest room in your house for a few days, or near a window that you open regularly. Once your tree is back, outside remember to fertilise it after the first frost. Spruce is an extremely slow grower and it will take it about 25 years to reach a height of 5 meters!

    Read more

    How to overwinter your tubers

    by Plant Circle

    How to overwinter your tubers

    In this article new would like to explain how to, and whether you should, overwinter your tuber plants! Did you know that Caladium, Amorphophallus and Xanthosoma all grow from a tuber? And that after the plant dies back, you can remove that tuber from the soil and plant it back later? Plants that grow from tubers usually die back in winter for a resting period of 3-7 months. Technically you can leave the plant in the pot and carry on as usual, as we assume the temperatures in your apartment won’t go below zero, meaning the plant can survive the cold season unaffected. However, if you would like your plant to come back in spring bigger and better than before, read on! 1. Remove the tuber from the soil and clean it well, getting as much excess soil off as possible. 2. Let the tuber dry out for a few days. 3. Once it’s dry to touch, place it in a box with a lid, and fill the box with either wood shavings or shredded paper.  4. Place it in a cool and dark storage with the lid not fully closed so a bit of air comes in. If you’ve followed the above steps to overwinter your tubers, all you have to do now is check back on your tubers once in a while. Once you notice a growth tip, it’s time to plant it back! You can plant Caladiums indoors in March and outdoors when the temperature is above 20 degrees celsius. When planting your Amorphohallus again, make sure that you place the tuber deep under the soil as the roots grow from the above the tube. This is so the tuber can support that beautiful, long stalk! When planting your Caladiums, make sure that the tuber is facing rings up, as this is where the plant will grow from. The tuber should be about 3-4 cm deep and you’ll need to keep it above approximately 24 degrees celsius for it to sprout. Tubers should be kept in moist, but not soggy, soil to sprout. Once new growth appears they should be watered often enough to keep the soil evenly moist, but again, never soggy! More detailed information on Amorphophallus, and how to grow them, can be found here.Happy planting!

    Read more

    Plant Circle Gift Guide

    by Plant Circle

    Plant Circle Gift Guide

    Do you also swear to yourself every year, that this is the year you’ll get your Christmas shopping out of the way nice and early? Yet, the months roll by and before you know it, Santa is almost coming to town? If you answered yes, we feel you! So to help you tick a few things off your holiday shopping list, at least when it comes to finding gifts for the plant loving people in your life, we’ve put together this Gift Guide that is guaranteed to spark holiday joy! Please enjoy this selection of high quality gift ideas… and stay tuned for part two! 1. PlantSpectrum by mother.life Plant lights don’t have to be ugly and mother.life is here to prove that! The sleek design of their light passes as decor, while at the same time being extremely practical and durable. Not only are these lights waterproof, but they also come with a 4 year warranty. The color tone is white, not too cold or too warm, which makes it a perfect addition to your living room, and most importantly: it will help your plants thrive during the colder and darker months! We’ve partnered up with mother.life to offer you a 10€ discount, simply go to this link, add the coupon code PLANTCIRCLE and start shopping!The €10 coupon is valid from the order amount of €139. 2. Plant Stakes by Botanopia Everybody needs a little support sometimes, especially our trailing plants! Botanopia plant stakes, whether tall or mini, will be a perfect gift for someone with an extensive plant collection, as these will always come in handy while at the same time being a beautiful accessory! Find the full range in the accessories section of our shop! 3. Terrarium kit and workshop by Plant Circle Who doesn’t love a good DIY project? Well, if they exist, we don’t know them! Our Virtual Terrarium Workshop and Terrarium Building Kit are the gifts that keep on giving. Easy to assemble and fun to watch with family and friends, and the result, a thriving mini biosphere, will bring its owner joy for years to come. Also perfect for the younger ones in your life!To make this gift extra special, add a Terrarium Plant Set, with a group of carefully selected plants that thrive in a humid, enclosed environment. 4. Vegan nail polish by Gitti Conscious Beauty As plant lovers we love all things plant based, and especially when they don’t come at a cost to the planet like the beauty products from Gitti Conscious Beauty. Our teams favourite is of course the vegan nail polish, but our founder also swears by their hand cream and mascara. We think these would make for a fantastic gift for anyone, vegan or not! 5. Smudge sticks and incense by Purnama Rituals Here at Plant Circle we are all about self care and rituals. Whether they come in the form of a face mask, a relaxing bath, or some grounding meditation, we all need to switch off and make time to do something nice for ourselves. Purnama Rituals offers a beautiful selection of smudge sticks and incense that will help you relax and celebrate those small rituals in your life. We think these make for a beautiful and mindful gift. 6. Candles by Munio Candles What is winter without candle light and subtle scents filling the house? We don’t know a single person who doesn’t love candles, and Munio Candles are not only sustainably crafted, but also absolutely beautiful, and they smell fantastic too. If you ask us, you can’t have too many candles, after all you need one for every mood, right? Munio also offers beautiful pre packed gift sets that come with candles and wax melts, as well as organic skincare if you want someone to fill extra spoiled! 7. Dog accessories by Cloud7 Is your giftee also a dog owner? We got you covered! We, and our dogs, absolutely love the stunning clothes and accessories from Berlin based brand Cloud7. Not only are they stylish, but more importantly, they’re high quality and durable. We particularly love the jackets and sweaters that are guaranteed to keep the doggies warm during these cold months.

    Read more

    Plant Circle Gift Guide pt. 2

    by Plant Circle

    Plant Circle Gift Guide pt. 2

    Did part one of our gift guide leave you wanting more? Not to worry, we have plenty of other gift ideas and suggestions for those of you who, like us, tend to wait until the last minute to get your Christmas gifts sorted! Whether you’re buying gifts for a plant lover, a dog lover, a book enthusiast, or a modern mystic, the second part of our gift guide has something for you! But be warned, you might wanna bookmark a few of these businesses and get something for yourself too! 8. Subscription box by Plant Circle Our Subscription Box is the gift that keeps giving! Get your loved one a 3 month subscription, and keep surprising them even after the holiday season is over! This subscription not only gifts them with a surprise baby plant each month, but also with an access to a virtual workshop, and other exciting and educational resources. And since the plant comes in a baby size, you don’t have to worry about space limitations! Perfect for beginner and intermediate plant parents alike. 9. Organic Skincare by MÁDARA Here at Plant Circle we love MÁDARA cosmetics, especially their CC cream and SOS hydration mask. Founded in 2006 by four Latvian women, MÁDARA pioneered scientific research of natural Northern ingredients 15 years ago while the industry was still obsessed with synthetic raw materials, and organic skincare was barely a thing. Sustainability and ethical production is a the heart of MÁDARA which makes us love the brand even more! 10. Toys and pet food by Pets Deli If your gift receiver is a pet owner be sure to check out Pets Deli. From delicious snacks to durable toys, Pets Deli has everything you could need, and as an added bonus, they’re based in Berlin and actively support animal causes. Our founders cat Zoe’s favourite cat toy is from Pets Deli, and she is obsessed with it! And Plant Circle’s employee of the month, Pina, loves the dental snacks and leber pate from Pets Deli. 11. Supplements and vitamins by Sunday Natural Sunday Natural is another Berlin based company that specialises in supplements, and here at Plant Circle we’ve been using their probiotics and enjoying the Milky Oolong tea. We think their teas, supplements, and superfoods make excellent gifts for literally anyone in your life, but especially those are health conscious, or want to improve their health in the new year! 12. Handmade artisan jewelry by Gudbling Gudbling is a small Berlin based and female owned handmade jewelry business that we have loved and adored for years! Christine, who is the owner and designer, very often repurposes vintage jewelry and found objects into beautiful, one-of-a-kind pieces. Gudbling pieces are perfect for those with boho hearts, but minimalists will also be able to find there something to their liking! 13. Home accessories by Bujnie Bujnie is polish design brand specialising in creating high quality plant accessories, and you may have seen their plant hangers in our shop, or on our instagram! Their products are made by hand in Poland with attention to detail and always in the trendiest colors. We love how their objects will fit any interior and elevate the look of our plants without stealing the spotlight from them! We especially love their plant wall hangers which are perfect if you have run out of floor or window space for more plants. As we always say: “if you don’t have space just go vertical… theres always room for one more!” 14. Spiritual self care by Kismet Kismet is a Berlin based esoteric store for curious souls. Stocked with beautiful, ethically sourced crystals, tarot cards and incense, this shop will provide you with plenty of inspiration and tools for your next self care rituals. We specifically love their tarot card decks, which are incredibly beautiful to look at, and would make an amazing gift for someone who is curious and open to something new.  15. Plant Tribe book by Judith de Graaf and Igor Josifovic From the Urban Jungle Blogger creators Judith de Graaf and Igor Josifovic, following the global success of Urban Jungle, comes Plant Tribe. This book is the perfect gift not only for plant lovers, but also design fans, as it provides a sneak peek into the homes of people around the world! These homes are of course filled with plants and beautiful objects, and we really get to know the people behind them. It’s a stunning coffee table book that anyone would be happy to find under the tree!

    Read more

    Plant profile: Monstera Siltepecana

    by Plant Circle

    Plant profile: Monstera Siltepecana

    Let’s take a look at how to care for Monstera Siltepecana; the first Monstera we ever produced ourselves for Plant Circle! We think it’s the perfect plant for the beginners and collectors alike, and here is what we’ve learned about keeping it happy during the last couple of years. Monstera Siltepecana is a popular houseplant thanks to it being easy care and having attractive foliage. Endemic to Mexico and Central America, it’s renowned for the silver markings on its immature foliage.Like other Monstera species, Siltepecana is rather easy going and doesn’t demand too much attention from us. This plant however undergoes a considerably big transformation from the juvenile to the mature form, and like most Monstera species, it can develop fenestration on its leaves as it reaches maturity. In order to experience the transformation first hand, you must first ensure that the plant enjoys the most ideal conditions growing up! Soil. Plant your Monstera Siltepecana in an airy potting mix, either premade or one that you make yourself using bark, perlite and peat moss. Remember that a good potting mix will ensure healthy roots! Siltepecana cannot stand direct sunlight and should receive bright indirect light instead. It would enjoy a spot 1-1,5 meters away from a south facing window, or sitting directly on an east, north-east, north west ,or south east facing window. The afternoon sun of the west facing window could potentially scorch your Siltepecana, so be careful! Watering. We suggest keeping your Monstera on the dry side, meaning water only when the top 3 cm of soil have dried out and is dry to the touch. If you’d like to see your Monstera develop holes in the leaves, you’ll wanna provide above average humidity, and most importantly something to climb. It is crucial for the maturity of the plant to have something to climb on. Once you attach it to the moss pole, make sure to keep it moist. If you do not care about the leaves maturing and getting fenestrated you can also grow it in a hanging basket. A juvenile Monstera Siltepecana is also a great addition to a terrarium! Growth rate. Siltepecana is an extremely fast grower. From leaf spike to fully unfurled leaf it only needs a few days under ideal growing conditions, and under less ideal conditions it might take a few days longer… still pretty fast, if you ask us! We had observed some crazy fast growth on our plant that we keep in the greenhouse.  In just 6 months it went from a baby sized plant to a one meter tall lady, and it just gave us first fenestrated leaves.  Propagation. This plant is super easy to propagate in water from cuttings. Simply cut between two nodes. They’ll often produce small aerial roots, which means you can also use the air-layering technique. Take some moist moss and wrap around an aerial root, secure with foil, et voila! Give it a couple of weeks and you should see the aerial roots pushing some fresh white roots. Once the roots are long enough, we suggest over 5cm, cut it off and plant it in moss to develop further. You can also easily transfer it into water if you’re more comfortable with that method. Pests. Monstera Siltepecana is prone to getting thrips, however, we have noticed that with the use of a store bought pesticide, it’s not too hard to get rid of the pests.If the infestation is very bad, we suggest using propagation to save the plant.    

    Read more

    Repotting your plants (winter edition)

    by Plant Circle

    Repotting your plants (winter edition)

    You’ve probably wondered when it’s a good time to repot your plants, and how to go about it. You’re not the only one! Thankfully there’s one universal sign that your plant needs a new pot, and that’s roots growing out of the bottom of the pot. But what do you do if it’s in the middle of winter? What kind of pot do you move it into? Is repotting in winter even allowed?! We’ve prepared a few tips for you, and a handy diagram below!   So you took the test and landed on a “Go for it!” but there are still a few things to consider when repotting your plants. Like choosing the right pot! Don’t go too big. The pot you’re transferring your plant to should only be one size bigger than the old one, so approximately no more than an additional 2 cm in diameter.Perhaps it’s time to change the soil? If this is the first time you’re repotting this plant, it’s very likely that the plant has been sitting in some poor potting mix. Now is your chance to upgrade! Make your own universal quality mix by mixing one part each of potting mix, perlite, and bark. Read more about potting mix in this post.Does your planter have drainage hole? if not, leave your plant in the plastic nursery pot. Make sure that the planter is slightly bigger than the nursery pot to allow for proper air circulation. You can also easily drill holes in your ceramic planters with a diamond drill bit!Potting directly into a terracotta planter? Note that terracotta planters absorb moisture, which means you’ll probably need to water your plants a little more often than usual. Also make sure you have saucer! Now that you’ve picked the right pot, you’re ready for repotting! Let’s go over that in steps too: 1. Press on the plastic nursery pot so the soil can easily get unstuck and detach from the pot.2. Carefully remove the plant from the plastic pot.3. Loosen up the root ball and remove the soil, cleaning the roots as much as you can. 4. Prepare your potting mix and add it into the bottom of the pot, then put the plant into the pot, and cover the roots with more potting mix.5. Make sure no roots are exposed, and push down the soil so the plant is stable.6. Water your plant! If the potting mix sinks down and exposes the roots after watering, you can add a bit more potting mix in this step to make sure they remain covered.Need visuals? We’ve got you covered there too! Below you’ll find all six steps, and if you want detailed video of the process, go to our instagram and see how we repotted a huge Philodendron Billietiae, a super potbound Scindapsus, another potbound baby, this time a Hoya, and don’t miss out on this good example of how bigger isn’t always better when it comes to pots!Happy repotting!

    Read more

    The key to (successfully) growing Alocasias

    by Plant Circle

    The key to (successfully) growing Alocasias

    It’s true that there’s no universal truth on how to grow specific kinds of plants, just experiences and opinions we can share. In this post, Plant Circle’s founder Monika shares what she’s learned, and have found to be the key to (successfully) growing alocasias. Curious yet? Read on! When you’re reading blog posts or articles about how to care for a certain kind of plant, you may notice that something important is often missing… people sometimes forget to share the exact location of, and conditions in, their home or garden! And that stuff is kind of important. Because if you live somewhere warm, and your garden is filled with thriving alocasias, a blog post like this one is not for you and you can easily skip it. I have no experience growing alocasias in the tropics, and I can only tell you what works in an apartment in Berlin. I can imagine that a lot of places in Europe will be similar, but I also know some will be wildly different, so use your best judgment when deciding whether or not to follow my advice! Apartments, just like geographical locations, can vary so much, especially by the season, and when it comes to how they are built and how much light they get. Apartments in the northern hemisphere are rather well insulated and can get very dry in winter due to heating. Mine, however, is actually different. Yes, it’s insulated and heated, but it gets rather humid in winter as I have quite a few plants in here, and that, combined with less airing out (it’s freaking cold outside!) creates a humid microclimate.  My journey with alocasias began a long time ago, but after years of failing at growing them, I decided enough is enough, and I went down an internet rabbit hole (thank you, ADHD) and hyper fixated on an extensive research about what these plants actually like. I’ve also spoken to the people around me who’ve grown them successfully about what their secret is, and all roads eventually led to this conclusion: hydro.  Alocasias love for their roots to be ‘exposed’. I even read somewhere, that they would grow on rocks in certain places, and basically only drink when it rained on them. The water would wash down the roots and then leave them to air dry themselves. I thought this was a fascinating, yet hard to replicate, at-home idea. I also read that they like to have ‘wet feet’ which means to sit in water. Now, if you try this with a regular potting mix, having it always be wet at the bottom, you will most likely start to get root rot. I don’t know about you, but I didn’t dare try! So instead I connected the dots and came up with a potting mix, that I thought would work: pumice, charcoal, bark, and hummus. I took some dying alocasias, removed the potting mix they came in (which happened to be this weird nursery mix that mainly consists of coco fibres) and placed them in my new creation. To my surprise, this worked like a dream! After just a few weeks, new shoots were coming out and the plants were revived. Now you can get the expertly mixed alocasia potting soil here. No mess required! Now, for the best results you can put it in a self watering pot and always keep it full. I grow my alocasias both in self watering pots (like this Elho pot with a self-watering insert) and in regular pots. It’s a little harder to control the water level in a regular pot, but if this is what you happen to have on hand, use it and just add a bit of water every week. Alocasias love for their roots to be ‘exposed’.I even read somewhere that they would grow on rocks in certain places and basically only drink when it rained on them. Monika Kalinowska, founder of Plant Circle So, if you’ve been struggling with alocasias, like I have, before you give up on this amazing genus, please give hydro a go! You can also try clay pebbles. Personally I would even add some bark to it at a 10% rate, just to make it even more airy. Good luck and let me know if you try this, and it works for you too!

    Read more

    What to do when your pets like to eat your plants

    by Plant Circle

    What to do when your pets like to eat your plants

    Owning plants can be challenging if you’re also a pet owner. Most popular plants you see on the market are sadly toxic and not suitable for pets that have the tendency to munch on some leaves. While some pets like to eat your plants because they’re bored, and simply providing them with some kind of stimulation could solve the issue, some do it out of sheer passion and there’s nothing you can do about it. Or is there? As the information on plant toxicity is often missing at the less specialized commercial plant shops, here at Plant Circle we make sure to always include it in the product descriptions on our website, and we even have a dedicated category for just pet friendly plants! As most of us here at Plant Circle live with both pets and plants, we think we have a few things figured out, so now we wanna share what we’ve learned about what can be done when your pets like your plants a little too much! 1. The easiest solution to your problem? Simply putting your plants out of your pets reach! This can be easily done if you have a dog, but it can be more challenging if you have a cat. Having dedicated shelves away from cabinets and other jumping off points will provide a safe area for plants, just as placing them on really tall plant stands would.We also recommend making use of hanging pots that can be attached to a curtain rod, or on a hook in the ceiling. Good luck reaching those, kitty!   2. Get your cat some cat grass! What to do when your pets like to eat your plants? Give them better plants to eat! We’ve noticed that even the most eager feline plant eaters will leave your houseplants alone when provided with the tasty alternative that is cat grass. 3. Switch to pet friendly plants! At least the plants that are within the reach of your cat. Pet friendly plants don’t have to be a compromise, as there are a lot of beautiful and interesting plants that are non toxic to both humans and animals when ingested, and you can find them right here!

    Read more

    Why is my plant turning brown?

    by Plant Circle

    Why is my plant turning brown?

    Have you ever noticed your plant getting brown spots on its leaves? They can appear on the tips, edges, or randomly on the surface of a leaf. Although this is obviously not the worst thing that could happen to your plant, it’s not pleasant to look at either, and it could be an indicator that your plant is struggling with one of the issues listed below! Irregular watering. This is a very common issue that can cause brown tips on your plant’s leaves. Whenever your plant needs moisture, but water isn’t getting into the roots, it will pull moisture from the leaves, hence the dried tips. To fix this simply water your plant regularly, perhaps in shorter intervals. Wanna know learn more? Let us teach you how to water your plants once and for all! Variegated plants. Brown leaves on variegated plants is super common! Variegated plants are more sensitive to lack of water and light, and since the white parts of the leaves have no chlorophyll, they are highly sensitive to issues that will turn leaves brown. If your leaf is fully white, the chances of it surviving and not browning are close to zero, at least in your home environment. Variegated plants need a lot more light than their green counterparts, so if you love variegated plants, you might wanna invest in some grow lights. Variegated plants will also suffer greatly if you don’t provide them with regular watering or meet their required humidity levels. However, sometimes none of this will help, and the leaves will get brown spots anyway. It’s the cost of their beauty, and something we simply need to accept. Low humidity. Just like irregular watering, low humidity can cause the browning of the leaves, and on Calatheas in particular you’ll often see the edges of the leaves turning brown. An easy way to fix this is to group your Calatheas together, get a humidifier, or place them on a tray with water and pebbles on it. Tempting as it is, we do not recommend misting your plants, as it is a very short term solution that can even cause leaf fungus if the room does not have proper air circulation.  Sun burn. If you ever notice brown patches on the leaves in more central spots, it’s likely because your plant sat in the afternoon sun and got burnt. Unfortunately there is no remedy for this, your only option is to cut off the leaf if it bothers you, and of course move your plant away from direct sun exposure. This issue is very common in spring and summer, after we’ve been desperately moving our plants closer to the windows all winter, and we forget to move them back to their usual spots in spring… based on a true story that may or may not have happened to us! Hard water. Another very common reason for the edges and tips of your plant’s leaf to go brown is hard water. If you live in the place where it’s common knowledge that the water is hard, then you’ll need to switch to filtered water or rain water to water your plants. This is a very common problem with Calatheas but we have also seen it happen to other plants like Ficus and Anthurium. Brita filters work pretty well, but for Calatheas we suggest using distilled water only. Read more about hard water here!

    Read more

    Why is my plant yellowing?

    by Plant Circle

    Why is my plant yellowing?

    One of the most frustrating things for a plant parent is seeing yellowing leaves on one of our beloved plants. Sometimes we have to accept that this is what just happens to plants, but other times we’re able to make some small changes to ensure it doesn’t happen again. Read on to find out what the reasons for yellowing leaves are, and maybe how to prevent the next one! Nature. Older leaves turning yellow and eventually falling off the plant is part of the plant’s life cycle. If you see an old leaf beginning to turn yellow and die, simply pluck it off. Plants will always shed leaves as they grow, and not every yellowing leaf is cause for concern, especially if you know that you provide your plant with adequate light and water, and regularly check for pests.There can however be other reasons for yellowing leaves, so let’s go over those! Water issues. A common result of over watering, or even under watering, your plant is that the leaves start turning yellow. If you notice yellow leaves on your plant, first check whether the soil is crispy dry or still wet, and you’ll have an idea of which crime you’re guilty of… and you might wanna check out this blog post to make sure watering isn’t the cause of yellowing leaves in the future! Light. Seasonal changes in lighting, or moving your plant to a different position, might cause your plant’s leaves to turn yellow. As soon as there is inadequate light, meaning too little light for the plant to sustain its foliage, it will drop ‘excess’ leaves in order to survive. Once you notice your plant doing this, move it closer to light source or install a grow light. Usually only older leaves will be shed in this way, so if you see your plant shedding new leaves, it’s likely that something else bothering it, like for example over watering. Nutrient deficiency. If you have never fertilised your plant, or only do so sparingly, your plant might be lacking some important nutrients that could cause its leaves go yellow. After a while the plant’s soil becomes depleted of nutrition, and there’s no other way for the plant to get the crucial minerals than via fertilisers. Remember, fertilising is important throughout the year, not only in spring and summer. Please note that once a leaf goes yellow, there’s no going back to green! We know, it’s a sad truth to face, but the best way to treat yellow leaves is to just cut them off, as this will help your plant focus its energy on the new growth.

    Read more

    Why is my plant’s soil mouldy?

    by Plant Circle

    Why is my plant’s soil mouldy?

    … and other common soil issues! Plant issues often start with the soil, so to ensure that your plants are as healthy and thriving as possible, we’re gonna take a look at the most common soil related issues, and how to fix them! Poor potting mix can lead to a plethora of problems with your plants, but they can easily be avoided by switching to a quality potting mix. We cannot stress enough how important it is to repot your plants into something light and airy after purchasing them, and it doesn’t have to cost a fortune. In fact, you can improve any potting mix by simply adding perlite and orchid bark to it!Now, some soil issues can be difficult to spot, but most of them are actually quite obvious… if you know what to look for!Let’s take a look at some of the most common ones, and the solutions. Mouldy soil. The root problem here, no pun intended, is a poor potting mix that doesn’t dry out fast enough. Additionally, your plant could also be dealing with over watering, and possibly even poor air circulation in the room. If you ever spot this issue, we suggest repotting your plant into a better aerated potting mix immediately . You can improve the quality of any soil by adding perlite and orchid bark to the mix, so invest in those, as they will always come in handy and last you a long time!In our experience, this hack will work well for pretty much any plant besides cacti.  White stuff on top of your plant’s soil. The white stuff on your plants soil is a buildup of minerals and salts. This is a very common issue in countries where tap water is very hard. To keep this from happening, switch to softer water if you can, like distilled-, filtered-, or rain water. We also suggest removing the affected top layer of soil and replacing it with a fresh mix, as those salts are harmful to your plants. And lastly, give your plant a shower from time to time to wash it all down! Soil is too compact. This one of the most common soil issues, and a very serious problem that can cause a lot of damage to the roots of your plant. And to make matters worse, it’s not the easiest one to spot either!Compact soil doesn’t let water get through, so whenever you water your plant, the liquid flows around the dense substrate, but doesn’t penetrate it. This way, the roots of your plant actually don’t get any of the water you’re watering it with! So if you’ve been wondering why your plant is looking all droopy even right after you’ve just watered it, check the potting mix! The only way to fix this issue is to immediately change the potting mix to something more airy. Little flies around you plants. These little flies that resemble fruit flies are called fungus gnats. Although these guys are not harmful in their mature form, the larvae will feed on your plants roots, making this a potentially serious soil issue. But not to worry, we wrote a whole blog post on how to get rid of them, and you can read it here!

    Read more